192277 - Micron Technical Reference Volume 3.pdf - 第177页
PASTE ROLL HEIGHT MONITOR ADJUSTMENTS & SETTINGS Chapter Issue 3, Aug 14 Technical Reference Manual 30.9 24. Press the System button. 25. Select Exit . Beam Width Adjustment The width of the beam is set to accommodat…
PASTE ROLL HEIGHT MONITOR
ADJUSTMENTS & SETTINGS
30.8 Technical Reference Manual Chapter Issue 3, Aug 14
17. Select Drive Front Squeegee using Jog Buttons. Press the right hand jog
button. Drive the squeegee down until the front squeegee is in contact with
the stencil.
18. Select Exit.
19. Open the front printhead cover.
20. Using a 3mm Allen key loosen the paste height adjustment cap headed
screw located on the front of the right hand leg.
21. Adjust the length of the leg to the required sensor height. Tighten the cap
headed screw.
22. Repeat Steps 7 and 8 for the left hand leg.
23. Close the front printhead cover.
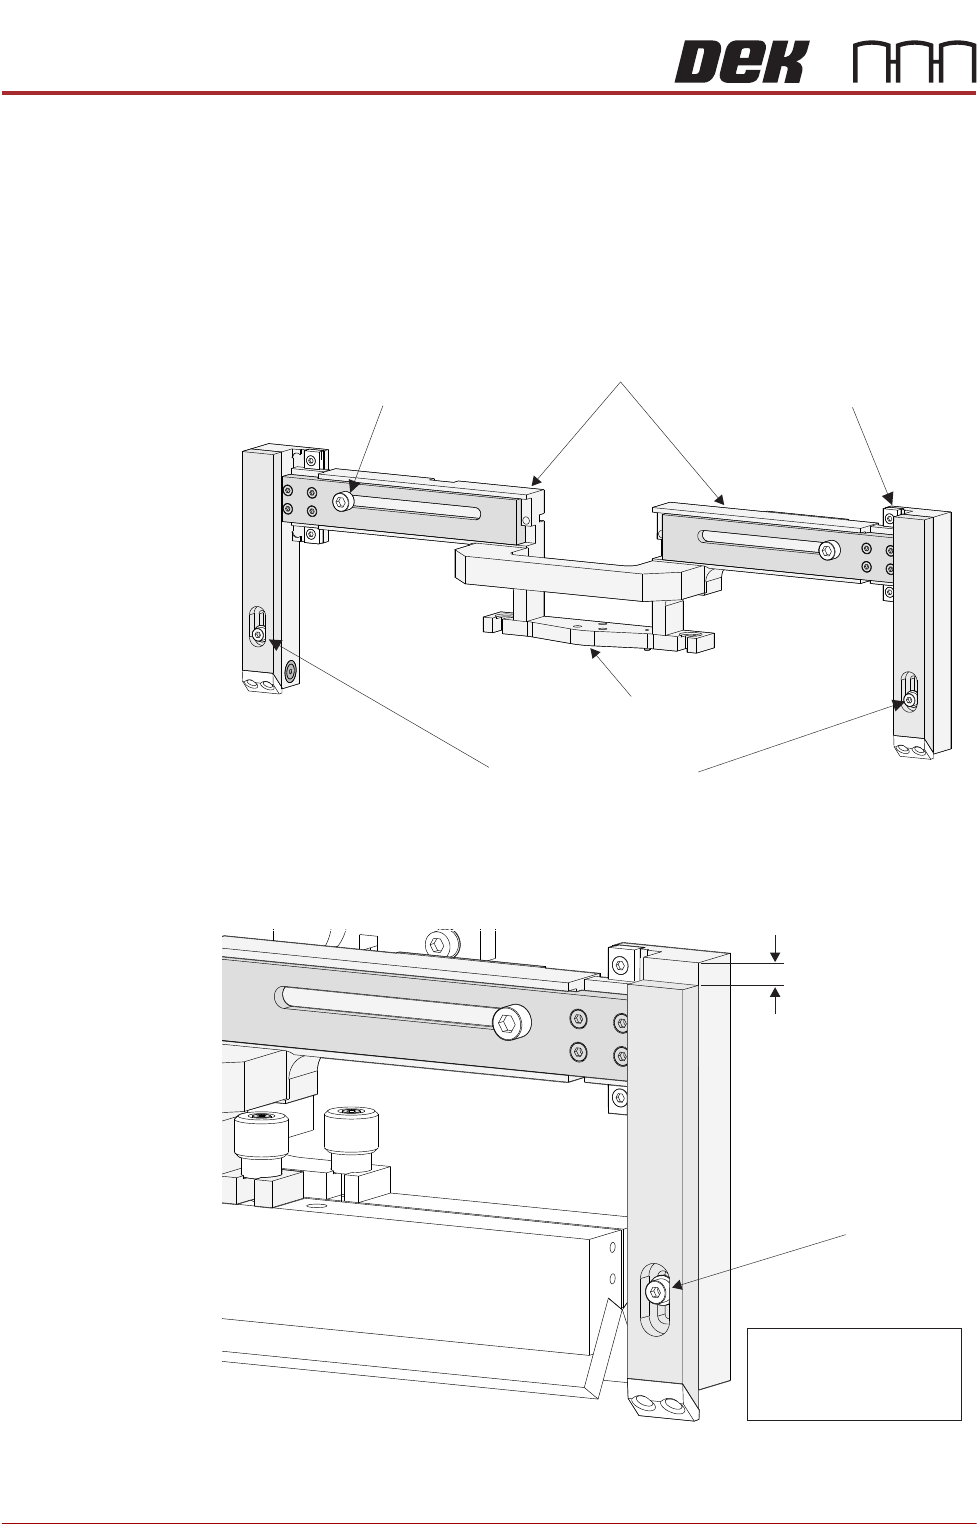
Paste Height Adjustment
Securing Screw
(in 2 positions)
THK Linear Bearing
(in 2 positions)
Width Adjustment Securing Screw
(in 2 positions)
Front Squeegee
Mount
Horizontal Beam
Paste Height
Adjustment
(0 - 10mm)
NOTE
Paste Height =
Paste Height Adjustment
+ 10mm
Paste Height Adjustment
Locking Screw
PASTE ROLL HEIGHT MONITOR
ADJUSTMENTS & SETTINGS
Chapter Issue 3, Aug 14 Technical Reference Manual 30.9
24. Press the System button.
25. Select Exit.
Beam Width
Adjustment
The width of the beam is set to accommodate the front squeegee and the
product.
1. Select Diagnostics.
2. Using the Next or Previous buttons; select Print Carriage.
3. Select Home Print Carriage.
4. Select Drive Carriage to Front Position.
5. Select Exit.
6. Open the printhead front cover.
7. The beam width adjustment screws are located as shown below.
Paste Height Adjustment
Securing Screw
(in 2 positions)
THK Linear Bearing
(in 2 positions)
Width Adjustment Securing Screw
(in 2 positions)
Front Squeegee
Mount
Horizontal Beam
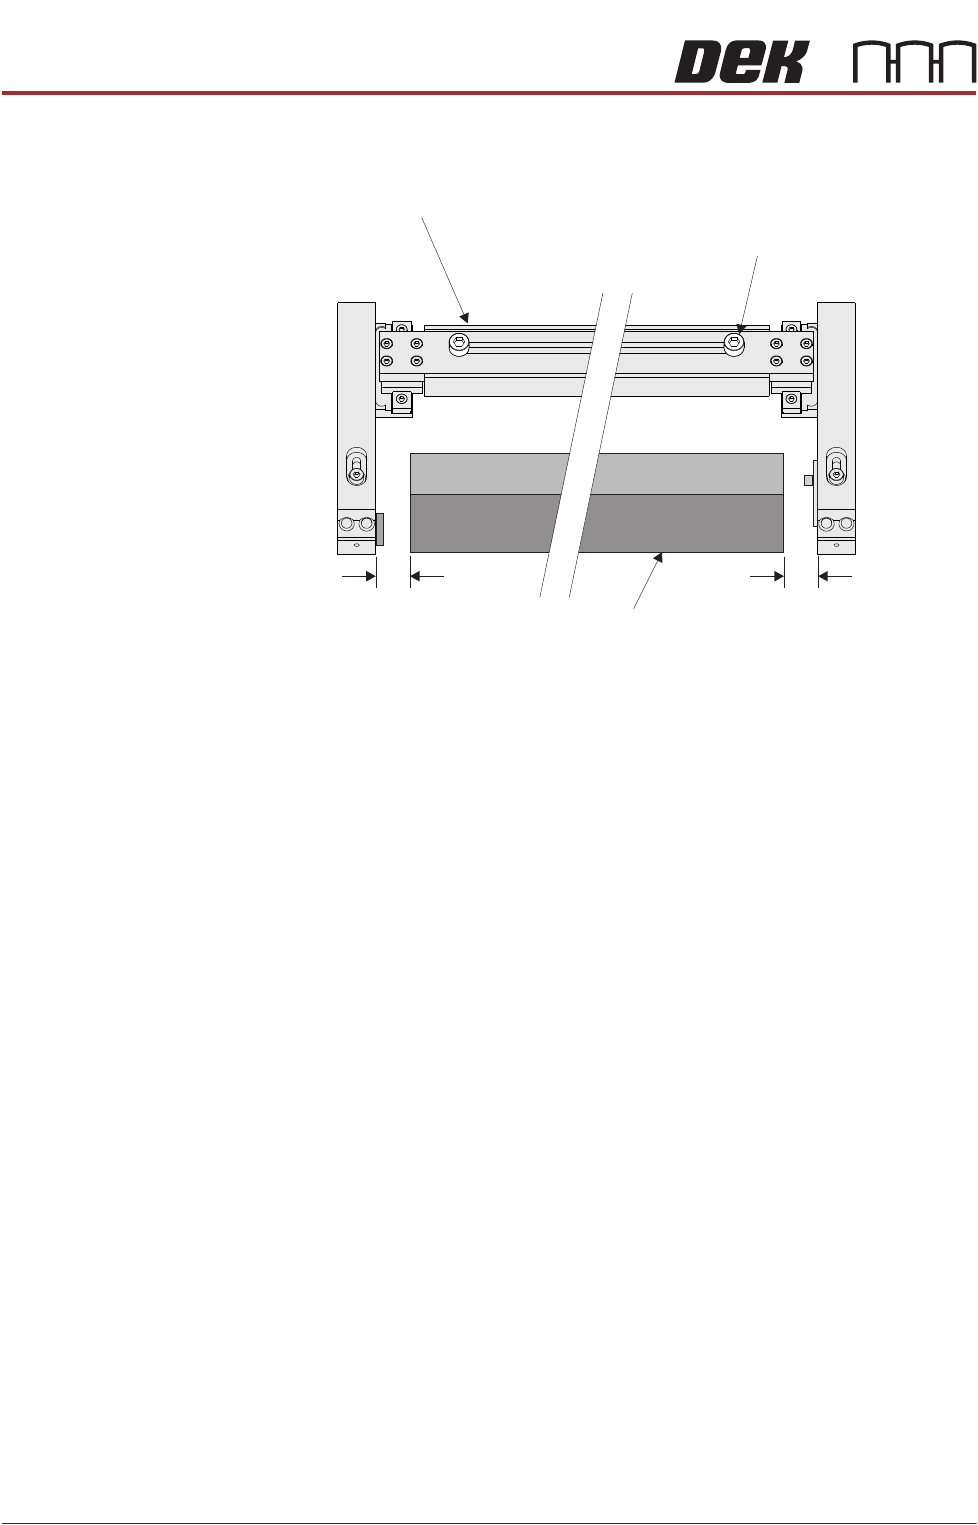
PASTE ROLL HEIGHT MONITOR
ADJUSTMENTS & SETTINGS
30.10 Technical Reference Manual Chapter Issue 3, Aug 14
8. Set each arm to provide a gap between the edge of the squeegee (or
deflector) equal to 10mm.
9. Close the front printhead cover.
10. Press the System button.
11. Select Exit.
Roll Height Monitor
Width Adjustment
Securing Screw
(in 2 positions)
10mm 10mm
Front Squeegee