192277 - Micron Technical Reference Volume 3.pdf - 第195页
BARCODE READER AND VERIFICATION AND TRACEABILITY REPLACEMENT PROCEDURES Chapter Issue 10, Feb 17 Technical Reference Manual 32.7 12. Restart the computer . 13. Insert the A TEN USB to Serial (RS232) Driver Disc into the …
BARCODE READER AND VERIFICATION AND TRACEABILITY
REPLACEMENT PROCEDURES
32.6 Technical Reference Manual Chapter Issue 10, Feb 17
REPLACEMENT PROCEDURES
These procedures detail how to fit and set up the equipment.
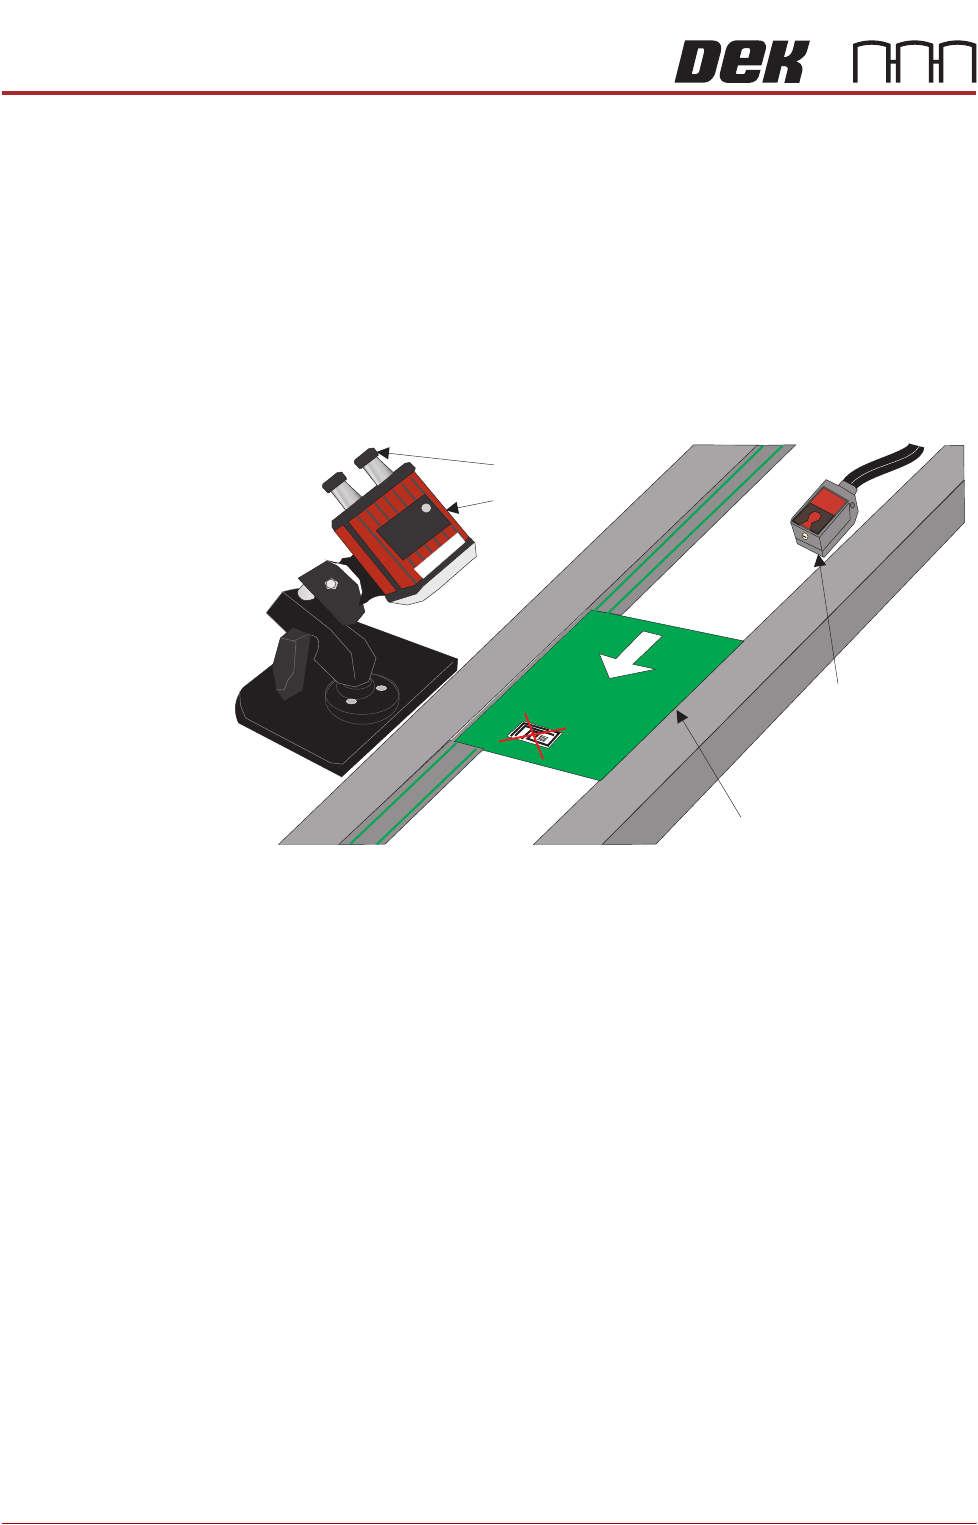
Fitting the Remote
Barcode Reader
1. Select Shut Down and switch the mains isolator to OFF.
2. Securely mount the remote barcode reader on it’s mounting stand.
3. Mount the unit onto the upline conveyor, ensuring that the reader is in a
position to read the barcode on the product.
NOTE
Because conveyor systems vary, the remote barcode reader is supplied on
a fully adjustable mounting stand. This stand should be secured in a suitable
location on the input side of the conveyor.
4. Fit the trigger sensor just before the reader (a Velcro fastener is used for
attaching it).
NOTE
The leading edge of the incoming board, triggers the remote barcode reader
into activation, enabling it to read the barcode on the board. A crosshair
provides an alignment check to target the label in the correct location.
5. Remove the printer’s rear panel to gain access to the PC.
NOTE
Type 4 Machine PC modules are located and accessed from the front of the
machine.
6. The Power and Signal (Barcode Reader) and the Trigger Sensor cables are
combined into one loom. Route the loom from the conveyor, under the DEK
printer exiting at the rear.
7. Attach the D type connector to the USB conversion cable - 9-pin D type
(USB to Serial (RS232)).
8. Power up the printer at the mains isolator.
9. On the MMI, select Start.
10. Select Run.
11. Type ‘pnpon’ in the command box.
Product with Barcode Label
Trigger Sensor
Barcode Reader
Power and Signal
Board Feed Direction

BARCODE READER AND VERIFICATION AND TRACEABILITY
REPLACEMENT PROCEDURES
Chapter Issue 10, Feb 17 Technical Reference Manual 32.7
12. Restart the computer.
13. Insert the ATEN USB to Serial (RS232) Driver Disc into the CD ROM drawer
on the PC.
14. The ATEN installation pane is displayed.
15. Select Next.
16. A windows information pane is posted; select Continue Anyway.
17. After installation completes select Finish.
18. Select Shut Down and switch the mains isolator to OFF.
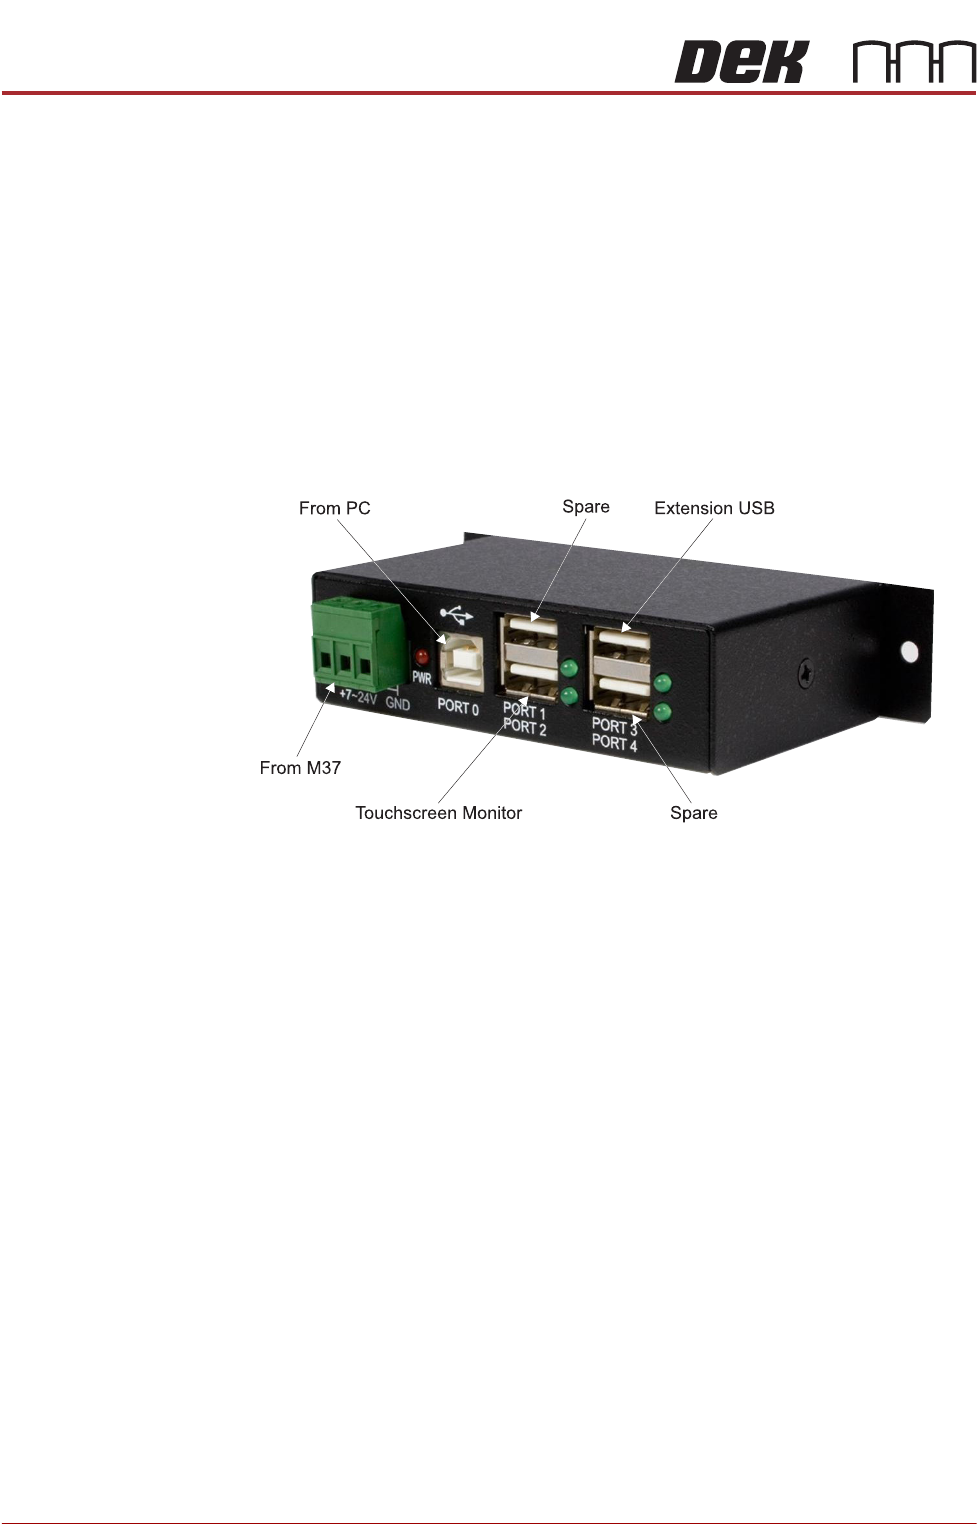
19. Connect the USB plug to USB8 on the PC (extreme right hand location).
20. Remove and retain the four pan headed screws, which hold the M37 Power
Supply Enclosure in place.
21. Slide the enclosure forward to gain access to the connectors at the rear.
22. Connect the power lead M37SK13.
23. Replace the M37 enclosure and secure it with the four screws previously
removed.
24. Power up the printer at the mains isolator.
25. Select Maintenance.
26. Select Machine Setup.
27. Select Barcodes.
28. Select Remote Barcode HW.
29. Select Fitted.
M37SK13
BARCODE READER AND VERIFICATION AND TRACEABILITY
REPLACEMENT PROCEDURES
32.8 Technical Reference Manual Chapter Issue 10, Feb 17
30. Select Accept.
31. Select Back.
32. Select Back.
33. Select Back.
34. Refit the rear panel ensuring that the cables are not trapped.
35. Use the configuration code cards to configure the remote barcode reader
(described later in this chapter).
Fitting the
Handheld Barcode
Reader
1. Select Shut Down and switch the mains isolator to OFF.
2. For types 1, 2 and 4, go to Step 3. For types 3 & 5 go to Step 6.
3. Gain access to the 4 port USB hub behind the front panel.
4. Connect the handheld barcode reader to a spare USB port on the hub.
5. Refit the front cover ensuring that the cable is routed between the MMI
monitor bracket and the front cover. Go to Step 7.
6. Connect the handheld barcode reader to the spare external USB port on the
RH corner panel of the machine.
7. Power up the machine.
8. Select Maintenance.
9. Select Machine Setup.
10. Select Barcodes.
11. Select Handheld Barcode HW.
12. Select Fitted.
13. Select Accept.
14. Select Start Character.
15. Set the start character for the barcode (see barcode label below).
16. Select Accept.
17. Select Name Length.
18. Set the name length for the barcode.
19. Select Accept.