M8_ServiceManual_e.pdf - 第47页
3 Mechanical Section 3-7 ④ Wind to fasten the wire between bot h sides of the nozzle cleaner assy. (Part No. KV8-M8881-A0X) ⑤ Move the nozzle back and fort h to clean the nozzle hole. ⑥ Remove the wi re and blow some air…
3 Mechanical Section
3-6
Nozzle
When obstacles such as solder paste are stuffed up in the nozzle, the suction becomes weak. And existence
of an obstacle at the nozzle tip prevents the vision processing from recognizing smaller components. Clean
nozzles to avoid these troubles.
■ Nozzle Cleaning with Air Blow
Clean the nozzle tips with alcohol and then blow away dust with a blower (more than once a week). When
choking error occurs, also clean the nozzle.
Be careful not to apply alcohol to identification marks. Quickly wipe off if applied.
■ Nozzle Cleaning using Wire (1)
Normally, cleaning with the air blow may be enough. However when the dirt is firmly fixed, clean the
nozzle using a wire.
NOTE: To clean the nozzle using a wire, the O-ring and the nozzle filter inside the nozzle must be removed first.
Cleaning the nozzle with a wire without removing them may result in the damage or loss of them. After the
nozzle is cleaned, make sure to re-install them using a special tool.
NOTE: For a description of how to remove/install the O-ring and nozzle filter, refer to “Removing O-ring and
Nozzle filter” and “Attaching O-ring and Nozzle filter” given later in this manual.
Take care not to get injured with the fine wire when cleaning the nozzle.
ACTION:
① Have a wire ready.
(300mm length, 0.1mm diam. Part No. KV8-M8887-00X)
② Remove the O-ring and nozzle filter from the nozzle.
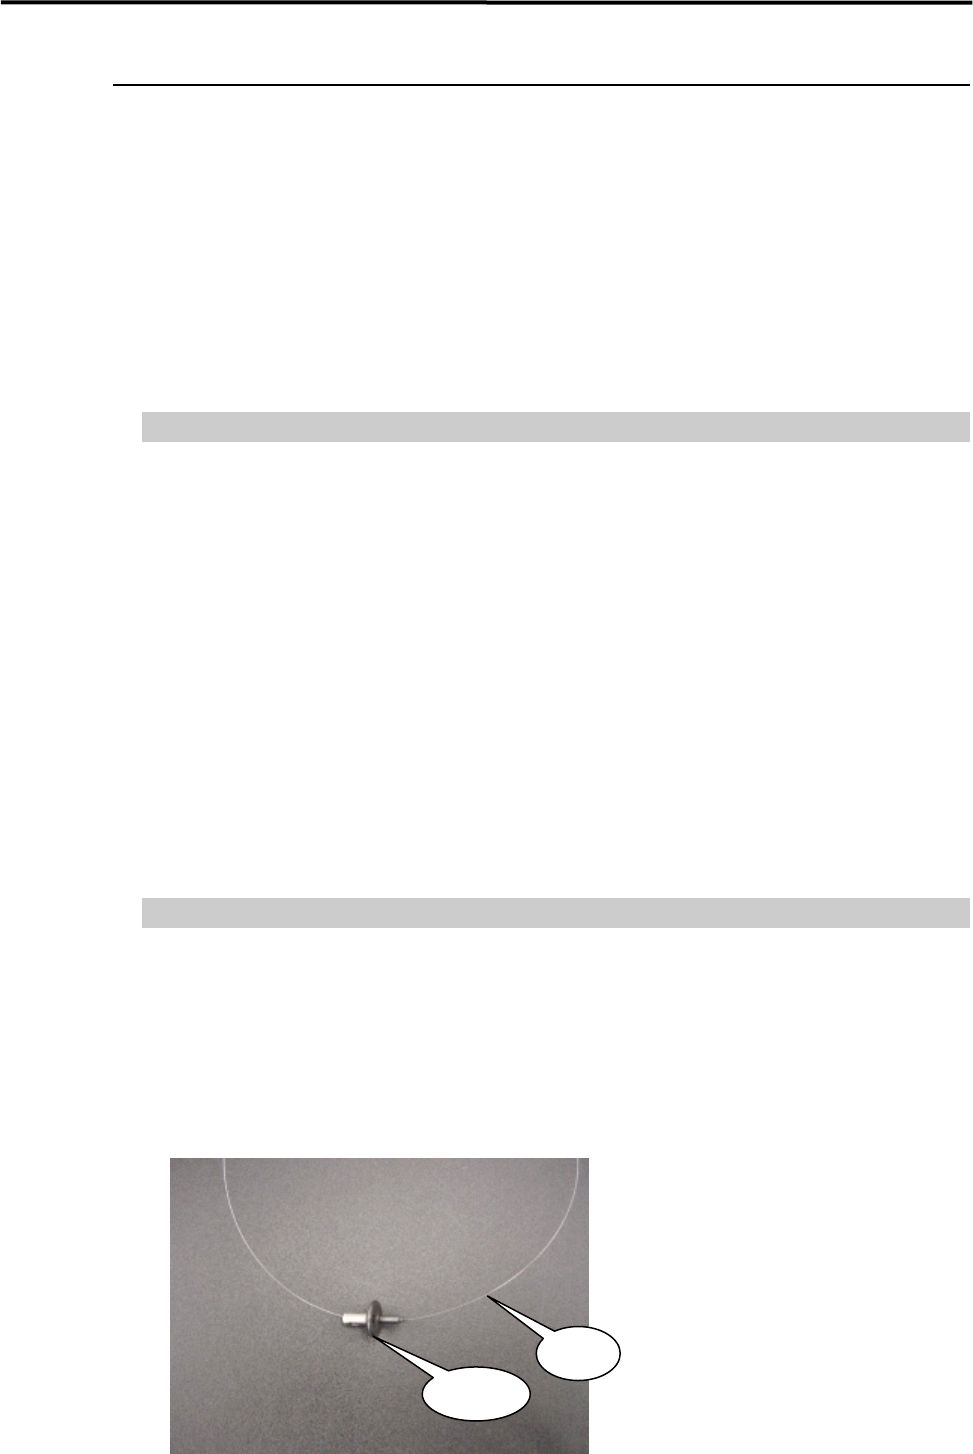
③ Pass the wire through the nozzle hole.
Nozzle
Wire
3 Mechanical Section
3-7
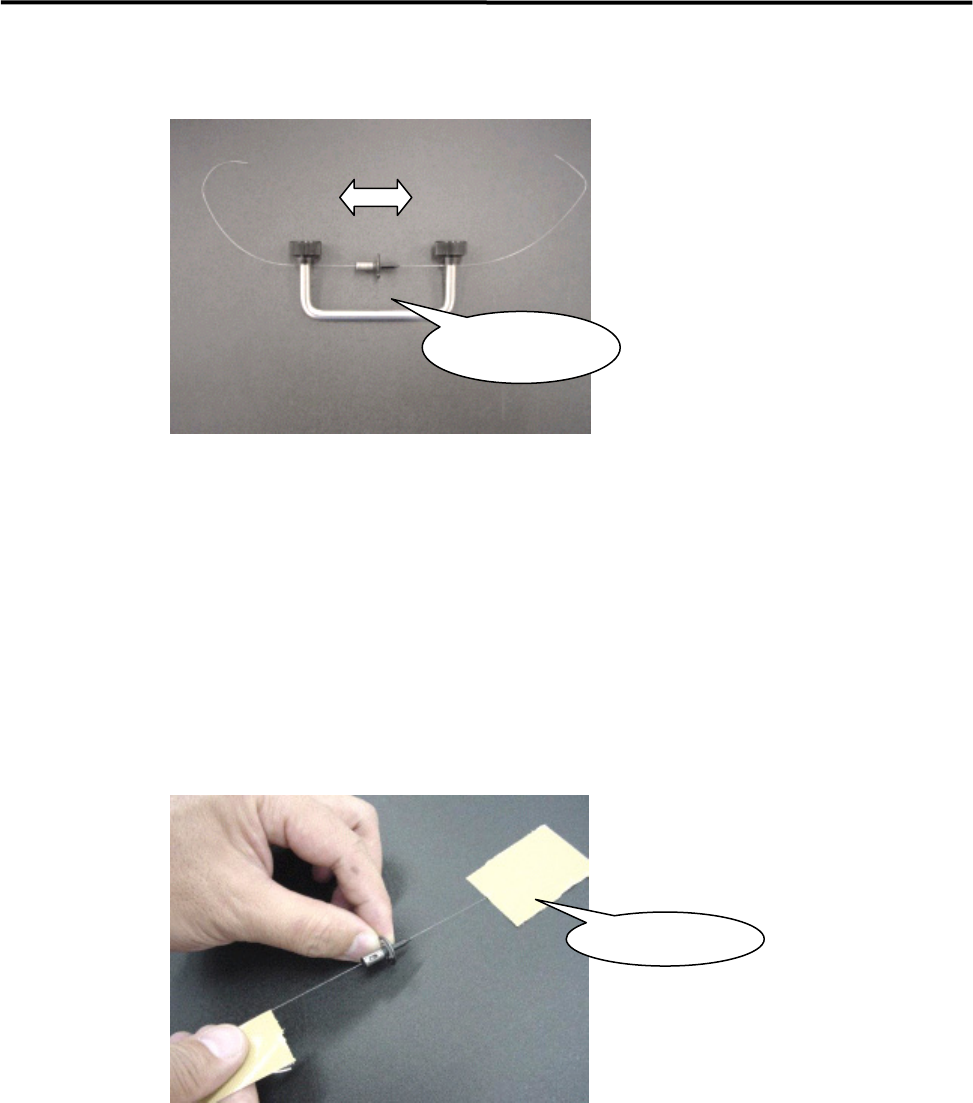
④ Wind to fasten the wire between both sides of the nozzle cleaner assy.
(Part No. KV8-M8881-A0X)
⑤ Move the nozzle back and forth to clean the nozzle hole.
⑥ Remove the wire and blow some air into the nozzle hole.
■ Nozzle Cleaning using Wire (2)
You can use the wire by fastening the wire ends with adhesive tape. In this case, adhesive may remain on
the wire. So be sure to clean the wire end before pulling out the wire from the nozzle.
Nozzle Cleaner
Assy.
Adhesive Tape

3 Mechanical Section
3-8
■ Inspection of Suction Pad (Nozzle No. P017, P018, P019, P020)
Check that the rubber suction pad located at the nozzle tip is free from scratches and cracks. If they are
found on the pad, replace the pad with a new one.
ACTION: Remove the old pad, apply silicon grease to the inner surface of a new pad, and then install it in the nozzle.
Part Name
Part No. Remark
RUBB.PAD17 LG0-M77A0-00X Suction pad for P017
RUBB.PAD18 LG0-M77A1-00X Suction pad for P018
RUBB.PAD19 LG0-M77A2-00X Suction pad for P019
RUBB.PAD20 LG0-M77A9-00X Suction pad for P020
GREASE SILICON LG0-M89AB-00X Silicone Grease