M8_ServiceManual_e.pdf - 第58页
3 Mechanical Section 3-18 Camera Camera Lens and Glass If the surface of the lens /lens filter is dirty by gr ease or dirt, and if any obstacles such as dropped components or deposits are rema ined on those parts, wrong …
3 Mechanical Section
3-17
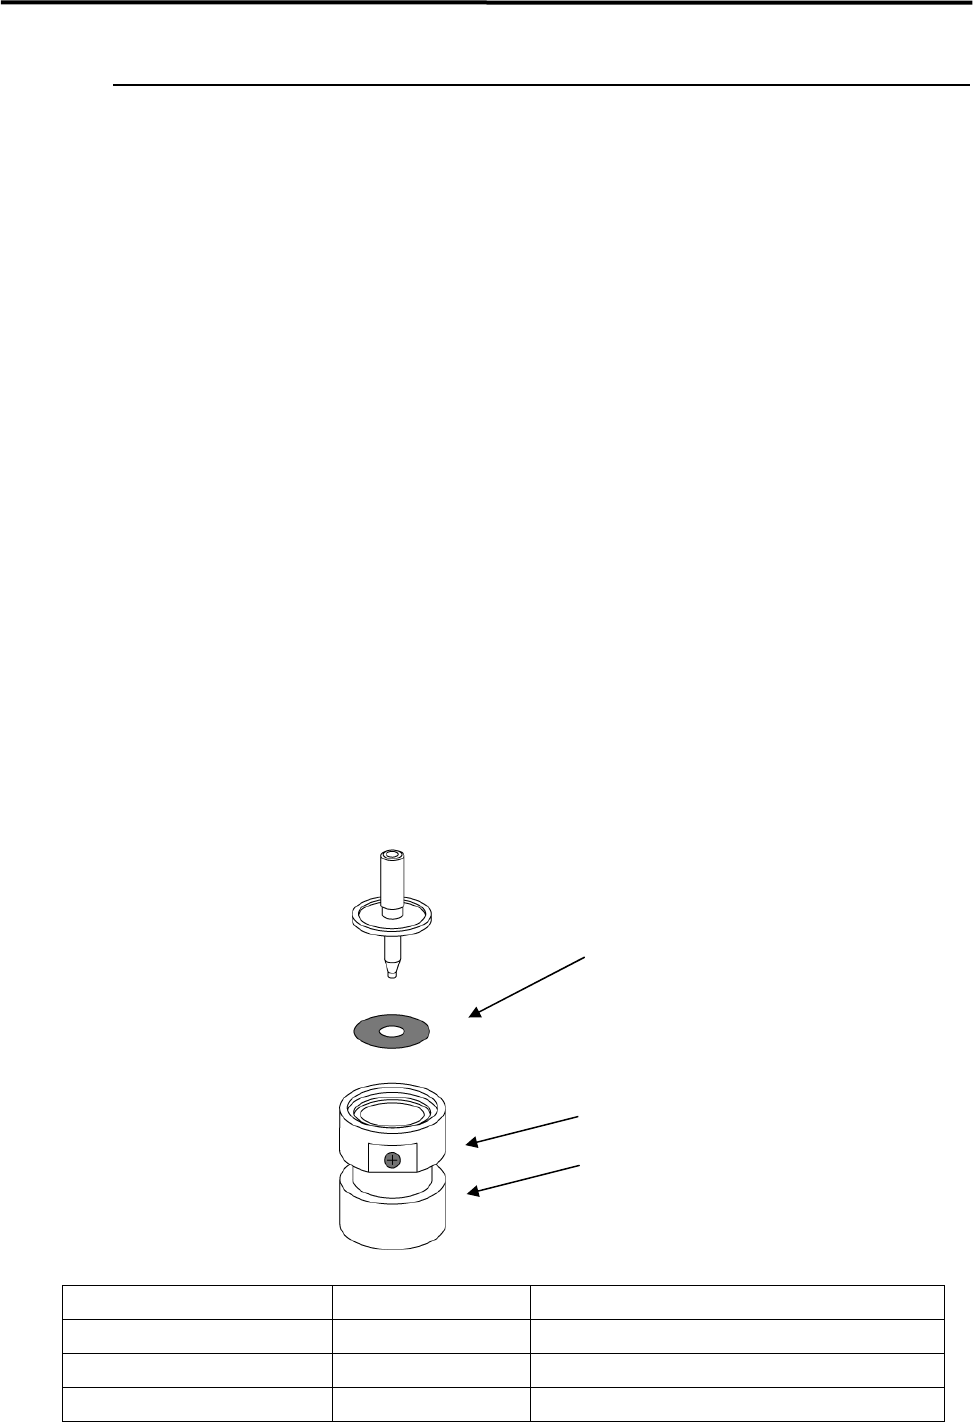
Flange Seal
The Flange Seal is affixed to cover and protect the mat black film, which covers the back of the nozzle
flange to avoid Vision Process error, may caused by reflecting. This seal may cause a Vision Process error
when it is damaged with scratches or when it turns reflective after long term use with nozzle changes.
Follow the procedure below when it needs to be replaced.
ACTION:
① Peel off the old Flange Seal thoroughly and clean off the dirt, such as oil, dust and moisture, from the
back of the nozzle flange using industrial alcohol. Do not use tools, such as an edged tool and
tweezers, to peel off the seal or damage the black film.
② Slide up the ring of the Flange Seal Set Tool (Optional) and turn it clockwise.
③ Remove the Flange Seal off the exfoliative paper using tweezers.
④ Set the Flange Seal, the adhesive side up, onto the Flange Seal Set Tool. Do not touch the seal with
hand.
⑤ Confirm that the seal is set evenly flat onto the inside bottom of the ring.
⑥ Insert the nozzle, nozzle tip down, into the tool.
⑦ Turn the ring counterclockwise with the nozzle pressed onto the tool, and slides it down to attach the
nozzle flange and the Flange Seal.
NOTE: The Flange Seal comes off easily when it touches liquid, such as oil and water. Wipe them off quickly and
well using something like dry cotton-swab.
NOTE: There are 3 types of Flange seal. Please refer to the list below.
Flange Seal Parts Number Parts Name Supported nozzle types
LG0-M77A6-000 FLANGE SEAL 1 P005, P012, P013
LG0-M77A7-000 FLANGE SEAL 2 P031~ P034, P006, P017, P018, P019, P042
LG0-M77A8-000 FLANGE SEAL 3 P020
Flange Seal
Ring
Flange Seal Set Tool
3 Mechanical Section
3-18
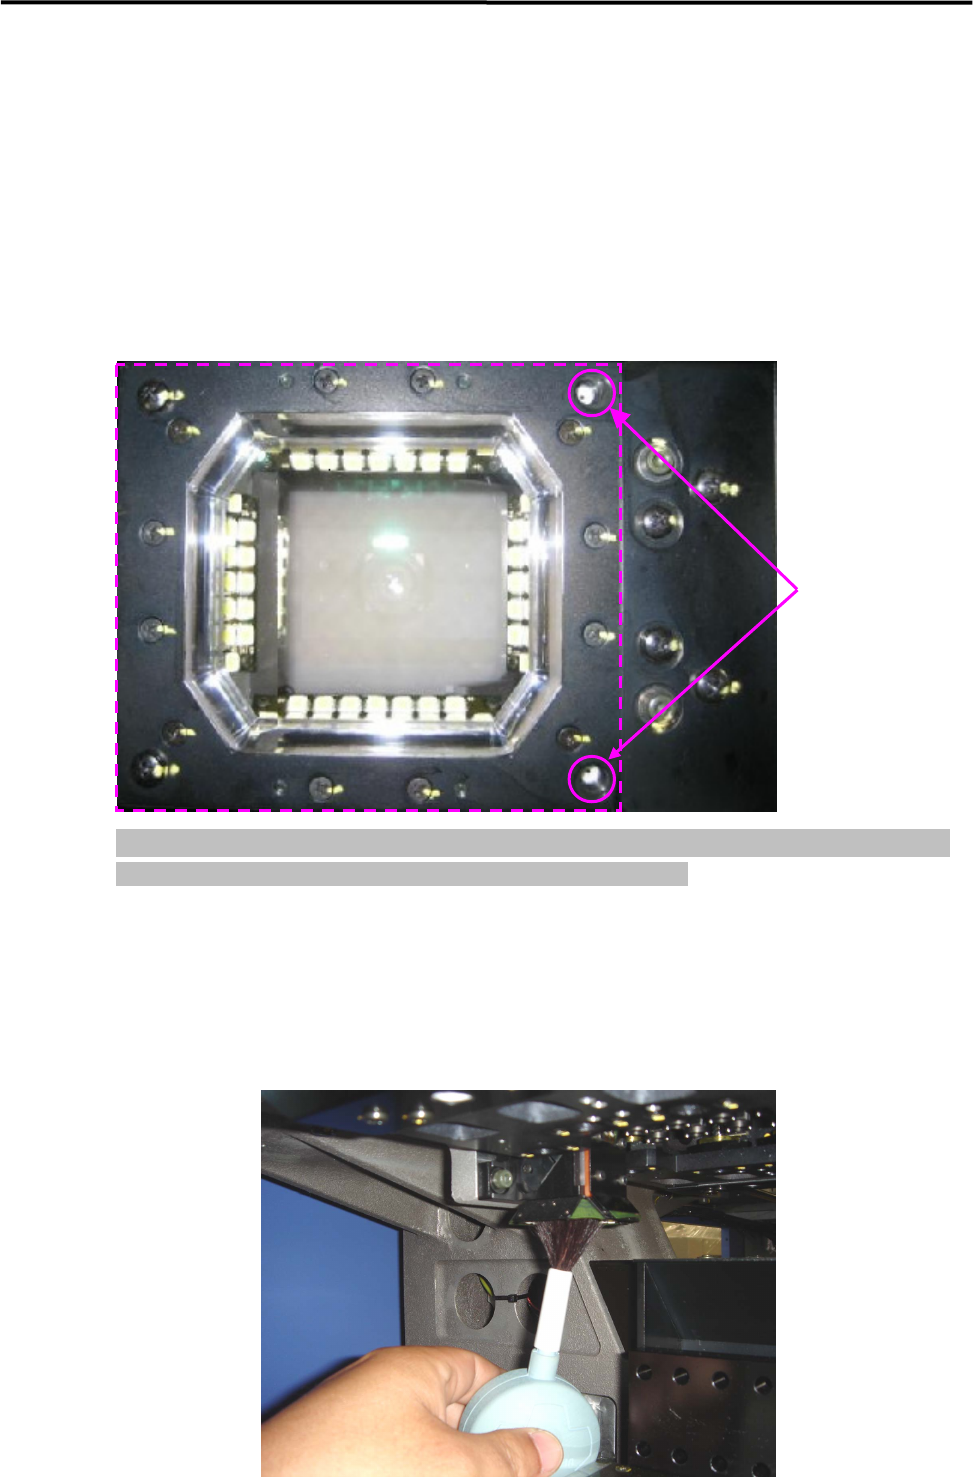
Camera
Camera Lens and Glass
If the surface of the lens /lens filter is dirty by grease or dirt, and if any obstacles such as dropped
components or deposits are remained on those parts, wrong recognition problem or recognition error may
be caused. Check lens and Glass every day and clean them if dirty. Be sure to keep them always clean
without any obstacles or deposits.
NOTE: Clean the proper part for each camera type. (See the chart below. O: Should be cleaned, X: No need to be
cleaned)
Use of liquid cleaner
Beam Camera
Industrial alcohol * Lens cleaner (Note 1)
Lens X OK OK
Glass O OK OK
* : Ethanol – Do not use Isopropyl alcohol solution (IPA). It causes Organic solvent will erode Lens and
Glass.
Note 1: It is contained in the Lens Cleaner Set, one of the standard accessories attached with a machine.
■ Lens Cleaner Set
Part Name
Part No. Remark
LENS CLEANER SET LG0-M89A4-00X Lens Cleaner Set
3 Mechanical Section
3-19
Cleaning Beam camera
Remove dirt/dropped obstacles (components or deposits) in a gentle way from the lens or lens filter of the
beam cameras, blowing air with a blower brush or wiping with a dry thing like a cotton swab. Avoid
applying your finger pressure directly to the lens and mirror through the use of such things as tissues.
For stubborn and sticky dirt such as grease, which cannot be cleaned away by air blow or wiping with dry
cotton swab, wipe it off with a moistened cotton swab with little amount of liquid cleaner, and finally with
dry one to remove the liquid cleaner and dirt completely. Do not apply the liquid cleaner directly on the lens
or lens filter.
NOTE: Be careful not to touch your finger or cotton swab directly to the LED lighting. The careless touch may
change the optical axis of lighting, causing vision recognition problem.
Cleaning Board Camera
The lens of teach camera faces downward, and usually it would not get any dirt/dust under the normal
operation. However, if it gets dirty, blow air using blower brush from the bottom of the teach camera in
order to remove the dust.
Wipe with a dry
cotton swab