00191369-02.pdf - 第128页
3 Introduction and Basic Concepts User Manual HS-50 3.3 User Interface - Views and Menus Software Version S R.501.xx 12 /99 Issue US 128 t I I t 3.3.2.4 "Language" Menu Y ou can use the " Language" me…
User Manual HS-50 3 Introduction and Basic Concepts
Software Version SR.501.xx 12/99 Issue US 3.3 User Interface - Views and Menus
127
t IIt
Load table program 3
This menu item allows you to reload the table program into the memory of the table program con-
troller. You may need to do this, for example, if a machine error has resulted in the loss of the table
program. 3
NOTE
This function cannot be executed in "Operator" access mode. 3
Å Click the menu item "Load table program".
The program is loaded. (The loading process can take some time).
Video image PA1 > Alt+8 3
In the case of certain actions, it may be necessary to display the camera image of the MVS system
on-screen (vision evaluation unit) during assembly. 3
Å Click the menu item Video image> or press the key combination ALT+8.
The display area is switched to the MVS system camera image in processing area 1.
Å Press then ESC key to restore the display area to the normal view.
Video image PA2 > Alt+9 3
Switch to the MVS system camera image in processing area 2. 3
3
3 Introduction and Basic Concepts User Manual HS-50
3.3 User Interface - Views and Menus Software Version SR.501.xx 12/99 Issue US
128
t IIt
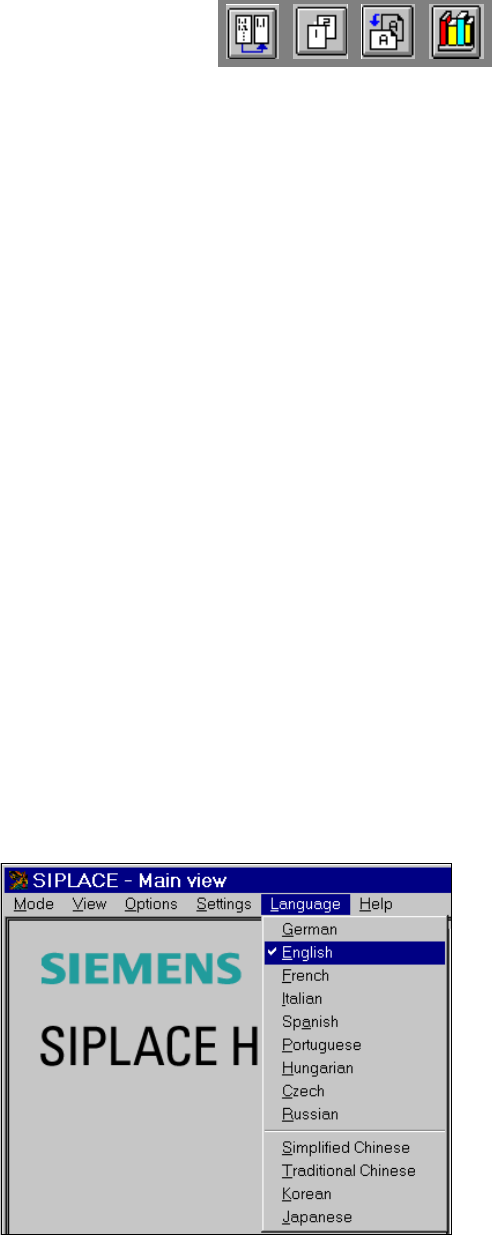
3.3.2.4 "Language" Menu
You can use the "Language" menu to select between the language versions which are integrated
in the SC software.
You can chose between the languages 3
– German
–English
–French
–Italian
–Spanish
– Portuguese
– Hungarian
– Czech
– Russian
– Simplified Chinese
– Traditional Chinese
– Korean and
– Japanese.
3
Å Click the menu item corresponding to the required language.
The user interface texts are displayed in the selected language.
User Manual HS-50 3 Introduction and Basic Concepts
Software Version SR.501.xx 12/99 Issue US 3.3 User Interface - Views and Menus
129
t IIt
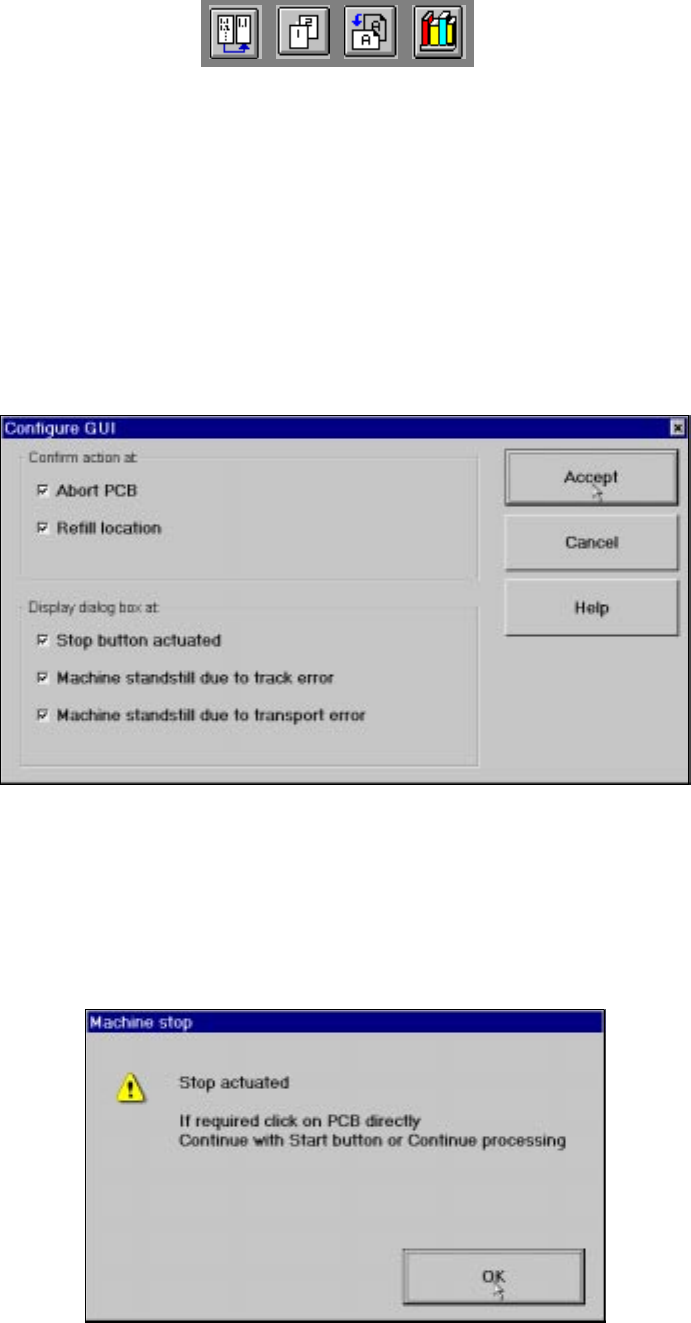
3.3.2.5 "Settings" Menu
The "Settings" menu is only available in the main view. The options in this menu can be used to
set whether a particular action must be confirmed again before it is executed. Or whether, when
a particular event occurs, a dialog box containing the relevant information is to be displayed and
then, similarly, confirmed by the user. 3
Å Click the menu item Configure GUI ... .
This displays the following window.
3
Å Activate/deactivate the check box for the required options.
Å Click Accept to save the settings.
3
Example: If the stop button is activated and the "Stop button actuated" box is checked,
the following dialog box is displayed and must be confirmed. 3
3
If the box is not checked, the dialog box does not appear. 3