5OM-1011-002.pdf - 第17页
2. Name of Each Section *1 [MAIN MENU] *2 Status Bar *6 [2] Button *3 Power ON/OFF *4 Power Light *5 [1] Button *7 Arrow Buttons Front Control Panel Fig. 5A1 2. Name of Each Section 0305-001 1-2 Tg0861-PM-MD *1 [MAIN MEN…
1. Notes on Use of Recognition Monitor
1. Notes on Use of Recognition Monitor
0305-001 1-1 Tg0861-PM-MD
• Never remove the monitor’s rear cover.
There are some monitor components with ex-
tremely high voltage. Touching any of such high
voltage components may cause electric shock.
DANGER
• Do not put anything on the monitor that blocks
its ventilation or prevents its heat release.
• Do not put anything heavy on the monitor, video
cable and power cable.
• Do not place the monitor close to any magnetic
field, motor, transformer or TV set.
CAUTION
• If the monitor is ever irregular (smoke, abnormal
sound or smell, etc.) immediately turn off the
power and switch off the monitor.
Contact our sales personnel or agent. It is very dan-
gerous to use the monitor in any such condition.
WARNING
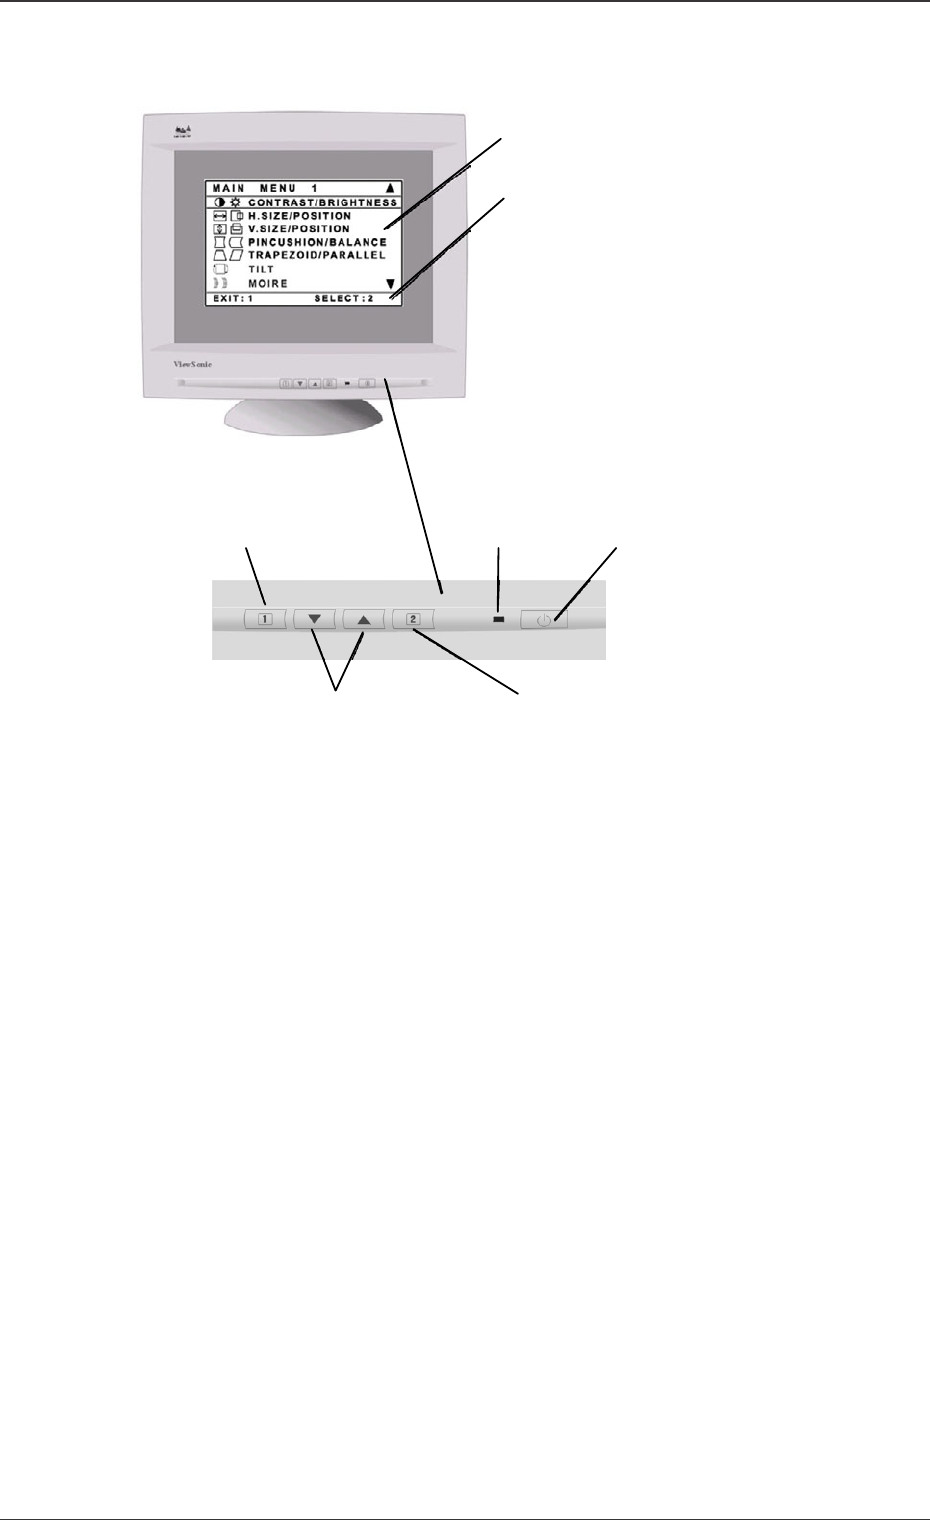
2. Name of Each Section
*1 [MAIN MENU]
*2 Status Bar
*6 [2] Button
*3 Power ON/OFF
*4 Power Light
*5 [1] Button
*7 Arrow Buttons
Front Control Panel
Fig. 5A1
2. Name of Each Section
0305-001 1-2 Tg0861-PM-MD
*1 [MAIN MENU]
From the display menu, the control panel enables various adjustments
*2 Status Bar
The next operation is displayed. In the above example, when the [1] button
is pressed, the menu is ended. When the [2] button is pressed, the emphati-
cally indicated controller is selected.
*3 Power ON/OFF
This button turns the power on or off.
*4 Power Light
When the power is ON, the light is turned on.
*5 [1] Button
This button shows the [MAIN MENU], or saves the change and ends the
[MAIN MENU].
*6 [2] Button
This button displays the emphatically indicated controllers (sometimes a set
consists of two controllers). Also, for part of controller displays, it toggles
between the controllers set (two in one).
*7 Arrow Button
This button scrolls the menu option up and down.

3. Adjustment and Setting Procedures
The image is adjusted by using the front control panel buttons with the [MAIN
MENU] displayed.
3.1 Image Adjustment Procedure
(1) Press the [1] button to display the [MAIN MENU] as shown in the follow-
ing figure.
(2) In order to select the adjusting controller, press the arrow button ([ ], [ ])
on the front control panel to scroll the [MAIN MENU] up and down and to
emphatically indicate the adjusting controller.
When the adjusting controller is emphatically indicated, press the [2] but-
ton.
Note: Some of the controllers in the [MAIN MENU] are indicated as a
set (two in one), such as [CONTRAST/BRIGHTNESS]. When
such a controller is to be changed, open the controller display and
then press the [2] button.
(3) Press the arrow button ([ ], [ ]) to adjust, using the selected controller.
(4) Press the [1] button twice to save the adjustment, and close the menu.
3. Adjustment and Setting Procedures
0305-001 1-3 Tg0861-PM-MD
Fig. 5A4
Fig. 5A2
Fig. 5A3