5OM-1011-002.pdf - 第18页
3. Adjustment and Setting Procedures The image is adjusted by using the front control panel buttons with the [MAIN MENU] displayed. 3.1 Image Adjustment Procedure (1) Press the [1] button to display the [MAIN MENU] as sh…
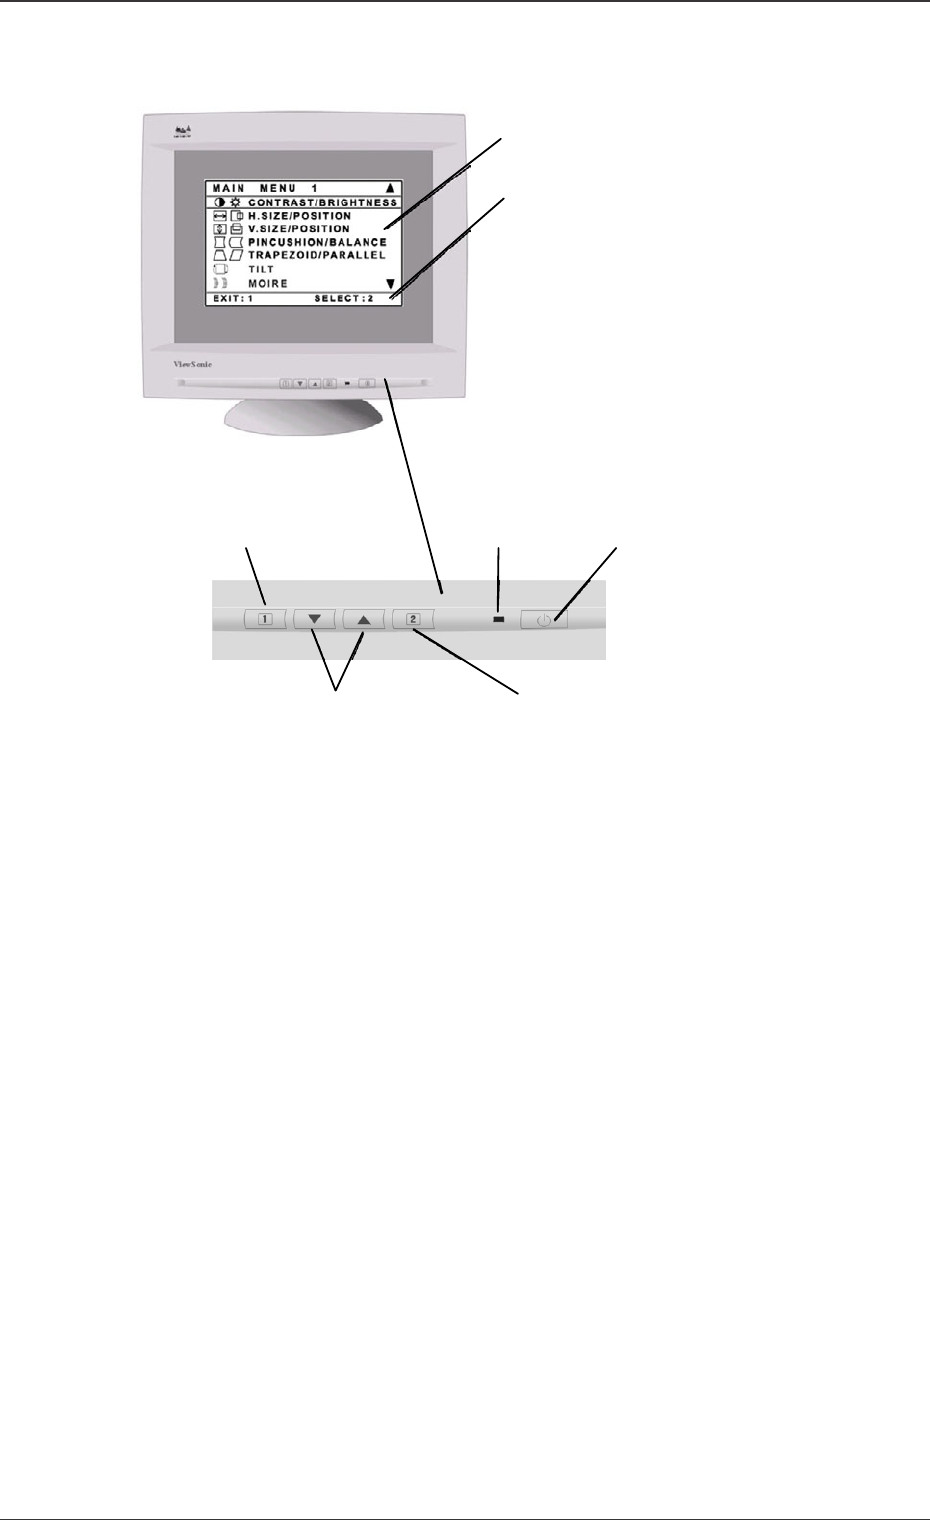
2. Name of Each Section
*1 [MAIN MENU]
*2 Status Bar
*6 [2] Button
*3 Power ON/OFF
*4 Power Light
*5 [1] Button
*7 Arrow Buttons
Front Control Panel
Fig. 5A1
2. Name of Each Section
0305-001 1-2 Tg0861-PM-MD
*1 [MAIN MENU]
From the display menu, the control panel enables various adjustments
*2 Status Bar
The next operation is displayed. In the above example, when the [1] button
is pressed, the menu is ended. When the [2] button is pressed, the emphati-
cally indicated controller is selected.
*3 Power ON/OFF
This button turns the power on or off.
*4 Power Light
When the power is ON, the light is turned on.
*5 [1] Button
This button shows the [MAIN MENU], or saves the change and ends the
[MAIN MENU].
*6 [2] Button
This button displays the emphatically indicated controllers (sometimes a set
consists of two controllers). Also, for part of controller displays, it toggles
between the controllers set (two in one).
*7 Arrow Button
This button scrolls the menu option up and down.

3. Adjustment and Setting Procedures
The image is adjusted by using the front control panel buttons with the [MAIN
MENU] displayed.
3.1 Image Adjustment Procedure
(1) Press the [1] button to display the [MAIN MENU] as shown in the follow-
ing figure.
(2) In order to select the adjusting controller, press the arrow button ([ ], [ ])
on the front control panel to scroll the [MAIN MENU] up and down and to
emphatically indicate the adjusting controller.
When the adjusting controller is emphatically indicated, press the [2] but-
ton.
Note: Some of the controllers in the [MAIN MENU] are indicated as a
set (two in one), such as [CONTRAST/BRIGHTNESS]. When
such a controller is to be changed, open the controller display and
then press the [2] button.
(3) Press the arrow button ([ ], [ ]) to adjust, using the selected controller.
(4) Press the [1] button twice to save the adjustment, and close the menu.
3. Adjustment and Setting Procedures
0305-001 1-3 Tg0861-PM-MD
Fig. 5A4
Fig. 5A2
Fig. 5A3
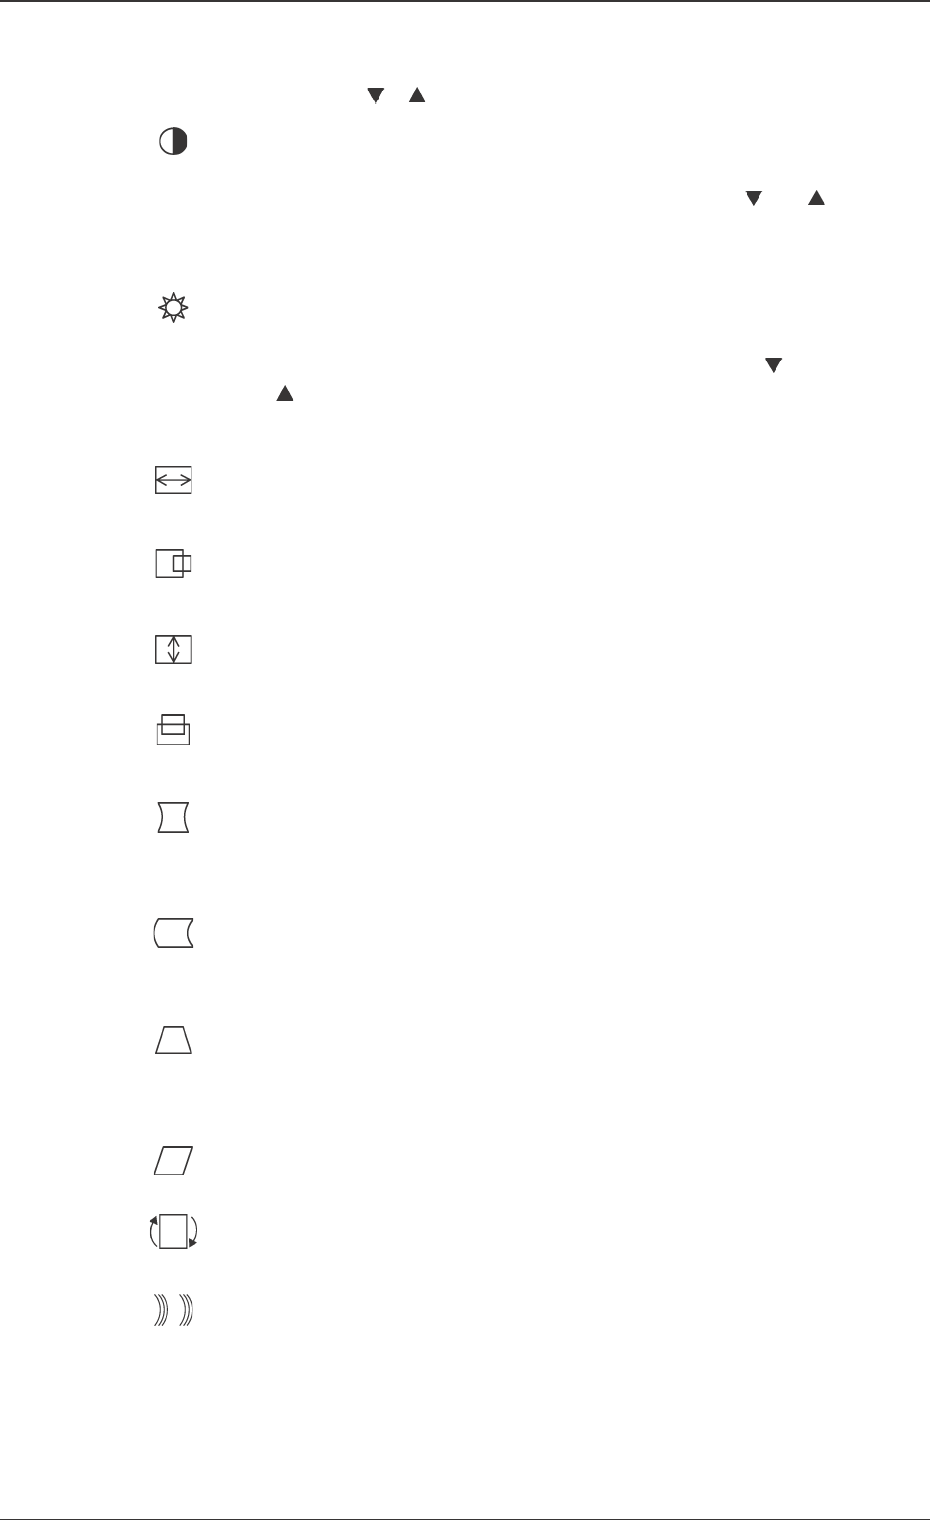
3.2 Controllers in [MAIN MENU]
Use the arrow buttons ([ ], [ ]) to adjust the following menu items.
3.2 Controllers in [MAIN MENU]
0305-001 1-4 Tg0861-PM-MD
CONTRAST
The contrast in the display is adjusted.
Shortcut: Before displaying the [MAIN MENU], press [
] or [ ]
and the [CONTRAST/BRIGHTNESS] controller display will ap-
pear.
BRIGHTNESS
The brightness of the display is adjusted.
Shortcut: Before displaying the [MAIN MENU], press [ ] or
[ ] and the [CONTRAST/BRIGHTNESS] controller display
will appear.
H. SIZE (Horizontal Magnitude)
The width of the image is adjusted.
H. POSITION
The image is moved to the right or left.
V. SIZE (Vertical Magnitude)
The height of the image is adjusted.
V. Position
The image is moved up and down.
PINCUSION
The dent or swell of the image in the vertical direction is cor-
rected.
PIN BALANCE
The dent or swell of the image (curvature in the same direction) in
the vertical direction is corrected.
TRAPEZOID
The upper side and lower sides of the image become of the same
width.
PARALLEL
The both ends of the image are inclined to the right or left.
Tilt
The entire image is turned.
MOIRE
Small or large wave patterns and interference stripes, which ap-
pear as unnecessary color patterns in the background, are con-
trolled.
Note : MOIRE interference stripes are much more noticeable
when the image displayed includes lines with small inter-
vals or detailed patterns.