APC - 224650 Issue 1.pdf - 第62页
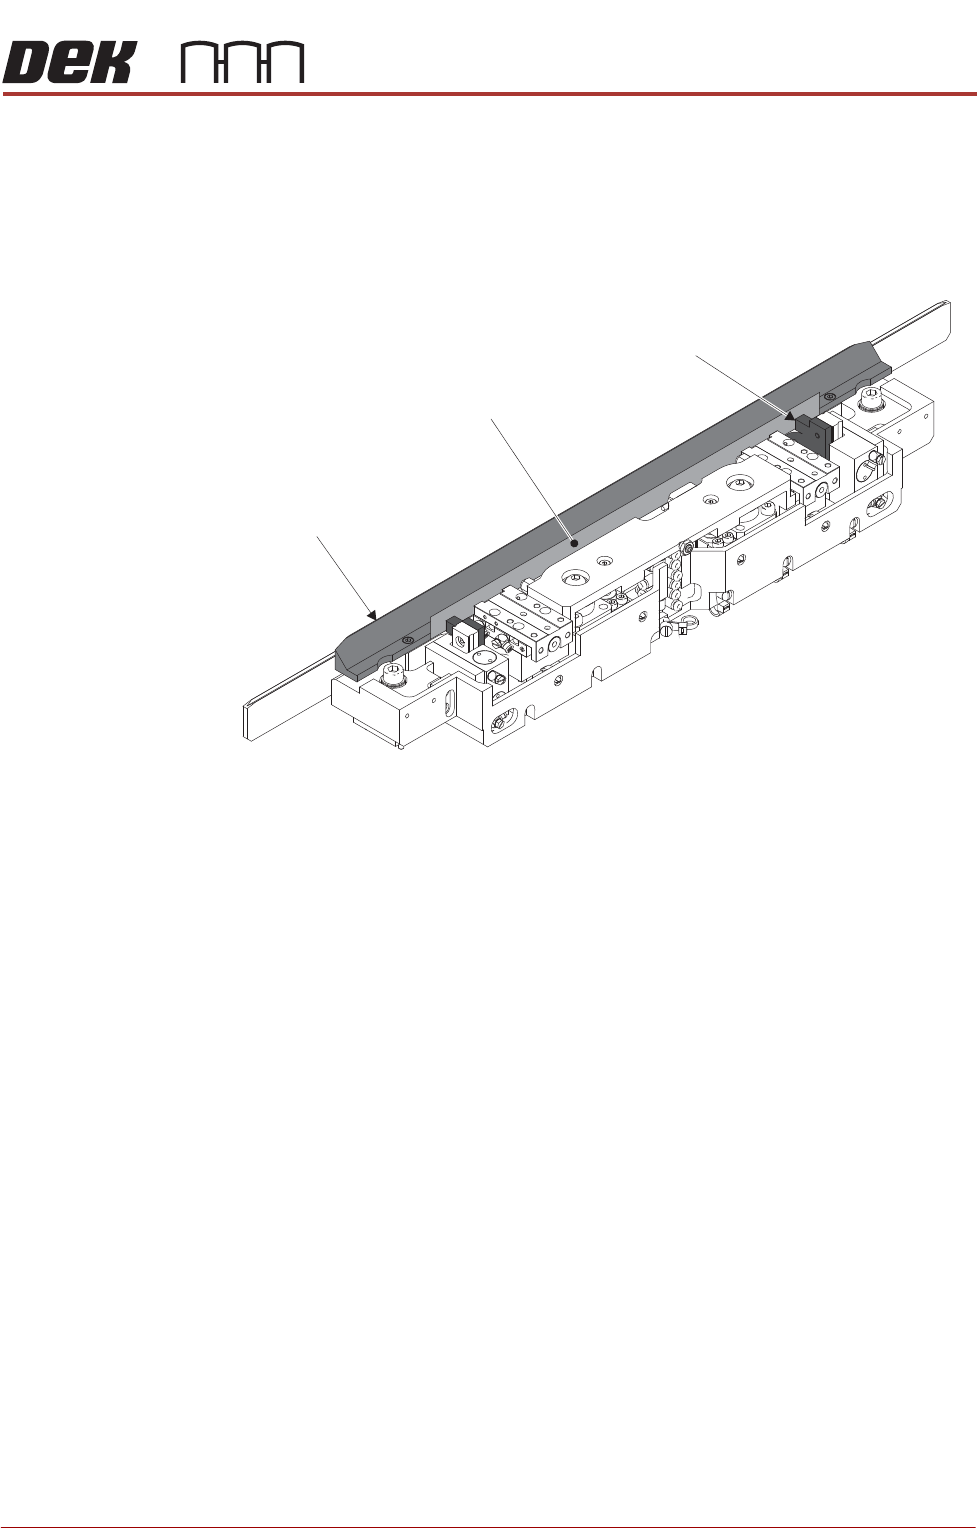
ALL PURPOSE CLAMPING (APC) REPLACEMENT PROCEDURES 1.50 All Purpose Clamping (APC) Manual Chapter Issue 1 Nov 16 Rear Snug Bar Replaceme nt Remove 1. Ensure the Prepare for Replacement procedure has been completed. 2. Rem…
ALL PURPOSE CLAMPING (APC)
REPLACEMENT PROCEDURES
Chapter Issue 1 Nov 16 All Purpose Clamping (APC) Manual 1.49
Replace 1. Apply thread lock compound to the 4 M3 cap head screws.
2. Position snug bar and loosely attach using the 4 M3 cap head screws.
3. Insert a 0.5mm feeler gauge between the up-stands on the mid plate and
the back of the snug bar. Butt the snug bar up against the feeler gauge and
fully tighten the cap head screws.
4. Install the top plate as detailed in Top Plate Replacement - Replace.
5. Install the board clamp foil as detailed in Board Clamp Foil Replacement -
Replace.
6. Complete the After Replacement Procedures.
Feeler Gauge
Snug Bar
Up-Stands
(2 positions)
ALL PURPOSE CLAMPING (APC)
REPLACEMENT PROCEDURES
1.50 All Purpose Clamping (APC) Manual Chapter Issue 1 Nov 16
Rear Snug Bar Replacement
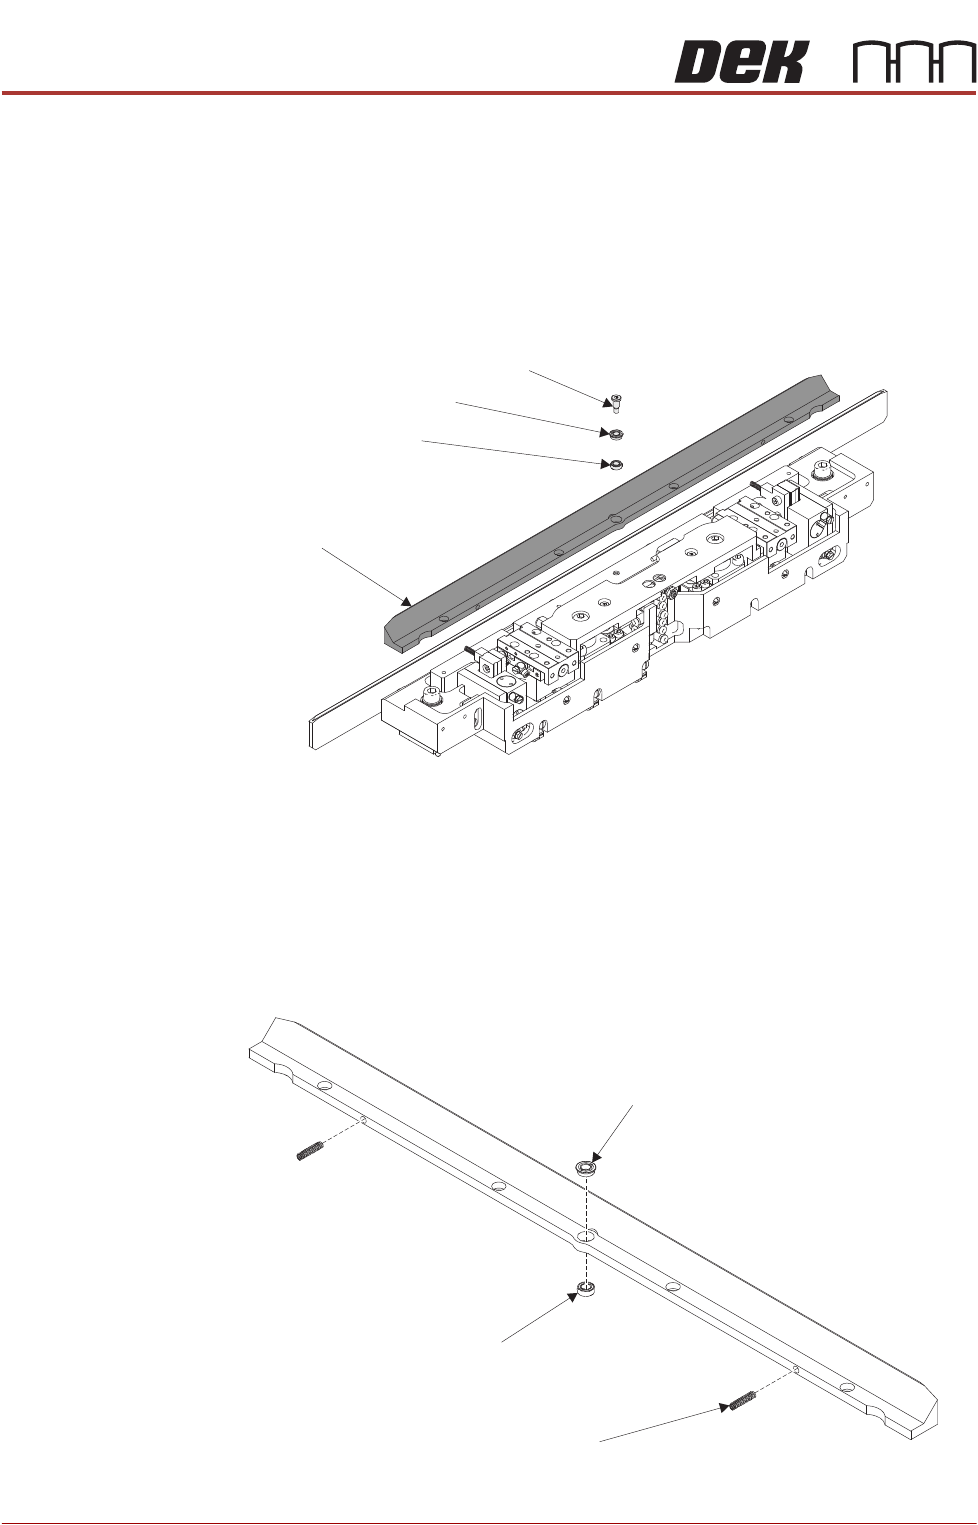
Remove 1. Ensure the Prepare for Replacement procedure has been completed.
2. Remove the board clamp foil as detailed in Board Clamp Foil Replacement
- Remove.
3. Remove the top plate as detailed in Top Plate Replacement - Remove.
4. Using a 2.5mm Allen key, remove the shoulder screw from the snug bar.
5. Remove the bearings. Remove the snug bar.
NOTE
When removing the snug bar ensure that the 2 springs fitted into the rear of
the snug bar are removed. Ensure the springs are not left behind inside the
mid plate.
Replace 1. Press fit the bearings into the snug bar.
Rear Snug Bar
Shoulder Screw
Flange Bearing
Bearing
Bearing
Spring
(2 positions)
Flanged Bearing
ALL PURPOSE CLAMPING (APC)
REPLACEMENT PROCEDURES
Chapter Issue 1 Nov 16 All Purpose Clamping (APC) Manual 1.51
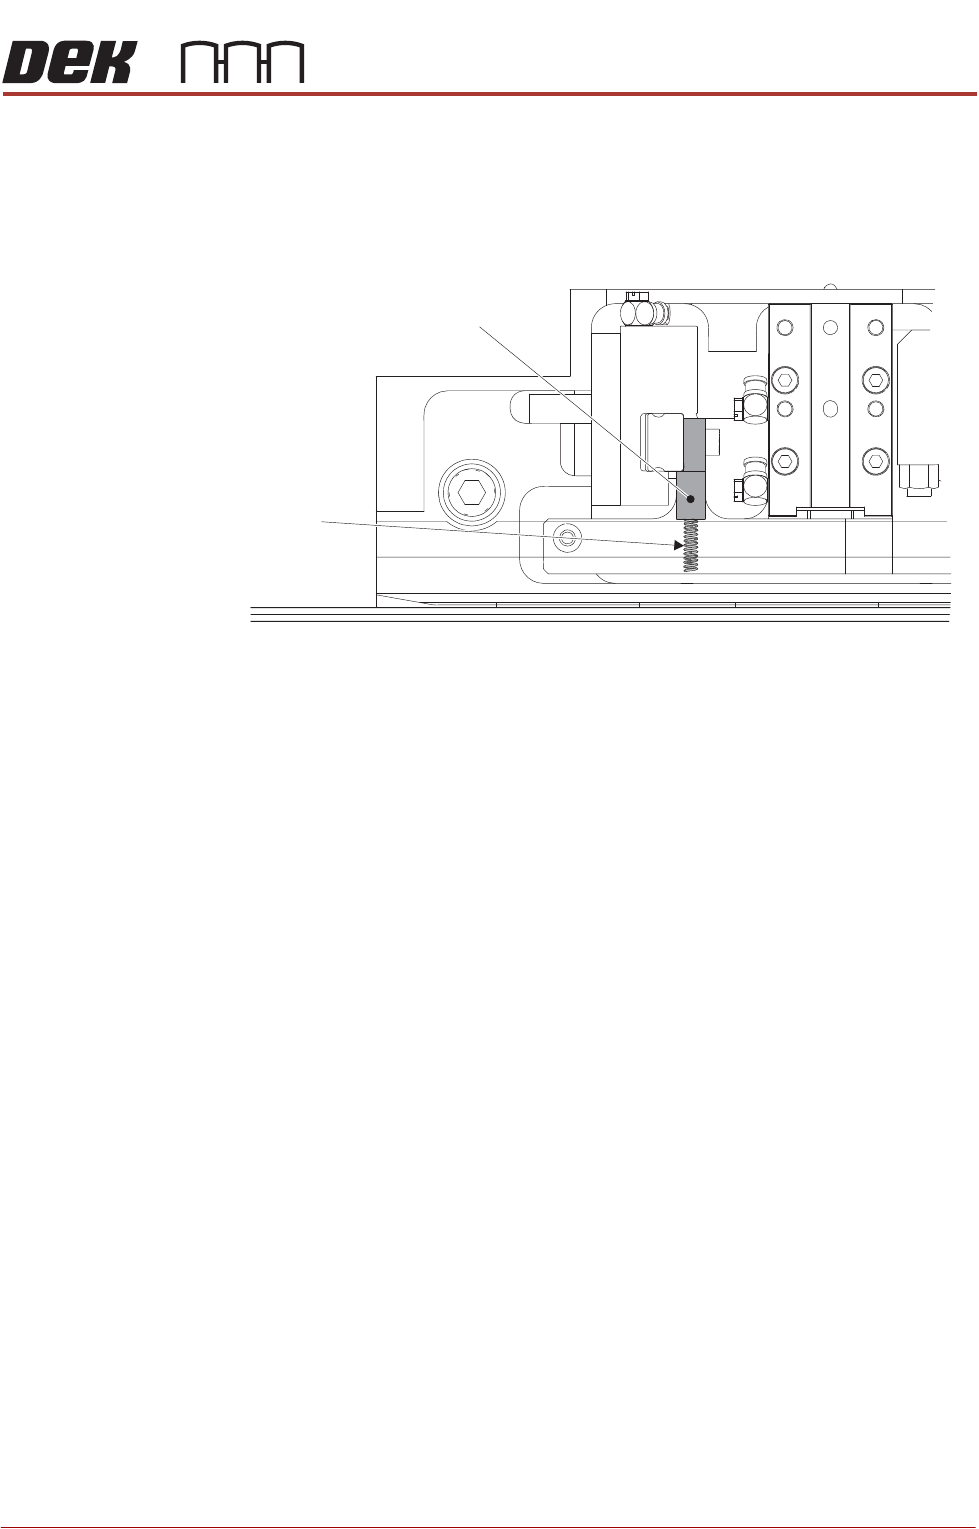
2. Install the springs into the pockets located on the rear of the snug bar.
3. Lower the snug bar into position, carefully compressing the springs so that,
when released, they extend out against the up-stand of the mid plate.
4. Apply thread lock compound to the shoulder screw. Install and tighten
shoulder screw to fix the snug bar to the mid plate.
5. Ensure that the snug bar is able to pivot on its central point
6. Install the top plate as detailed in Top Plate Replacement - Replace.
7. Install the board clamp foil as detailed in Board Clamp Foil Replacement -
Replace.
8. Complete the After Replacement Procedures.
Partial Plan View of Rear APC Module
(Snug Bar is opaque for clarity)
Spring
Up-Stand