APC - 224650 Issue 1.pdf - 第79页
ALL PURPOSE CLAMPING (APC) REPLACEMENT PROCEDURES Chapter Issue 1 Nov 16 All Purpose Clamping (APC) Manual 1.67 Replace 1. Prepare new clamp, by cleaning all faces with IP A wipes to ensure transport grease has been remo…
ALL PURPOSE CLAMPING (APC)
REPLACEMENT PROCEDURES
1.66 All Purpose Clamping (APC) Manual Chapter Issue 1 Nov 16
Zimmer Clamp
Replacement
There are two clamps per APC module, if replacement is required then both
clamps in a module should be replaced as a pair.
Remove 1. Ensure the Prepare for Replacement procedure has been completed.
2. Remove the board clamp foil, as detailed in Board Clamp Foil Replacement
- Remove.
3. Remove the top plate, as detailed in Top Plate Replacement - Remove.
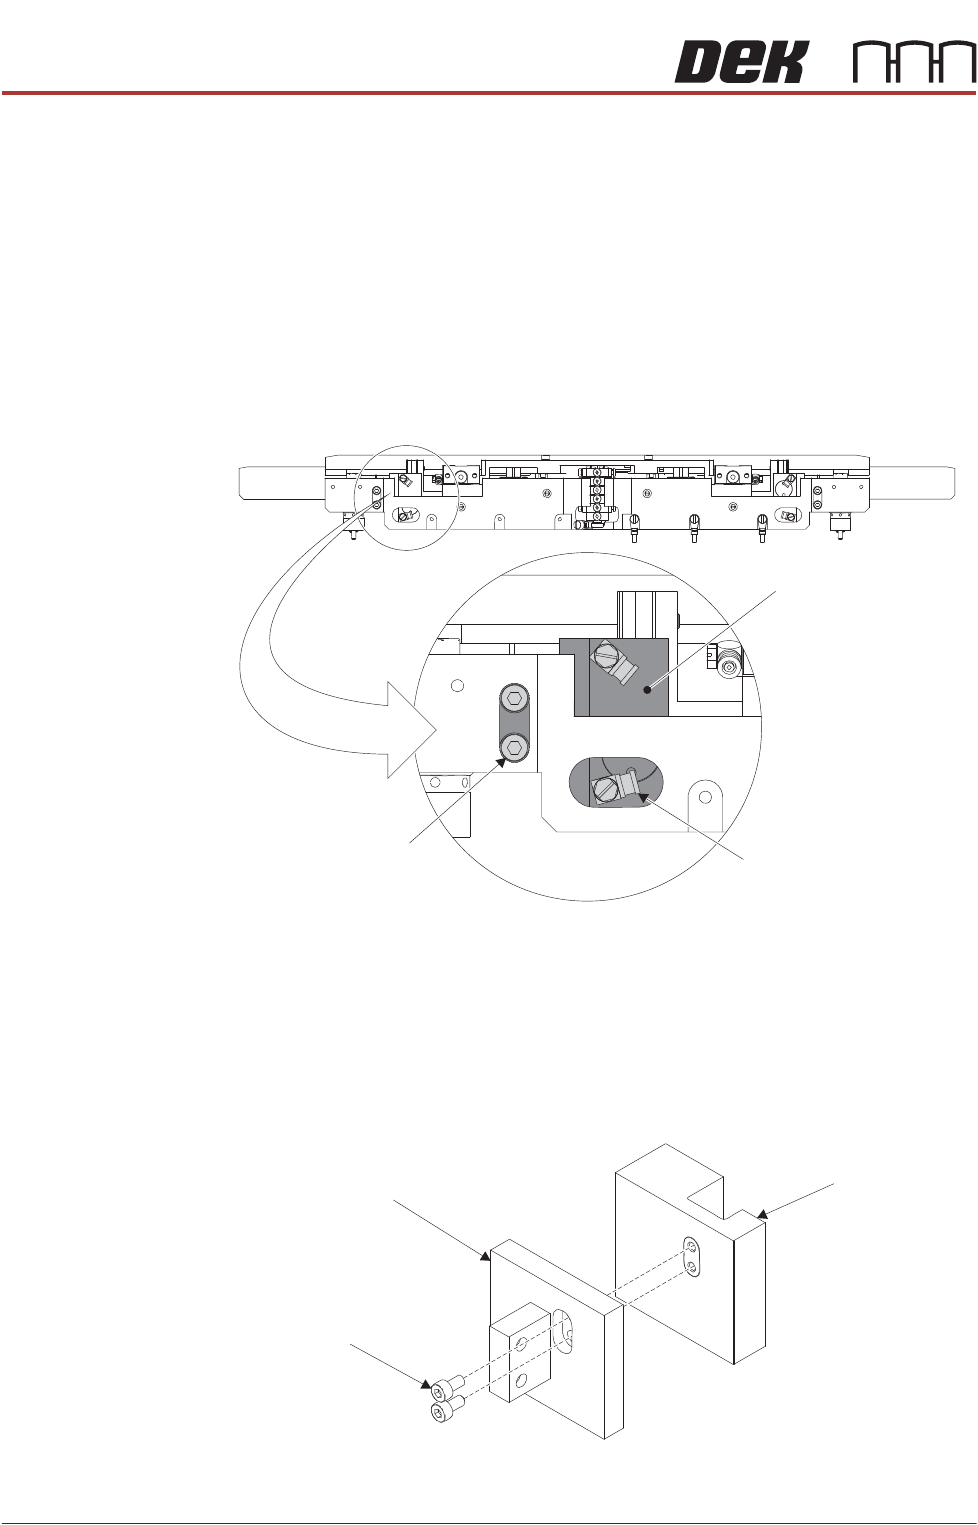
4. Using a flat bladed screwdriver, remove the pneumatic elbow fittings.
NOTE
Marking the elbow fittings A and B will aid during reassembly. Also make a
note of the orientation.
5. Using a 2.5mm Allen key, remove the clamp mounting block retaining cap
head screws.
6. Remove the clamp and clamp mounting block assy.
7. Using a 2mm Allen key, remove the cap head screws that secure the clamp
to the clamp mounting block.
8. Repeat Steps 4 to 7 for the other clamp.
Pneumatic Elbow Fitting
(2 positions)
Cap Head Screw
(2 positions)
Clamp and Clamp
Mounting Block Assy
Clamp Mounting Block
Cap Head Screws
Clamp
ALL PURPOSE CLAMPING (APC)
REPLACEMENT PROCEDURES
Chapter Issue 1 Nov 16 All Purpose Clamping (APC) Manual 1.67
Replace 1. Prepare new clamp, by cleaning all faces with IPA wipes to ensure transport
grease has been removed. Particular attention should given to the piston
face.
2. Using a 1.5mm Allen key, remove the protective blanking screw from port B
and the venting screw from port A on the clamp.
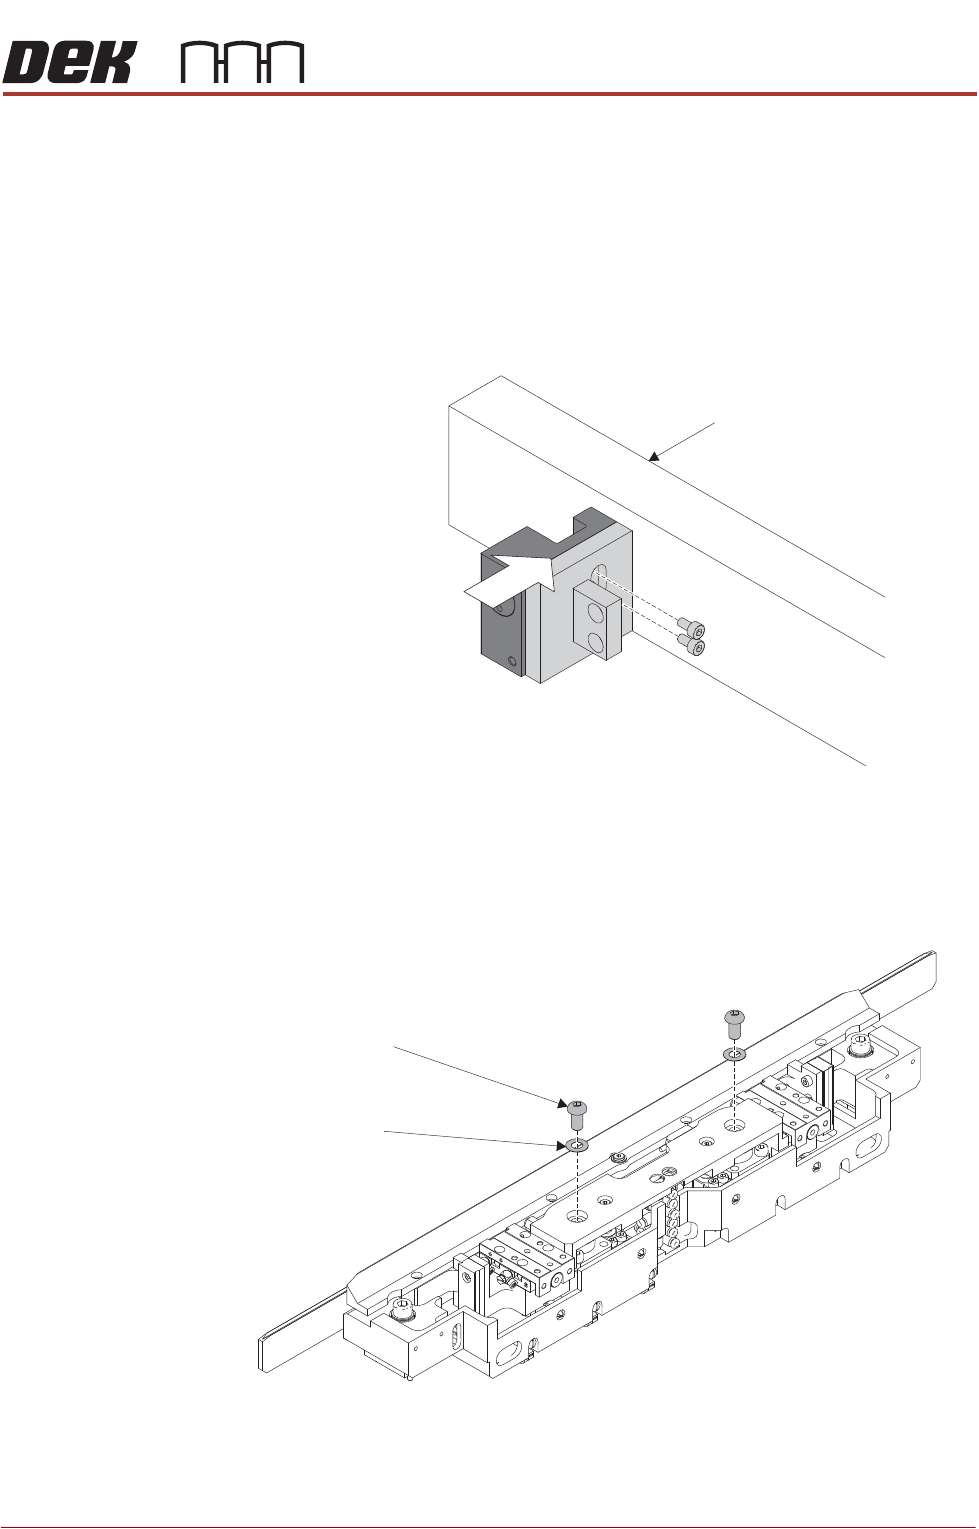
3. Using a flat work surface and square block, set the mounting block edges
flush with the clamp edges. Secure the clamp to the mounting block using
a 2mm Allen key and cap head screws.
4. Repeat Steps 1 to 3 for the other clamp assembly.
5. Using a 5mm Allen key, remove the socket button head screws and shim
washers from the mid plate. Apply thread lock compound to the screws, and
refit loosely so the mid plate is free to move.
Square Block
Socket Button Head Screw
(2 positions)
Shim Washer
(2 position)
ALL PURPOSE CLAMPING (APC)
REPLACEMENT PROCEDURES
1.68 All Purpose Clamping (APC) Manual Chapter Issue 1 Nov 16
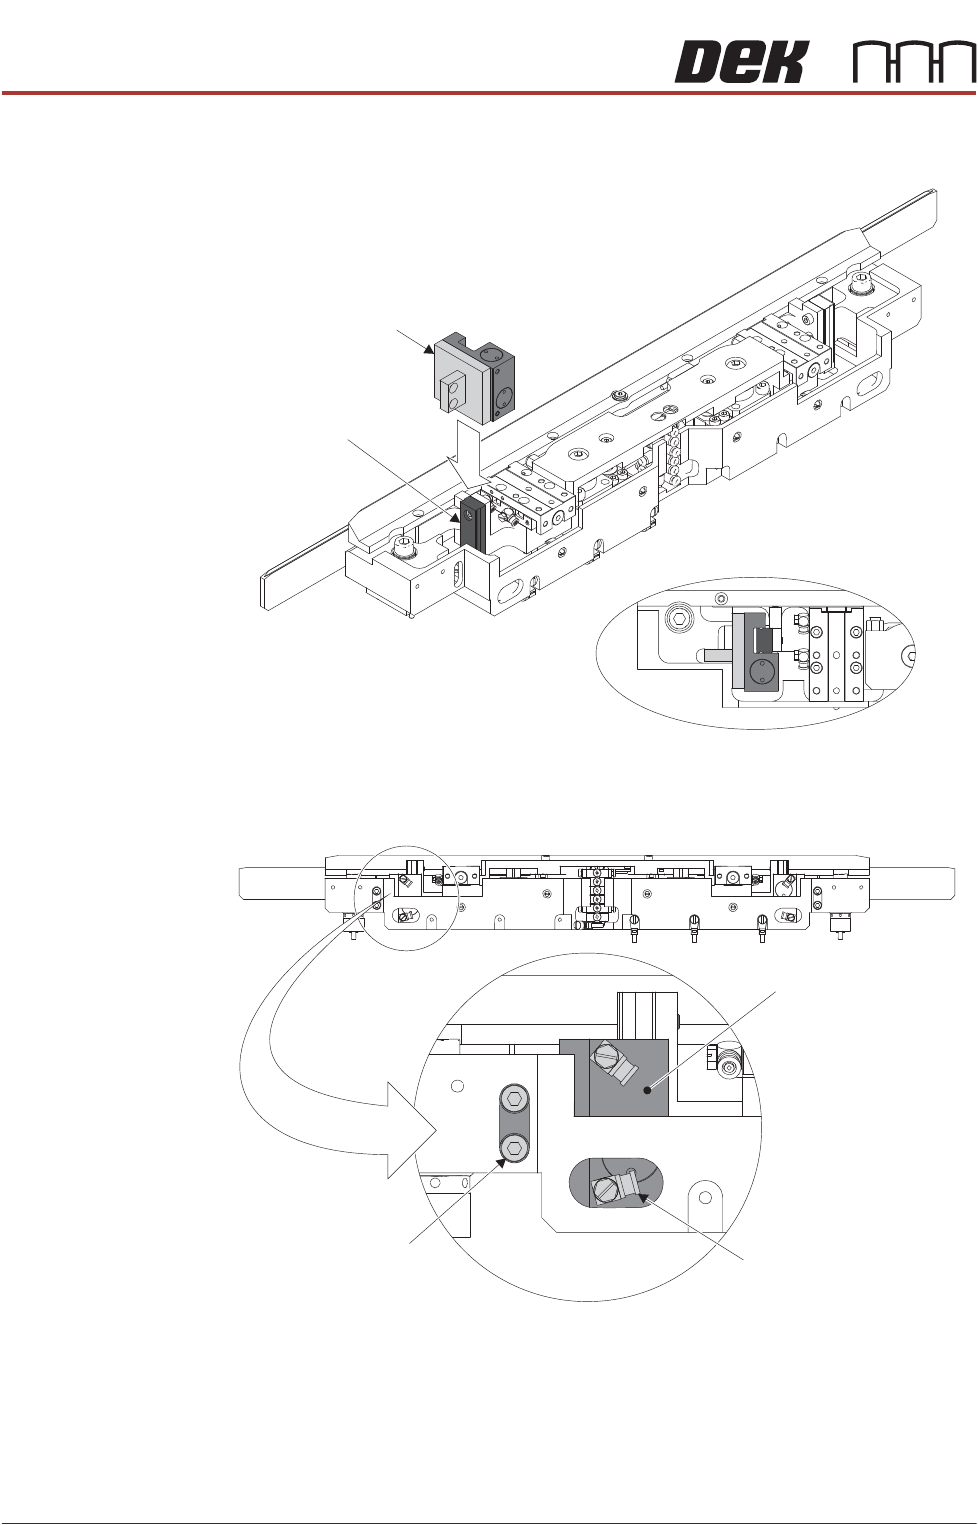
6. Install the clamp assembly into the base assembly, ensuring the assembly
slides down and surrounds the linear rail.
7. Using a 2.5mm Allen key, secure the clamp assembly to the base assembly.
8. Using a flat bladed screwdriver, reconnect the elbow fittings to the clamp
assembly. Ensure the fittings are orientated and installed to the correct ports
(noted/marked during Step 4 of the removal procedure).
9. Repeat Steps 6 to 8 for the other clamp assembly.
10. Centralise the mid plate assembly in the x axes.
Clamp Assembly
Linear Rail
Top View of Installed Clamp Assembly
Pneumatic Elbow Fitting
(2 positions)
Cap Head Screw
(2 positions)
Clamp and Clamp
Mounting Block Assy