APC - 224650 Issue 1.pdf - 第72页
ALL PURPOSE CLAMPING (APC) REPLACEMENT PROCEDURES 1.60 All Purpose Clamping (APC) Manual Chapter Issue 1 Nov 16 13. Using a 5mm Allen key , reinsta ll the socket button head screws and shim washers that att ach the mid p…
ALL PURPOSE CLAMPING (APC)
REPLACEMENT PROCEDURES
Chapter Issue 1 Nov 16 All Purpose Clamping (APC) Manual 1.59
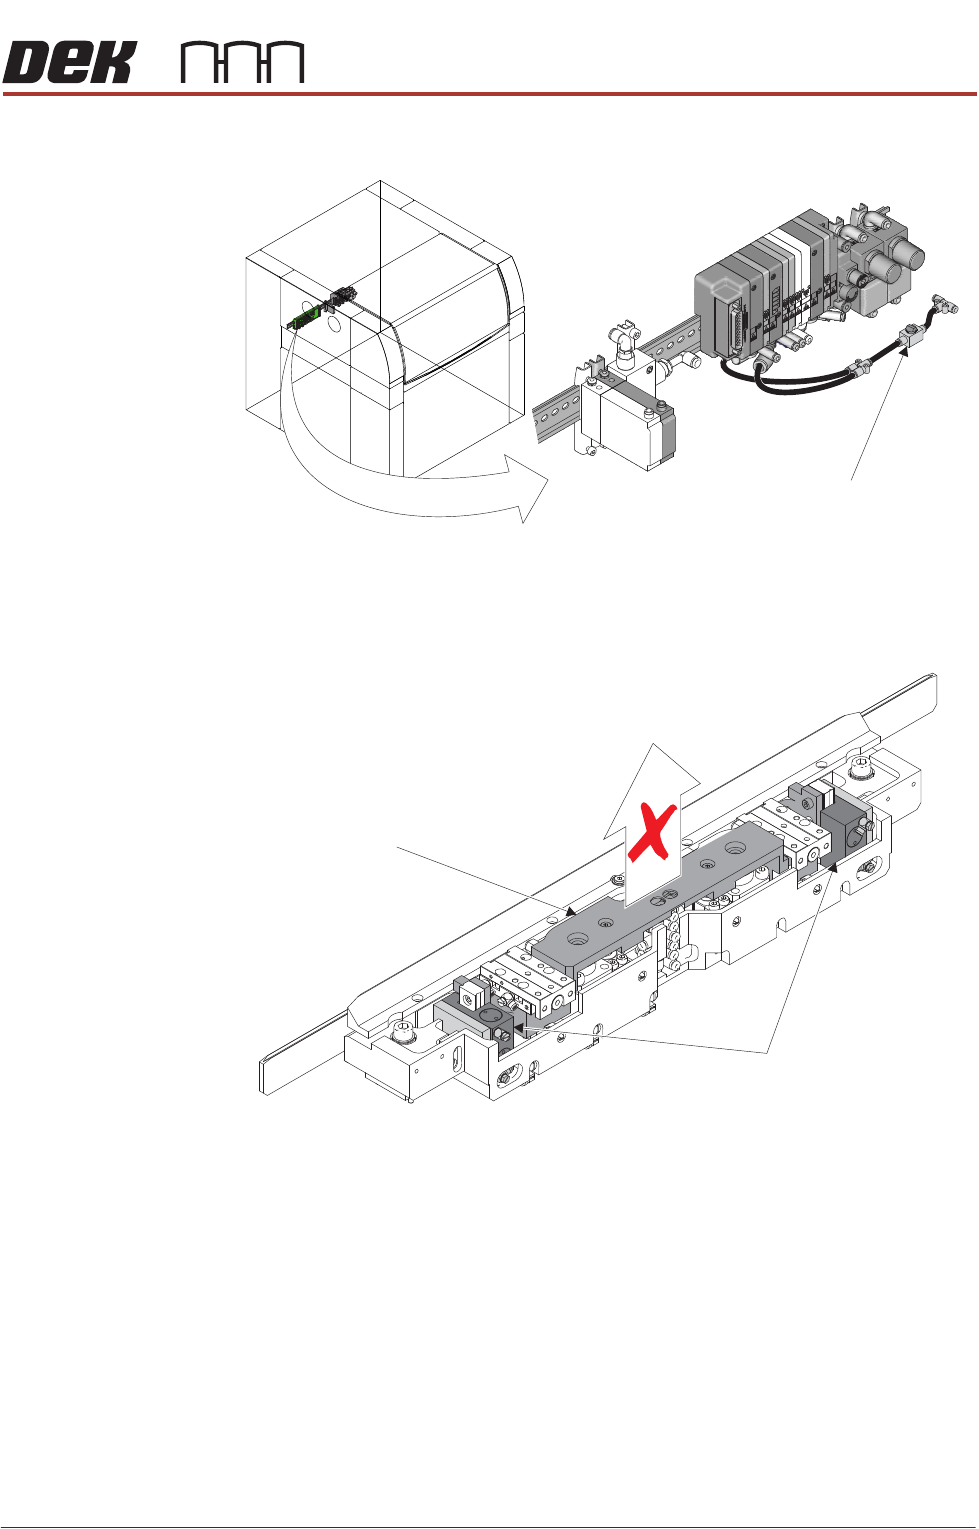
11. Use the isolator switch valve to reinstate the air supply to the APC modules.
12. Ensure that the zimmer clamps have energised. The mid plate assembly
should not be able to rise when manually lifting is attempted.
Isolator Switch Valve
Location of APC Pneumatic Manifold
Zimmer Clamps
(2 positions)
Mid Plate Assembly
ALL PURPOSE CLAMPING (APC)
REPLACEMENT PROCEDURES
1.60 All Purpose Clamping (APC) Manual Chapter Issue 1 Nov 16
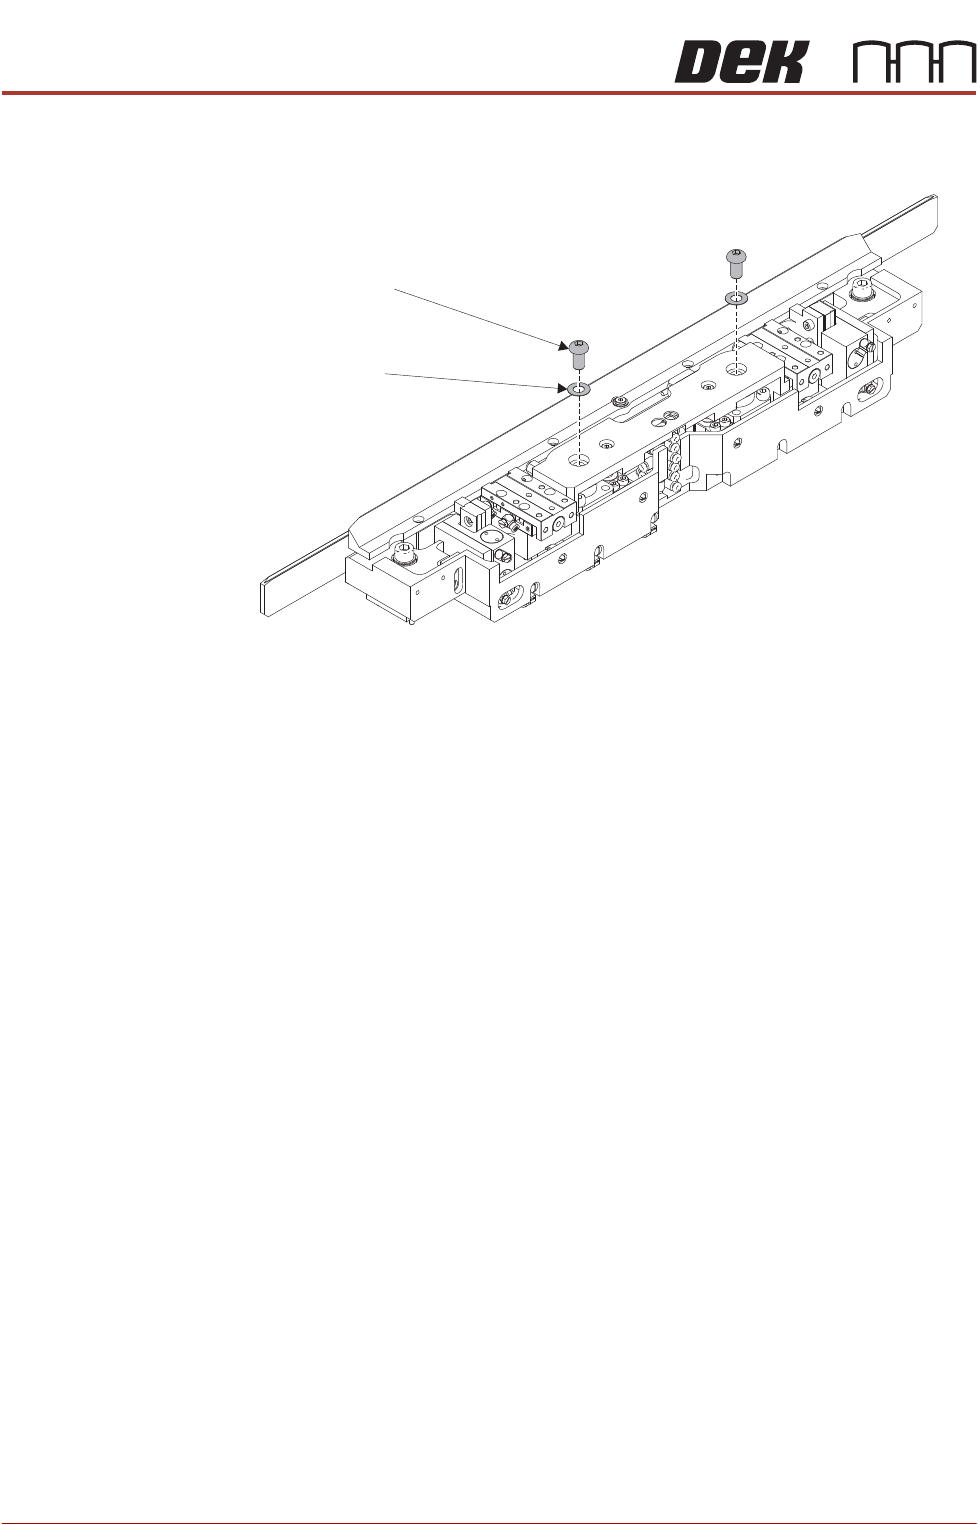
13. Using a 5mm Allen key, reinstall the socket button head screws and shim
washers that attach the mid plate to the ball spline assemblies.
14. Use the isolator switch valve to isolate the air supply to the APC modules.
Disconnect the up-stream hose from the isolator switch to allow any residual
pressure in the system to vent. Reconnect the up-stream hose.
15. Ensure that the mid plate assembly has free movement. Lift the assembly
and allow to drop, checking that it drops under its own weight back to its
original position.
16. Install the top plate as detailed in Top Plate Replacement - Replace.
17. Install the board clamp foil as detailed in Board Clamp Foil Replacement -
Replace.
18. Complete the After Replacement Procedures.
Socket Button Head Screw
(2 positions)
Shim Washer
(2 position)
ALL PURPOSE CLAMPING (APC)
REPLACEMENT PROCEDURES
Chapter Issue 1 Nov 16 All Purpose Clamping (APC) Manual 1.61
Mid Plate
Pneumatic
Cylinder
Replacement
There are two mid plate pneumatic cylinders per APC module, if replacement
is required then both cylinders in a module should be replaced as a pair.
Remove 1. Ensure the Prepare for Replacement procedure has been completed.
2. Remove the board clamp foil, as detailed in Board Clamp Foil Replacement
- Remove.
3. Remove the top plate, as detailed in Top Plate Replacement - Remove.
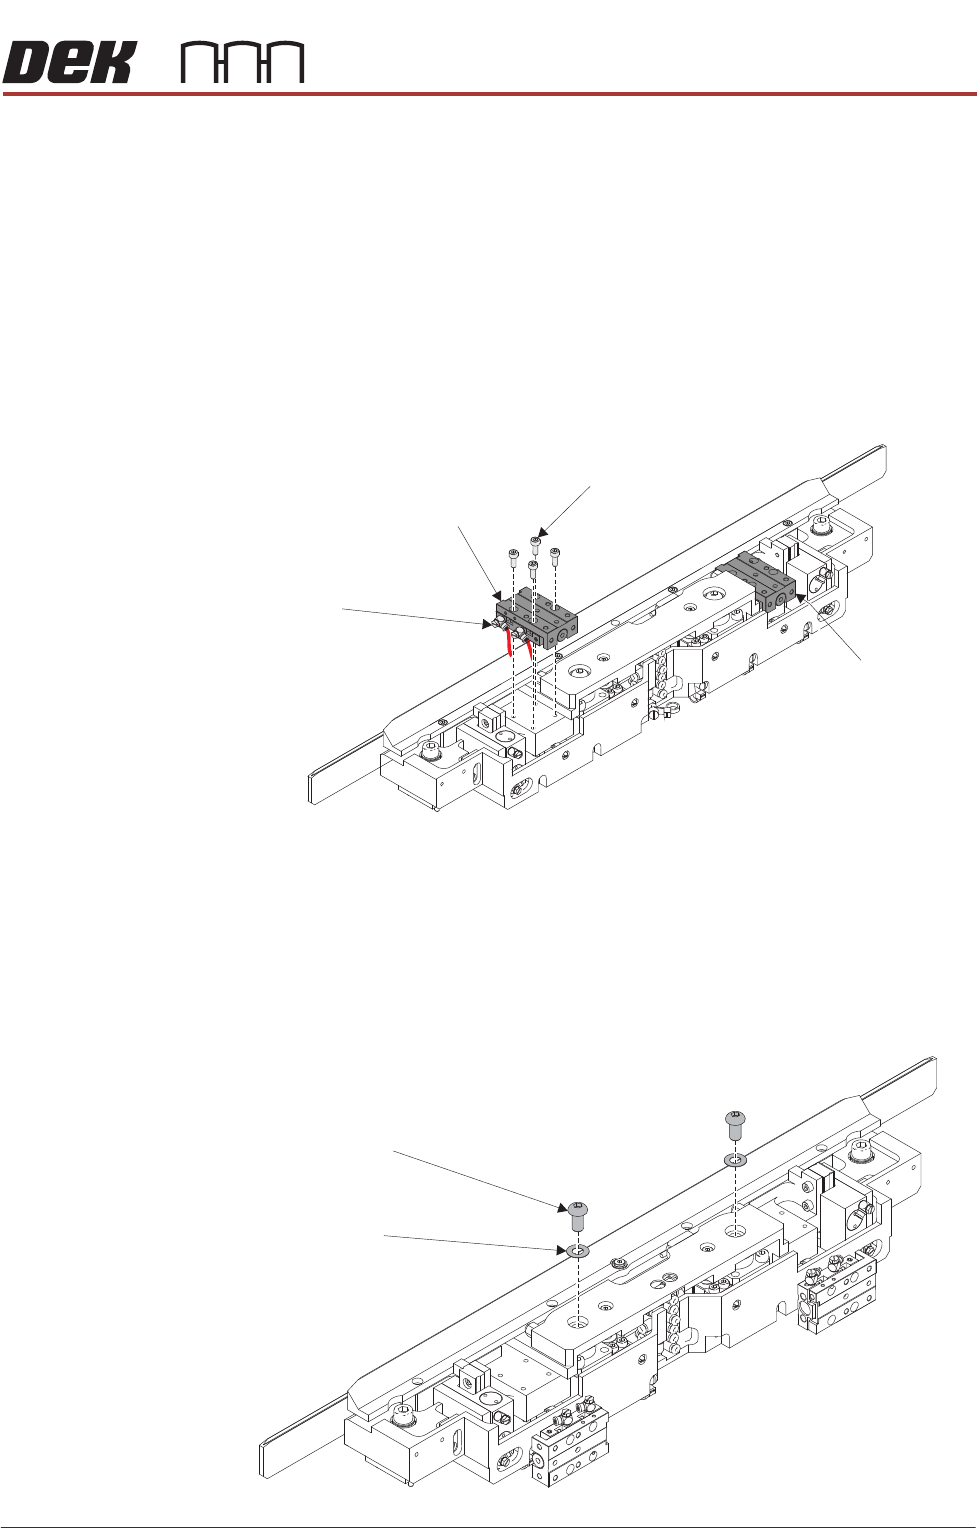
4. Using a 2.5mm Allen key, remove the cap head screws from the first slide
table. Leave the pneumatic elbow fittings attached to the slide table.
5. Move the slide table from its mounting, and allow it to hang over the rear of
the module, the weight being supported by the still attached pneumatic
fittings.
6. Repeat Steps 4 to 5 for the other slide table.
7. Using a 5mm Allen key, remove the socket button head screws and shim
washers from the mid plate.
Slide Table
Cap Head Screw
(4 positions)
Pneumatic Elbow Fittings
(2 positions)
Slide Table
Socket Button Head Screw
(2 positions)
Shim Washer
(2 position)