NPM-D3维修手册.pdf - 第206页
NPM-D3 Service Manual 5.6 2D Inspection Head Page 5-78 EJM6D3-MB-05SM-00( 編集中 ).DOC 5.6.5 Installing the 2D Inspection Head 2D 検査ヘッド取り付け 安装 2D 检查头 Note that there are two types of 2D ins pection head: type A with a resol…
NPM-D3
Service Manual
5.6 2D Inspection Head
EJM6D3-MB-05SM-00(
編集中
).DOC Page 5-77
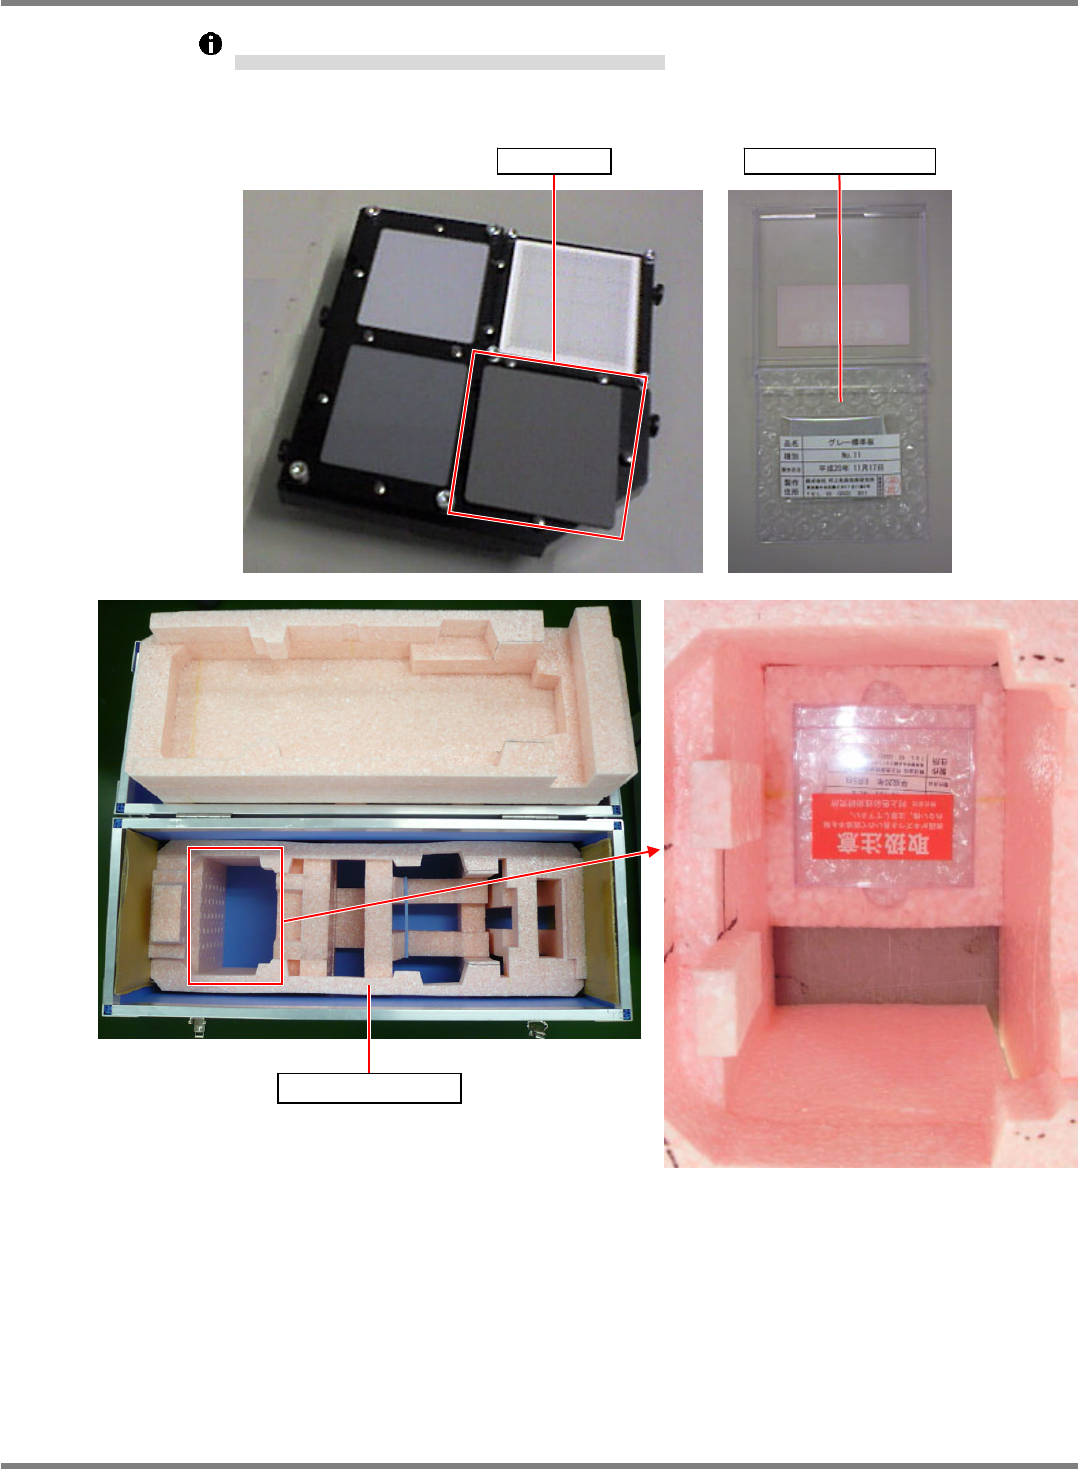
Put the gray plate in its own case, and then store it in the dedicated case A.
グレイ板は、(グレイ板用)ケースに収納した状態で、専用ケース A に収納する。
在将灰色板收纳到(用于灰色板的)盒内的状态下,将盒收纳到专用盒 A 中。
Gray plate Case (for gray plate)
Dedicated case A
NPM-D3
Service Manual
5.6 2D Inspection Head
Page 5-78 EJM6D3-MB-05SM-00(
編集中
).DOC
5.6.5 Installing the 2D Inspection Head
2D 検査ヘッド取り付け
安装 2D 检查头
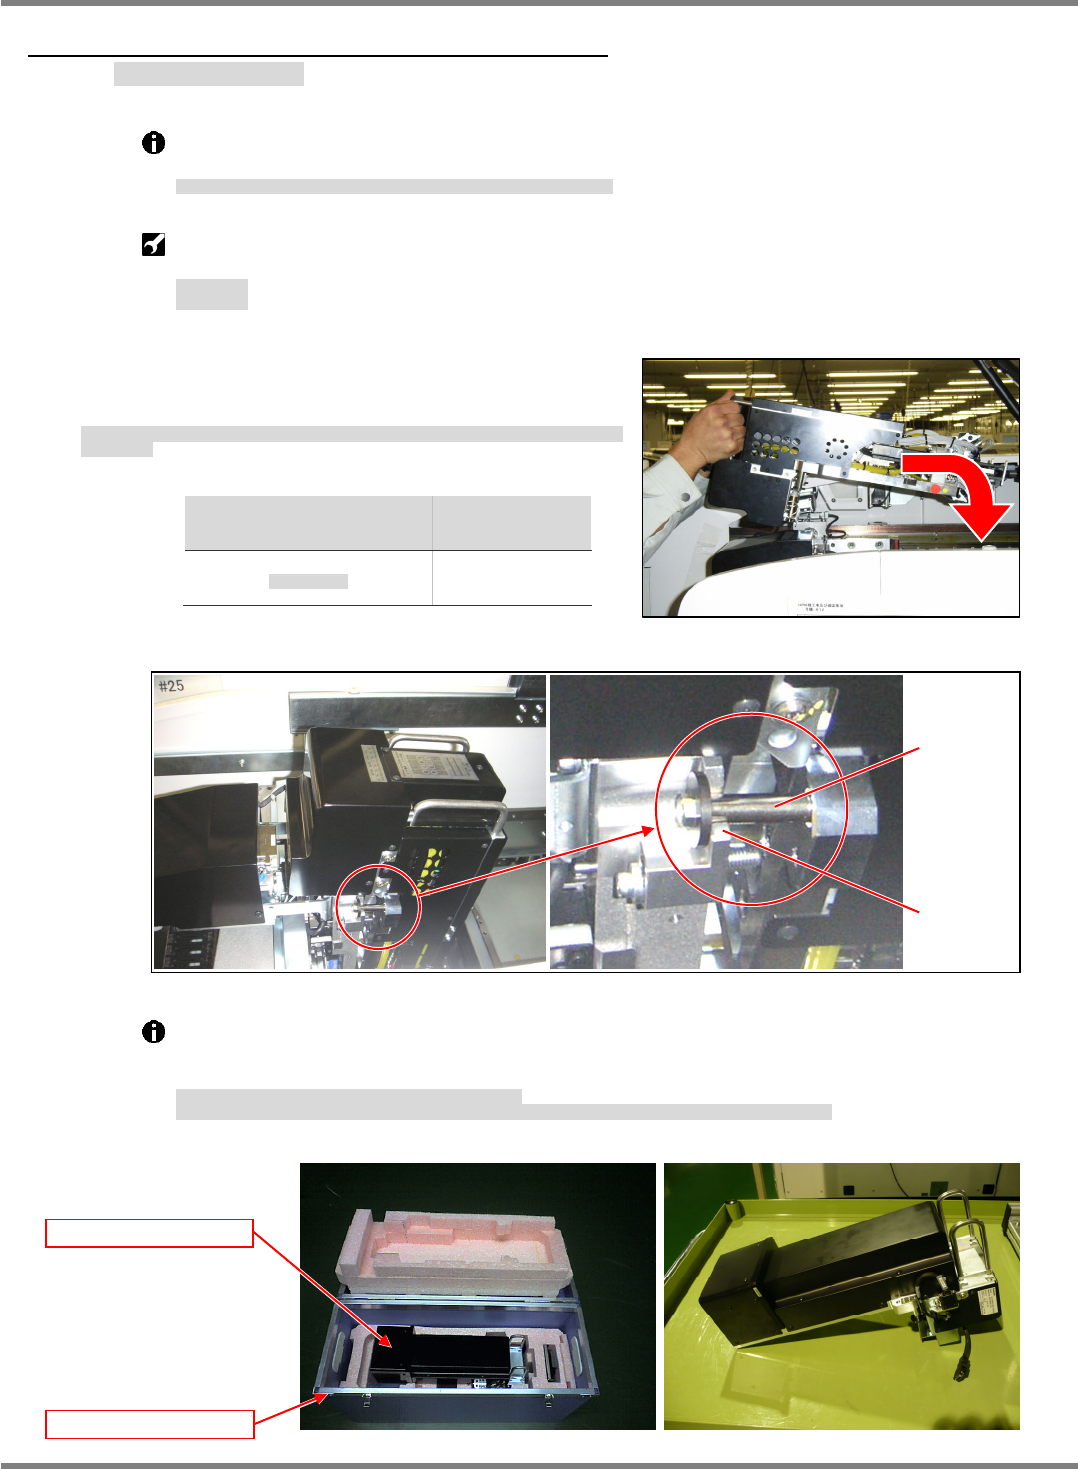
Note that there are two types of 2D inspection head: type A with a resolution of 18
m and
type B with 9
m.
2D 検査ヘッドは、分解能が 18 m (Type A)と 9m (Type B) の 2 種類あります。
2D 检查头有分辨率为 18 m (Type A)和 9m (Type B) 的 2 个种类。
Torque wrench: QL25N (TOHNICHI)
Long bit:
N510046662AA
トルクレンチ
ロングビット
扭矩扳手
长钻头
33.
1. Hold the handles of the 2D inspection unit and engage the
spacer of the unit with the U-groove at the X-axis head
mounting position. (Figs. 1 and 2)
2D 検査ヘッドユニット上部の取手を持ち、X 軸ヘッド取り付け部の U 溝部にヘッドユニットのスペー
サを乗せる。
拿住 2D 检查头装置上部的把手,在 X 轴头安装部的 U 形槽处放上头装置的衬垫。
Head
ヘッド種類
头种类
Weight
重量
重量
2D inspection
2D
検査ヘッド
2D
检查头
5.7 k
g
Take out the 2D inspection head unit from the dedicated case A. (Fig. 3)
When setting the unit aside temporarily, place it on a flat surface with the drawer connector
facing down. (Fig. 4)
2D 検査ヘッドユニットは、専用ケース A から取り出す。(Fig. 3)
2D 検査ヘッドユニットを仮置きする場合は、平らな所にドロアコネクタが下になるようにして、置いてください。(Fig. 4)
将 2D 检查头装置从专用盒 A 中取出。(Fig. 3)
要暂时放置 2D 检查头装置时,请在平整的地方将抽屉式连接器朝下放置。(Fig. 4)
Fig. 1
Fig. 3
Dedicated case A
2D inspection head
Fig. 4
Fig. 2
U-groove
Spacer
NPM-D3
Service Manual
5.6 2D Inspection Head
EJM6D3-MB-05SM-00(
編集中
).DOC Page 5-79
2. The 2D inspection head unit is located by the positioning pins (2-5). Pull the unit toward you and tighten
the mounting bolts (3-M6x20). Make sure that the mounting surfaces are flush against each other. (Fig. 3)
2D 検査ヘッドユニットは規正ピン(25)で位置決めされます。2D 検査ヘッドユニットを手前に引き、取り付けボルト (3M620) を締め付け、取り付け面が密着していること
を確認します。(Fig. 3)
2D 检查头装置是由定位销 (25) 来定位的。将 2D 检查头装置向跟前拉,用安装螺栓 (3M620) 进行紧固,并确认安装面紧密结合了。(Fig. 4)
Tighten the mounting bolts at the specified torque using a torque wrench.
2D 検査ヘッドユニットの取り付けボルトはトルクレンチを使用して規定のトルクで締め付けます。
对 2D 检查头装置的安装螺栓要用扭矩扳手按规定的扭矩来拧紧。
Bolt tightening torque: 6
0.5 N
ヘッドユニット取り付けボルト締め付けトルク
头装置安装螺栓拧紧扭矩
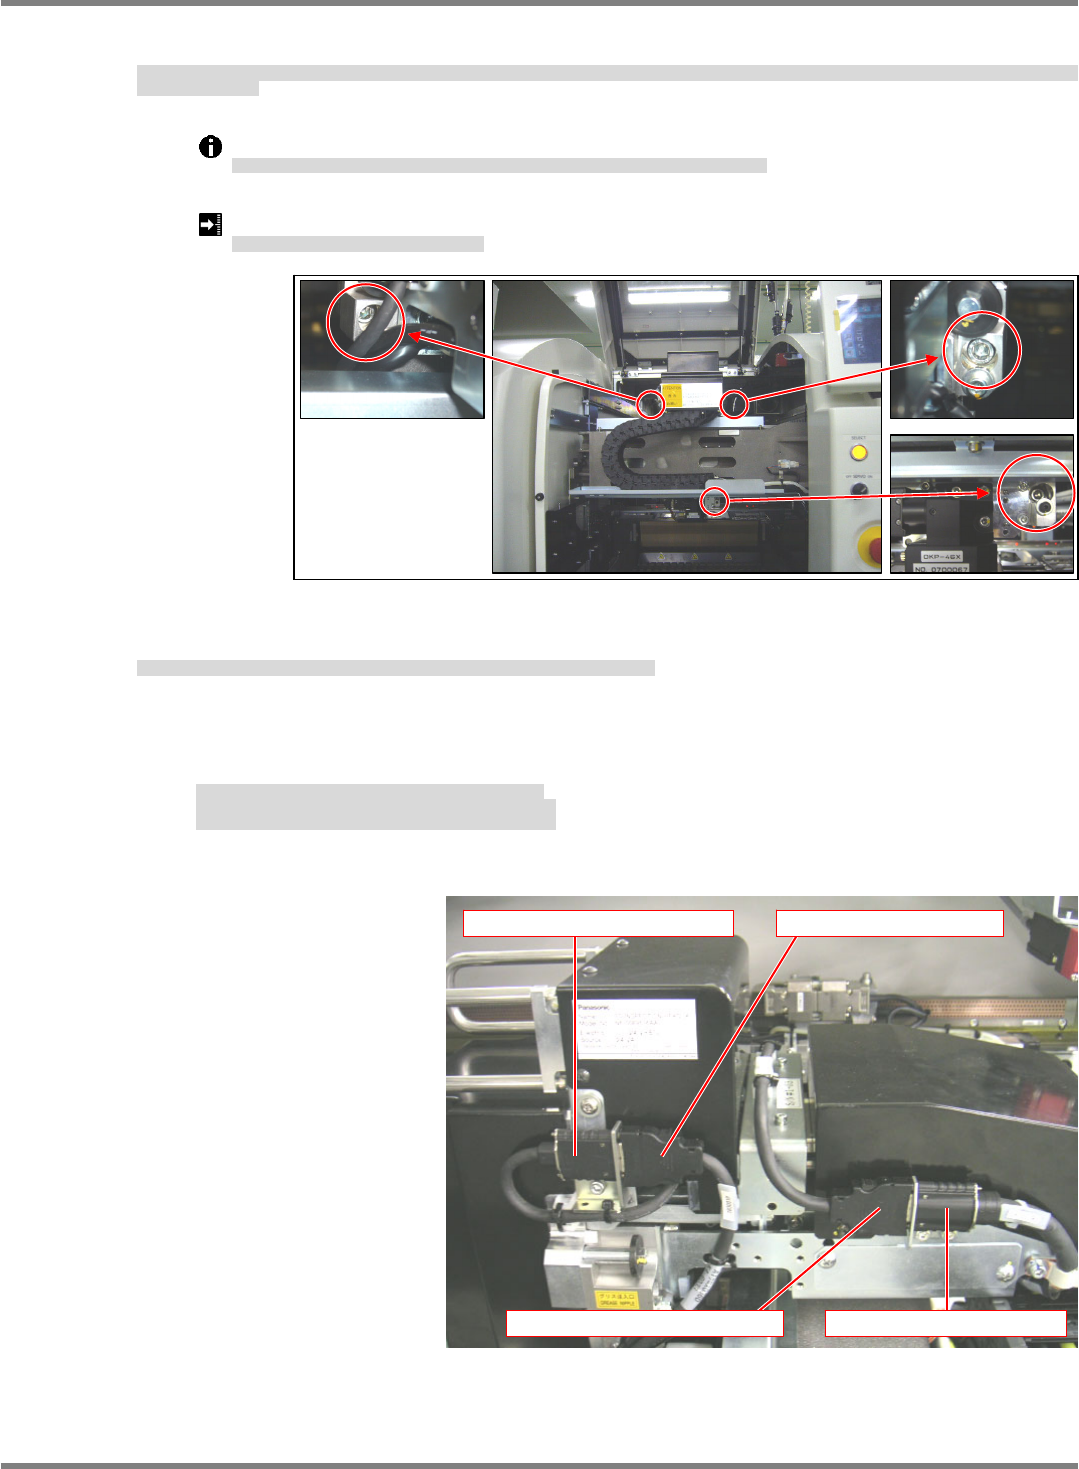
3. Connect the cables (camera link and head camera) to the 2D inspection head.
2D 検査ヘッドユニットとの接続ケーブル (カメラリンク・ヘッドカメラケーブル) を接続する。
对连接到 2D 检查头装置的连接电缆 (照相机连接线・头照相机电缆) 进行连接。
- Disconnect the head camera cable from the cableveyor connector.
- Connect the head camera cable to the head camera connector.
- Connect the camera link output cable to the cableveyor connector.
・ケーブルベアコネクタからヘッドカメラケーブルを取り外す。
・ヘッドカメラ接続コネクタにヘッドカメラケーブルを接続する。
・ケーブルベアコネクタにカメラリンク出力ケーブルを接続する。
・从电缆链套连接器上拆下头照相机电缆。
・将头照相机电缆连接到头照相机连接器上。
・将照相机连接输出电缆连接到电缆链套连接器上。
Fig. 3
Head camera connector Head camera cable
Camera link output cable Cableveyor connector