NPM-D3维修手册.pdf - 第49页
NPM-D3 SERVICE MANUAL 4.2 XY Drive Axes EJM6D3-MB-04SM-02.DOC Page 4-11 11. Click [Signal monitor]. When the display changes, move the axis co ncerned in the full range a nd make sure that ‘OK’ is displayed under the che…
NPM-D3
SERVICE MANUAL
4.2 XY Drive Axes
Page 4-10 EJM6D3-MB-04SM-02.DOC
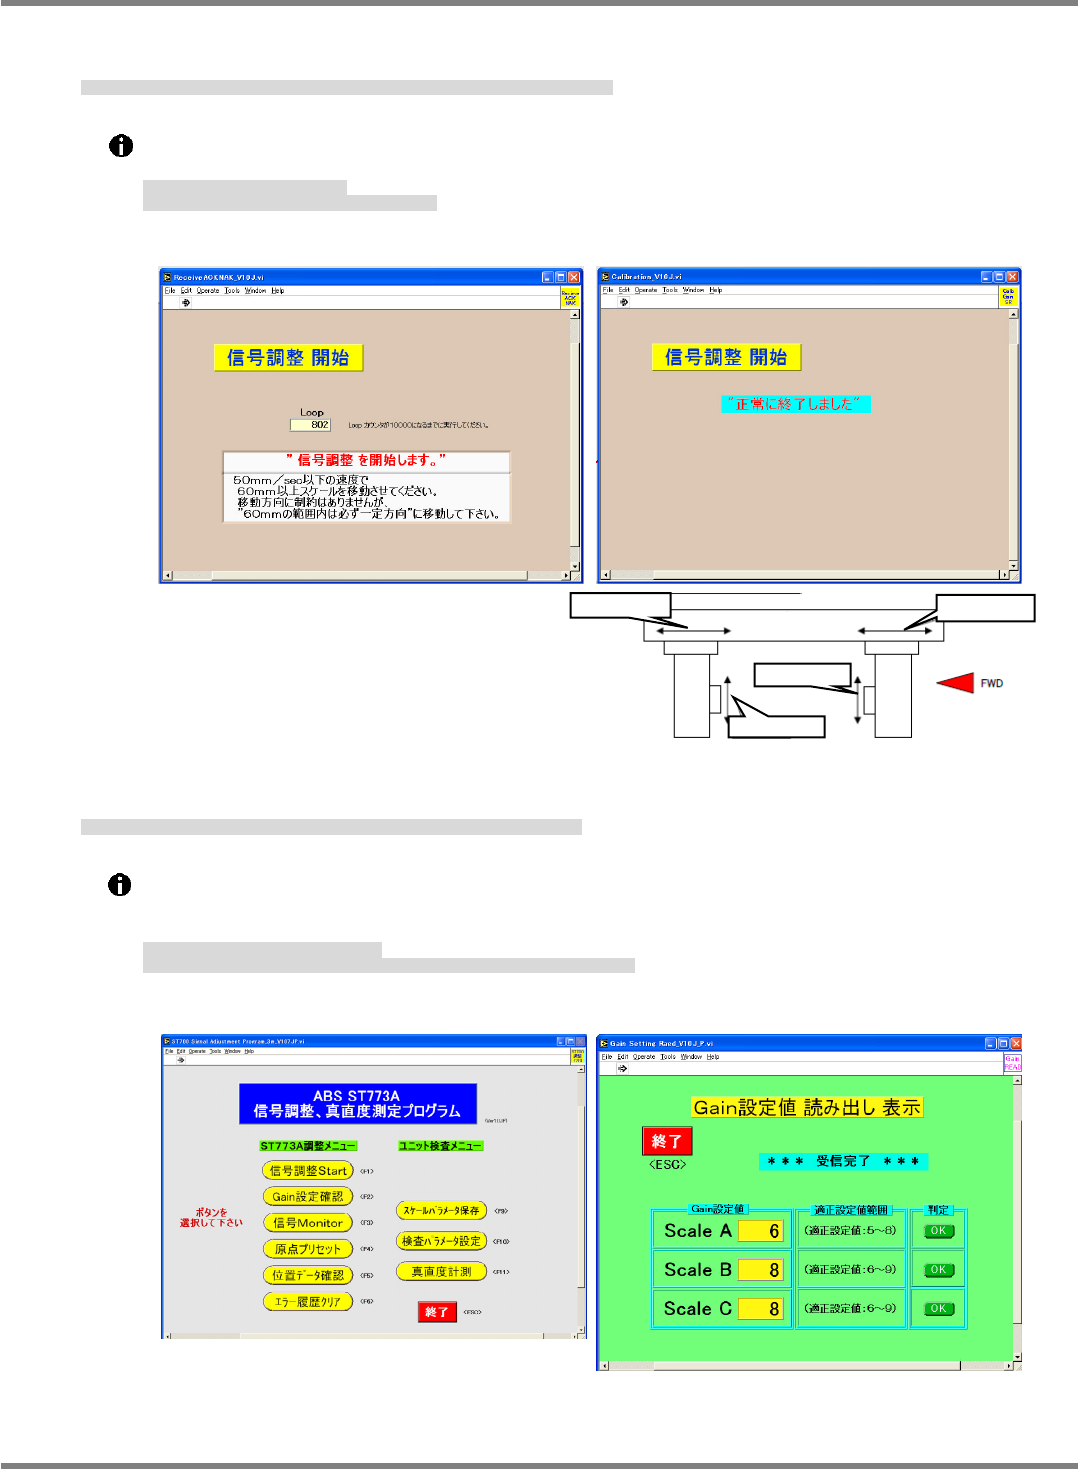
9. When the message ‘Starts signal check’ appears again, move the axis in the opposite direction until the
message appears.
再び ‘信号調整を開始します’ の画面が表示されるので、先とは逆の方向に表示が出るまで動かす。
会再次显示 ‘信号调整开始’ 的画面,请一直移动到显示出与刚才相反的方向为止。
Follow the instructions on the screen.
If the result is NG, redo the procedure from step 6.
画面表示の指示にしがってください。
NG
が表示された場合は、
6
からやり直してください。
请服从画面中显示的指示。
如显示
NG
时,请从
6
开始重新实施。
10. Click [Gain set check] and check the judgment of the scales A, B and C, then click [Finish].
[Gain 設定確認] をクリックして、Scale A、B、C の判定を確認し、[終了] をクリックする。
单击 [Gain 设定确认],确认 Scale A、B、C 的判定后单击 [结束]。
If all scales are judged to be OK, proceed to the next step.
If NG is detected, check the clearance between the linear head and scale again and reconfirm
the judgment.
判定がすべて
OK
の場合、次の項目に進む。
判定に
NG
がある場合は、リニアヘッドとスケールのスキマを再確認し、再度確認を行う。
如果判定都
OK
的话,进入到下一个项目。
判定中有
NG
的话,再次确认线性头和标尺的间隙后,再次进行确认。
Fig. 12
Fig. 11
Fig. 14
Fig. 15
Fig. 13
Y axis
X axis
X axis
R side
F side
Moving direction
Moving direction
Moving direction
Moving direction
NPM-D3
SERVICE MANUAL
4.2 XY Drive Axes
EJM6D3-MB-04SM-02.DOC Page 4-11
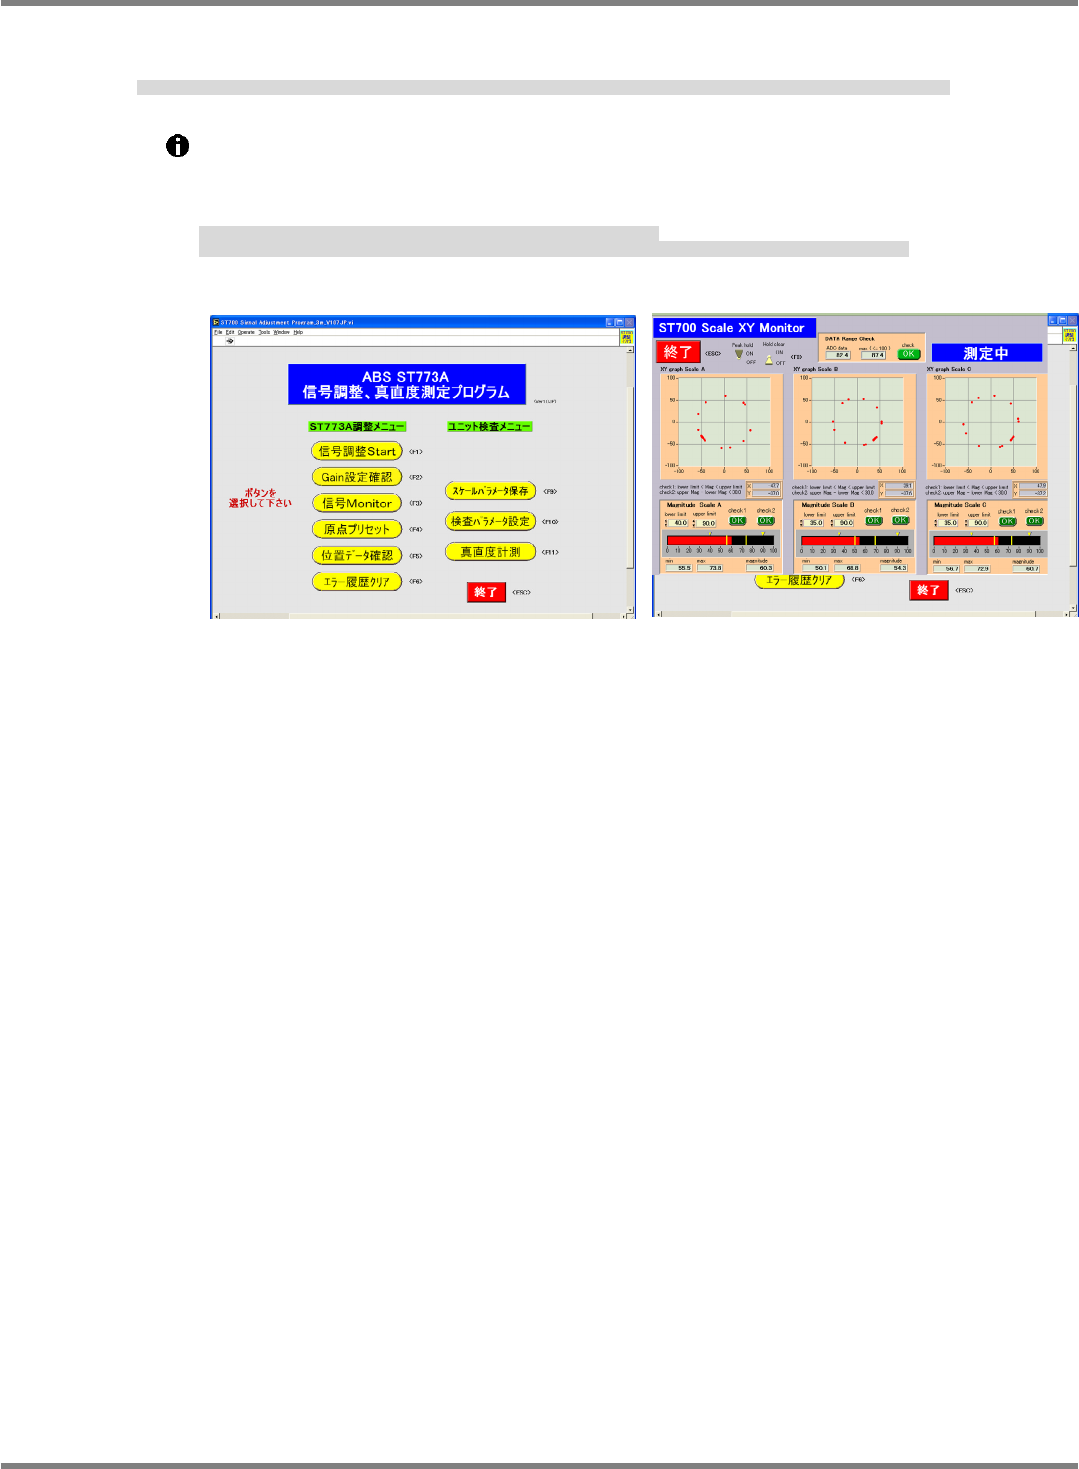
11. Click [Signal monitor]. When the display changes, move the axis concerned in the full range and make sure
that ‘OK’ is displayed under the check field. Then click [Finish].
[信号 Monitor] をクリックし、画面表示が変わったら、確認している軸を全域で動かし、Check 欄が OK であることを確認し、[終了] をクリックする。
单击 [信号 Monitor],等显示的画面变化后,使要确认的轴在全区域移动,确认 Check 栏中成为 OK 后,单击[结束]。
If ‘NG’ is displayed, move the axis near to the position where the highest scale value is displayed
and repeat from step 6.
When making readjustment, the check field on the signal monitor screen remains ‘NG’, click
[Hold clear] to clear it and then check again.
NG
の場合、
Scale
値が一番高く表示される付近に動かして、
6
番より再度確認する。
再調整の際、
‘
信号
Monitor’
画面の
Check
欄が
NG
のままなので、
[Hold clear]
をクリックし、
NG
を解除して再確認してください。
是
NG
时,移动到
Scale
值的最高显示值附近后,再次从
6
开始重新确认。
再调整时,因为
‘
信号
Monitor’
画面的
Check
栏还是
NG
,请单击
[Hold clear]
解除
NG
后再进行确认。
Fig. 16
Fig. 17
NPM-D3
SERVICE MANUAL
4.2 XY Drive Axes
Page 4-12 EJM6D3-MB-04SM-02.DOC
XY
4.2.2 Origin Adjustment
原点調整
原点调整
Unit No.
N610052923AA
N610052924AA
4.2.1 Linear Scale
Adjustment
リニアスケールの調整
线性刻度的调整
4.2.2 Origin Adjustment
原点調整
原点调整
PC (Signal adjustment program)
PC (
信号調整プログラム
)
PC (
信号调整程序
)
Origin Adjustment
原点調整
原点调整
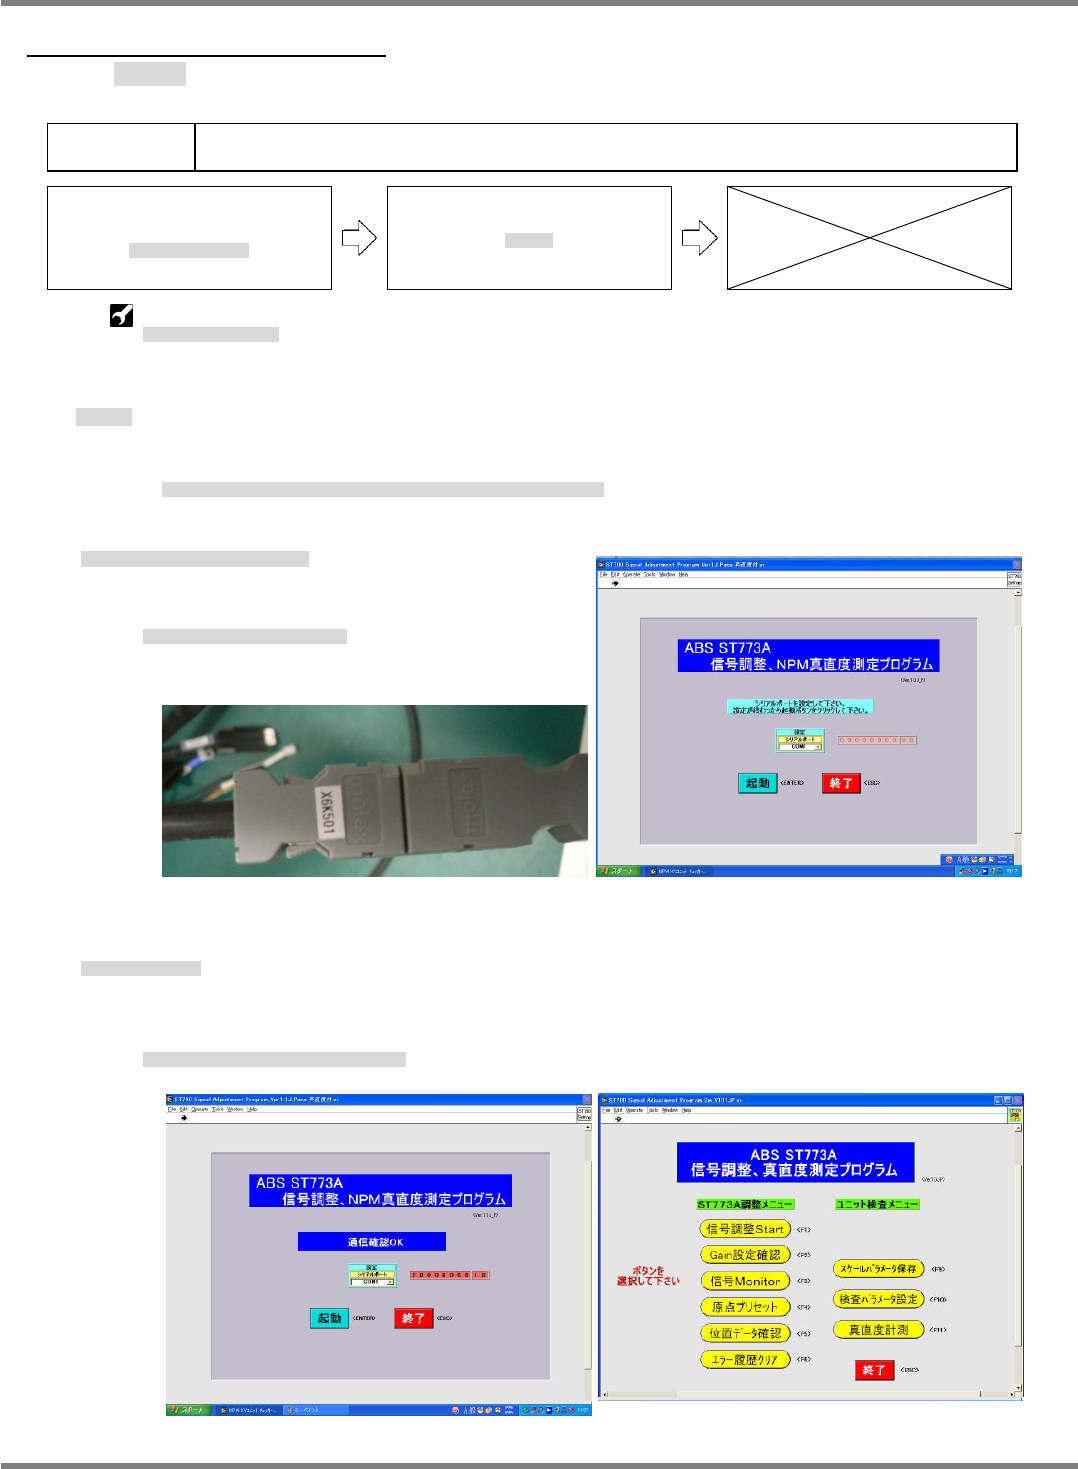
To adjust the origin after attaching the linear head, start from step 3.
リニアヘッド取り付け後、続けて原点調整を行う場合、3 番から行ってください。
如果在安装线性头之后,接下去就进行原点调整时,请从 3 开始实施。
2.
1. Launch the signal adjustment program and adjust the origin.
信号調整プログラムを立ち上げ調整する。
启动信号调整程序后进行调整。
Connect the encoder cable to the connector.
エンコーダ線コネクタに接続します。
将编码器线连接到连接器。
2. Click [Start].
起動をクリックする。
单击[启动]。
When the message indicating that the communication check is OK appears, the display changes
to the menu screen.
通信確認が
OK
になると画面が切り替わります。
通信确认成为
OK
后,画面会切换。
Fig. 2
Fig. 1
Fig. 3
Fig. 4