NPM-D3维修手册.pdf - 第80页
NPM-D3 SERVICE MANUAL 4.5 Sensors Page 4-42 EJM6D3-MB-04SM-02.DOC Bolt (M3-5) Spacer Bolt (M4-16) Connect the connector Sheet metal Electrostatic sheet When sliding the left holder, be careful not to pinch the cables bec…
NPM-D3
SERVICE MANUAL
4.5 Sensors
EJM6D3-MB-04SM-02.DOC Page 4-41
Each modification can be achieved without detaching the camera from the machine.
各々の改造は、設備から取り外すことなく、実施可能です。
各项改造都可在不从设备上拆卸的情况下实施。
Perform calibration without fail after modification from Type I.
Type
Ⅰからの改造後は、必ずキャリブレーションを実施してください。
从
Type
Ⅰ进行改造后,必须要实施校准。
From Type I to Type II
Type
Ⅰから
Type
Ⅱへの改造
从
Type
Ⅰ到
Type
Ⅱ的改造
19.
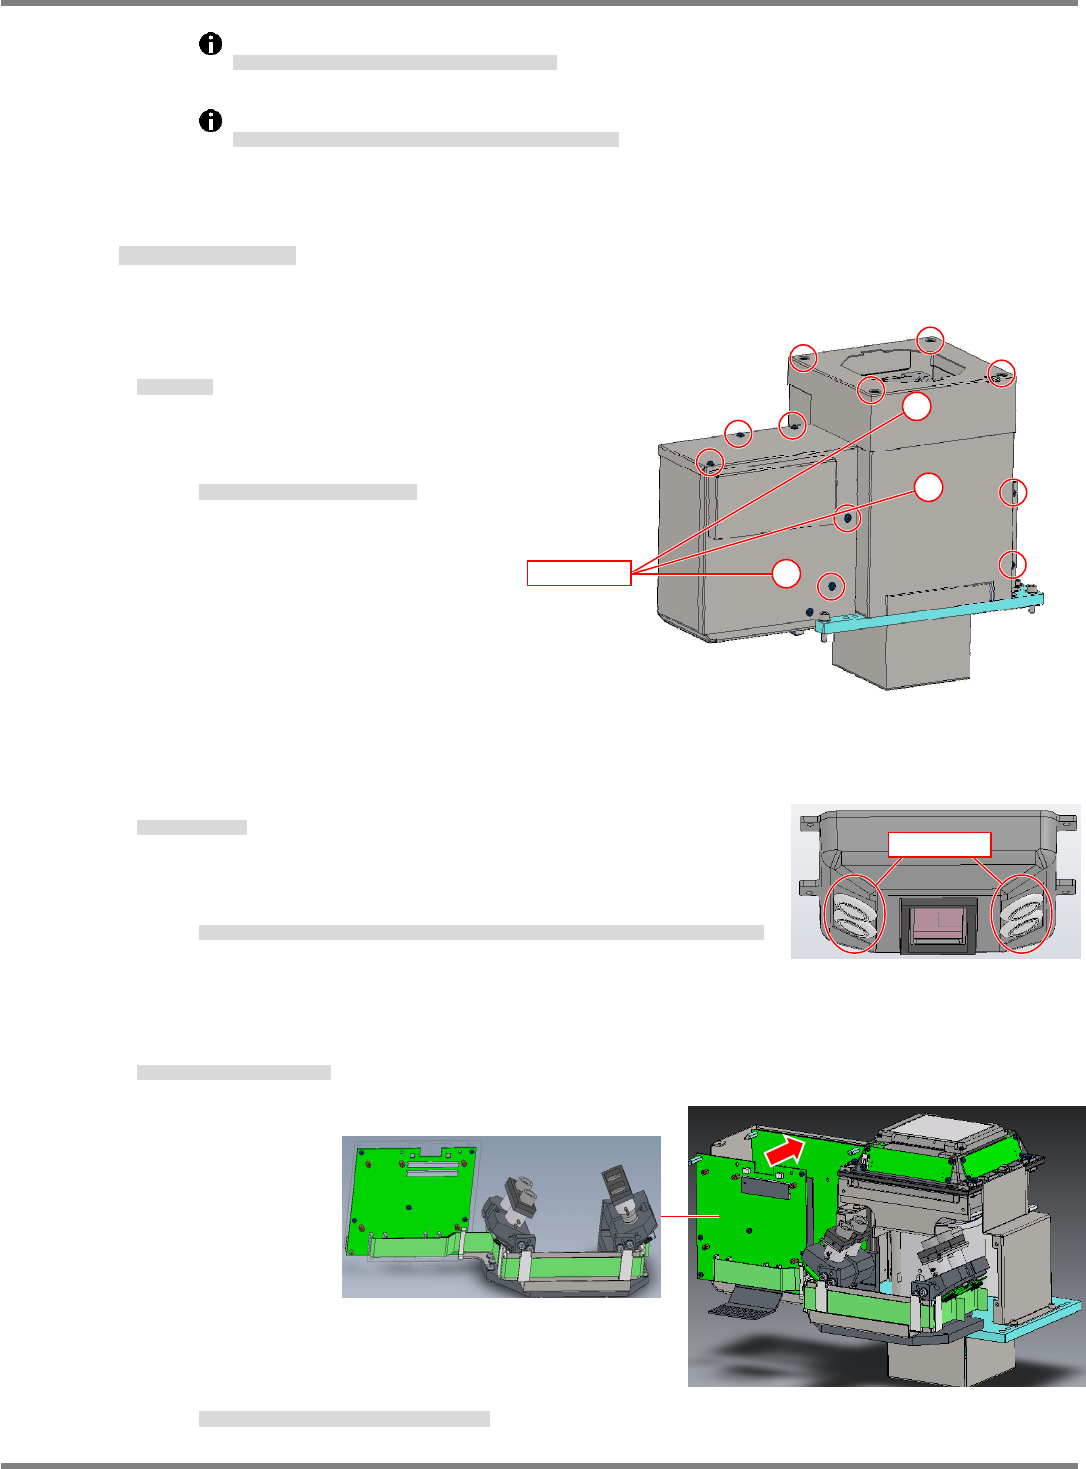
1. Detach the covers.
カバーを外す。
拆下盖。
Detach the three covers in the
ascending order (1) to (3).
3
つのカバーを
~
の順番で外します。
按照
~
的顺序拆下
3
个盖。
2. Remove the grommets.
グロメットを取り外す。
拆下护圈。
Under the light of the machine, remove the grommets (x 4) that
cover the eye holes to which the camera is installed.
本体の照明の下、これから取り付けるカメラが覗く穴をカバーしているグロメット
4
個を取り外します。
拆下主体照明下面的、盖住接下去要安装的照相机的观察孔的
4
个护圈。
3. Attach the 3D camera unit to the machine.
3D カメラユニットを本体に取り付ける。
将 3D 照相机单元安装到主体上。
Position the
camera unit
aligning it with
the D-pin.
カメラユニットは
D
ピンに合わせて位置を決めます。
使照相机单元对准
D
销进行定位。
Grommet
Cover
1
2
3

NPM-D3
SERVICE MANUAL
4.5 Sensors
Page 4-42 EJM6D3-MB-04SM-02.DOC
Bolt (M3-5)
Spacer
Bolt (M4-16)
Connect the
connector
Sheet metal
Electrostatic
sheet
When sliding the left holder, be
careful not to pinch the cables
because there is no sufficient
clearance.
左側のホルダは奥の配線との隙間が少ないため、スライ
ドさせて入れる際、配線をはさまない様注意してくださ
い。
因为左侧的支架与内侧电线的间隙较小,所以在使其滑入
时,请注意不要夹住电线。
Tightening torque: 50 cN
・
m
締め付けトルク
拧紧扭矩
4. Slide the 3D camera holders upward and secure them in
place.
3D カメラのホルダを上にスライドさせて固定する。
将 3D 照相机支架滑到上面,固定住。
Tightening torque: 20 cN
・
m
締め付けトルク
拧紧扭矩
5. Attach the sheet metal where the fan is mounted.
ファンが取り付けてある板金部分を取り付ける。
将装有风扇的金属板装上。
Before attaching the sheet metal, fit the electrostatic
sheet aligning with the holes. Then, connect the
connector of the fan to CN1 port.
板金部分を取り付ける前に、穴に合わせて静電シートを取り付けます。それから、ファ
ンのコネクタを
CN1
に取り付けます。
在安装金属板部分之前,请对准孔安装静电片。然后,将风扇的连接器装到
CN1
上。
Tightening torque: 50 cN
・
m
締め付けトルク
拧紧扭矩
Make sure the cable comes to the left so that the arrow engraved in the fan faces downward.
Check that the nameplate of the fan comes to the bottom side.
When the fan is stopped or the connector is not connected, an alarm message appears on
the screen.
ファンに刻印された矢印が下方向になるように、配線が左側に出るようにしてください。
ファンの銘板が下側になっていることを確認してください。
ファンが停止、またはコネクタが未接続の場合は、ファンアラームが設備の画面に表示されます。
请使风扇的有刻印箭头处朝下方向,并使电线从左侧出来。
请确认风扇的铭板应位于下侧。
如果风扇停止、或者连接器未连接时,会在设备画面中显示风扇的警报。
Holder
NPM-D3
SERVICE MANUAL
4.5 Sensors
EJM6D3-MB-04SM-02.DOC Page 4-43
Cover
1
2
3
Grommet
Grommet
6. Reattach the covers.
カバーを取り付ける。
安装盖。
Tightening torque: 50 cN
・
m
締め付けトルク
拧紧扭矩
Before reattaching the covers, remove the
grommets (x 2) mounted on them.
取り付ける前に、カバーに取り付けてある
2
か所のグロメ
ットをはずします。
安装前要将盖上所装的
2
处护圈拆下。
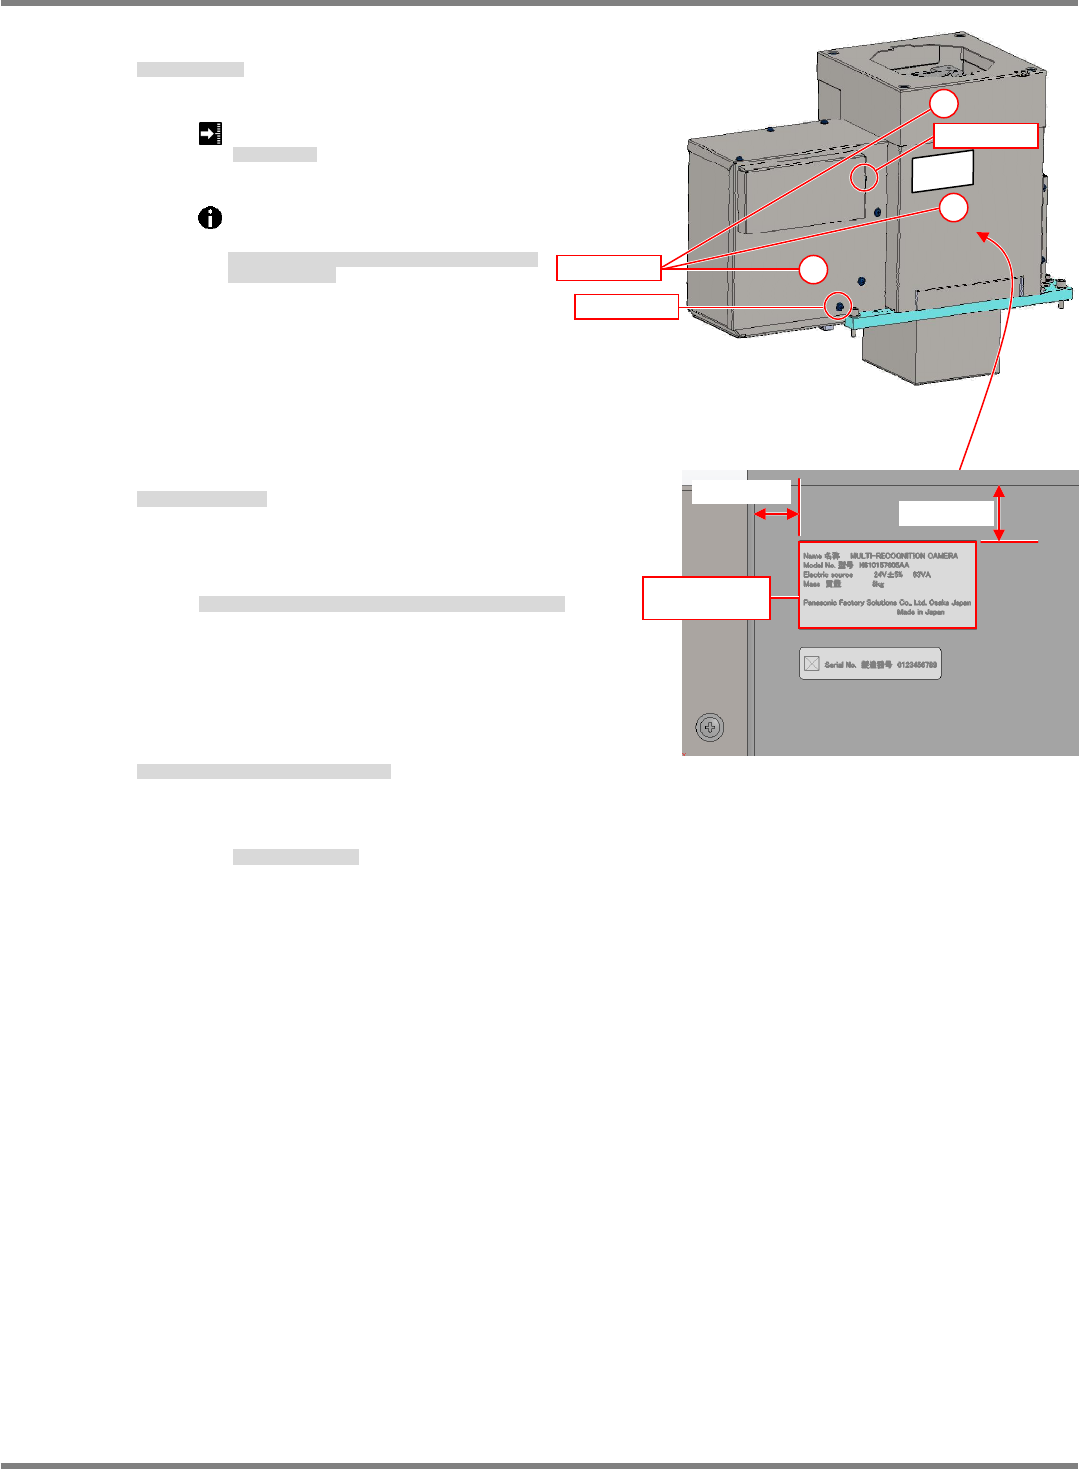
7. Change the nameplate with a new one.
銘板ラベルを貼り替える。
换贴铭板标签。
Peel off the nameplate label for Type 1 and affix
the one for Type II.
Type
Ⅰの銘板ラベルを剥がして、
Type
Ⅱの銘板ラベルを貼ります。
剥下
Type
Ⅰ的铭板标签,贴上
Type
Ⅱ的铭板标签。
8. Perform calibration of the multi recognition camera.
マルチ認識カメラのキャリブレーションを実施する。
实施多功能识别照相机的校准。
20.
■
Calibration
■
キャリブレーション
■ 校准
15
1 mm
15
1 mm
Nameplate
label