ServiceInstruction_Vision XP.pdf - 第113页
Vision XP+ V AC Page 109 3 Setup Instructions 3.15 Configuration Activ Energy Meters Operating Instructions V ersion 1.5 3.15 Configur ation Ac tiv Energ y Meters Fig. 3-2 2 Con figuration Activ Ene rgy Meters A) Enablin…
Page 108 Vision XP+ VAC
3 Setup Instructions
3.14 Backup Tool
Operating Instructions
Version 1.5
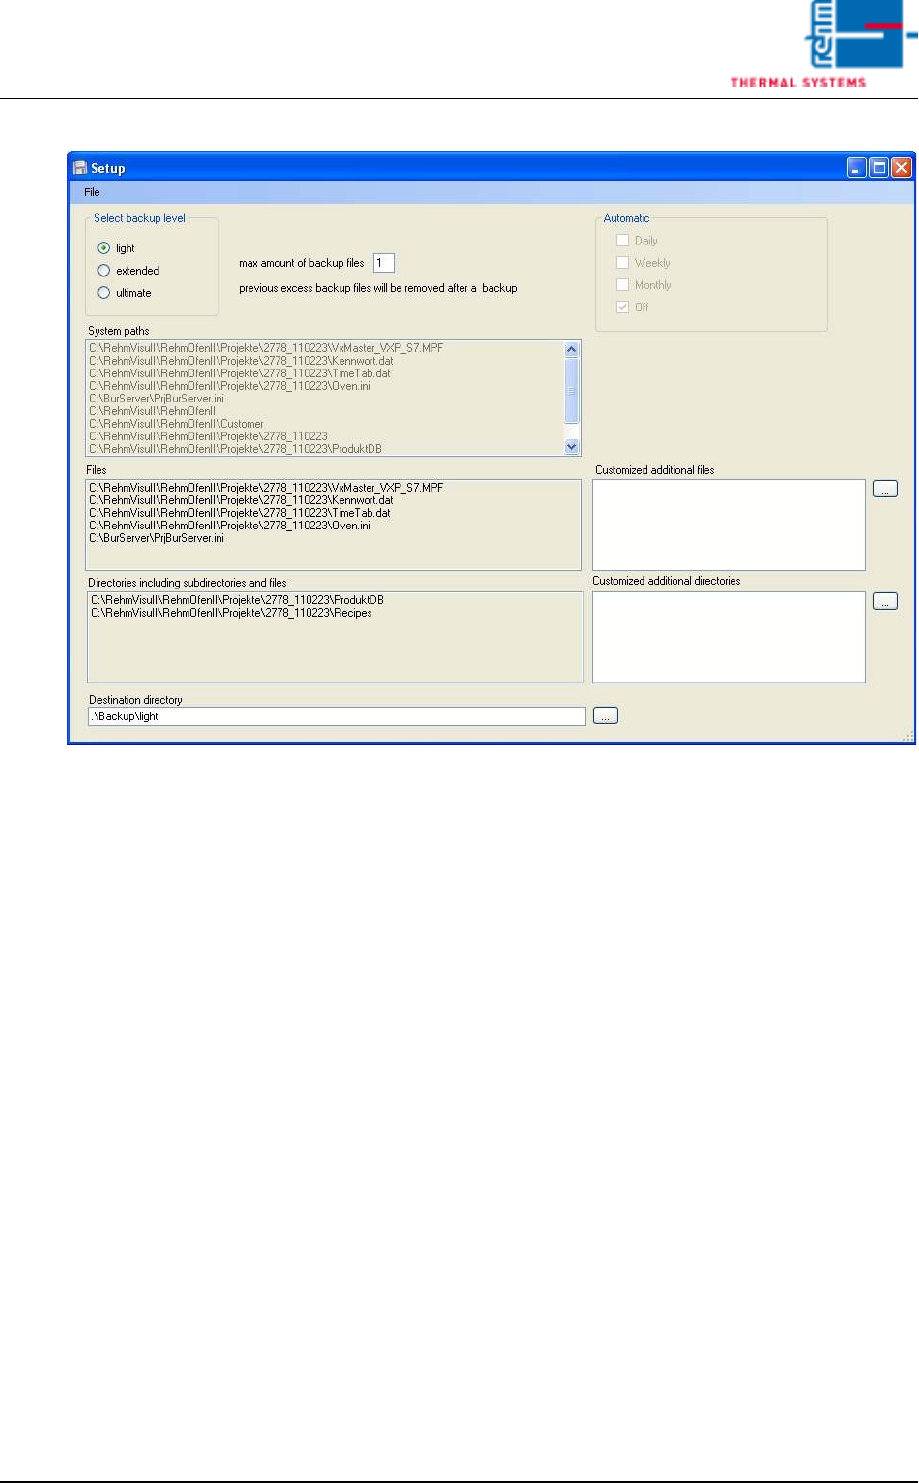
Fig. 3-21 Setup
Over the menu item [File -> Save] the current configuration can be saved.
All amendments are registered temporary. If a configuration setting has
been changed and not saved until now, there is a save-query when leaving
the backup level or when closing the window.
Vision XP+ VAC Page 109
3 Setup Instructions
3.15 Configuration Activ Energy Meters
Operating Instructions
Version 1.5
3.15 Configuration Activ Energy Meters
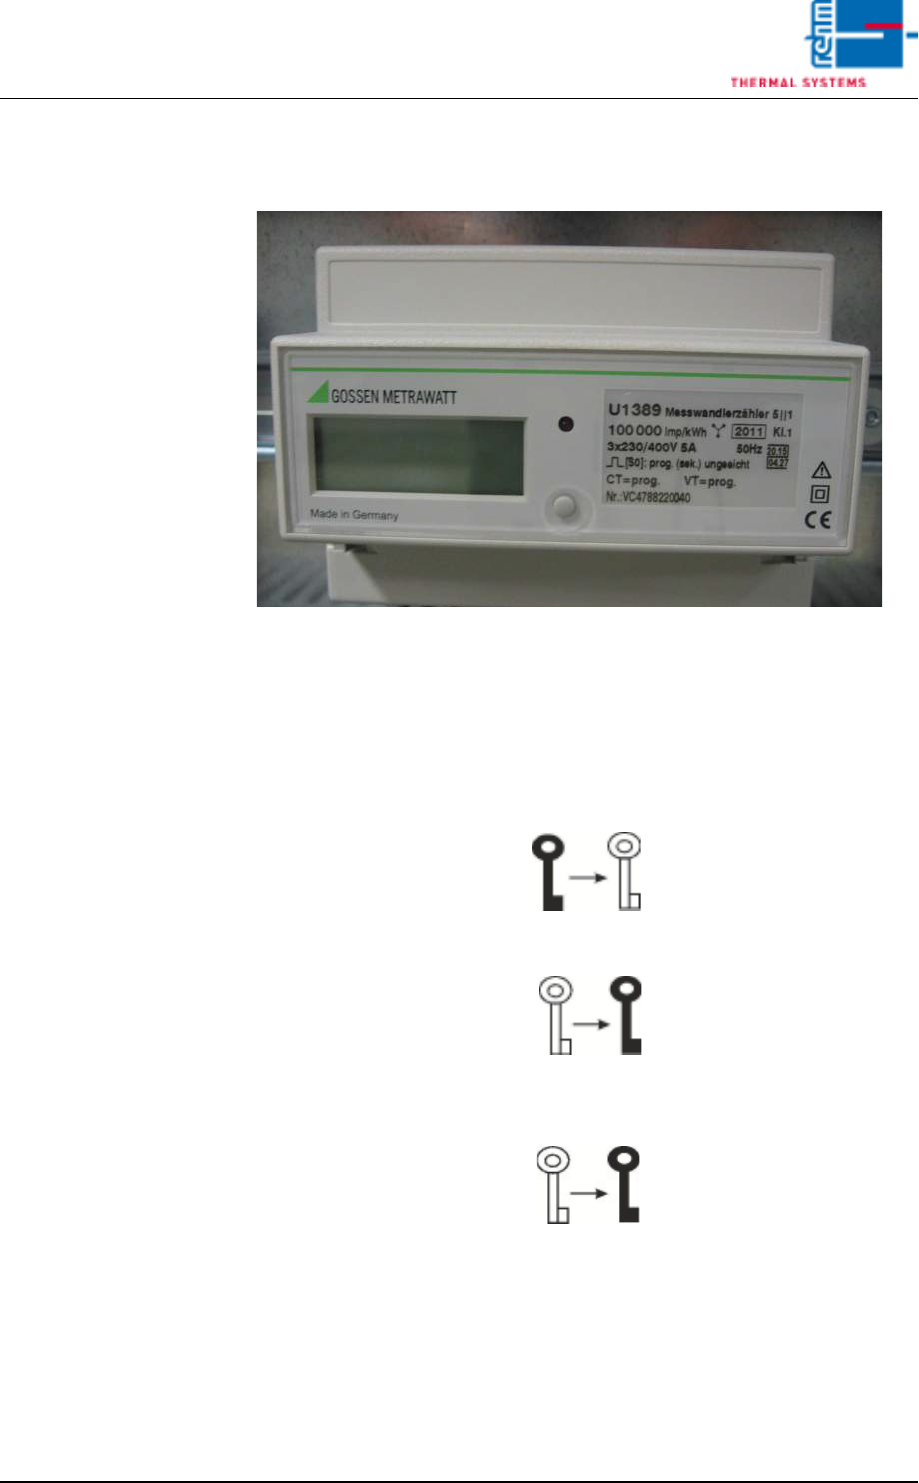
Fig. 3-22 Configuration Activ Energy Meters
A) Enabling parameter modifications
• The enable key serves to enable or disable parameter changes. It is locat-
ed below the terminal cover and is activated with a pointed object (e. g.
ballpen).
• Pressing the key for the first time activates operating mode „Change pa-
rameters“ (key off):
• Renewed activation disables operating mode „Change parameters“
(key on):
• If the key is not activated for approx. 2 minutes, operating mode „Change
parameters“ is automatically aborted and blocked. The key is displayed
again:

Page 110 Vision XP+ VAC
3 Setup Instructions
3.15 Configuration Activ Energy Meters
Operating Instructions
Version 1.5
B) Changing parameter values
1. Briefly press the enable key first, as described under Item a) (activates
operating mode „Change parameters“).
2. Press and hold the menu key once until the read-out test is displayed.
3. Repeatedly press the menu key until the parameter to be changed ap-
pears at the display.
4. Press and hold the menu key until the parameter value at the digit with
the highest value (on the far left-hand side) blinks.
• Example - Parameters:
CT = 150/5A 30
Pulse rate: 10000 Pulses/kWH
Vt = 1
5. Please wait until the point which is to be changed is flashing (e. G. ten).
Then press three times, the desired value 30 appears. Please wait again
until the flashing cycle is finished. Now, the value 30 is accepted.
6. By short pressing the Menu button you will reach the next parameter lev-
el.
7. This parameter will be fixed as described under point 5.
8. Press the menu key several times until the standard display appears.
9. Press the enable key once more. This disables operating mode
„Change parameter values“.