ServiceInstruction_Vision XP.pdf - 第27页
Vision XP+ V AC Page 23 2 Maintenance 2.5 Process chamber Operating Instructions V ersion 1.5 2.5.7 Cleaning the Seal Fig. 2-2 0 Cle aning the P rocess Chamber Seal The seals must be c lean and un- damaged in o rder to a…
Page 22 Vision XP+ VAC
2 Maintenance
2.5 Process chamber
Operating Instructions
Version 1.5
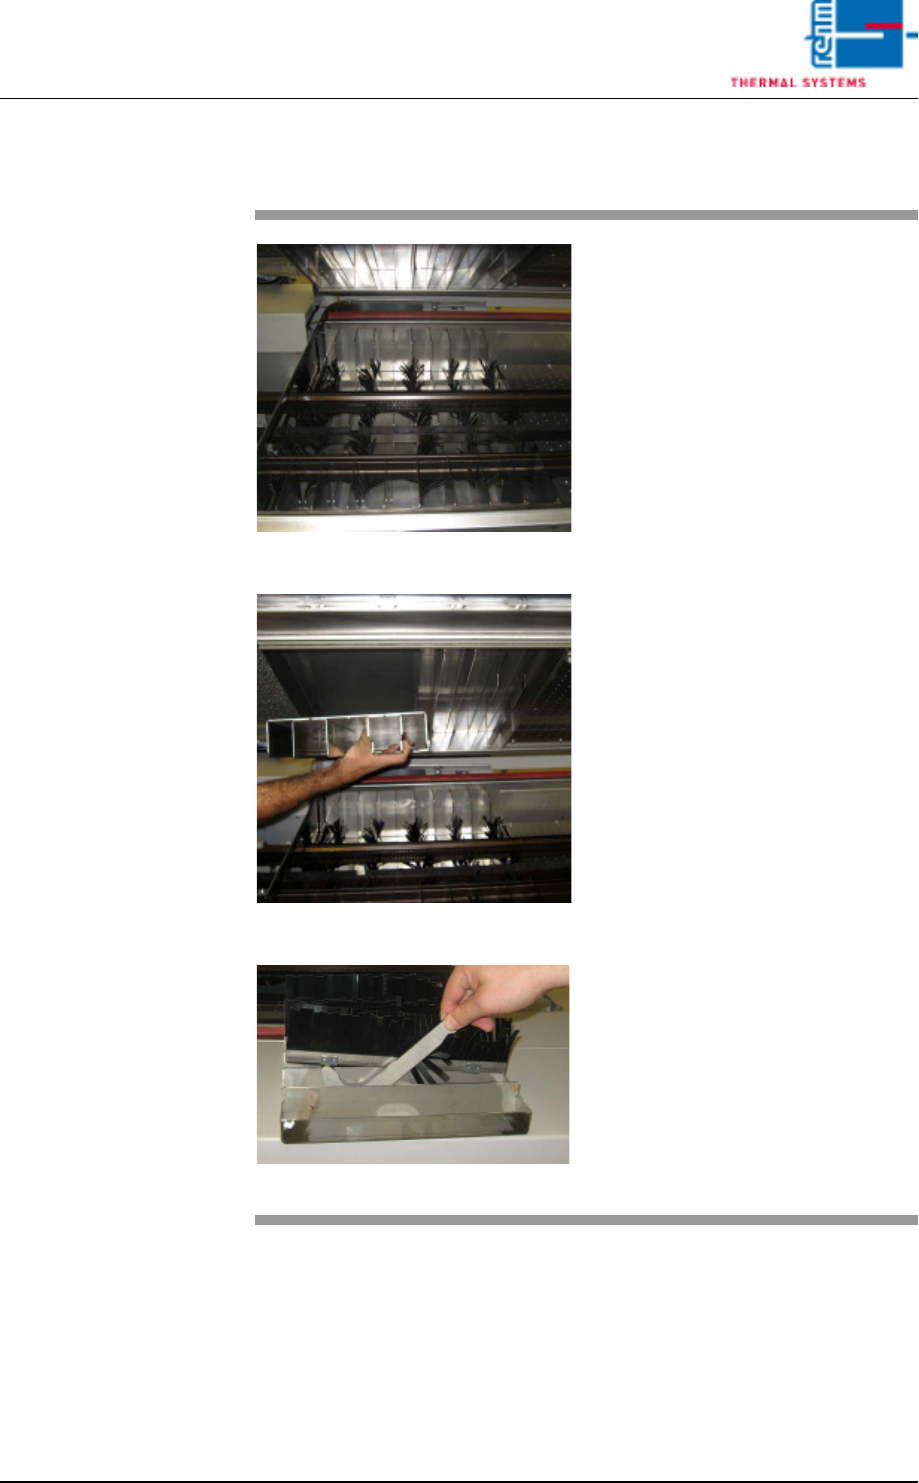
2.5.6 Cleaning the Curtains
Fig. 2-17 Bottom Curtains
Fig. 2-18 Top curtains (2-part)
Fig. 2-19 Push the clips up with prying tool
Consumable materials:
• Oven cleaner
• Rags
• Prying tool
Procedure:
1. Raise the process chamber.
2. Lift the curtains out of the sys-
tem along with the mounting
bracket.
3. Clean all curtains, the mounting
bracket and the interior of the
process chamber with oven
cleaner and a rag.
If the curtains are excessively dam-
aged they must be replaced.
Procedure:
1. Push up the clips at the left and
right-hand sides of the mount-
ing rail with the prying tool.
2. Remove the old curtain.
3. Insert the new curtain.
4. Replace the clips.

Vision XP+ VAC Page 23
2 Maintenance
2.5 Process chamber
Operating Instructions
Version 1.5
2.5.7 Cleaning the Seal
Fig. 2-20 Cleaning the Process Chamber
Seal
The seals must be clean and un-
damaged in order to assure reliable
production.
Consumable materials:
• Appropriate cleaning agent
• Rags
Procedure:
1. Raise the process chamber.
2. Clean the process chamber
seals with Appropriate cleaning
agent and a rag.
3. Clean all contamination from
the sheet metal panel at the
mating side of the seal.
4. The seals at the system’s inlet
and outlet must be cleaned us-
ing the same procedure.
Seals
Page 24 Vision XP+ VAC
2 Maintenance
2.5 Process chamber
Operating Instructions
Version 1.5
2.5.8 Replacing the Seals
Fig. 2-21 Replacing the Process Chamber
Seals
Fig. 2-22 Replacing the Process Chamber
Seals
Fig. 2-23 Replacing the Process Chamber
Seals
Consumable materials:
detergent water
Procedure:
1. The seal can be pulled by hand
from the metal bracket.
2. Then clean the metal bracket
inside with detergent water.
3. Loosen the screws slightly
4. Now, the seal can be pressed
again into the metal bracket.
5. Press down the holder sheet
with the hand and tighten the
screws again.