4H4CEPM.pdf - 第63页
Page 53 301 CM 4H4C-E-PMA01-A03-01 Stock Data Case of T ray 4. Click on next to FeederT ype field. • [SelectFeederT ype] window opens. 5. Select a tray , and then click on Select . 6. Click on of the tray layout field. •…

Page 52
4H4C-E-PMA01-A03-01
Stock Data
7. Choose the chip to set, and click on
Select .
• [SelectFeederLayoutList] window closes, and
the chosen chip is set.
8. Choose Deep.
9. Set all the chips to mount for each
table in stock data by repeating the
steps from 4. to 8.
10. Click on Close .
• The screen returns to the main menu.
444C-EPt-EdSd-002
4H4C-EPt-EdSd-004
4H4C-EPt-EdSd-004
Page 53
301
CM
4H4C-E-PMA01-A03-01
Stock Data
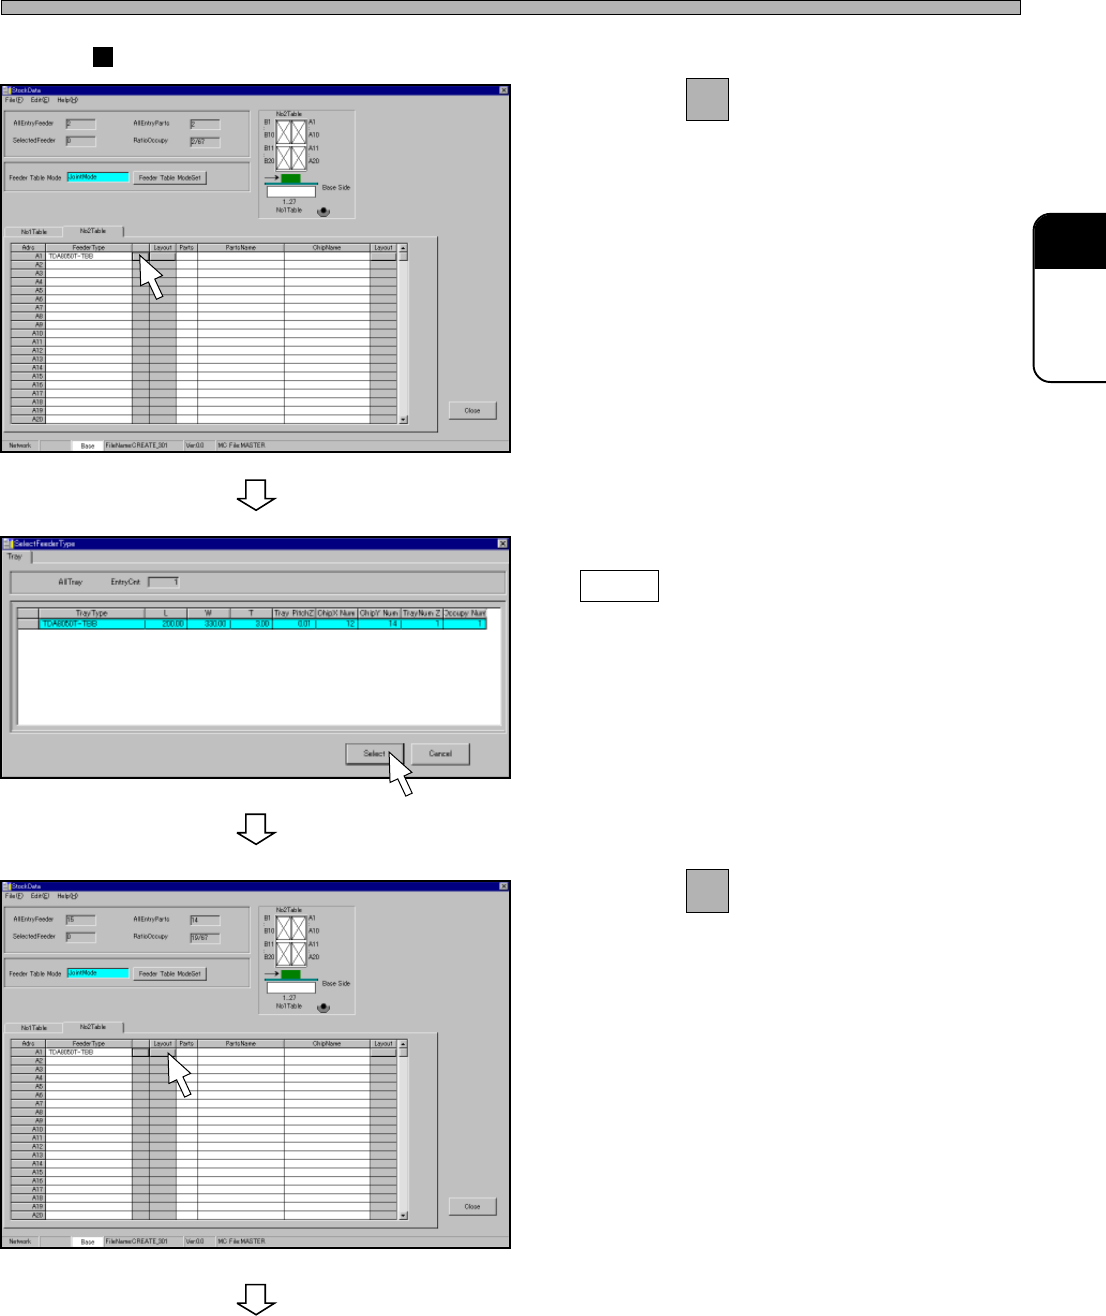
Case of Tray
4. Click on next to FeederType field.
• [SelectFeederType] window opens.
5. Select a tray, and then click on
Select .
6. Click on of the tray layout field.
• [Tray Layout] window opens.
To the next page
4H4C-EPt-EdSd-007
4H4C-EPt-EdSd-008
4H4C-EPt-EdSd-009
Page 54
4H4C-E-PMA01-A03-01
Stock Data
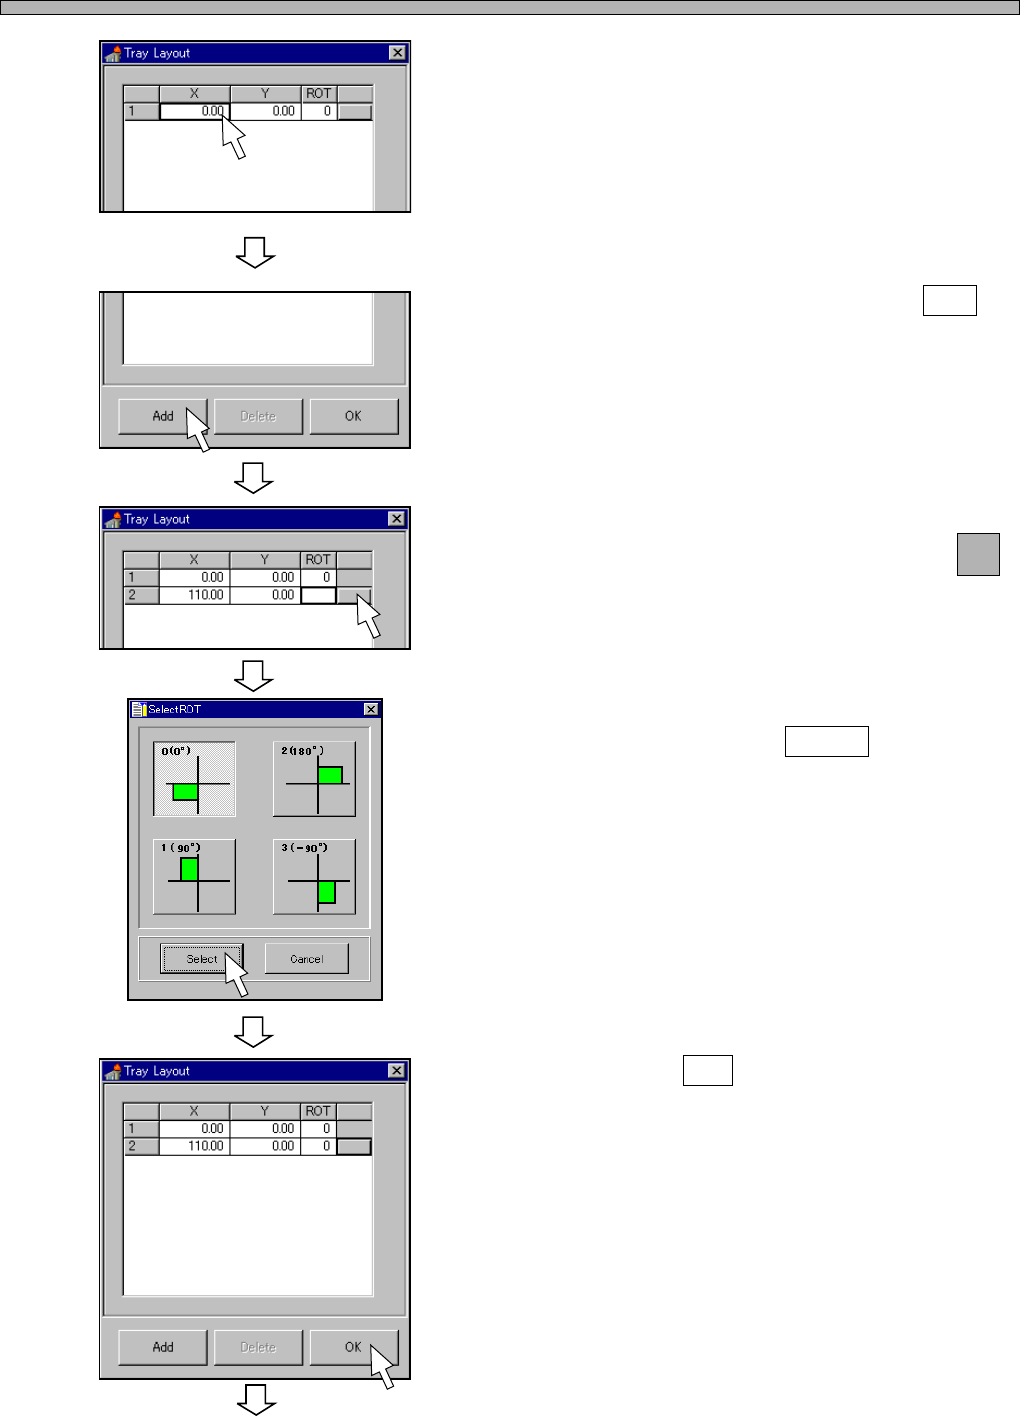
7. Enter the origin coordinates (X, Y) of
the tray.
• When fitting it to the pallet guide, you do not
need to edit this data.
• When using the offset block for pallet, you
need to add 8 mm to the x-coordinate.
8. To set a second tray, click on Add .
9. Enter the origin coordinates (X, Y) of
a second tray, and then click on
next to the ROT field.
• [SelectROT] window opens.
10. Select the rotation angle of the tray,
and then click on Select .
11. Click on OK .
4H4C-EPt-EdSd-010
To the next page
4H4C-EPt-EdSd-010
4H4C-EPt-EdSd-011
4H4C-EPt-EdSd-012
4H4C-EPt-EdSd-013