4H4CEPM.pdf - 第64页
Page 54 4H4C-E-PMA01-A03-01 Stock Data 7. Enter the origin coordinates (X, Y) of the tray . • When fitting it to the pallet guide, you do not need to edit this data. • When using the offset block for pallet, you need to …
Page 53
301
CM
4H4C-E-PMA01-A03-01
Stock Data
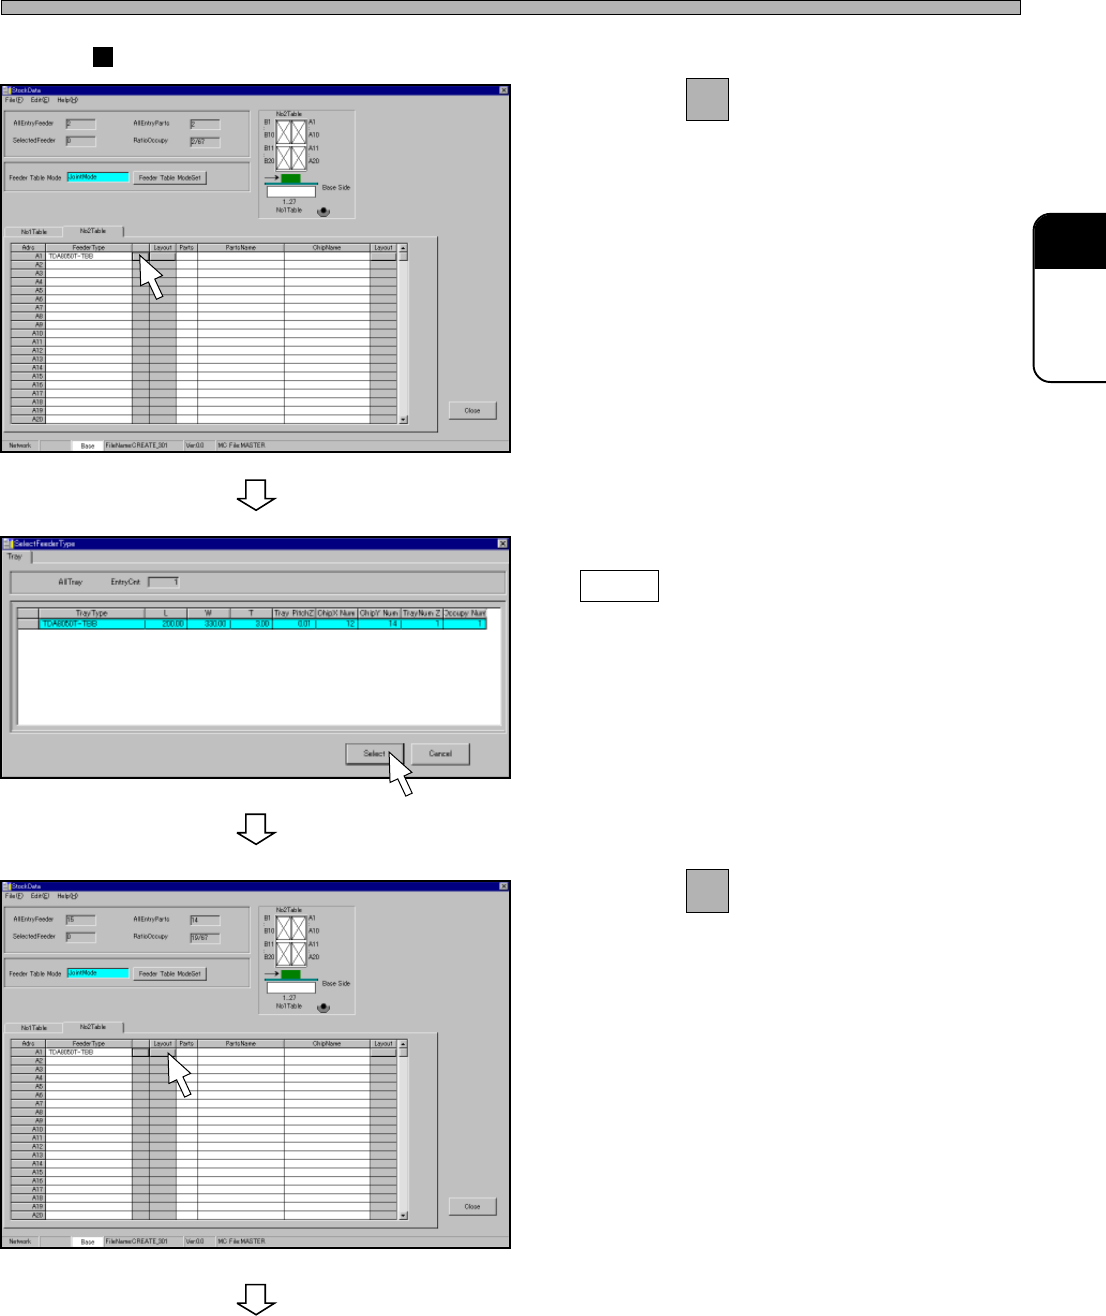
Case of Tray
4. Click on next to FeederType field.
• [SelectFeederType] window opens.
5. Select a tray, and then click on
Select .
6. Click on of the tray layout field.
• [Tray Layout] window opens.
To the next page
4H4C-EPt-EdSd-007
4H4C-EPt-EdSd-008
4H4C-EPt-EdSd-009
Page 54
4H4C-E-PMA01-A03-01
Stock Data
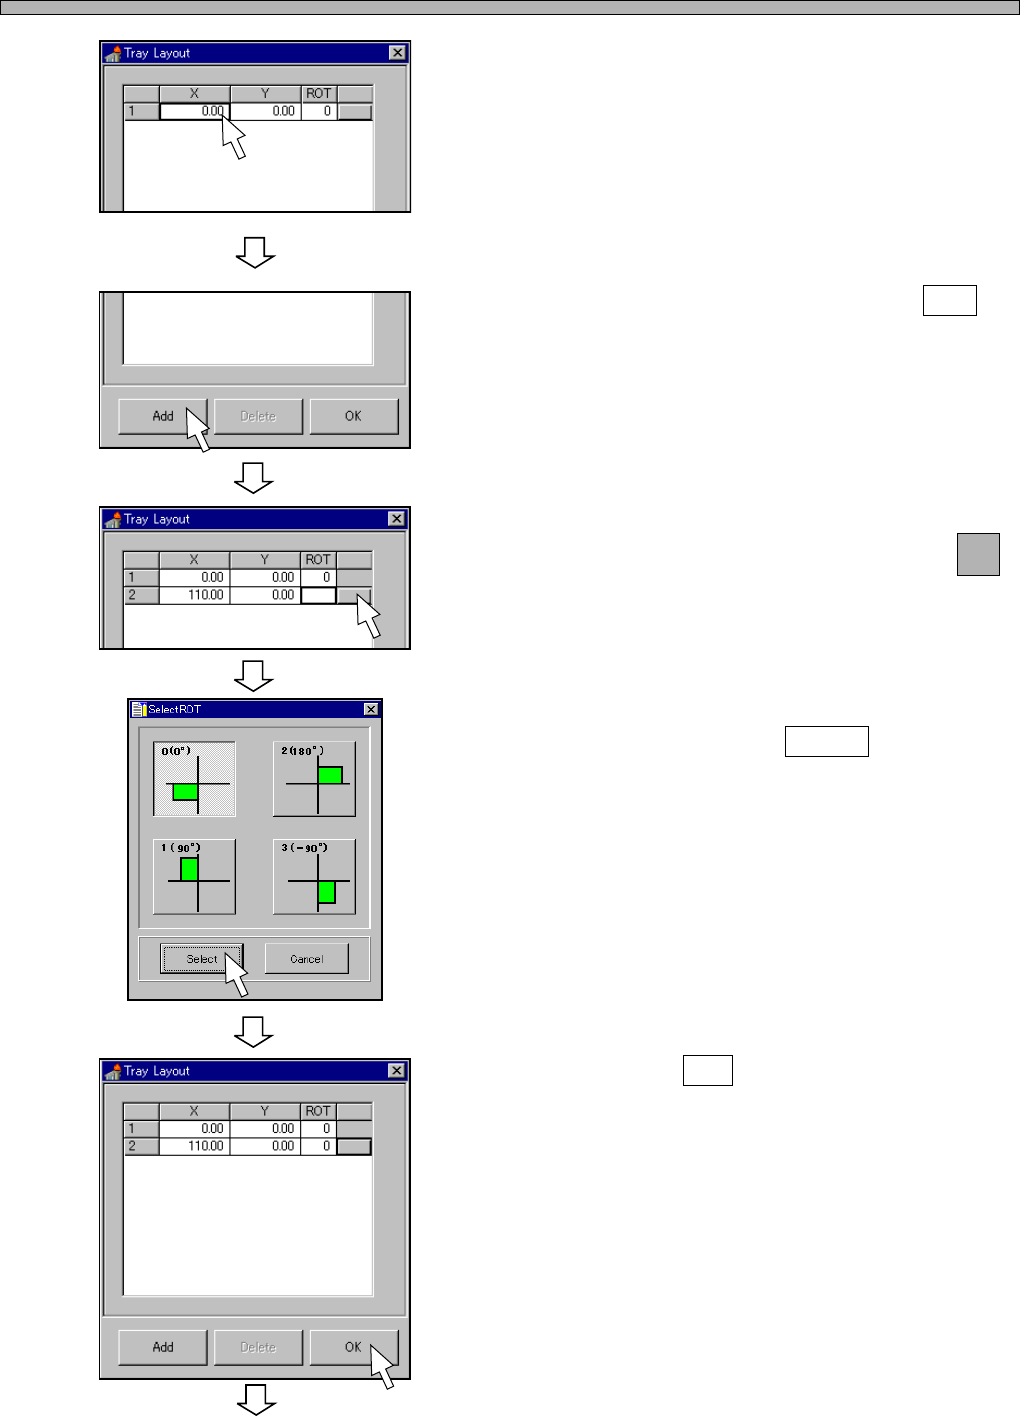
7. Enter the origin coordinates (X, Y) of
the tray.
• When fitting it to the pallet guide, you do not
need to edit this data.
• When using the offset block for pallet, you
need to add 8 mm to the x-coordinate.
8. To set a second tray, click on Add .
9. Enter the origin coordinates (X, Y) of
a second tray, and then click on
next to the ROT field.
• [SelectROT] window opens.
10. Select the rotation angle of the tray,
and then click on Select .
11. Click on OK .
4H4C-EPt-EdSd-010
To the next page
4H4C-EPt-EdSd-010
4H4C-EPt-EdSd-011
4H4C-EPt-EdSd-012
4H4C-EPt-EdSd-013
Page 55
301
CM
4H4C-E-PMA01-A03-00
Stock Data
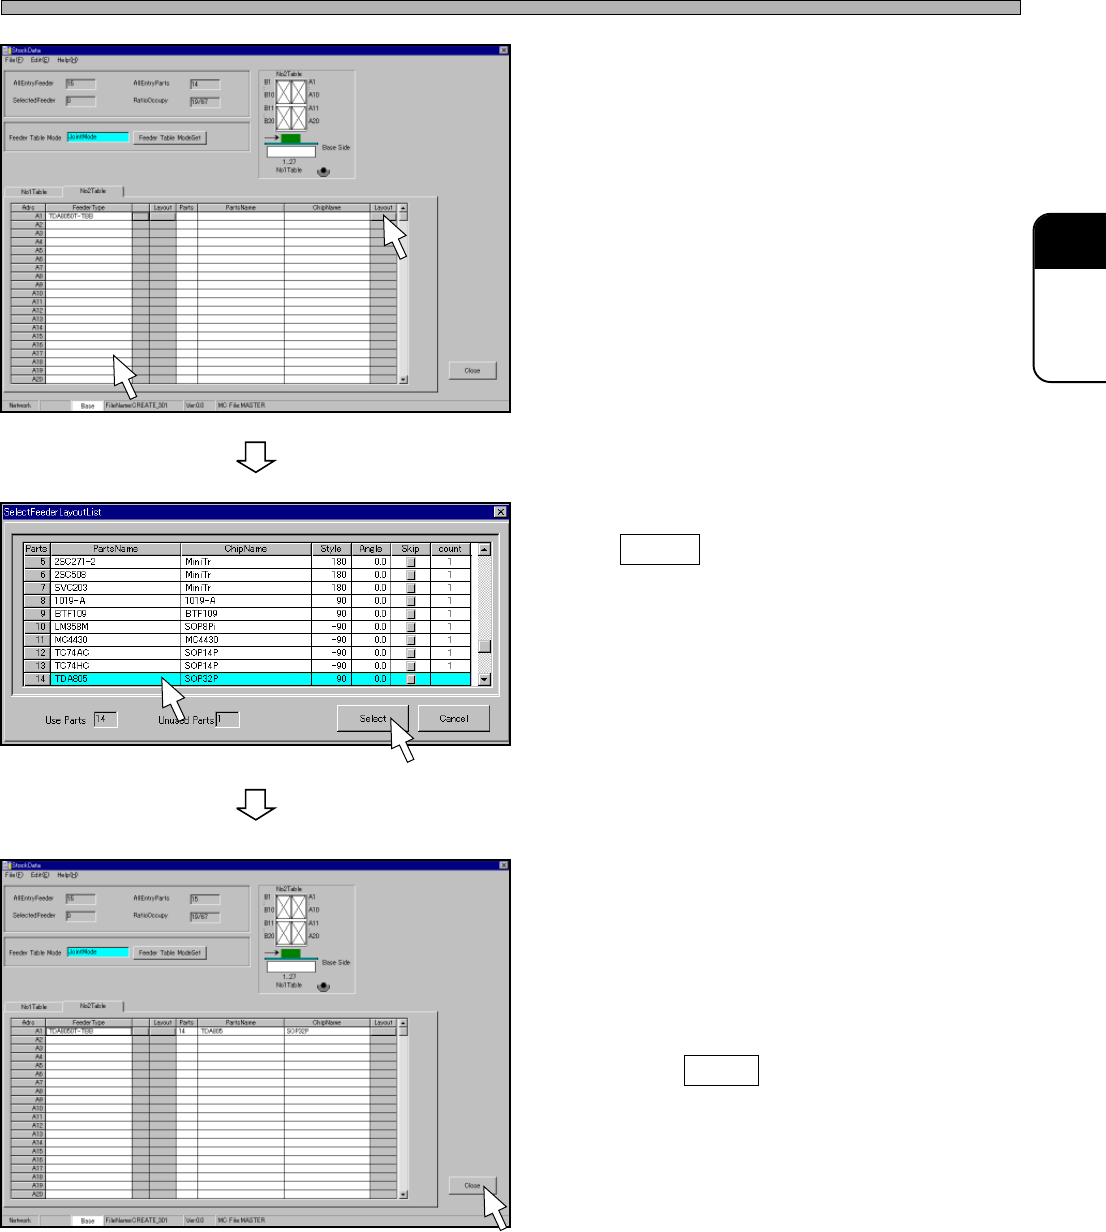
12. Click on the “Layout” field of the
address that the chip is set.
• [SelectFeederLayoutList] window opens.
13. Select a chip to input, and then click
on Select .
• [SelectFeederLayoutList] window closes, and
the selected chip is set.
14. Input all the chips to mount into the
stock data by repeating steps 4 to 13.
15. Click on Close .
• The screen returns to the main menu.
4H4C-EPt-EdSd-009
4H4C-EPt-EdSd-014
4H4C-EPt-EdSd-015