4H4CEPM.pdf - 第71页
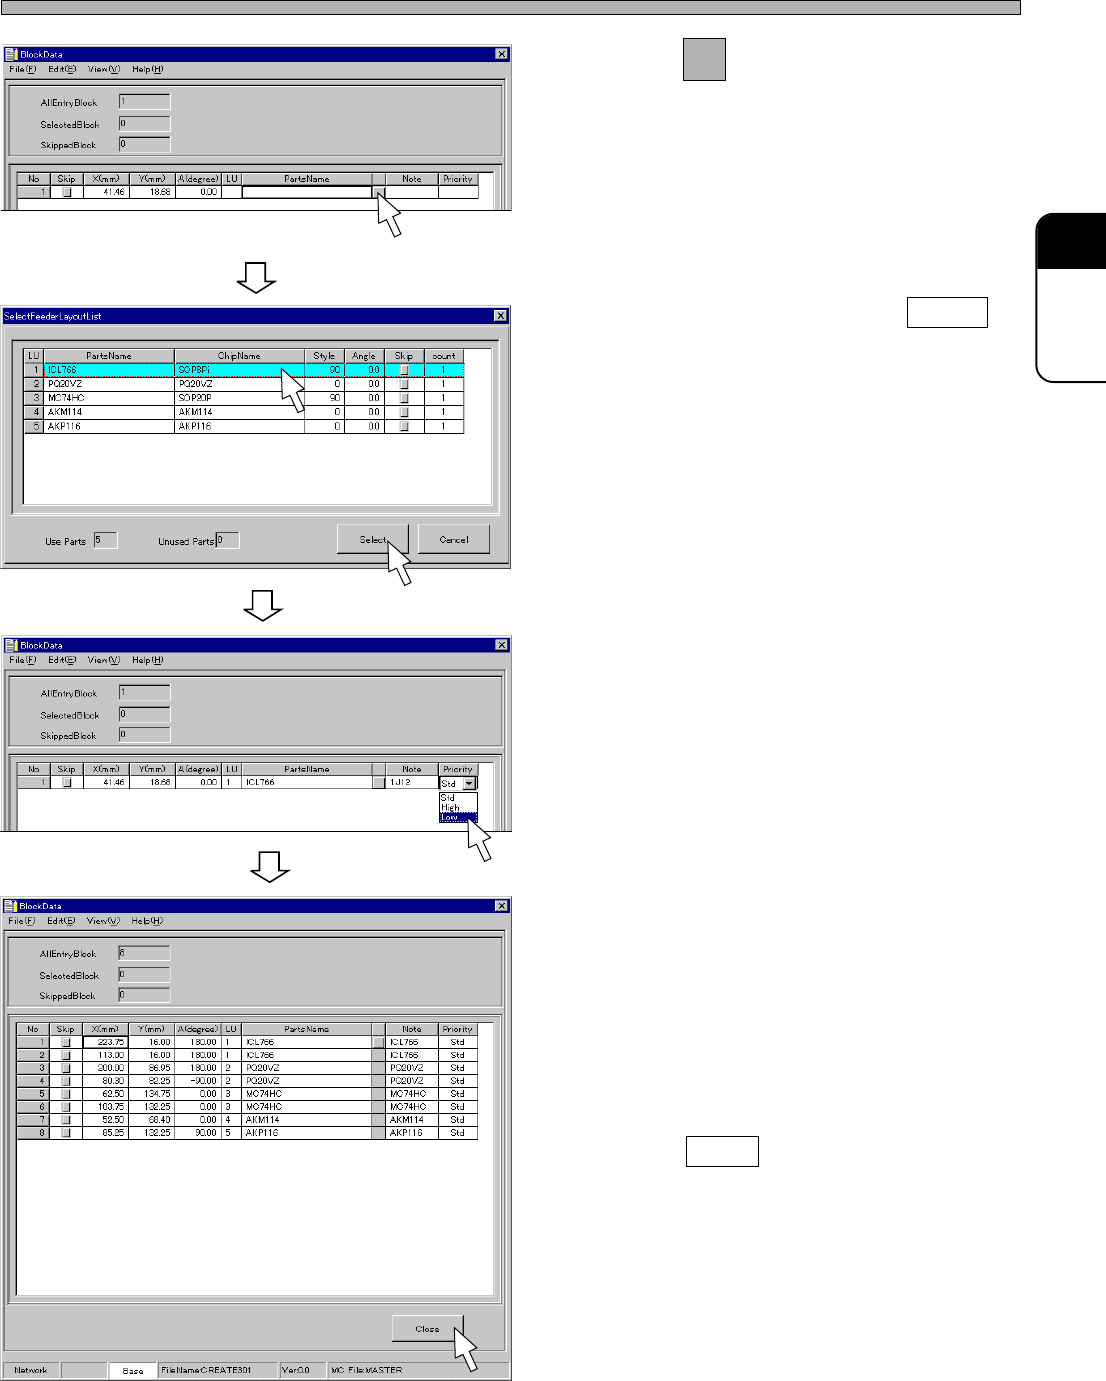
Page 61 301 CM 4H4C-E-PMA01-A04-02 Block Data 4. Click on next to PartsName field. • [SelectFeederLayoutList] window opens. 5. Choose a chip, and click on Select . • [SelectFeederLayoutList] window closes, and the chosen…
Page 60
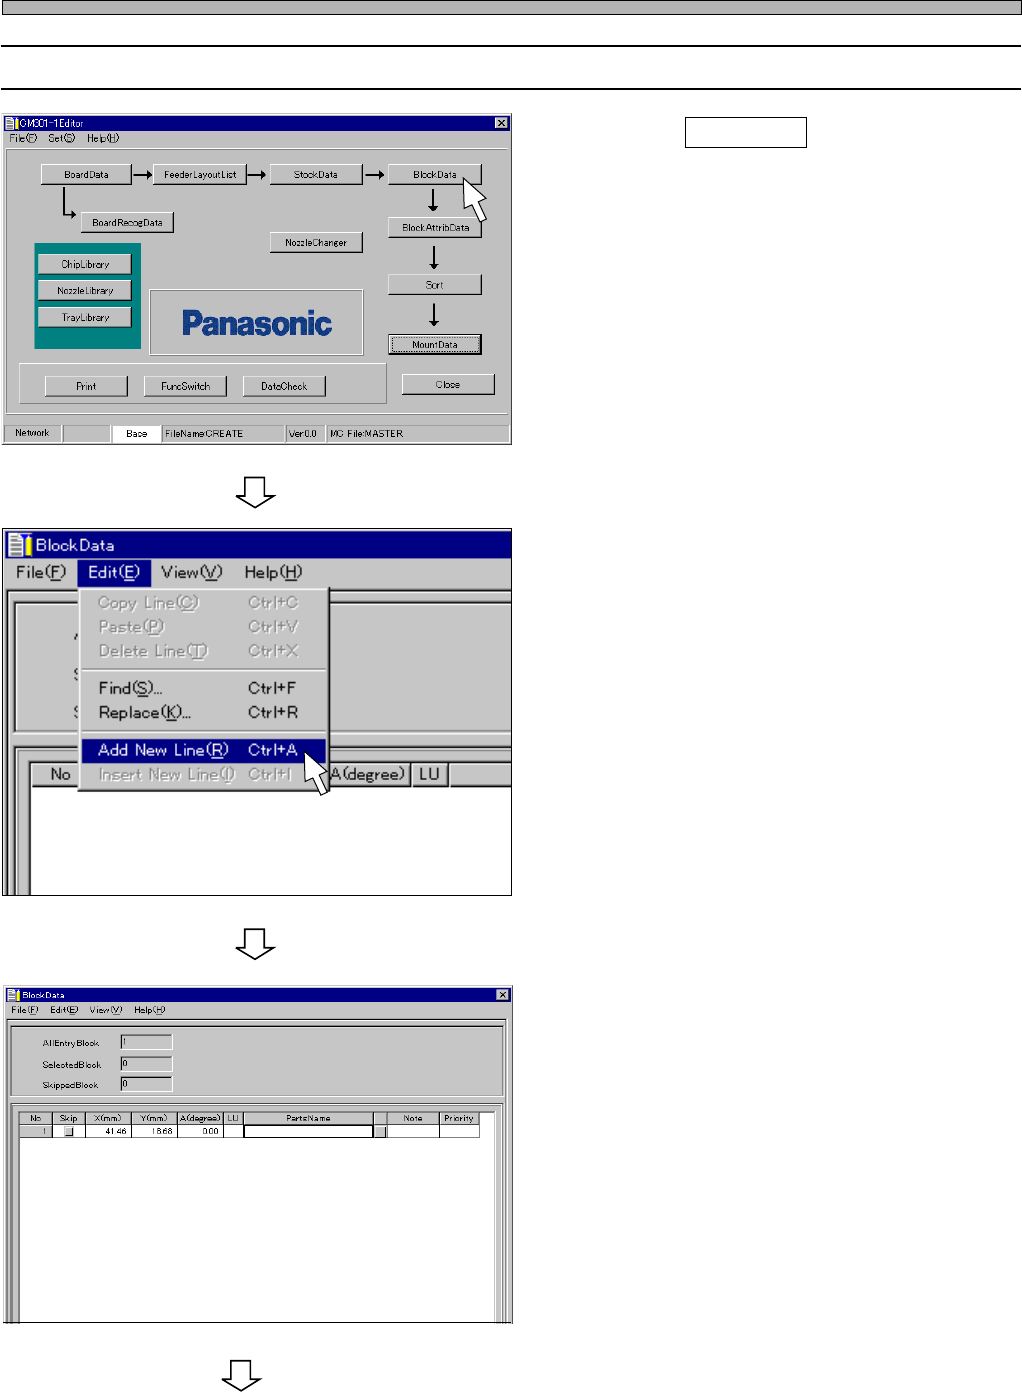
11-2 Editing Block Data
1. Click on BlockData .
• [BlockData] window opens.
2. Choose “AddNewLine” from “Edit” on
menu bar.
• A new row is created.
3. Enter the coordinates (X, Y) and the
mount angle (A).
4H4C-E-PMA01-A04-02
Block Data
To the next page
4H4C-EPt-Ed-001
4H4C-EPt-EdBl-003
4H4C-EPt-EdBl-004
Page 61
301
CM
4H4C-E-PMA01-A04-02
Block Data
4. Click on next to PartsName field.
• [SelectFeederLayoutList] window opens.
5. Choose a chip, and click on Select .
• [SelectFeederLayoutList] window closes, and
the chosen PartsName is set.
6. Enter a comment.
7. Set the order of priority.
• Select “Middle”, “High” or “Low”.
8. Enter all coordinates and all
PartsNames in block data by repeat-
ing the steps from 2. to 7.
9. Click on Close .
• The main menu is displayed.
4H4C-EPt-EdBl-004
4H4C-EPt-EdBl-005
4H4C-EPt-EdBl-006
4H4C-EPt-EdBl-001
Page 62
4H4C-E-PMA01-A04-01
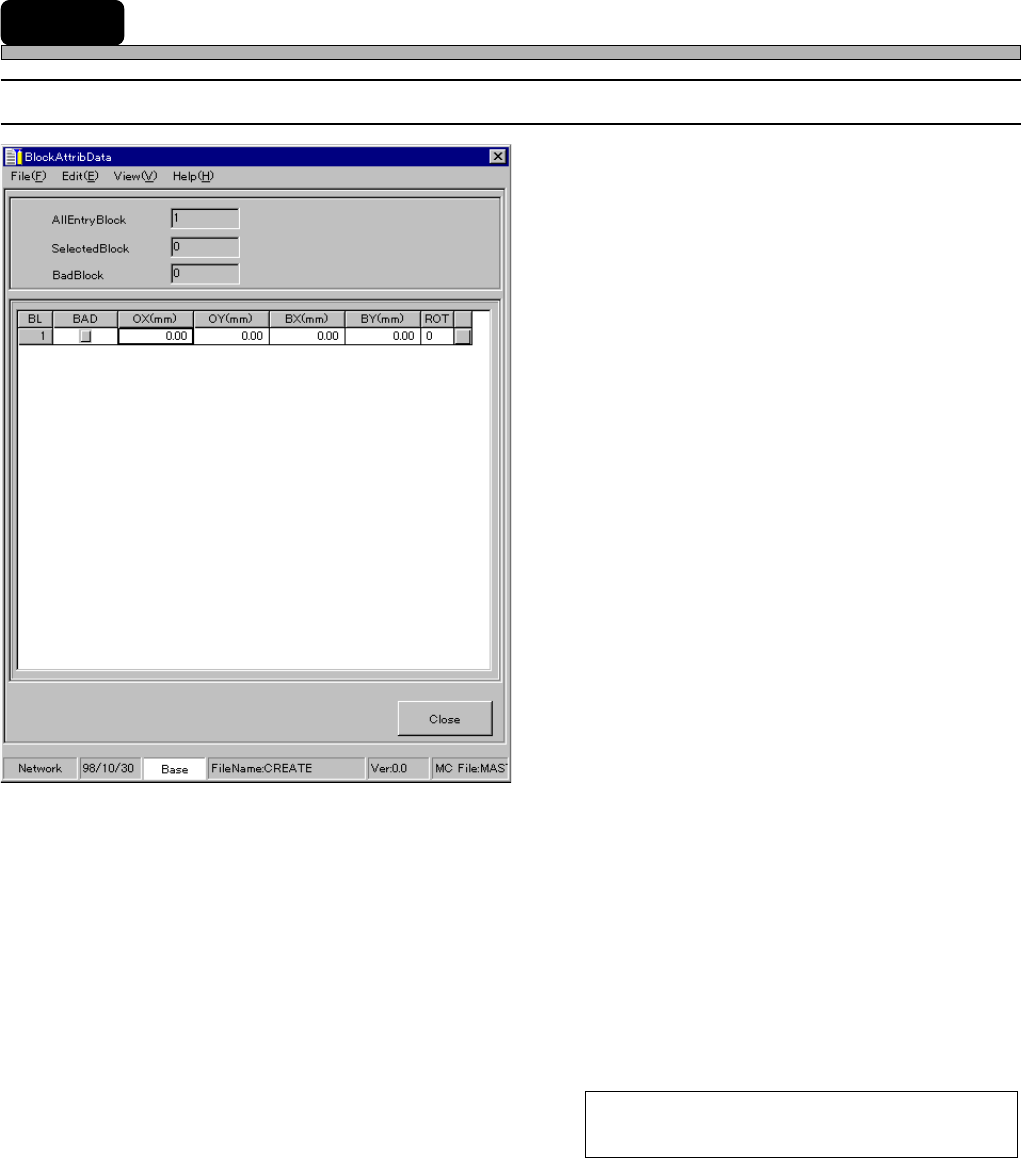
12 Block Attribute Data
12-1 Block Attribute Data
1. BL (Block No.)
2. BAD (Defective Block)
3. OX, OY (Block Origin)
4. BX, BY (Defective Block Mark)
5. ROT (Block Rotation)
The descriptions are as follows.
1. BL (Block No.)
This shows block No.
2. BAD (Defective Block)
When you have fourd a defective block in advance, you can prohibit the block from being mounted
by checking off the check box in BAD field. When the problem is solved, you can withdraw the
prohibition only by removing the check in the box. You do not need to sort data again.
To prohibit mounting, check off the check box.
To withdraw the prohibition, remove the check.
444C-EPt-EdBa-001