HS50_advance_level 1_20200522_221201 (1).pdf - 第461页
06/2002 E dition S tudent Guide HS-50 Advance d I 12 Preve ntive Maintenance 28

Student Guide HS-50 Advanced I 06/2002 Edition
12 Preventive Maintenance
27
You will need the following tools, consumables and equipment for the monthly maintenance tasks:
– Laboratory gloves
– Lint-free cloths
– Lens cleaning cloth (e.g. Kodak)
– Lint-free cottonwool buds
– SIPLACE cleaning cloth (Item no. 00315253-01)
– Ethyl alcohol
– Set of cleaned sleeves
– Set of cleaned and slightly greased valve plungers.
Replace the sleeves and the valve plungers
The sleeves may be replaced at the same time as the cleaned ceramic nozzles. The procedure is
as follows:
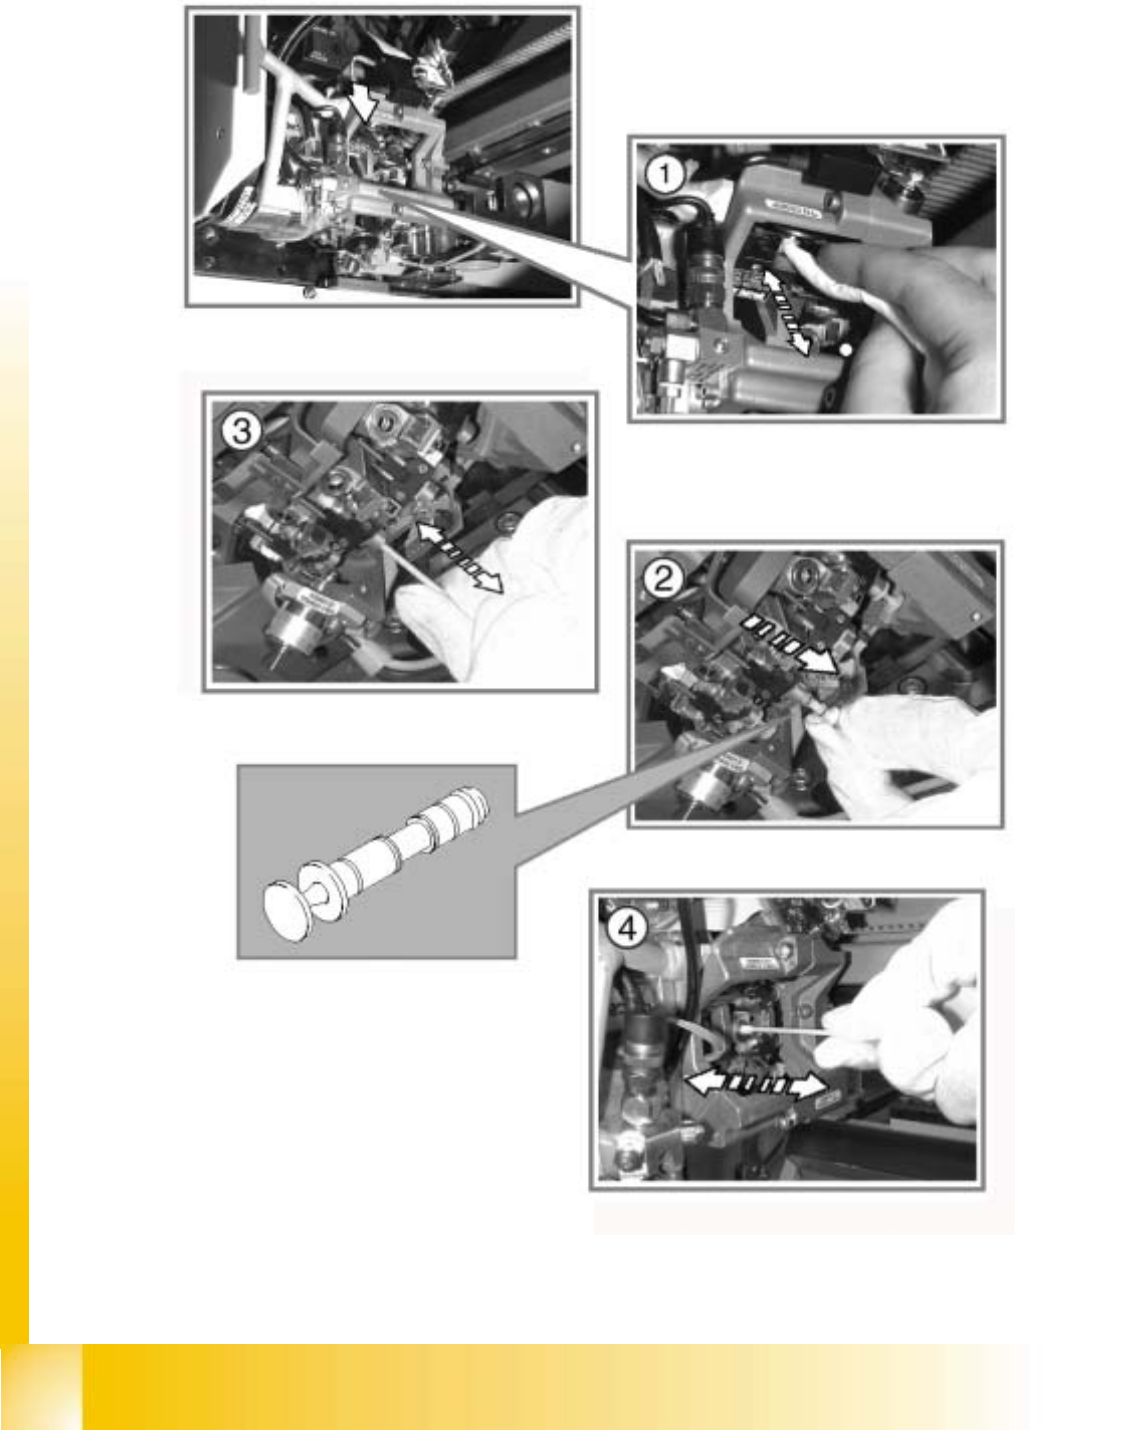
: Use the "Single Functions" menu to place the nozzles of the Collect&Place head in the nozzle
changer.
a Open the protective cover.
Do not hold the sleeves with your bare hands. Always wear laboratory gloves when carrying out
maintenance work on the sleeve. In this way you will avoid dirtying the glass disk and the
12
friction wheel unnecessarily, which could cause malfunctions (counting errors and overswing).
s Remove the sleeves from the head.
Pull out the sleeves as shown in the diagram.
12
d Put them into the containers provided.
Use the "Single Functions" menu to pace the star.
06/2002 Edition Student Guide HS-50 Advanced I
12 Preventive Maintenance
28

Student Guide HS-50 Advanced I 06/2002 Edition
12 Preventive Maintenance
29
a Use a lens cleaning cloth to clean the glass disk of the scanning unit on the turning station.
s Remove 12 valve plungers.
d Clean the valve casings using a cottonwool bud moistened with ethyl alcohol
Never use pipe-cleaners or bottle brushes to clean the valve casing.
12
: Grease the cleaned valve plunger extremely sparingly and insert into the valve casing.
See chapter "Maintenance of the valve plungers").
: Move it back and forth several times.
: If the valve plungers move too easily, replace them with new plungers.
If the valve plungers move too easily they cannot be guaranteed to work correctly.
12
: Insert cleaned sleeves into the segments.
See chapter "Maintenance of the sleeves").
Do not exert too much pressure when snapping the sleeves into place to avoid damaging the
sleeve retaining springs.
12
: Check that the sleeve moves easily in the segment.
If the sleeve does not move easily:
: Pull the sleeve out again.
f Clean the segment using a cottonwool bud moistened with ethyl alcohol
Never use pipe-cleaners or bottle brushes to clean the segment.
12
: Use the "Single Functions" menu to pick up the nozzles of the Collect&Place head.