00198150-02_SM_TX_en.pdf - 第271页
11 Cutter 11.11 Replacing Wiper Clip Service Manual SIPLACE TX Series 06/2017 271 Fig.380: Removing the wiper ► Remove the two screws (1) fixing the wiper (2) . ► Remove the wiper (2) . The notch (3) in the wiper wi…
11 Cutter
11.10 Replacing Wiper [03000491-xx]
270 Service Manual SIPLACE TX Series 06/2017
11.10 Replacing Wiper [03000491-xx]
Parts, equipment and tools
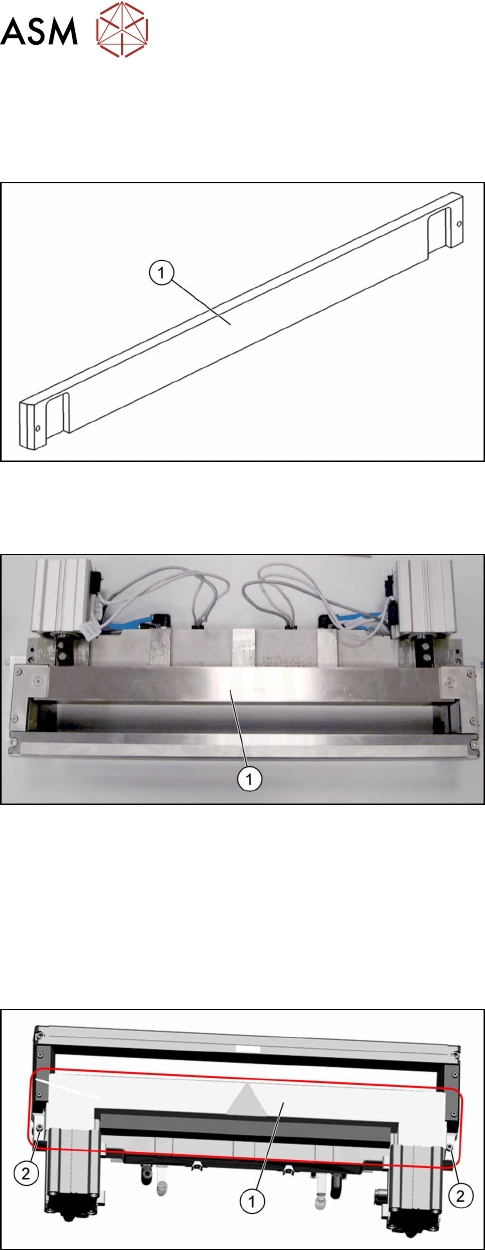
Fig.377: Wiper
1. Wiper (cutter HF) [03000491‑xx]
Overview
Fig.378: Wiper on cutter
1. Wiper
Removal
► Switch off the machine, disconnect it from the power supply and secure it to prevent
unauthorized reactivation. Observe the instructions in section 1.2 "Preparatory Work..." [}15].
► Remove the cutter from the machine.
Replacing the Cutter on the COT Insert [03066690-xx] [}252]
Fig.379: Cover plate
► Remove the screws(2) fastening the top cover
plate(1) and then remove the top cover plate.
11 Cutter
11.11 Replacing Wiper Clip
Service Manual SIPLACE TX Series 06/2017 271
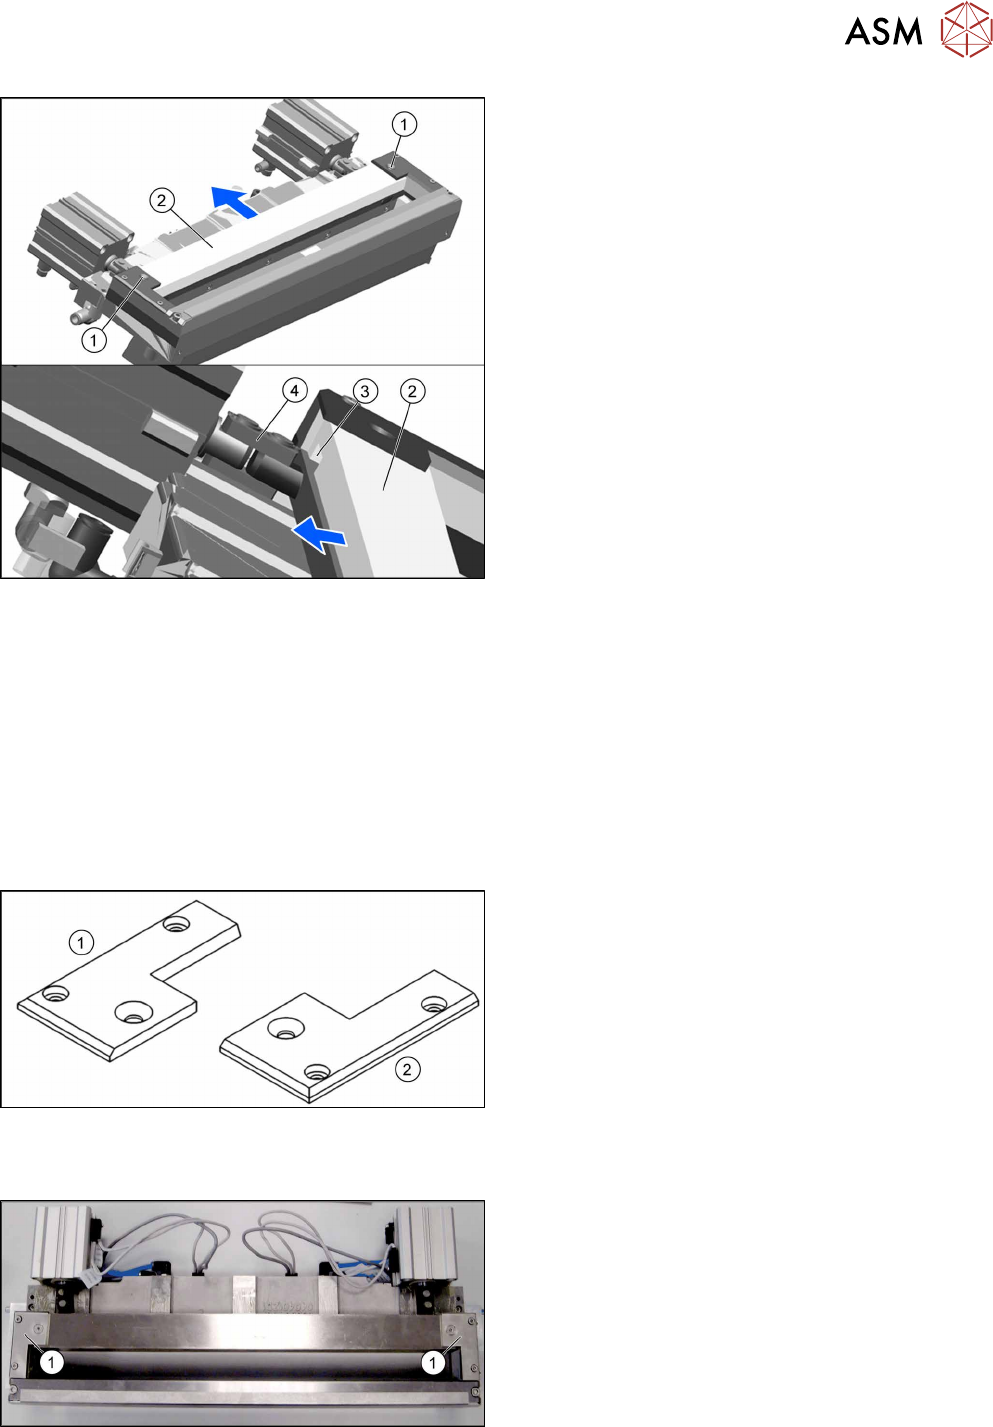
Fig.380: Removing the wiper
► Remove the two screws(1) fixing the wiper(2).
► Remove the wiper(2).
The notch(3) in the wiper will move over the ar-
ticulated joint(4) on the short-stroke cylinder.
Installation
► Follow the removal instructions in reverse order for installation.
See also
2 Replacing the Cutter on the COT Insert [03066690-xx] [}252]
11.11 Replacing Wiper Clip
Parts, equipment and tools
Fig.381: Wiper clips left and right
1. Wiper clip left (SIPLACE HF) [03000506‑xx]
2. Wiper holder, right (cutter HF) [03000505‑xx]
Overview
Fig.382: Wiper clips on cutter
1. Wiper clips
11 Cutter
11.11 Replacing Wiper Clip
272 Service Manual SIPLACE TX Series 06/2017
Removal
► Switch off the machine, disconnect it from the power supply and secure it to prevent
unauthorized reactivation. Observe the instructions in section 1.2 "Preparatory Work..." [}15].
► Remove the cutter from the machine.
Replacing the Cutter on the COT Insert [03066690-xx] [}252]
► Remove the wiper (see 11.10 "Replacing Wiper [03000491-xx]" [}270]).
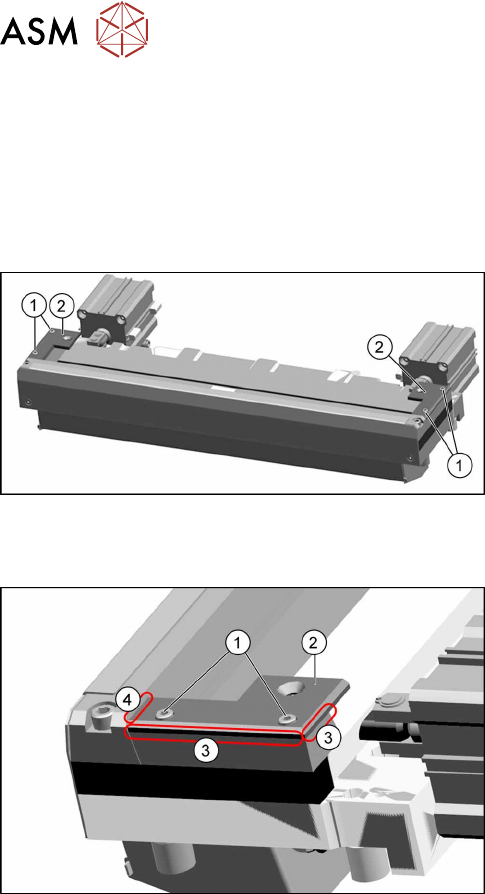
Fig.383: Removing the wiper clips
► Remove the two screws(1) (left and right) and
remove the wiper clips(2).
Installation
Fig.384: Installing the wiper clips
► Install the new wiper clips(2) on both sides and
loosely put the screws(1) back in.
► Align the wiper clips to the edges of the cutter
frame(3) and to the cutter top blade(4).
► Tighten the screws(1) fixing the wiper clips.
► Follow the removal instructions in reverse order for further installation.
See also
2 Replacing the Cutter on the COT Insert [03066690-xx] [}252]