00198140-01_UM_JTF-ML_TX12_de_en.pdf - 第86页
Setting up and Commissioning Retrofitting in the SIPLACE TX-Series 4.2.5 Converting the COT Insert 86 JEDEC Tray Feeder (JTF-ML) Removing the NC holder ► Remove the reject bin (1) . ► Remove the screw s (3) fastening the…
Setting up and Commissioning
4.2.2 Tools and Equipment Required Retrofitting in the SIPLACE TX-Series
JEDEC Tray Feeder (JTF-ML) 85
4.2.2
4.2.2 Tools and Equipment Required
Tools and Equipment Required
▪ Standard tools
▪ Recommended: Allen key extension, ratchet
▪Hammer
▪Punch
▪ Feeler gauge
▪ Belt tension device
▪ Lifting trolley
▪ Second person
▪ Assembly instructions "Input and Output Conveyor Extension SIPLACE TX" [00198141-xx]
4.2.3
4.2.3 Required Working Time
Required Working Time
The complete installation, including the output conveyor extension, will take approx. four hours.
4.2.4
4.2.4 Preparatory Steps
Preparatory Steps
► Move the component trolley out of the machine.
► Switch off the machine, disconnect it from the power supply and secure it to prevent unauthorized
reactivation. Observe the instructions in section "2.1.6 Preparatory Work..." [ ➙ 76].
4.2.5
4.2.5 Converting the COT Insert
Converting the COT Insert
TX - Removing the NC
Removing NC 1
► Remove the four screws (1) fastening the nozzle
changer (NC).
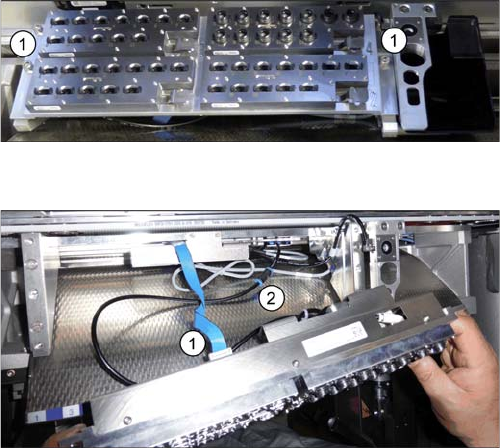
Removing NC 2
► Unplug the electrical (1) and pneumatic
connections (2) for the nozzle changer and put the
NC aside.
Setting up and Commissioning
Retrofitting in the SIPLACE TX-Series 4.2.5 Converting the COT Insert
86 JEDEC Tray Feeder (JTF-ML)
Removing the NC holder
► Remove the reject bin (1).
► Remove the screws (3) fastening the two NC
holders (2) and remove the NC holders.
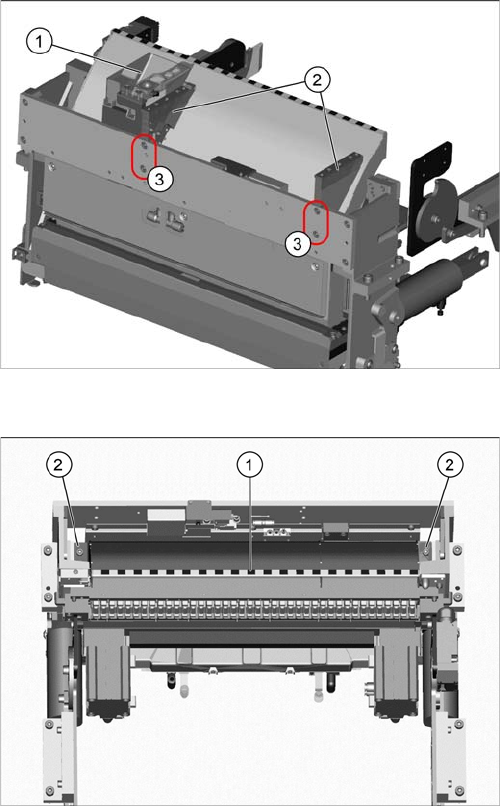
Removing the empty-tape duct assembly
► Remove the two screws (2) holding the empty-tape
duct assembly (1).
► Carefully lift the empty-tape duct out of the COT in-
sert.
Setting up and Commissioning
4.2.5 Converting the COT Insert Retrofitting in the SIPLACE TX-Series
JEDEC Tray Feeder (JTF-ML) 87
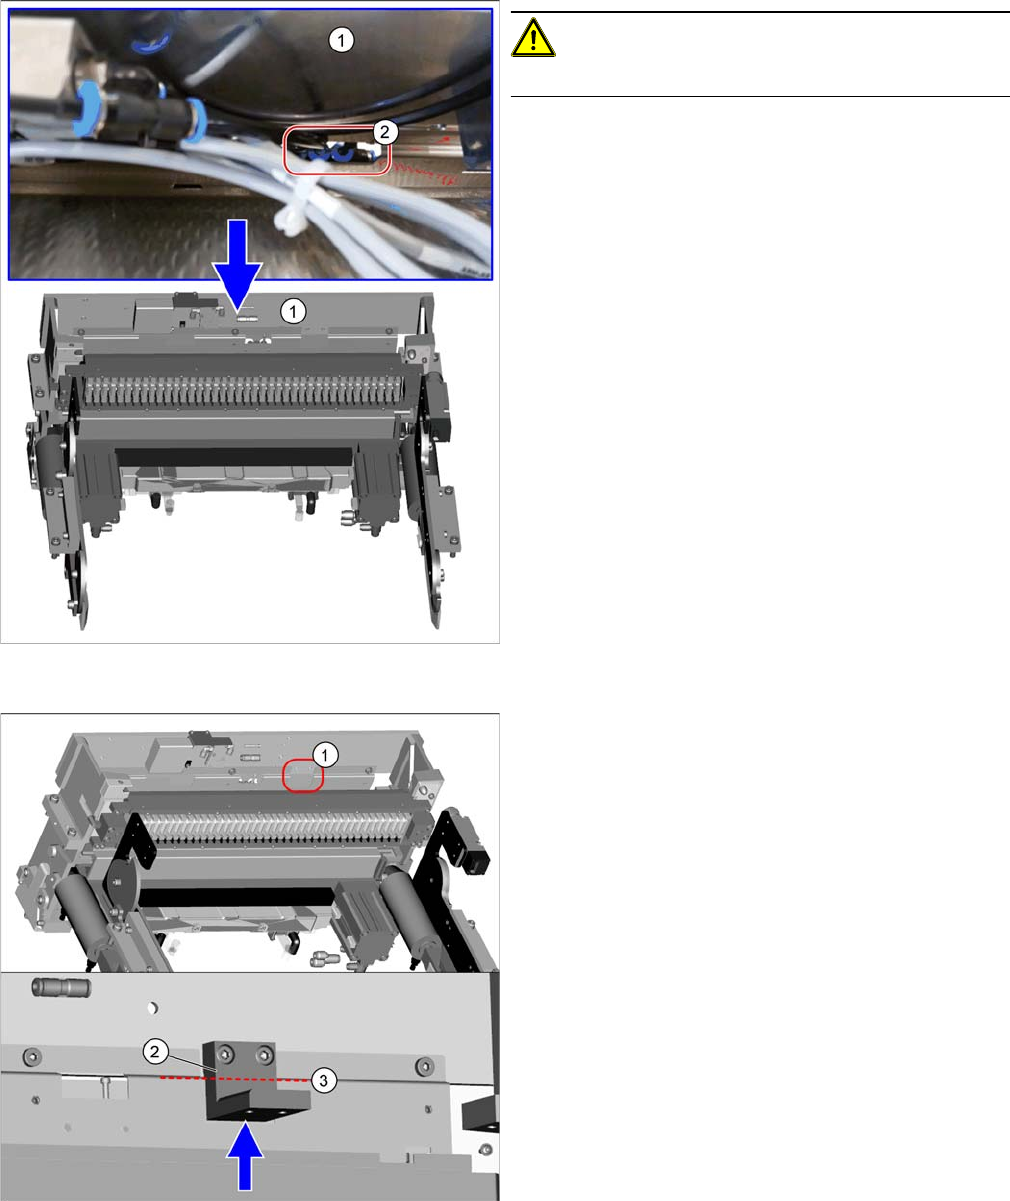
Connecting the compressed air hose
CAUTION!
Make sure that the machine is switched off.
At the bottom, on the traverse bar (1) of the COT insert,
you will find a 3-fold compressed air distributor (2). One
of the connections on the 3-fold distributor is closed with
a plug.
► Remove the plug.
► Connect the compressed air hose with the QSM-4
connector.
Fitting the holder
► Fit the holder (2), using the two screws ISO4762-
M6x14-A2-70 [03043125-xx] provided, to the trav-
erse bar (1).
When tightening the screws, press the holder up-
wards, against the edge (3).