00198140-01_UM_JTF-ML_TX12_de_en.pdf - 第93页
Setting up and Commissioning 4.2.10 Fitting the SIPLACE JTF-ML Adapter Retrofitting in the SI PLACE TX-Series JEDEC Tray Feeder (JTF-ML) 93 4.2.10 4 . 2 . 1 0 F it t in g t h e S I P L A C E J T F - M L A d a p t e r Fit…
Setting up and Commissioning
Retrofitting in the SIPLACE TX-Series 4.2.9 Fitting the Machine Protective Features
92 JEDEC Tray Feeder (JTF-ML)
4.2.9
4.2.9 Fitting the Machine Protective Features
Fitting the Machine Protective Features
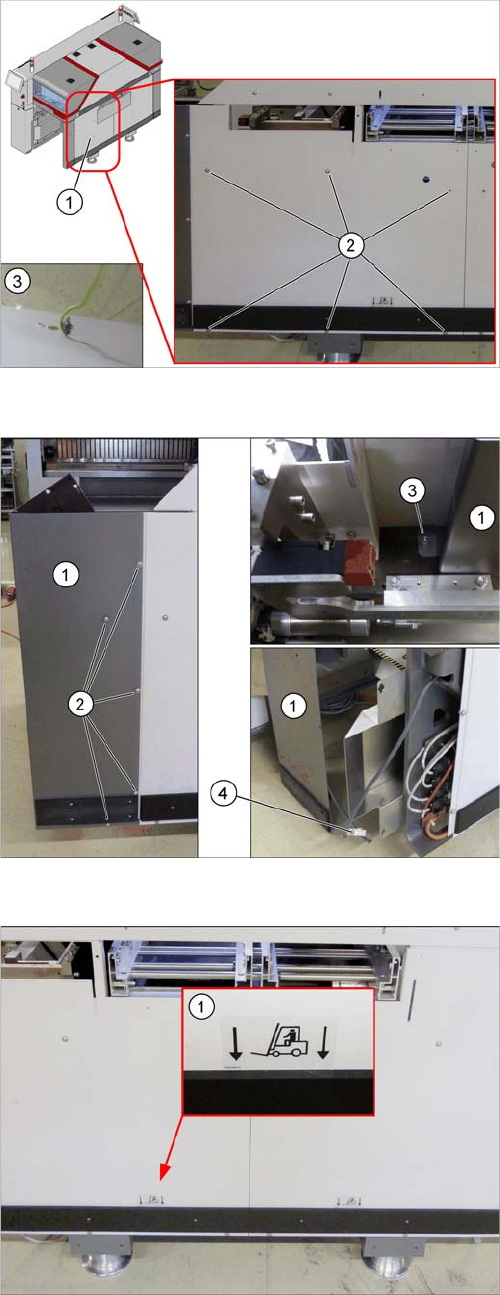
Fitting the side cover
► Fasten the ground cable (3).
► Fasten the JTF side cover (1) with six ISO7380-
2M6x8-A2-70 [03099592-xx] (2) screws.
Fitting the corner cover
► Connect the connector (4) with the machine.
► Fasten the corner cover (1) on the outside with
five (2) and on the inside with one ISO7380-2M6x8-
A2-70 [03099592-xx] (3) screw.
Attaching the label
► If not present: attach the fork lift label (1)
[03051260-xx] to the side cover.
Setting up and Commissioning
4.2.10 Fitting the SIPLACE JTF-ML Adapter Retrofitting in the SIPLACE TX-Series
JEDEC Tray Feeder (JTF-ML) 93
4.2.10
4.2.10 Fitting the SIPLACE JTF-ML Adapter
Fitting the SIPLACE JTF-ML Adapter
WARNING
Second person
We highly recommend that you enlist the help of a second person when fitting the SIPLACE
JTF-ML to the machine.
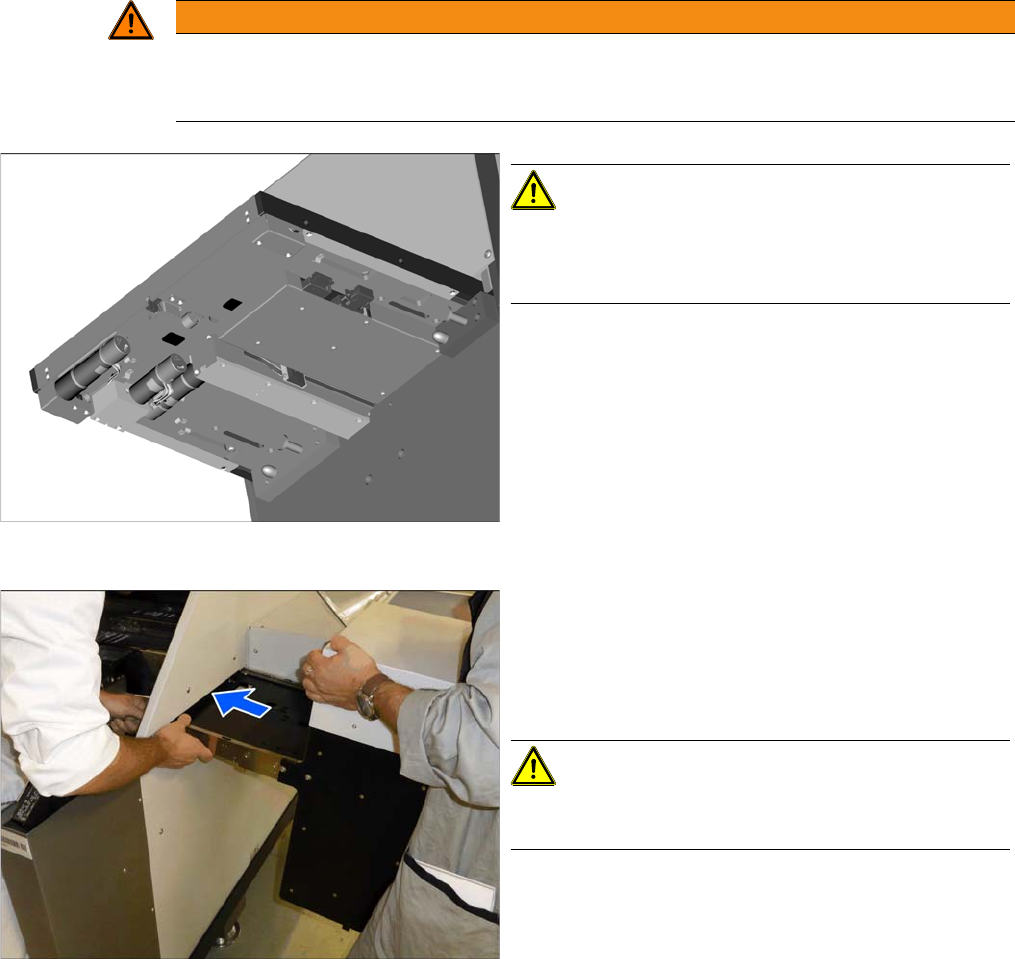
Underside of the SIPLACE JTF-ML
CAUTION!
The light barriers and other sensitive components are lo-
cated on the underside of the SIPLACE JTF-ML.
Make sure you do not damage these!
Inserting the SIPLACE JTF-ML
► Hold the SIPLACE JTF-ML as shown.
► Insert the SIPLACE JTF-ML into the machine. While
threading it through, make sure that you do not dam-
age the components on the underside of the
SIPLACE JTF-ML.
CAUTION!
Do not let go of the SIPLACE JTF-ML until it has been
fastened firmly to the holder (see next step).
Setting up and Commissioning
Retrofitting in the SIPLACE TX-Series 4.2.11 Preparing the Component Trolley
94 JEDEC Tray Feeder (JTF-ML)
4.2.11
4.2.11 Preparing the Component Trolley
Preparing the Component Trolley
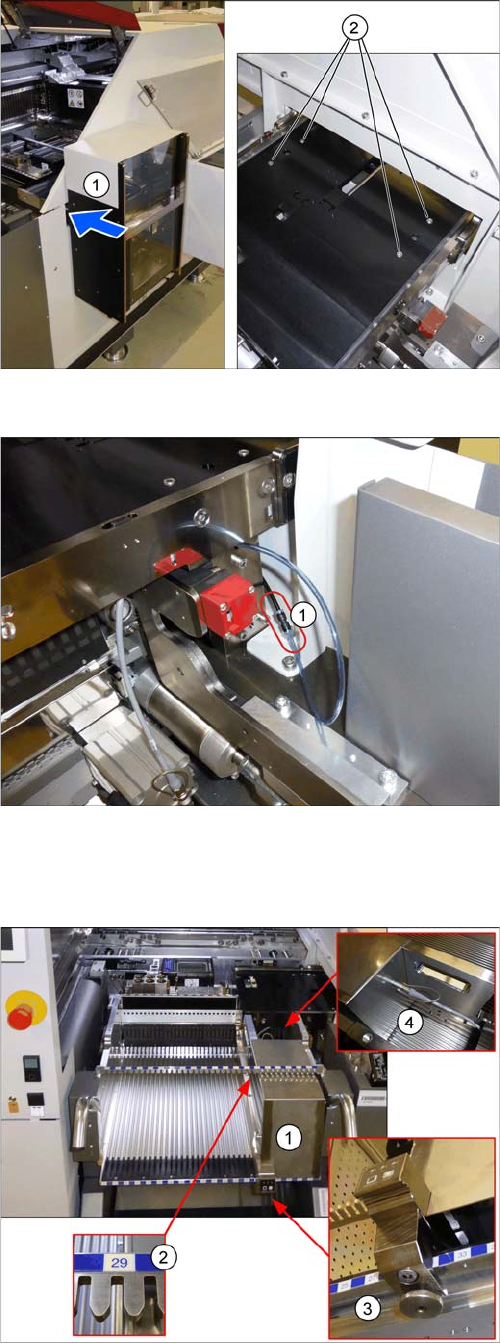
Mounting the SIPLACE JTF-ML
► Fasten the SIPLACE JTF-ML (1) to the holder with
four screws (2).
Connecting the compressed air hose
► Connect the compressed air hose (1).
Preparing the component trolley
► Fit the SIPLACE JTF-ML FDK (1) into place on track
29 (2) of the SIPLACE JTF component trolley.
► Lock the (3) SIPLACE JTF-ML FDK.
► Move the SIPLACE JTF component trolley into the
machine.
► Connect (4) the SIPLACE JTF-ML to the SIPLACE
JTF-ML FDK.