00191025-01.pdf - 第82页
5 Placement SIPLACE 80S /F/G User’s Manual 5.2 Loading Cluster Data Edition 12/96 from Software Version SR.009.xx 5 - 6 The data are now loade d and the m ain menu a ppears. In the second box of the mai n menu the name o…
SIPLACE 80S/F/G User’s Manual 5 Placement
Edition 12/96 from Software Version SR.009.xx 5.2 Loading Cluster Data
5 - 5
5.2 Loading Cluster Data
NOTE
The menus and activities described in this section are only needed and enabled when no line computer is
connected and when the function "without LC" has been selected in the selection menu "LC mode." If a line
computer is connected, cluster control is effected via the line computer.
5.2.1 Initial Loading of Cluster Data after Switching On the Machine
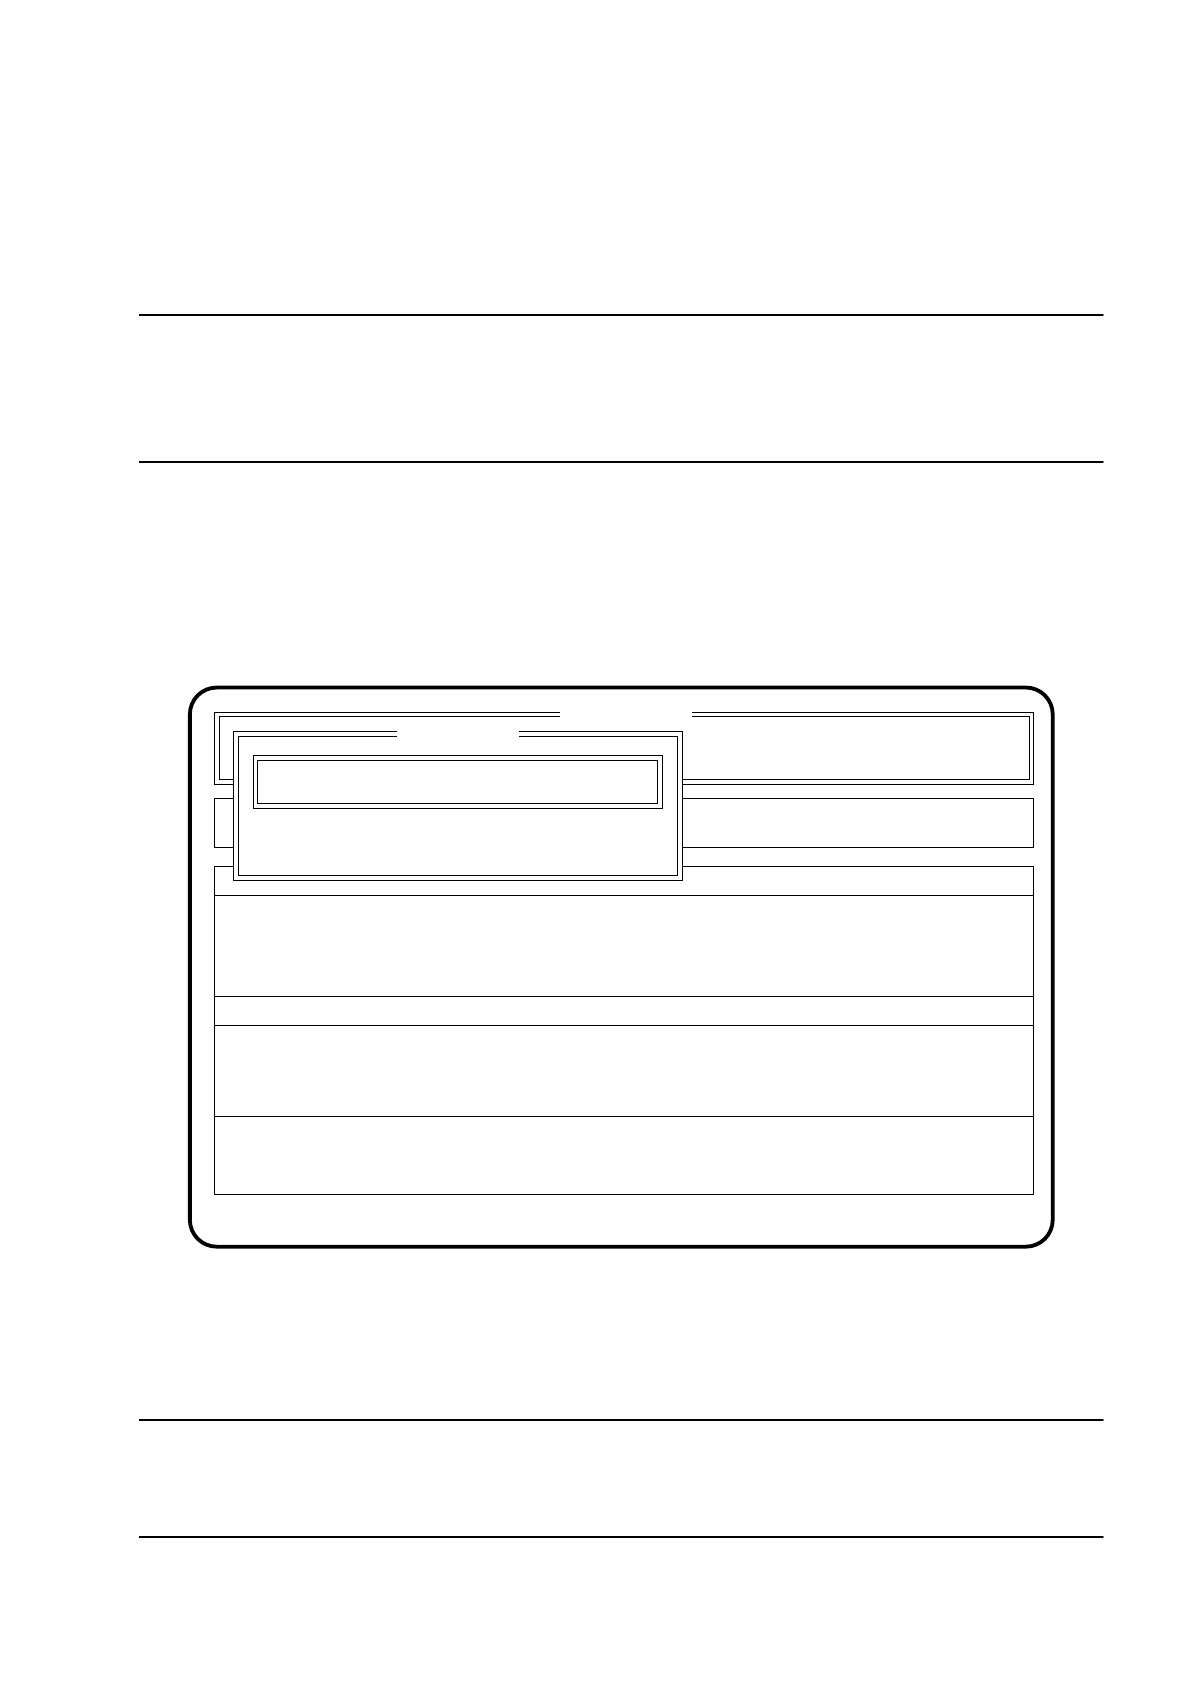
After the machine has started, the menu "New cluster" appears automatically.
Fig. 5.2.1
●
Using the keyboard, enter the name of the cluster which is to be processed.
●
Confirm the input using the
Return key
("State:" Wait for data).
NOTE
Set-up and cluster have to be present on the hard disk together with the corresponding package form and
fiducial data.
SI 80 V 9.x
Rüstung :
Machine options
Software options
Single functions
Vision system
Error
State
Action
:
:
:
Visionsystem
Neuer Nutzen...
Schnittst. GESP.
Cluster name: TEST
Esc: abort Ret: input
New cluster
New cluster ...
Wait for data
5 Placement SIPLACE 80S/F/G User’s Manual
5.2 Loading Cluster Data Edition 12/96 from Software Version SR.009.xx
5 - 6
The data are now loaded and the main menu appears. In the second box of the main menu the name of the
cluster and of the set-up are displayed.
●
Press the
Esc key
if you wish to quit the menu without executing an input.
5.2.2 Changing Clusters
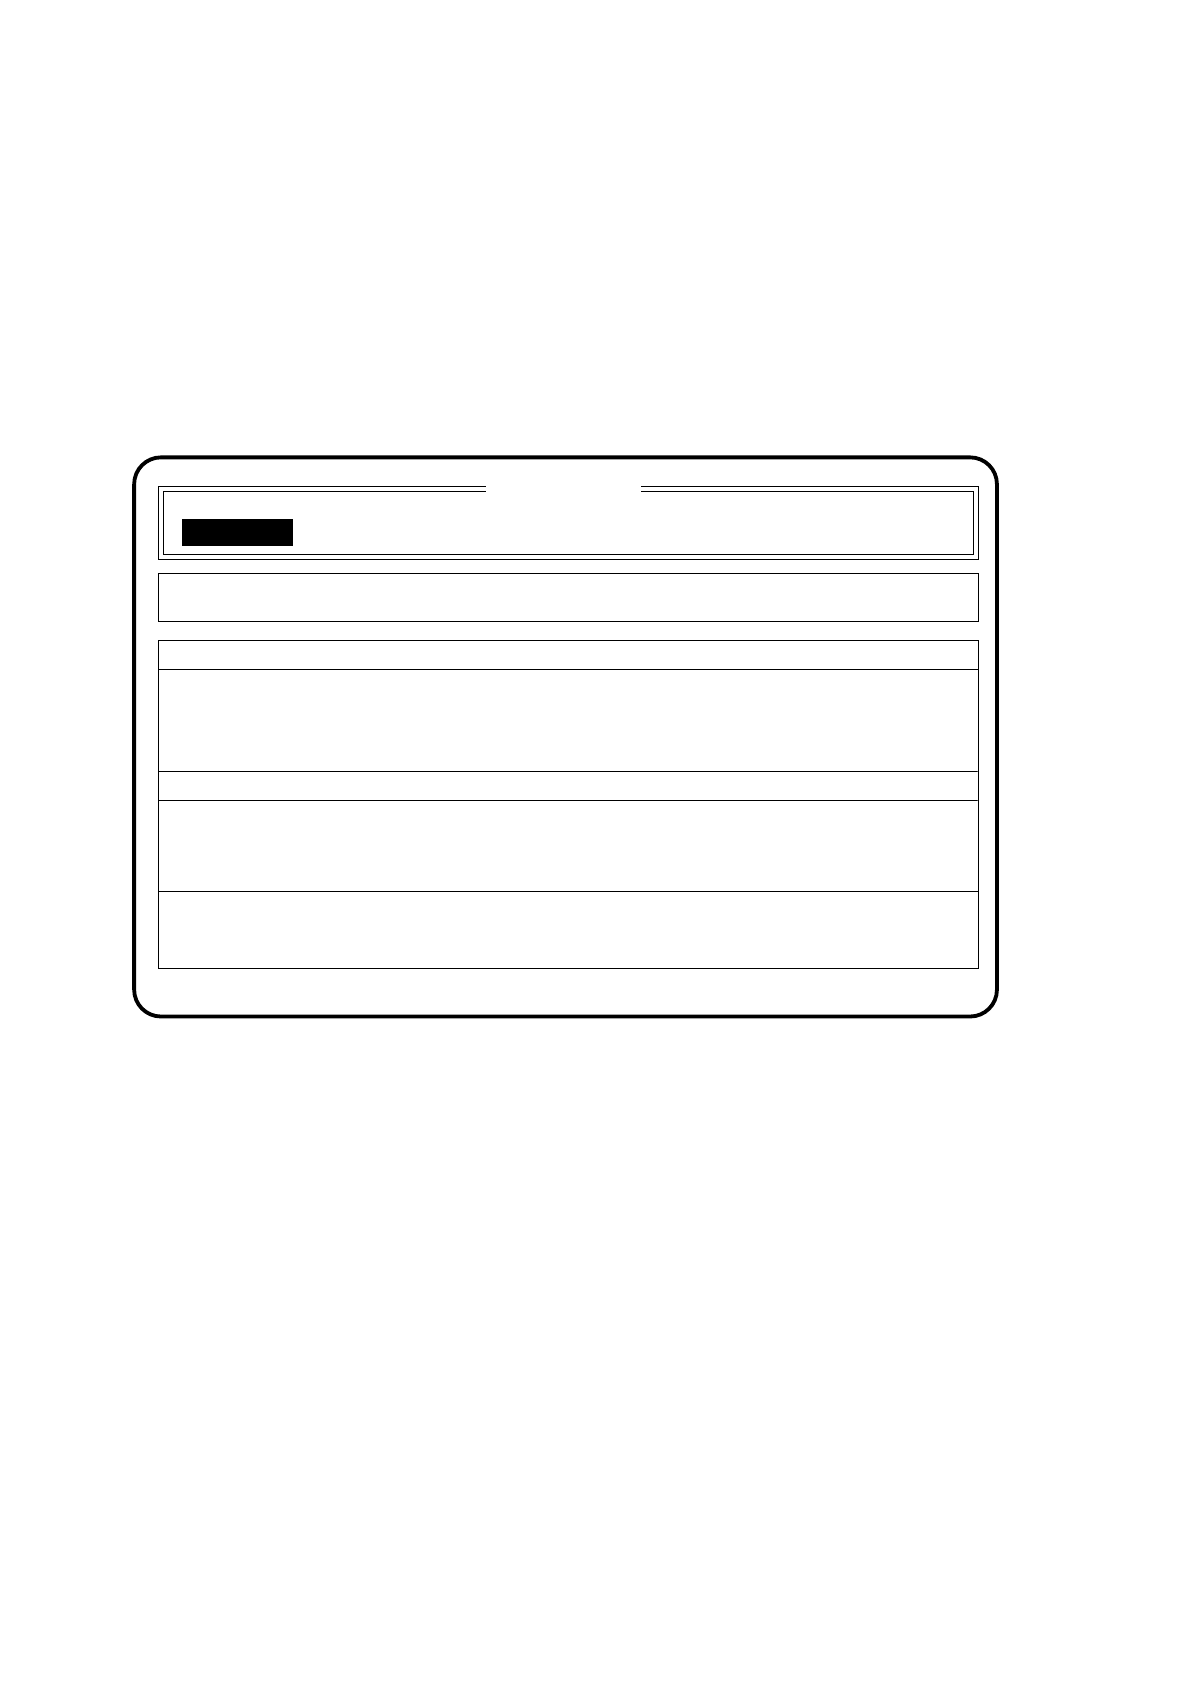
Fig. 5.2.2
●
If you wish to change the cluster, use the
cursor keys
to position the cursor bar over the menu item "New
cluster".
●
When the menu item "New cluster" is shown in inverse video, press the
Return key
.
The menu "New cluster" appears on the screen, as shown in Section 5.2.1.
●
Using the keyboard, enter the name of the new cluster.
●
Confirm the input using the
Return key
("State" Wait for data).
The data are loaded and the main menu appears on the screen. The name of the new cluster is shown in
the second box of the main menu.
SI 80 V9.x
Cluster:
Set-up :
Component feeding Display errors
Confirm errors
Machine options
Software options
Single functions
Vision system
Error
State
Action
:
:
: New cluster ...
New cluster
Wait for data
TEST
TEST
SIPLACE 80S/F/G User’s Manual 5 Placement
Edition 12/96 from Software Version SR.009.xx 5.3 Options
5 - 7
5.3 Options
5.3.1 Machine Options
With the "operator” user class it is possible to find out from the menu "Machine options” which machine
options have been activated.
In the menu "Machine options" you have the possibility, once the line engineer password has been entered,
of switching sub-functions of the machine ON or OFF.
Using the
cursor keys
select the menu item "Machine options" within the main menu to call up the menu
"Machine options." Then press the
Return key
. The menu "Machine options" is then shown on the screen.
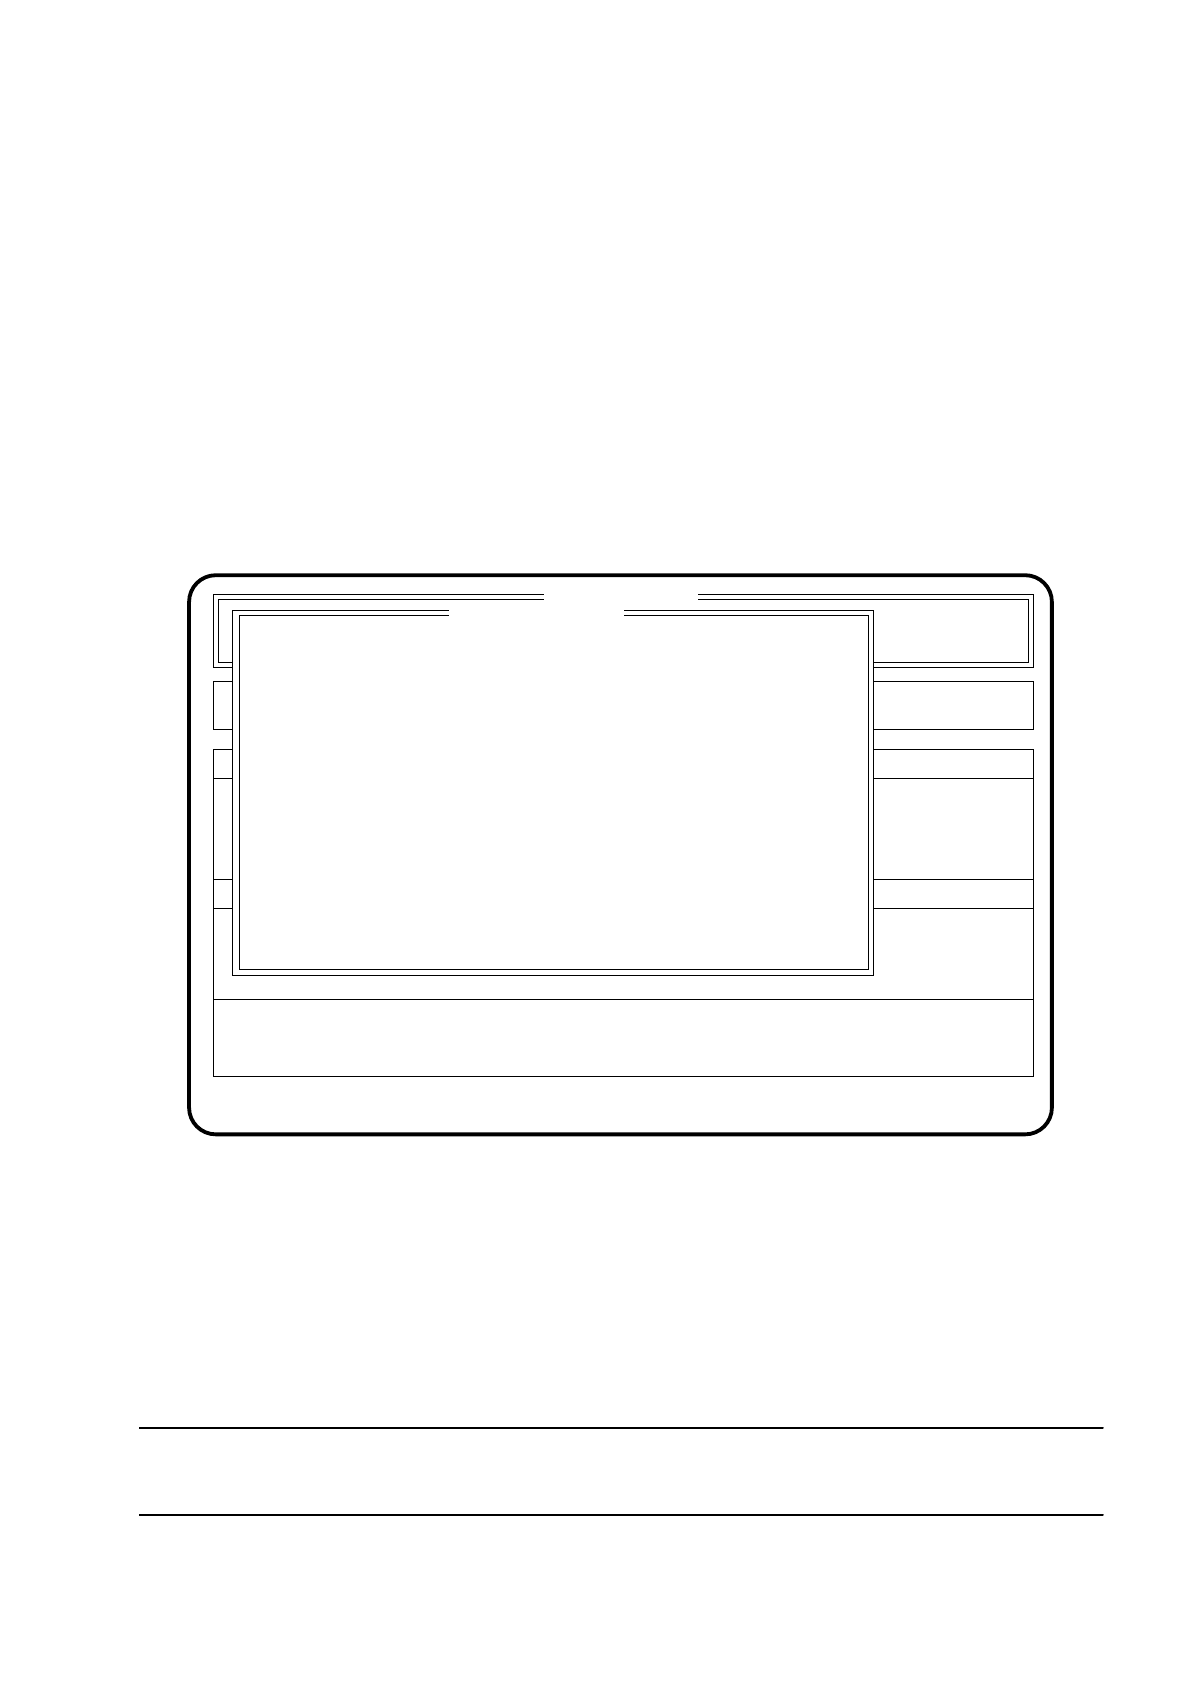
Fig. 5.3.1
Press the
Esc key
to quit the menu. The program returns to the main menu.
To change function states proceed as follows (once the line engineer password has been entered):
●
Using the
cursor keys
position the cursor bar over the function which to be manipulated.
●
Press the
spacebar
to change the state (active = (X), not active = ( ) ) of the function.
●
Press the
Return key
to accept the input.
NOTE
The menu only displays functions which have been configured in the machine data.
SI 80 V 9.x
Nutzen:
Rüstung :
Single functions
Vision system
Error
State
Action
:
:
:
Machine options
Placement
Position recognition
Ink spot check
Optical centering 1
Optical centering 2
Mechanical centering 1
Mechanical centering 2
Interface blocked
( X )
( X )
( )
( )
( )
( )
( )
( X )
Esc: abort Blank: select Ret: input
Refill check
( X )
Coplanarity (80F only)( )
( )
( )
Conveyor position recognition
Ceramic substrate centering