00198439-03_SIPLACE_JTF-ML2_TX12_V1-V2_DE_EN_CHS.pdf - 第140页
4 Setting up and commissioning 4.2 Retrofitting in the SIPLACE TX-Series 140 User Manual / Bedienungsanleitung / 用户手册 SIPLACE TX V1/V2 Series JEDEC Tray Feeder (JTF-ML2) 11/2019 4.2.5.8 Mounting the conveyor Fig.81: Mou…

4 Setting up and commissioning
4.2 Retrofitting in the SIPLACE TX-Series
User Manual / Bedienungsanleitung / 用户手册 SIPLACE TX V1/V2 Series JEDEC Tray Feeder (JTF-ML2) 11/2019 139
Fig.79: Hooking in the tower
► Hook in the tower at the SIPLACE
JTF‑ML2 adapter.
The bolts(1) have to be at the
hooks(2).
Fig.80: Tighten the tower
► Fasten the tower with two screws(1)
ISO7379 - 10x25-12.9 on the
SIPLACE JTF‑ML2 adapter.
4 Setting up and commissioning
4.2 Retrofitting in the SIPLACE TX-Series
140 User Manual / Bedienungsanleitung / 用户手册 SIPLACE TX V1/V2 Series JEDEC Tray Feeder (JTF-ML2) 11/2019
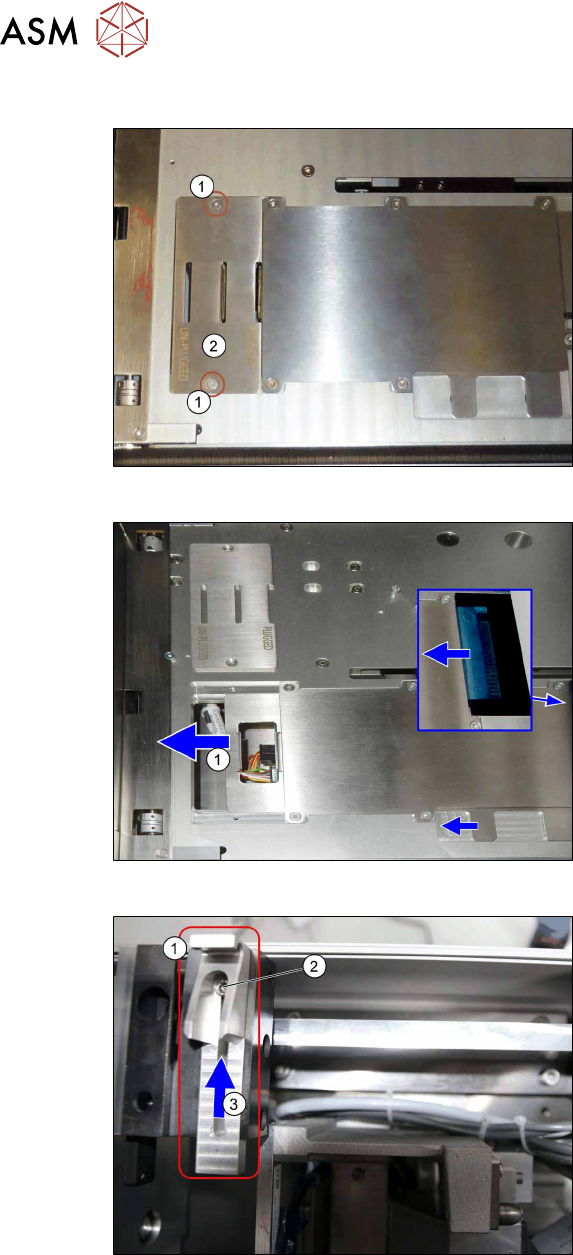
4.2.5.8 Mounting the conveyor
Fig.81: Mounting the conveyor 1
► Check if the screws(1) and the
cover(2) has been removed.
If not: Remove the screws and the
cover.
Fig.82: Mounting the conveyor 2
► Check if the plate(1) has been moved
to the left.
If not: Push the plate until end position
to the left.
Fig.83: Mounting the conveyor 3
► Loosen the screw(2) at conveyor
pivot(1).
► (3) Push the conveyor pivot until end
position towards the tower.
► Tighten the screw(2).
4 Setting up and commissioning
4.2 Retrofitting in the SIPLACE TX-Series
User Manual / Bedienungsanleitung / 用户手册 SIPLACE TX V1/V2 Series JEDEC Tray Feeder (JTF-ML2) 11/2019 141
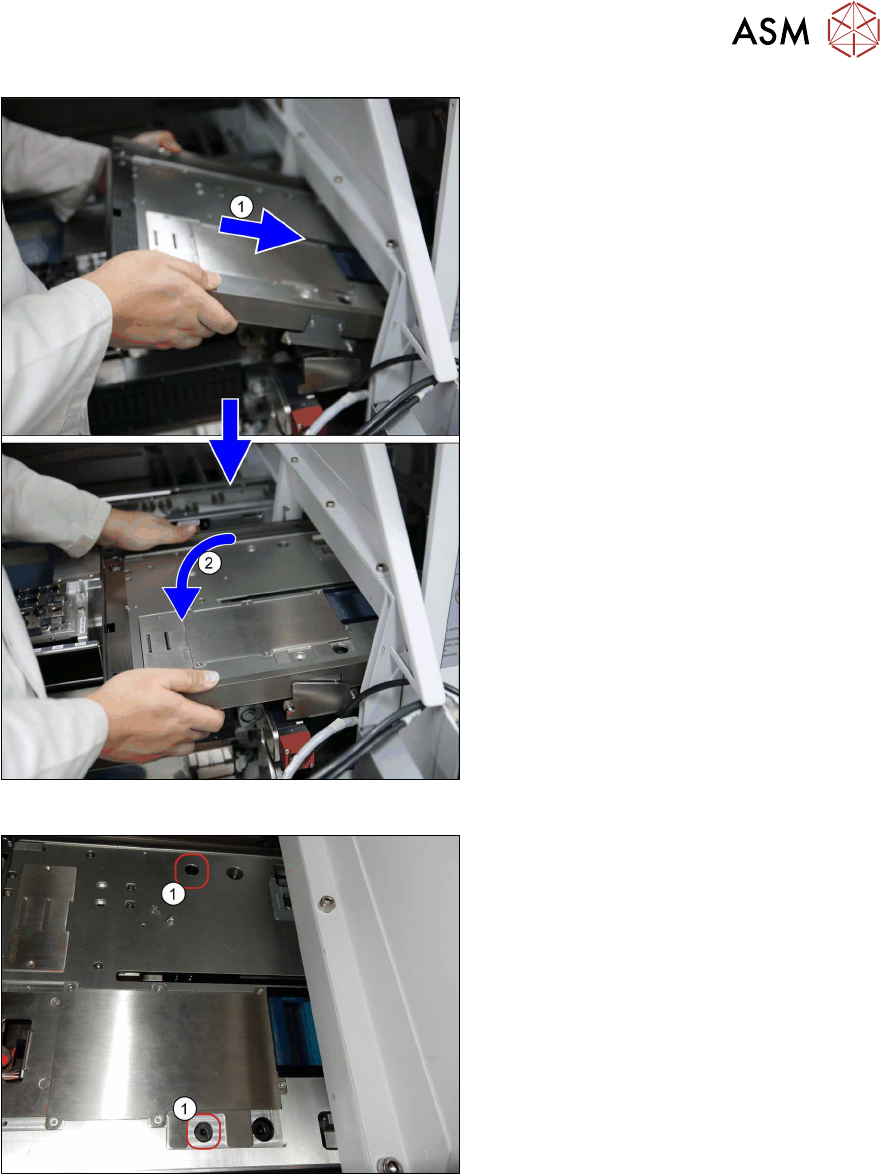
Fig.84: Mounting the conveyor 4
► Before mounting the conveyor, loosely
insert the cables [03134469‑xx] and
[03134468‑xx] into the mounting
bracket (see also next figure).
► (1) Insert the conveyor. Make sure that
it fits correctly into the conveyor pivot.
► (2) Swing the conveyor down onto the
SIPLACE JTF-ML2 adapter.
Fig.85: Mounting the conveyor 5
► Fasten the conveyor with two
screws(1) (ISO7379 - 8x16-12.9) on
the SIPLACE JTF-ML2 adapter.