00198505-01_SM_SIPLACE_SmartFeeder_EN.pdf - 第157页
8 Repairs to SmartFeeder 2x8 mm X 8.7 Drives Service Manual SIPLACE SmartFeeder 4 - 104 mm X 11/2017 157 Feeder mod- ule Position Number Item no. Designation SmartFeeder 2x8mmX 1 03095487-xx ETP gear set foil right X 2…
8 Repairs to SmartFeeder 2x8 mm X
8.7 Drives
156 Service Manual SIPLACE SmartFeeder 4 - 104 mm X 11/2017
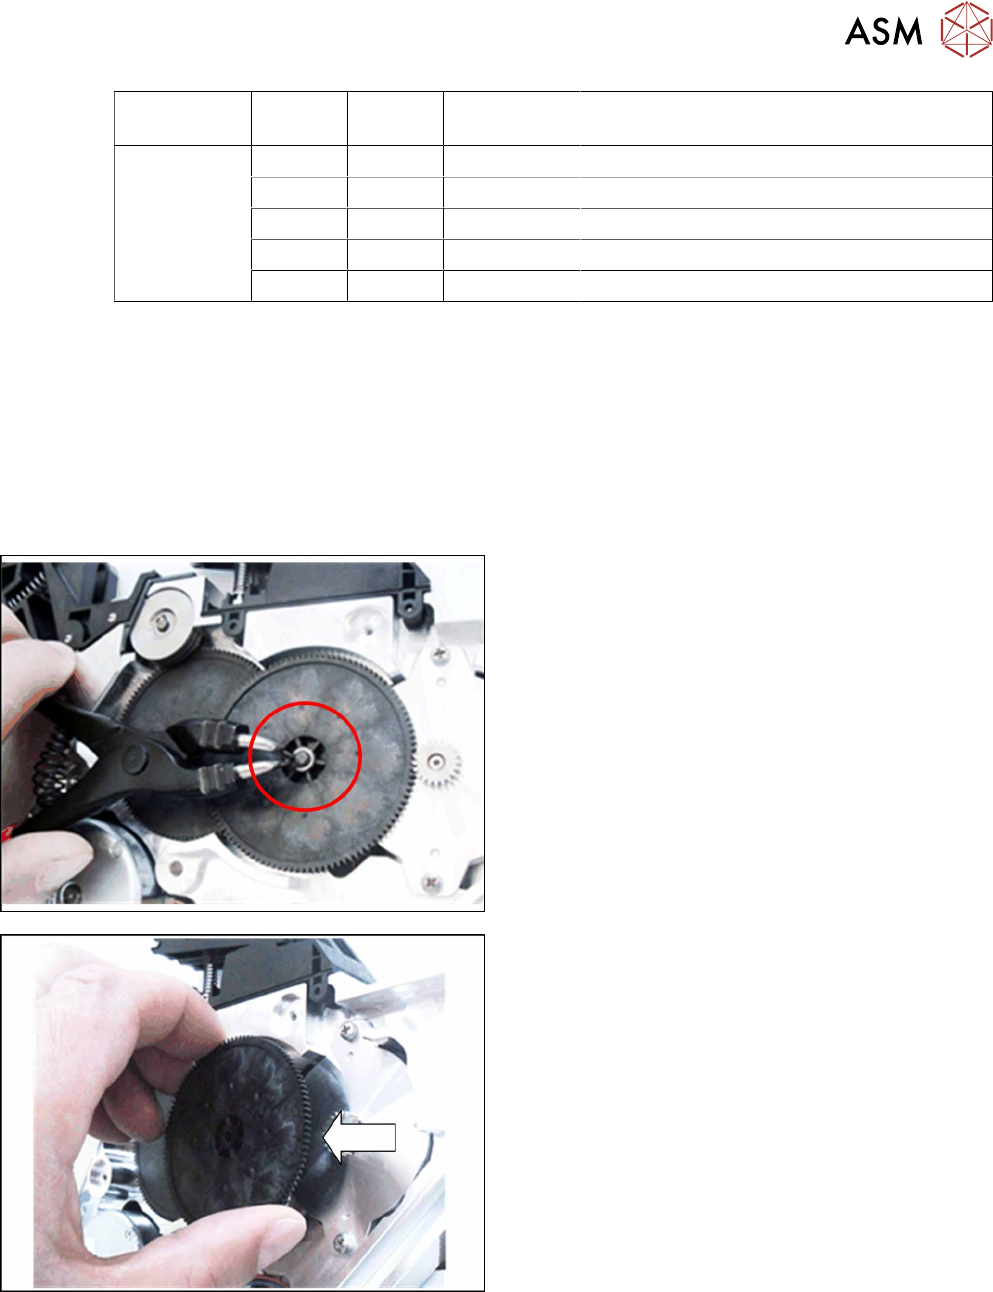
► Connect the new toothed wheel 4 onto the axis.
Make sure that the teeth of toothed wheel 4 cor-
rectly engage with the teeth of the shifted gear.
► Place the washer onto the axis for toothed wheel
4.
► Fasten the circlip to the axis of toothed wheel 4.
Use the relevant circlip pliers for this.
► Fasten the left side cover (see 8.3.2 "Fitting the
Left Side Cover" [}136]).
8.7.2.2 Shifted gear foil drive right (lane 2)
Required spare parts
Fig.49: Gear set foil X 2x8mm right [03095487-xx]
The spare parts kit "ETP gear set foil right X 2x8mm" [03095487-xx] contains all the parts in the fol-
lowing table, in the quantities listed.
8 Repairs to SmartFeeder 2x8 mm X
8.7 Drives
Service Manual SIPLACE SmartFeeder 4 - 104 mm X 11/2017 157
Feeder mod-
ule
Position Number Item no. Designation
SmartFeeder
2x8mmX
1 03095487-xx ETP gear set foil right X 2x8mm
1 1 03071607-xx Shifted gear 1 foil right PA /X2x8
2 1 03071605-xx Toothed wheel 4 foil PA /X2x8
3 3 03083028-xx DIN 988-3x6x0.1-1.4310 (washer)
4 2 00305726-xx DIN 471-3x0.4-C67 (circlip)
Required tools
●
Phillips screwdriver 60 Ncm
●
TORX screwdriver 60 Ncm, size T8
●
Circlip pliers for outer rings 3-10 mm
●
Tweezers
●
Polylub GLY 801 (grease)
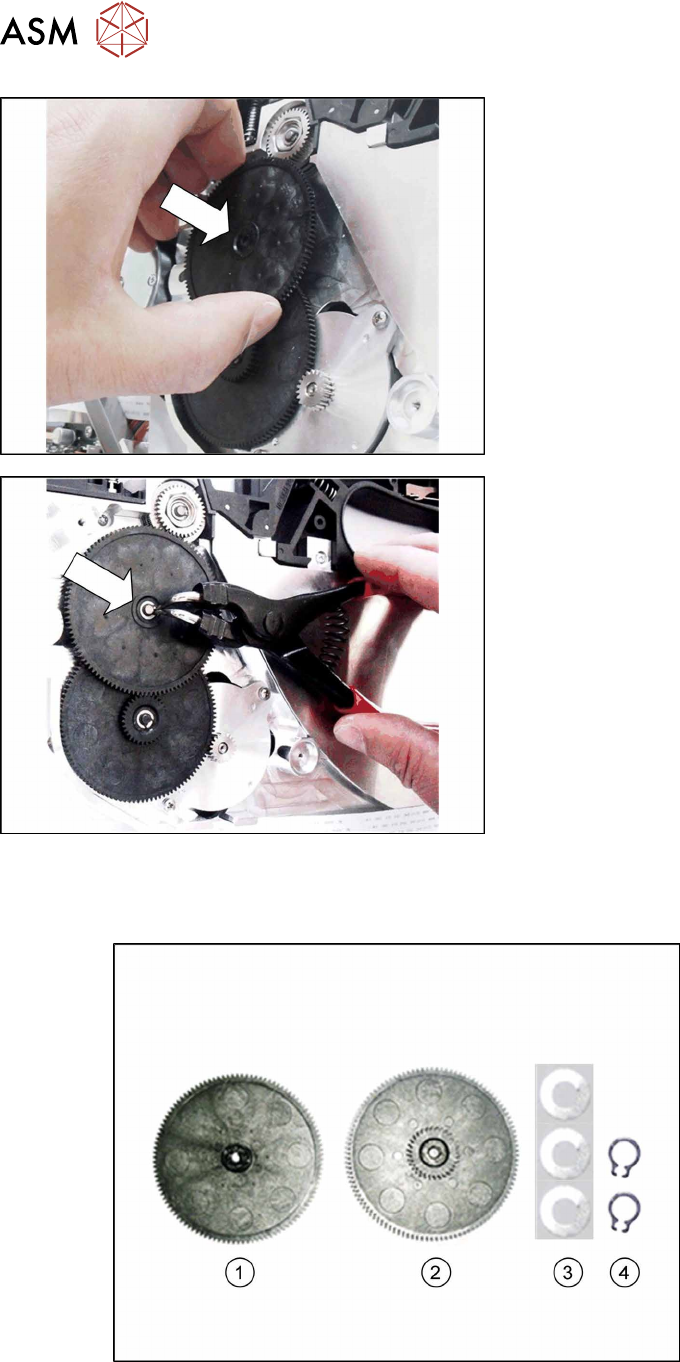
Removing shifted gear 1 foil right
► Place the feeder on a stable, level and clean sur-
face.
► Remove the right side cover (see 8.3.3 "Remov-
ing the Right Side Cover" [}136])
► Remove the circlip from the axis of shifted gear 1.
Use the relevant circlip pliers for this.
► Remove the washer.
► Pull shifted gear 1 straight up (vertically) and off
the axis.
8 Repairs to SmartFeeder 2x8 mm X
8.7 Drives
158 Service Manual SIPLACE SmartFeeder 4 - 104 mm X 11/2017
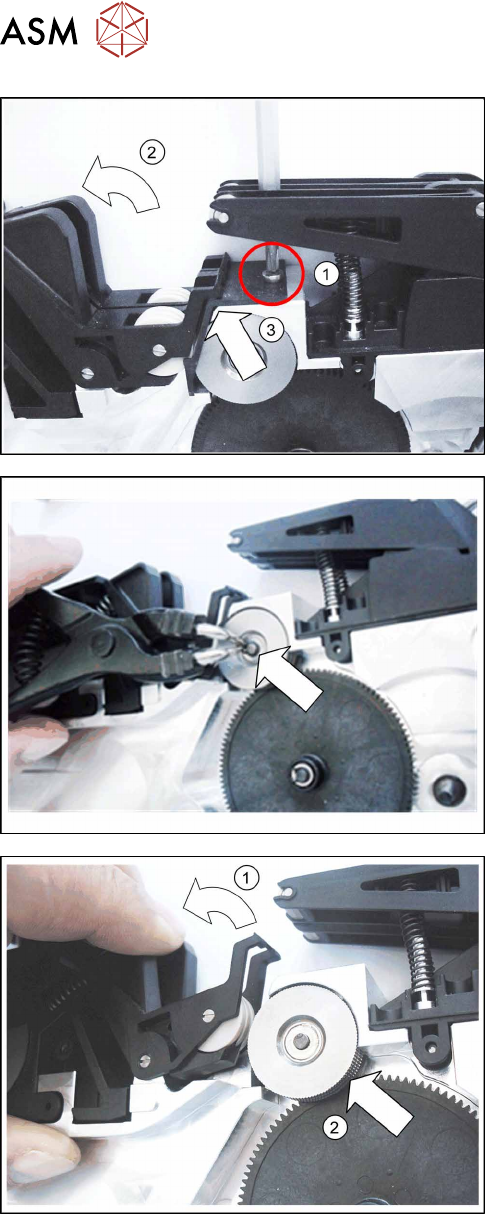
► Loosen the screw on the wiper plate.(1)
► Press the two rockers towards the back. (2)
► Remove the wiper plate.(3)
► Remove the circlip from the axis on the tamp
wheel.
Use suitable circlip pliers for this.
► Remove the washer.
► Press the right rocker towards the back.(1)
► Pull the tamp wheel off the axis.(2)