00198505-01_SM_SIPLACE_SmartFeeder_EN.pdf - 第52页
6 Repairs to SmartFeeder 4 mm X 6.8 Foil rocker 52 Service Manual SIPLACE SmartFeeder 4 - 104 mm X 11/2017 6.8.2.2 Replacing the creasing roller and roller axis Removing individual parts ► Pull the creasing roller out of…
6 Repairs to SmartFeeder 4 mm X
6.8 Foil rocker
Service Manual SIPLACE SmartFeeder 4 - 104 mm X 11/2017 51
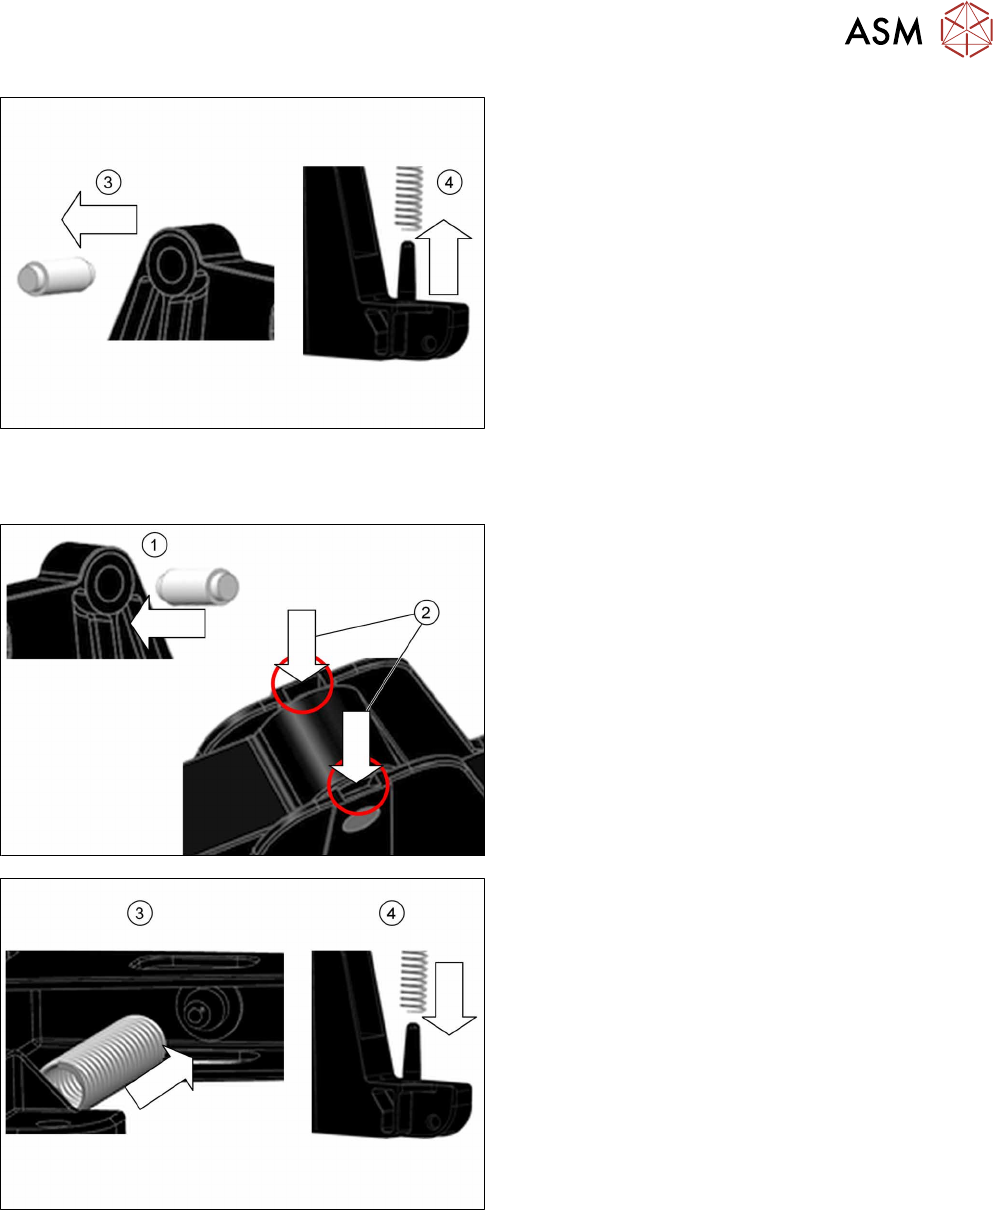
► Push the axis sideways out of the foil rocker.(3)
► Pull the pressure spring up and off the pin.(4)
The foil rocker has now been dismantled and defective parts can be replaced.
Fitting individual parts
► Insert the axis into the foil rocker.(1)
► Push the foil rocker axis from above, through the
little slits on the left and right, into the retaining
plates of the rocker bearings, as far as the
stop.(2)
Make sure that the axis of the foil rockers en-
gages on the fixing brackets on the left and right.
► Insert the end of the pressure spring into the pins
on the underside of the foil rocker.(3)
► Insert the other end of the pressure spring into
the pins on the rocker bearings.(4)
6 Repairs to SmartFeeder 4 mm X
6.8 Foil rocker
52 Service Manual SIPLACE SmartFeeder 4 - 104 mm X 11/2017
6.8.2.2 Replacing the creasing roller and roller axis
Removing individual parts
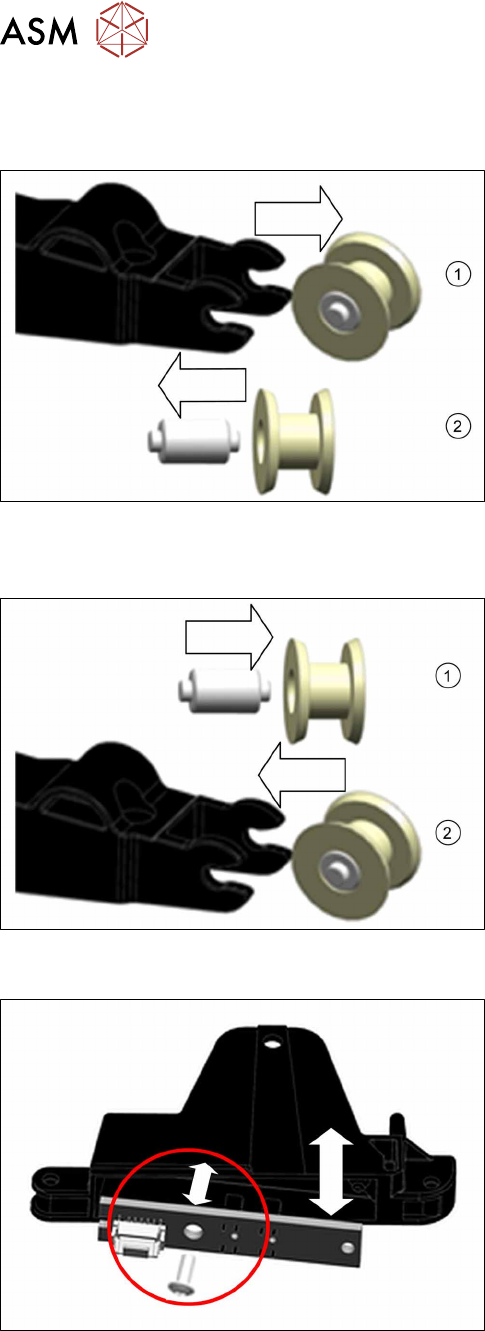
► Pull the creasing roller out of the foil rocker, to-
gether with the roller axis.(1)
► Push the roller axis sideways out of the creasing
roller.(2)
Defective parts can now be replaced.
Fitting individual parts
► Insert the roller axis sideways into the creasing
roller.(1)
► Insert the creasing roller into the foil rocker, to-
gether with the roller axis.(2)
6.8.2.3 Replacing the light barrier transmitter
► Loosen the foil rocker (see 6.8.1.1 "Removing the
Foil Rocker Assembly" [}48]).
► Remove the screw, which fastens the light barrier
transmitter to the rocker bearing unit.
► Pull the light barrier transmitter downwards and
out of the rocker bearing unit.
► Insert the new light barrier transmitter from below
into the rocker bearing unit, as shown.
► Screw the light barrier transmitter to the rocker
bearing unit.
► Fasten the foil rocker (see 6.8.1.2 "Fitting the Foil
Rocker Assembly" [}49]).
6 Repairs to SmartFeeder 4 mm X
6.9 Rocker
Service Manual SIPLACE SmartFeeder 4 - 104 mm X 11/2017 53
6.8.2.4 Replacing the rocker bearing unit
► Loosen the foil rocker unit (see 6.8.1.1 "Removing the Foil Rocker Assembly" [}48]).
► Remove the foil rocker and the pressure spring (see6.8.2.1 "Replacing the foil rocker, axis and
pressure spring" [}50]).
► Remove the light barrier transmitter (see 6.8.2.3 "Replacing the light barrier transmit-
ter" [}52]).
The rocker bearing unit has now been isolated and can be replaced.
► Fasten the light barrier transmitter to the new rocker bearing unit (see 6.8.2.3 "Replacing the
light barrier transmitter" [}52]).
► Fasten the foil rocker (see 6.8.2.1 "Replacing the foil rocker, axis and pressure spring" [}50]).
► Fasten the foil rocker unit (see 6.8.1.2 "Fitting the Foil Rocker Assembly" [}49]).
6.9 Rocker
Required spare part:
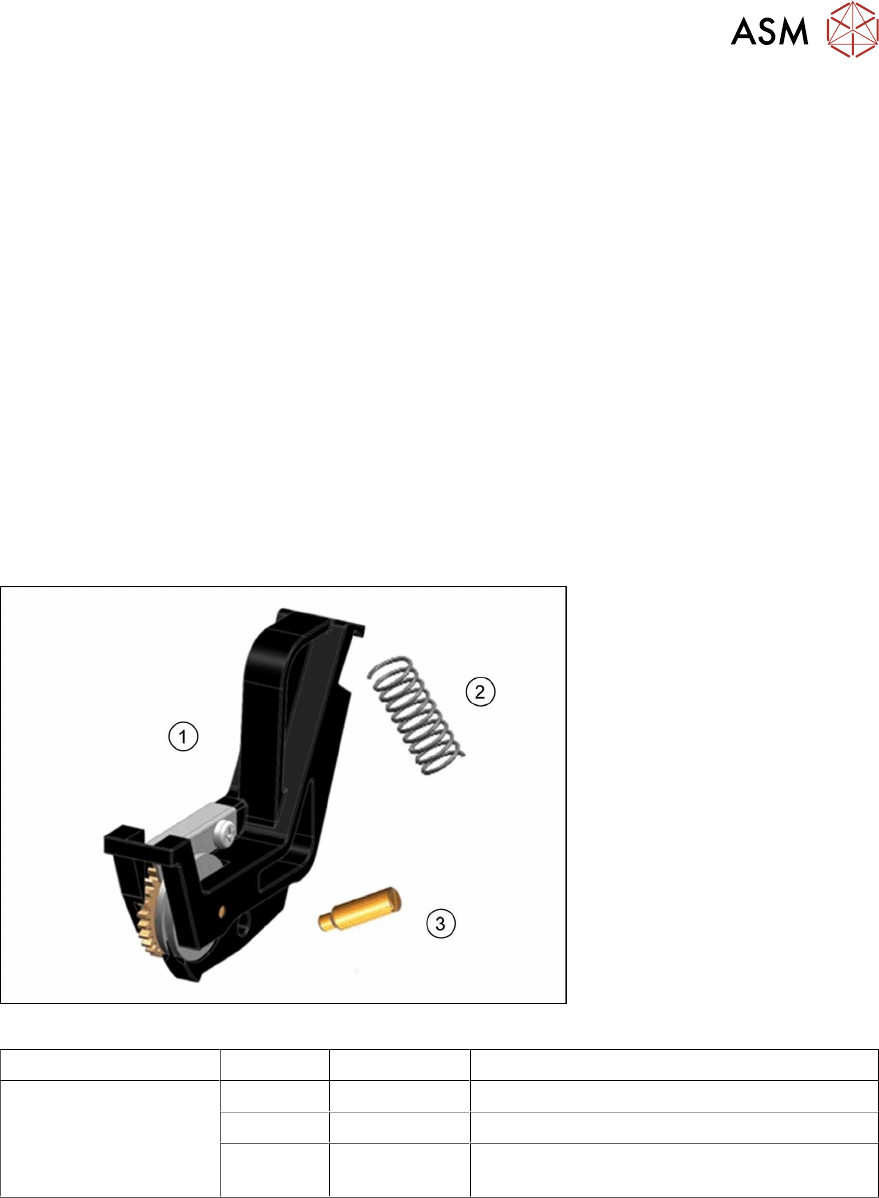
Fig.12: Rocker for foil disposal assy. X4Smart
Feeder module Position Item no. Designation
SmartFeeder 4mm X 1 03135376Sxx Rocker for foil disposal assy. X4Smart
2 03136794Sxx Compressed spring rocker X4Smart
3 03122867Sxx Bearing shaft, bronze, tamp wheel rocker
X4Smart
Tools required:
●
Flat-bladed screwdriver size 1