00198505-01_SM_SIPLACE_SmartFeeder_EN.pdf - 第272页
10 Repairs to SmartFeeder 24 - 104 mm X 10.9 Rocker 272 Service Manual SIPLACE SmartFeeder 4 - 104 mm X 11/2017 ► Insert the new pressure spring with the rear part into the (new) spring holder. ► Push the pressure spring…
10 Repairs to SmartFeeder 24 - 104 mm X
10.9 Rocker
Service Manual SIPLACE SmartFeeder 4 - 104 mm X 11/2017 271
SmartFeeder 44mmX 1 03120770-xx Stuffing gear interlocked complete rocker /
X44Smart
2 03120767-xx Rocker wiper X44Smart
3 03120773Sxx Rocker axis X44
SmartFeeder 56mmX 1 03120660-xx Stuffing gear interlocked complete rocker /
X56Smart
2 03120658-xx Rocker wiper X56Smart
3 03120661Sxx Rocker axis X56
SmartFeeder 72mmX 1 03115630-xx Stuffing gear interlocked complete rocker /
X72Smart
2 03115981-xx Rocker wiper X72Smart
3 03115977-xx Rocker axis X72
SmartFeeder 88mmX 1 03120969-xx Stuffing gear interlocked complete rocker /
X88Smart
2 03120941-xx Rocker wiper X88Smart
3 03120945-xx Rocker axis X88
SmartFeeder 104mmX 1 03121125-xx Stuffing gear interlocked complete rocker /
X104Smart
2 03121123-xx Rocker wiper X104Smart
3 03121124-xx Rocker axis X104
Required tools
●
TORX screwdriver size T8, 0.6Nm
10.9.2.1 Replacing the pressure spring and spring support
► Remove the right side wall (see 10.3.3 "Rear side
wall on the right" [}231])
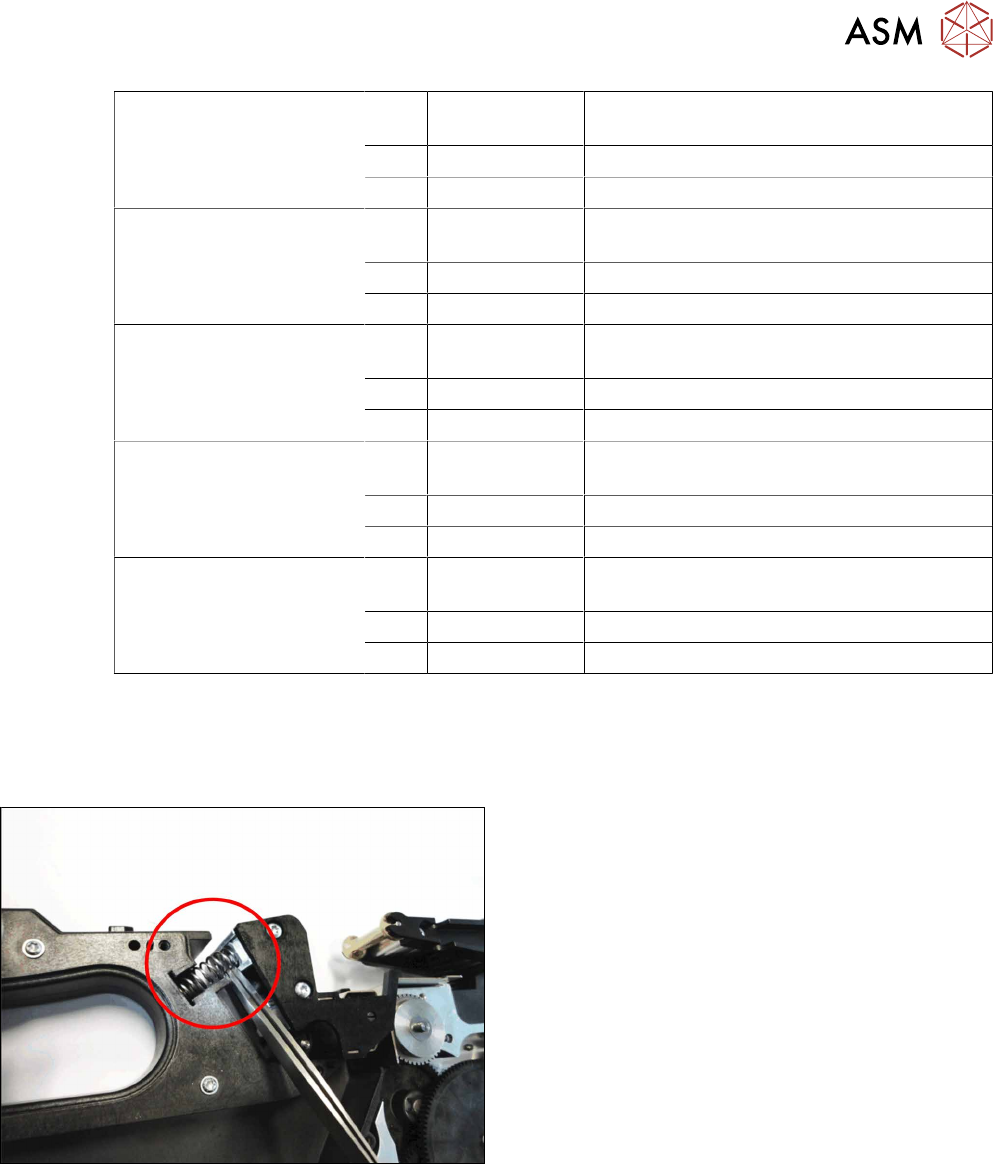
► Remove the pressure spring.
To do this, use a pair of tweezers to pull the pres-
sure spring and spring holder sideways and out
of the feeder module base unit.
10 Repairs to SmartFeeder 24 - 104 mm X
10.9 Rocker
272 Service Manual SIPLACE SmartFeeder 4 - 104 mm X 11/2017
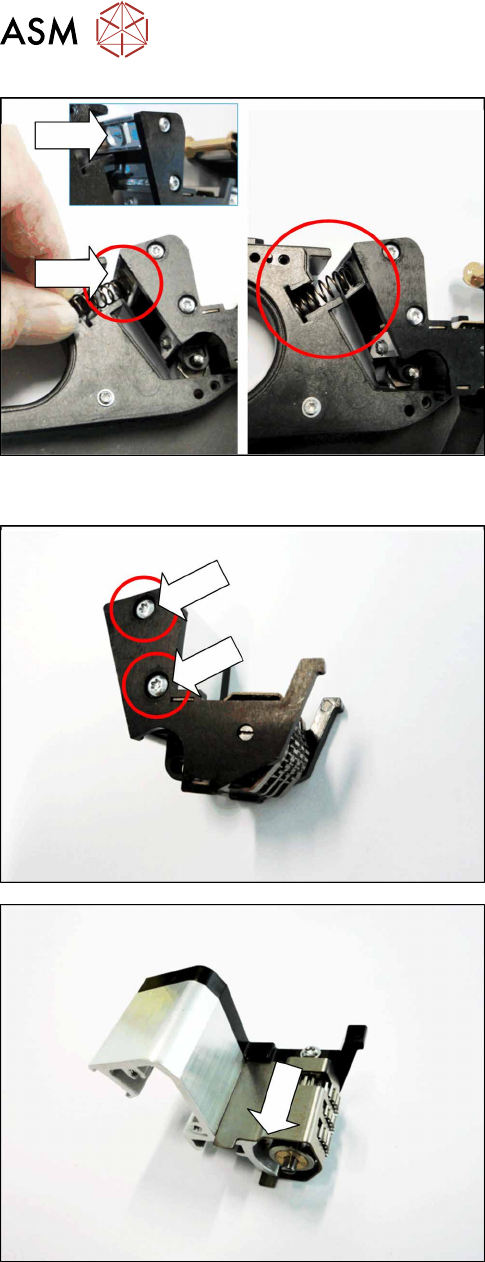
► Insert the new pressure spring with the rear part
into the (new) spring holder.
► Push the pressure spring then with the front part
first into the fitting on the rocker.
► Then push the rear part of the pressure spring
with spring holder sideways into the feeder mod-
ule base unit.
► Fasten the right rear side wall (see 10.3.3 "Rear
side wall on the right" [}231])
10.9.2.2 Replacing the tamp wheel, wiper and roller axis
► Remove the rocker (see 10.9.1.1 "Removing the
rocker" [}268]).
► Remove the two screws marked in the diagram.
Use a size T8 TORX screwdriver for this.
► Remove the side section of the rocker.
► Push the tamp wheel together with the wiper in
the direction of the arrow and off the roller axis.
10 Repairs to SmartFeeder 24 - 104 mm X
10.9 Rocker
Service Manual SIPLACE SmartFeeder 4 - 104 mm X 11/2017 273
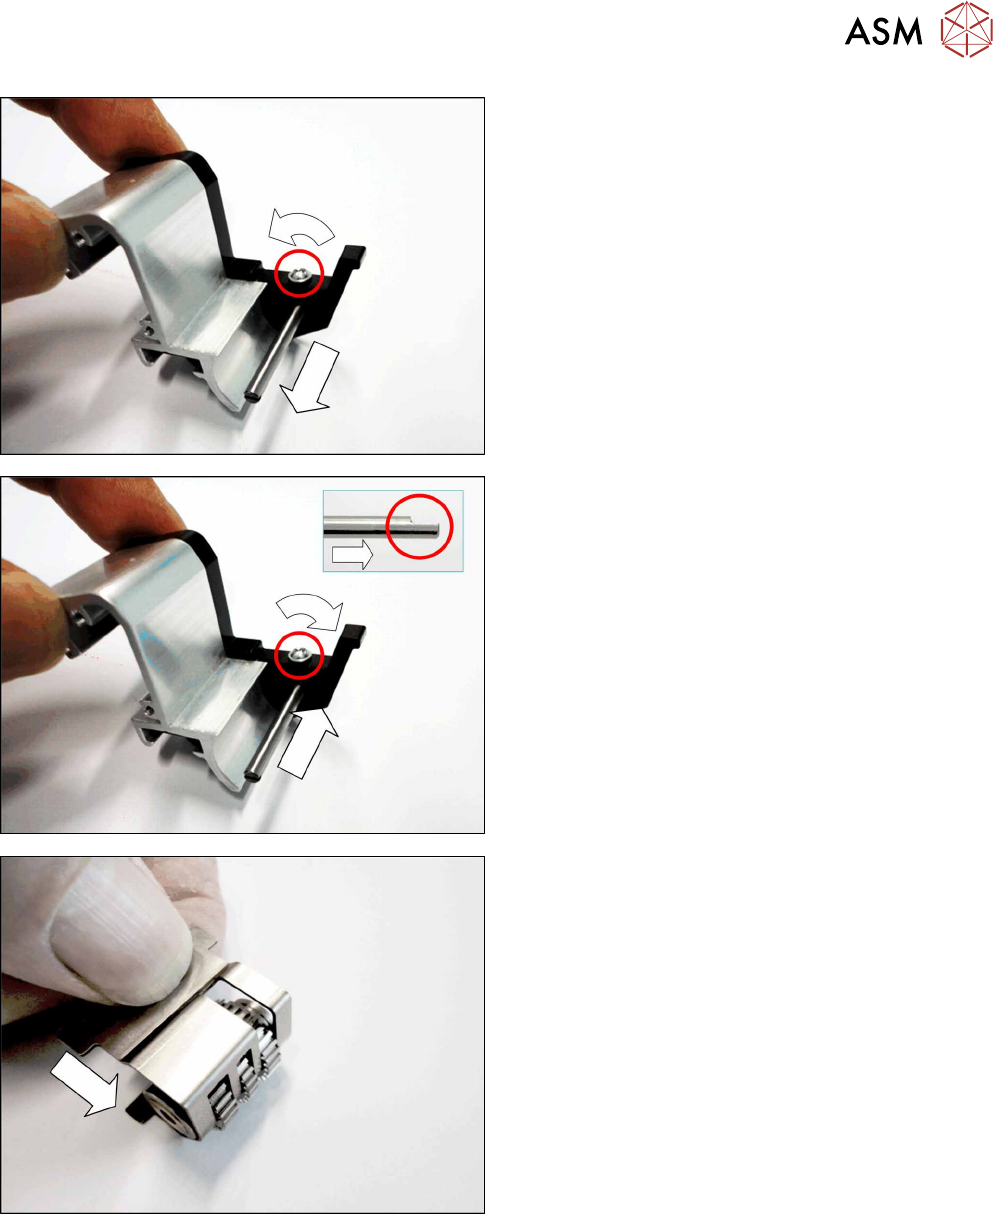
► Loosen the screw which fixes the roller axis.
Use a size T8 TORX screwdriver for this.
► Remove the roller axis.
► Insert the (new) rocker axis into the hole in the
rocker side section, with the flattened side first.
Make sure that the flattened part of the rocker
axis is on the top.
► Fix the rocker axis with the screw marked in the
diagram.
Use a size T8 TORX screwdriver and 0.6 Nm for
this.
► Insert the (new) tamp wheel, as shown, into the
(new) wiper.