00198505-01_SM_SIPLACE_SmartFeeder_EN.pdf - 第66页
6 Repairs to SmartFeeder 4 mm X 6.12 Flap/drip tray for cover foil 66 Service Manual SIPLACE SmartFeeder 4 - 104 mm X 11/2017 6.12 Flap/drip tray for cover foil Required spare part Fig.16: Drip tray and shaft Feeder mod…
6 Repairs to SmartFeeder 4 mm X
6.11 Wiper
Service Manual SIPLACE SmartFeeder 4 - 104 mm X 11/2017 65
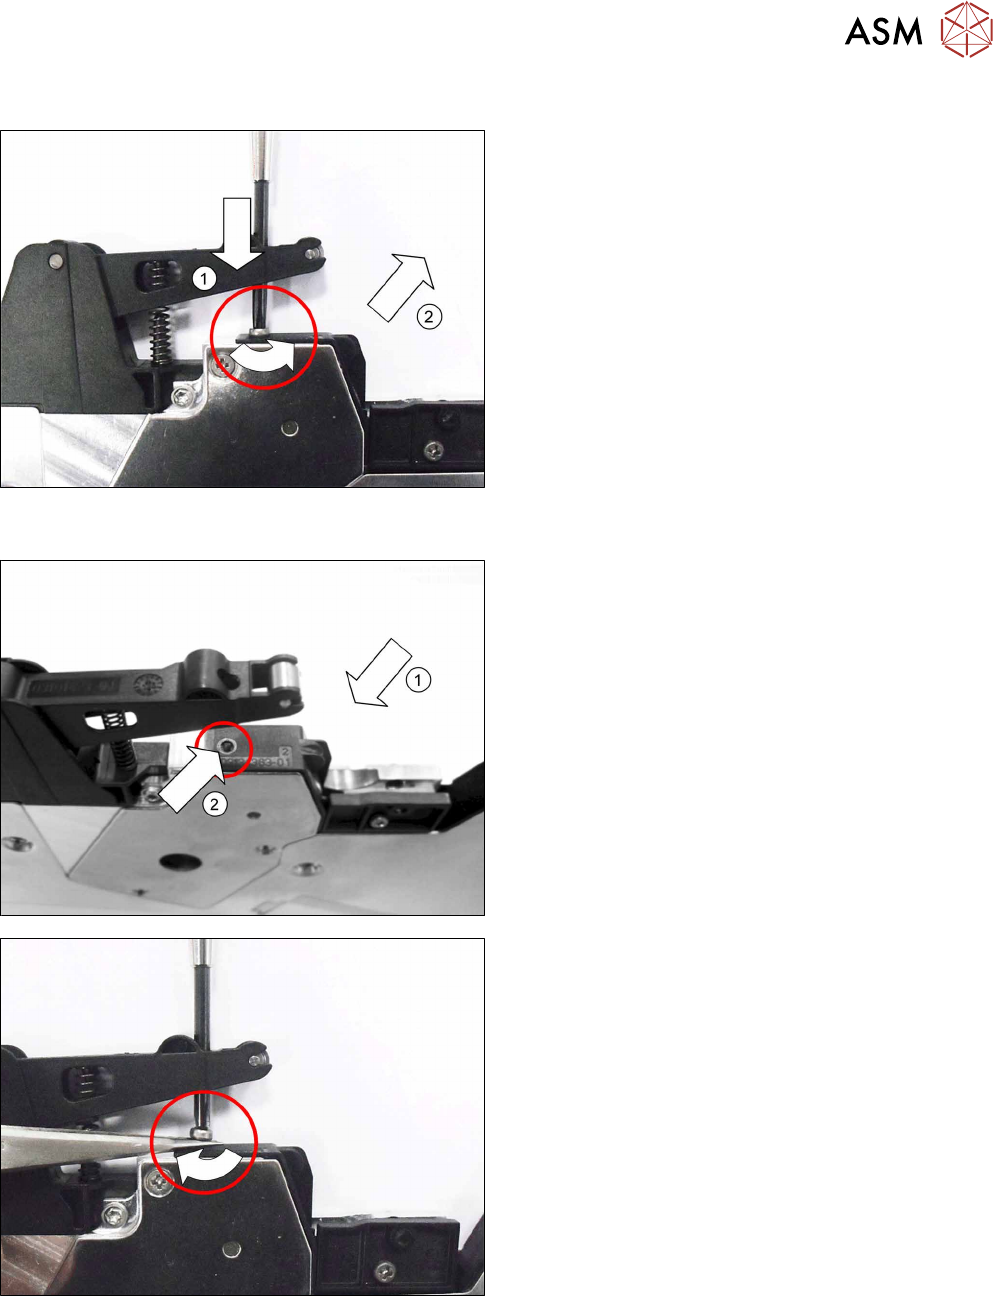
6.11.1 Removing the wiper 4 mm X
► Remove the rocker (see 6.9.1 "Removing the
rocker" [}54]).
► Carefully place the feeder module with the left
side down on a stable, level and clean surface.
► Insert the Phillips screwdriver through the open-
ing in the rocker(1).
► Remove the Phillips screwwhich is fastening the
wiper.
► Pull the wiper diagonally upwards and out. (2)
6.11.2 Fitting the wiper 4 mm X
► Insert the wiper as shown.(1)
► Make sure that you can see the hole for the
screw through the wiper.(2)
► Use a pair of tweezers to hold the Phillips screw
over the hole.
► Insert the Phillips screwdriver through the open-
ing in the rocker.
► Hand-tighten the wiper.
► Fit the rocker (see 6.9.2 "Fitting the
rocker" [}55]).

6 Repairs to SmartFeeder 4 mm X
6.12 Flap/drip tray for cover foil
66 Service Manual SIPLACE SmartFeeder 4 - 104 mm X 11/2017
6.12 Flap/drip tray for cover foil
Required spare part
Fig.16: Drip tray and shaft
Feeder module Position Item no. Designation
SmartFeeder 4mmX 1 03119392Sxx Drip tray for cover foil X4Smart
2 03004081-xx Shaft for D2 foil flap X8
Required tools
●
TORX screwdriver size T8, with 0.6Nm
●
Phillips screwdriver 0.9Nm
6 Repairs to SmartFeeder 4 mm X
6.12 Flap/drip tray for cover foil
Service Manual SIPLACE SmartFeeder 4 - 104 mm X 11/2017 67
6.12.1 Replacing the drip tray and shaft
► Carefully place the feeder module with the left side down on a stable, level and clean surface.
► Remove the right side cover (see 6.3.3 "Removing the Right Side Cover" [}32])
► Remove the "insertion foil container" (see 6.14.1 "Replacing the foil container" [}69]).
► Clean the foil container thoroughly and remove all foil and adhesive residues.
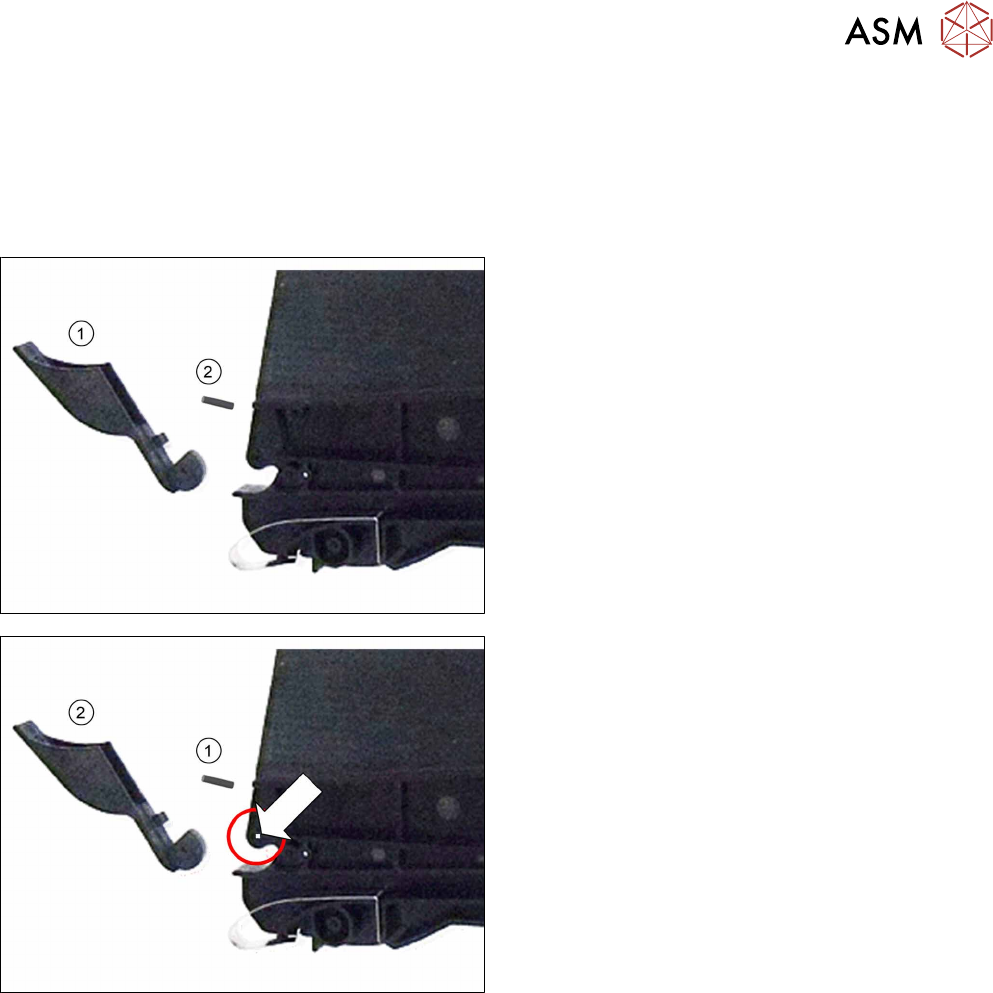
► Remove the "cover foil drip tray"(1) and, if
needed, the "shaft D2"(2). The shaft is just inser-
ted into the foil container.
► Insert the (new) "shaft D2"(1) in the position
shown in the foil container, as far as the stop.
► Push the (new) cover foil drip tray onto the "shaft
D2".
► Fit the "insertion foil container" (see 6.14.1 "Replacing the foil container" [}69]).
► Fit the right side cover (see6.3.4 "Fitting the Right Side Cover" [}33]).