00198505-01_SM_SIPLACE_SmartFeeder_EN.pdf - 第59页
6 Repairs to SmartFeeder 4 mm X 6.10 Tamp wheel Service Manual SIPLACE SmartFeeder 4 - 104 mm X 11/2017 59 6.10.1 Removing the tamp wheel ► Carefully place the feeder module with the right side down on a stable, level an…
6 Repairs to SmartFeeder 4 mm X
6.10 Tamp wheel
58 Service Manual SIPLACE SmartFeeder 4 - 104 mm X 11/2017
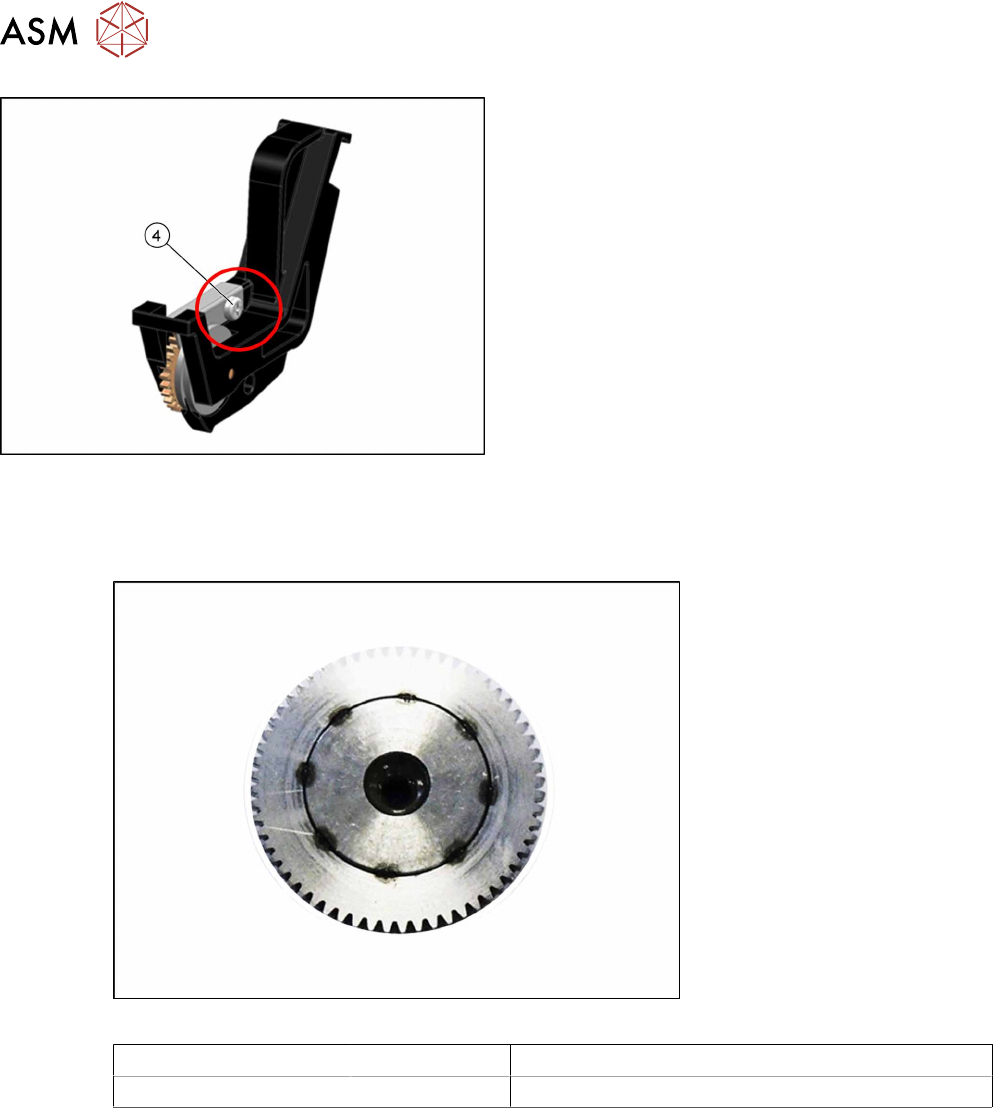
► Screw the cover plate to the rocker.(4)
Use a size T8 TORX screwdriver for this.
6.10 Tamp wheel
Required spare part
Fig.14: Knurled tamp wheel assy.
Feeder module Item no. Designation
SmartFeeder 4mm X 03131680-xx Knurled tamp wheel assy. X4Smart V2
Required tools
●
Phillips screwdriver, small
●
Flat-bladed screwdriver
●
Allen key size 4
●
Tweezers
6 Repairs to SmartFeeder 4 mm X
6.10 Tamp wheel
Service Manual SIPLACE SmartFeeder 4 - 104 mm X 11/2017 59
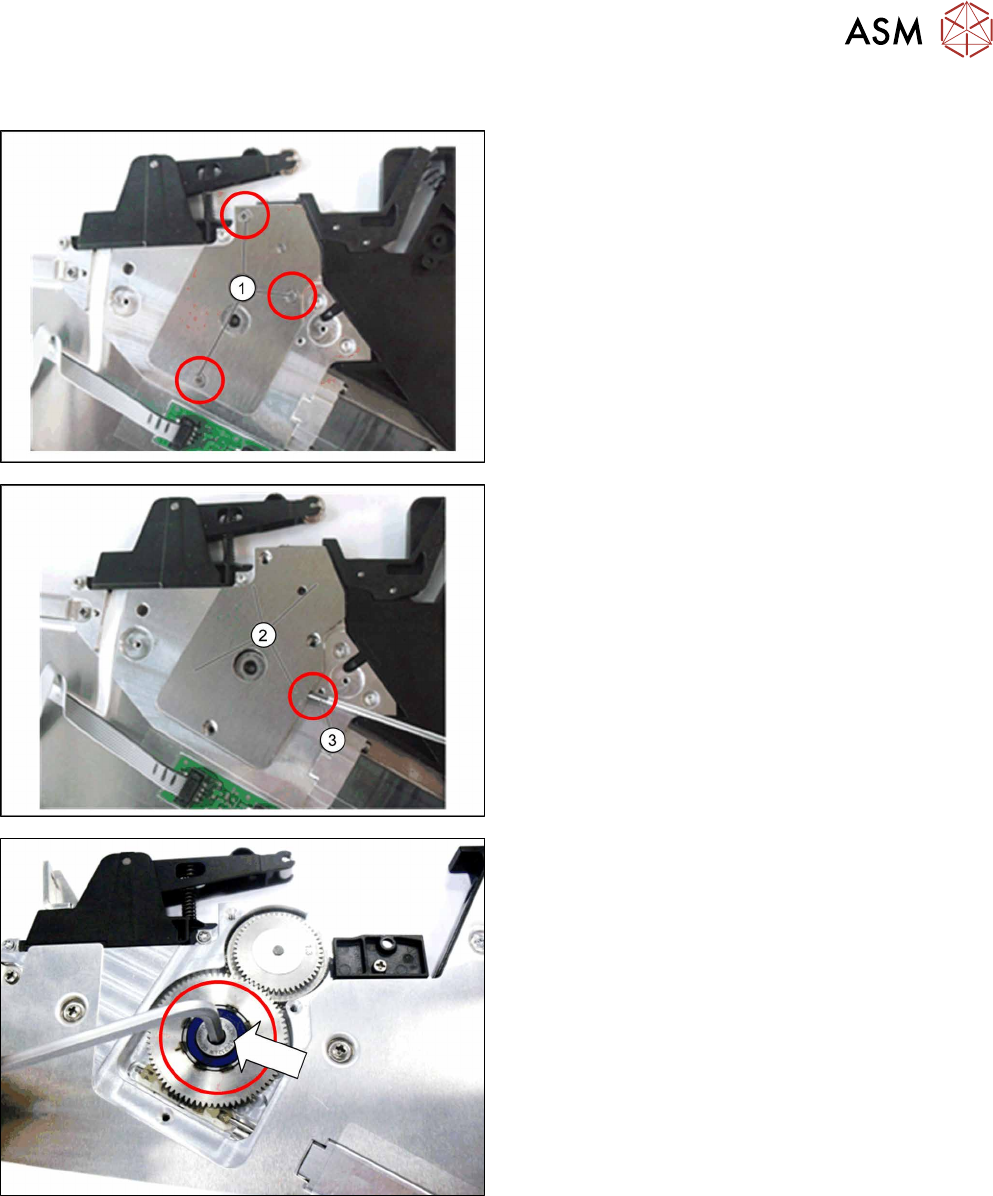
6.10.1 Removing the tamp wheel
► Carefully place the feeder module with the right
side down on a stable, level and clean surface.
► Remove the left side cover (see 6.3.1 "Removing
the Left Side Cover" [}31]).
► Remove the 3 Phillips screws(1) marked in the
diagram from the bearing cap for the foil drive.
► Lift the bearing cap(2) up with a pair of tweezers
or a small screwdriver(3) and remove it.
► Remove the rocker (see 6.9.1 "Removing the
rocker" [}54]).
► Remove the wiper (see 6.11.1 "Removing the
wiper 4 mm X" [}65]).
► Loosen the Allen screw on the spiral gear.
Use a size 4 Allen key for this.
6 Repairs to SmartFeeder 4 mm X
6.10 Tamp wheel
60 Service Manual SIPLACE SmartFeeder 4 - 104 mm X 11/2017
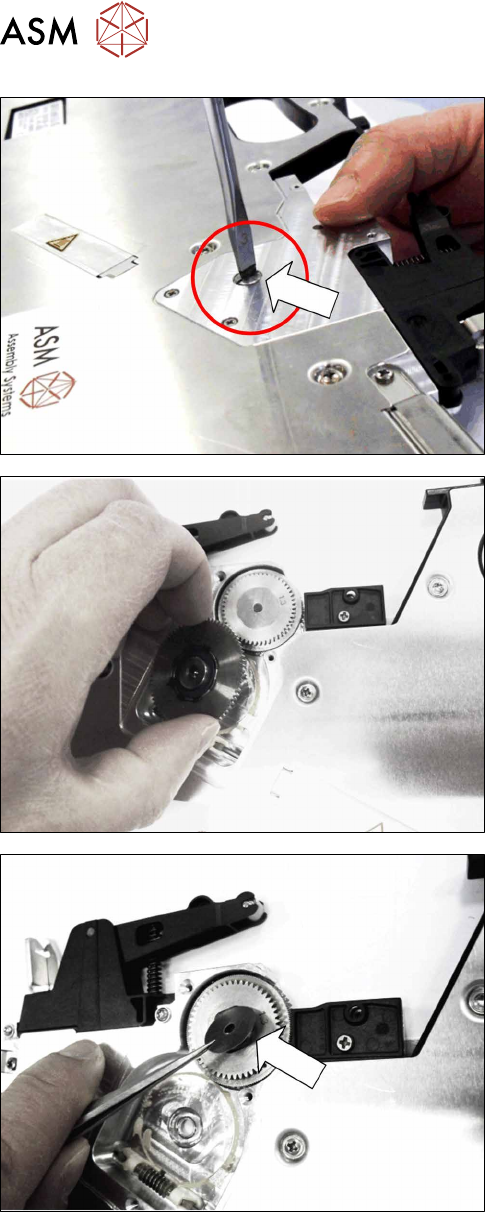
► Tilt the feeder module to the right and hold the Al-
len screw on the spiral gear with one finger.
► Remove the slotted screw.
► Remove the spiral gear.
► Remove the top washer from the spiral gear.