00198505-01_SM_SIPLACE_SmartFeeder_EN.pdf - 第264页
10 Repairs to SmartFeeder 24 - 104 mm X 10.8 Foil rocker 264 Service Manual SIPLACE SmartFeeder 4 - 104 mm X 11/2017 ► Push the flat ribbon cable through the opening in the base unit marked in the diagram. (1) ► Swing o…
10 Repairs to SmartFeeder 24 - 104 mm X
10.8 Foil rocker
Service Manual SIPLACE SmartFeeder 4 - 104 mm X 11/2017 263
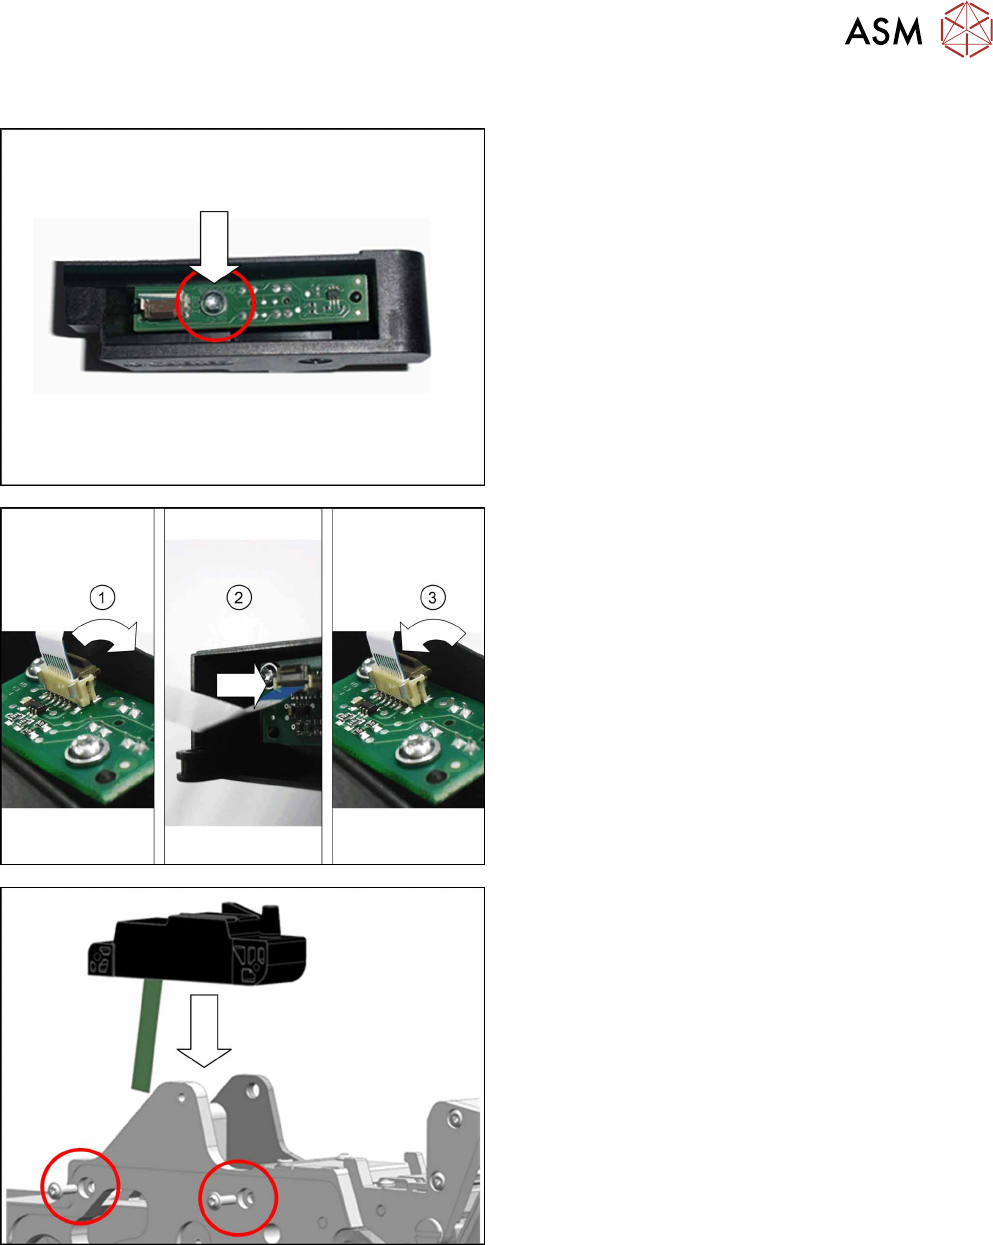
Fitting the light barrier transmitter cable
► Insert the light barrier transmitter, as shown, into
the foil rocker housing.
Make sure that the locating pins from the foil
housing engage n the two holes on the short
sides of the board.
► Fasten the light barrier transmitter with a T8
TORX screwdriver to the foil rocker housing.
► Swing the holder on the flat ribbon connection
up.(1)
► Push the cable with the blue side pointing up-
wards, into the flat ribbon cable connection, as
far as the stop. (2)Make sure that the cable con-
tacts lie against the contacts on the connection.
► Swing the bracket on the flat ribbon connection
down.(3)
► Position the foil rocker housing from above onto
the base unit.
► Fasten the foil rocker housing with the two
screws shown in the diagram. Use a size T8
TORX screwdriver with 0.6 Nm. for this.
10 Repairs to SmartFeeder 24 - 104 mm X
10.8 Foil rocker
264 Service Manual SIPLACE SmartFeeder 4 - 104 mm X 11/2017
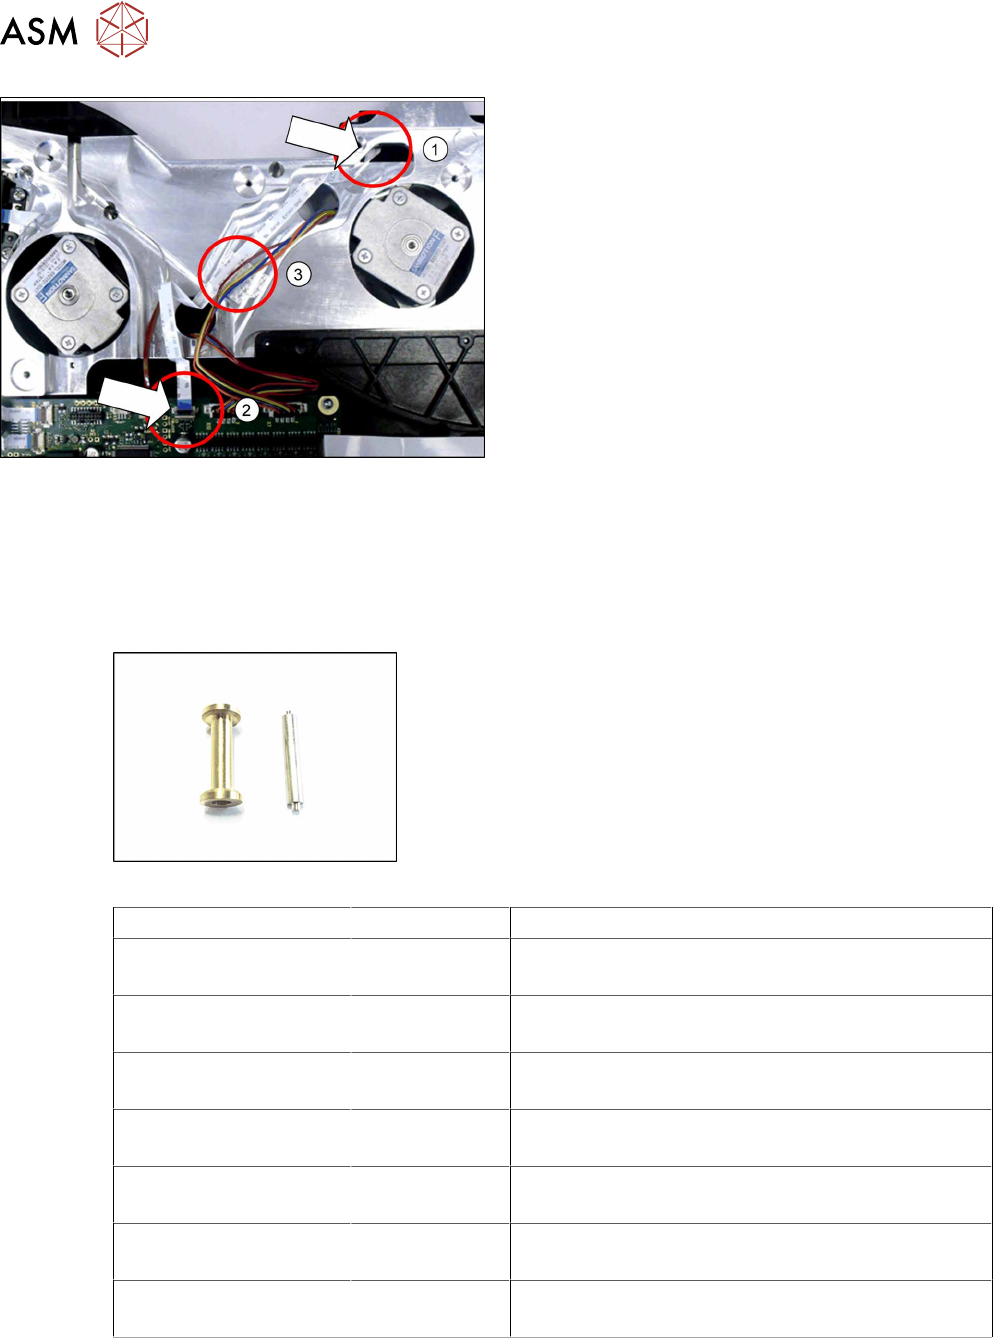
► Push the flat ribbon cable through the opening in
the base unit marked in the diagram.(1)
► Swing open the the holder bar on the flat ribbon
connection X5 on the control board.(2)
► Push the flat ribbon cable with the blue side
pointing upwards, into the flat ribbon cable con-
nection, as far as the stop.
► Swing the bracket on the flat ribbon connection
down.
► Run the flat ribbon cable as shown in the dia-
gram.
► Press the flat ribbon cable onto the double-sided
adhesive band, at the point marked.(3)
► Fasten the foil rocker (see 10.8.1.1.2 "Fitting the
foil rocker assembly" [}260]).
► Fix the left side plate into place (see10.3.1 "Re-
moving/fitting the left side plate" [}230]).
10.8.1.3 Roller/roller axis rocker
Required spare part
Fig.96: Creasing roller /X24 PSA and roller axis rocker X24Smart
Feeder module Item no. Designation
SmartFeeder 24mm X 03101525- xx
03113780-xx
Creasing roller /X24 PSA
Roller axis rocker X24Smart
SmartFeeder 32mm X 03117235- xx
03117227-xx
Creasing roller /X32 PSA
Roller axis rocker X32Smart??? axis???
SmartFeeder 44mm X 03120859- xx
03120855-xx
Creasing roller /X44 PSA
Roller axis rocker X44Smart
SmartFeeder 56mm X 03115149- xx
03115132-xx
Creasing roller /X56 PSA
Roller axis rocker X56Smart
SmartFeeder 72mm X 03114922- xx
03114940-xx
Creasing roller /X72 PSA
Roller axis rocker X72Smart
SmartFeeder 88mm X 03120983- xx
03120982-xx
Creasing roller /X88 PSA
Roller axis rocker X88Smart
SmartFeeder 104mm X 03121140- xx
03121141-xx
Creasing roller /X104 PSA
Roller axis rocker X104Smart
Required tools
●
Flat-bladed screwdriver size 1
10 Repairs to SmartFeeder 24 - 104 mm X
10.8 Foil rocker
Service Manual SIPLACE SmartFeeder 4 - 104 mm X 11/2017 265
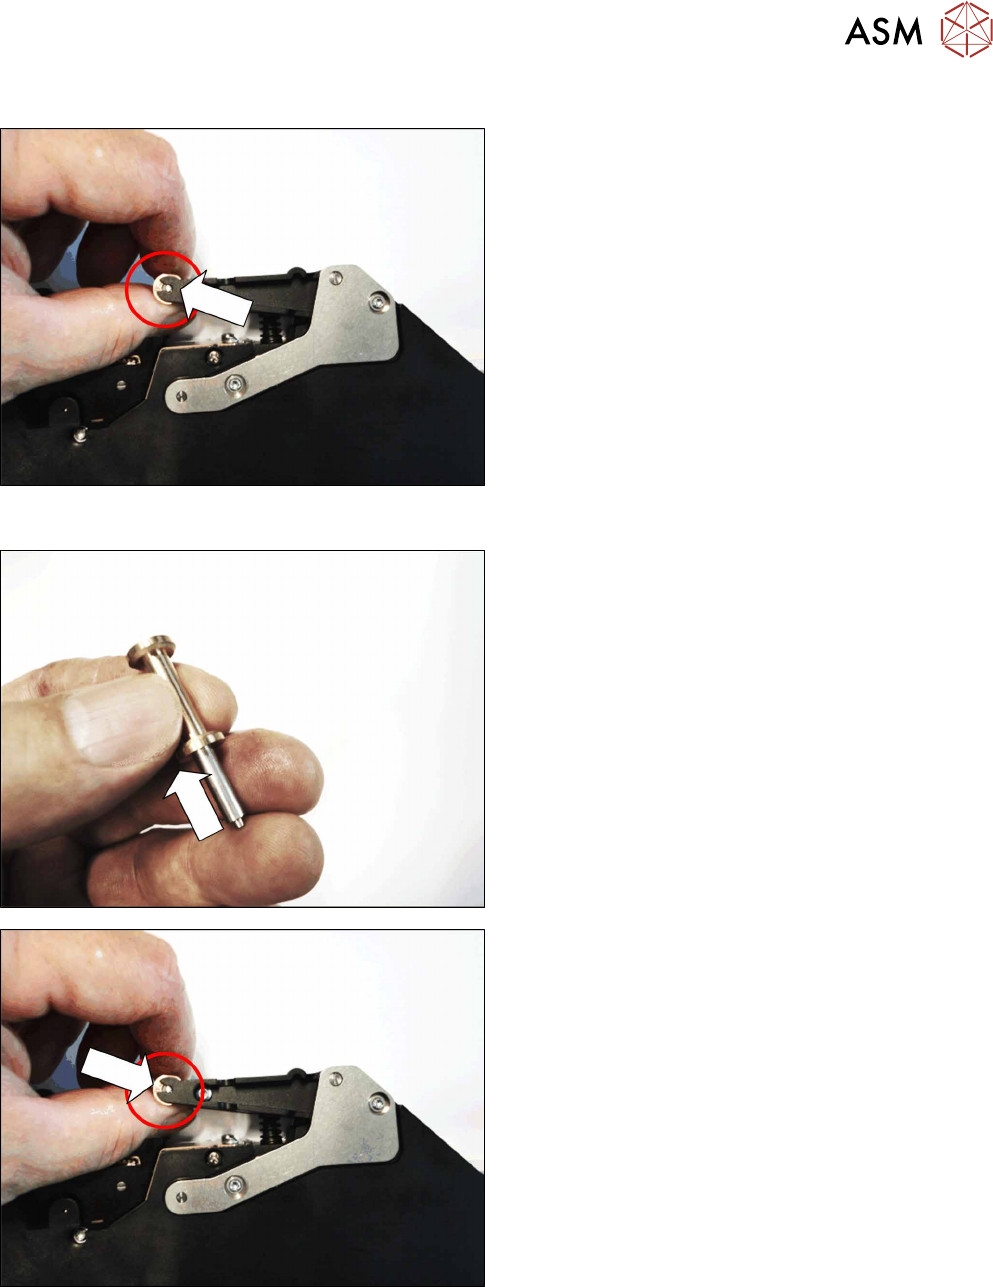
Removing the roller/roller axis
► Carefully place the feeder module with the left
side down on a stable, level and clean surface.
► Pull the roller out of the rocker in the direction of
the arrow, together with the roller axis.
Make sure that the roller axis is not lost.
Fitting the roller/roller axis
► Push the roller axis into the roller.
► Press both ends of the roller axis as far as the
stop into the holders on the rocker.