00198505-01_SM_SIPLACE_SmartFeeder_EN.pdf - 第188页
9 Repairs to SmartFeeder 12 mm X / 16 mm X 9.5 Pickup window 188 Service Manual SIPLACE SmartFeeder 4 - 104 mm X 11/2017 9.5.1 Removing the Pickup Window ► Carefully place the feeder module with the right side down on a …
9 Repairs to SmartFeeder 12 mm X / 16 mm X
9.5 Pickup window
Service Manual SIPLACE SmartFeeder 4 - 104 mm X 11/2017 187
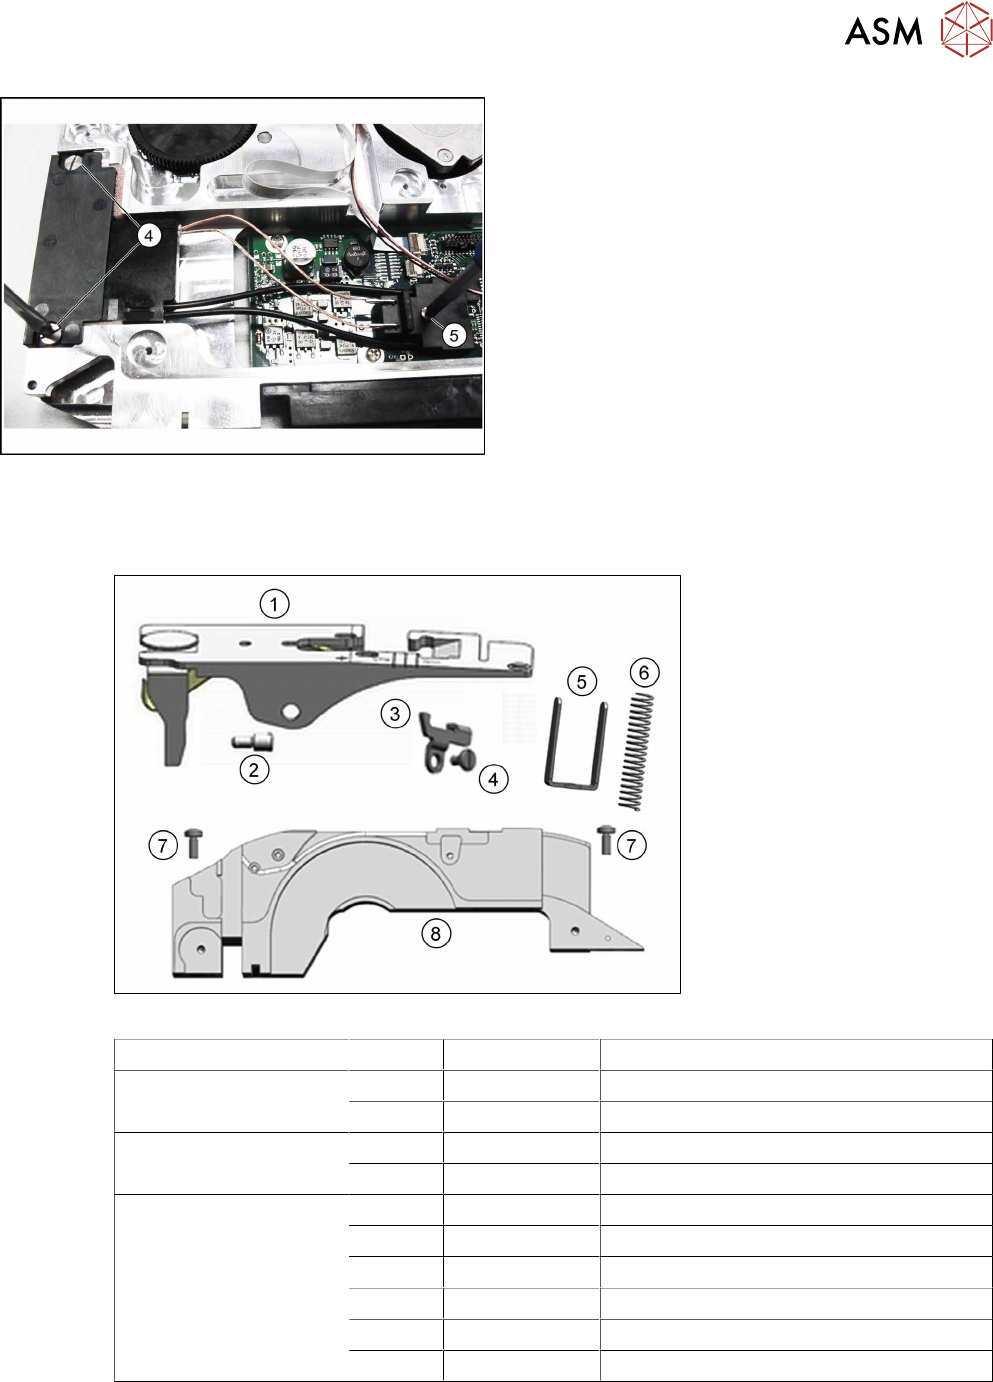
► Screw the EDIF into place using the two marked
screws(4) with 0.6Nm.
► Make sure that the EDIF springs back when
slight pressure is applied from the front.
If the EDIF does not spring back, loosen the
screws(4) and make sure that the two springs(3)
are aligned towards the front and are not bent.
► Screw the EDIF connector into place with
0.2Nm.(5)
► Fasten the left side cover (see 9.3.2 "Fitting the
Left Side Cover" [}184]).
9.5 Pickup window
Required spare part
Fig.66: Pickup window
Feeder module Position Item no. Designation
SmartFeeder 12mm X 1 03083995-xx Pickup window with lock X12 V2 assembly
8 03083996-xx Tape duct, front X12 V2
SmartFeeder 16mm X 1 03082789-xx Pickup window with lock X16 V2 assembly
8 03082041-xx Tape duct, front X16 N
SmartFeeder 12mm X
SmartFeeder 16mm X
2 03082321-xx Threaded axis pickup window X12/X16 V2
3 03053708-xx Rocker lever /X2x8
4 03077823-xx Collar screw /X2x8
5 03082323- Pressure bracket X12/X16 V2
6 03091961-xx Pressure spring 1.1x9.0x74.0mm
7 03010209-xx ISO 7045 - M2.5 x 6-A2-50-H
Required tools
●
Flat-bladed screwdriver size 1, 0.35Nm
●
Phillips screwdriver 0.6Nm
●
Tweezers
9 Repairs to SmartFeeder 12 mm X / 16 mm X
9.5 Pickup window
188 Service Manual SIPLACE SmartFeeder 4 - 104 mm X 11/2017
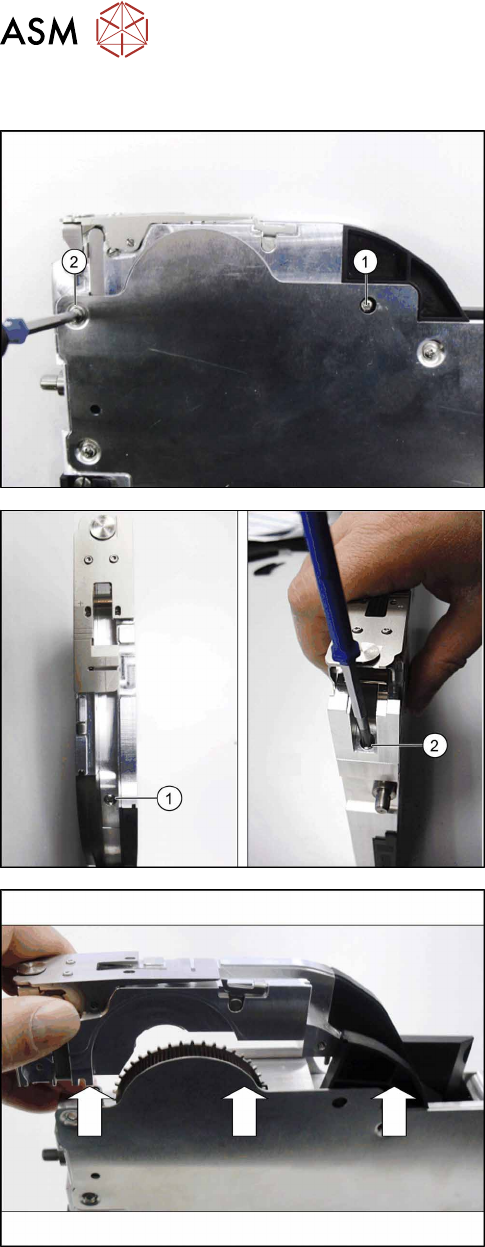
9.5.1 Removing the Pickup Window
► Carefully place the feeder module with the right
side down on a stable, level and clean surface.
► Remove the screw from the splice sensor.(1)
► Remove the top left screw from the side
cover.(2)
► Stand the feeder module up.
► Remove the back screw on the tape duct.(1)
► Hold the pickup window and tape duct with one
hand (as shown) to counteract the spring force of
the compression spring.
► Remove the front screw of the tape duct.(2)
► Lift the tape duct with pickup window and ramp
out of the feeder module.
9 Repairs to SmartFeeder 12 mm X / 16 mm X
9.5 Pickup window
Service Manual SIPLACE SmartFeeder 4 - 104 mm X 11/2017 189
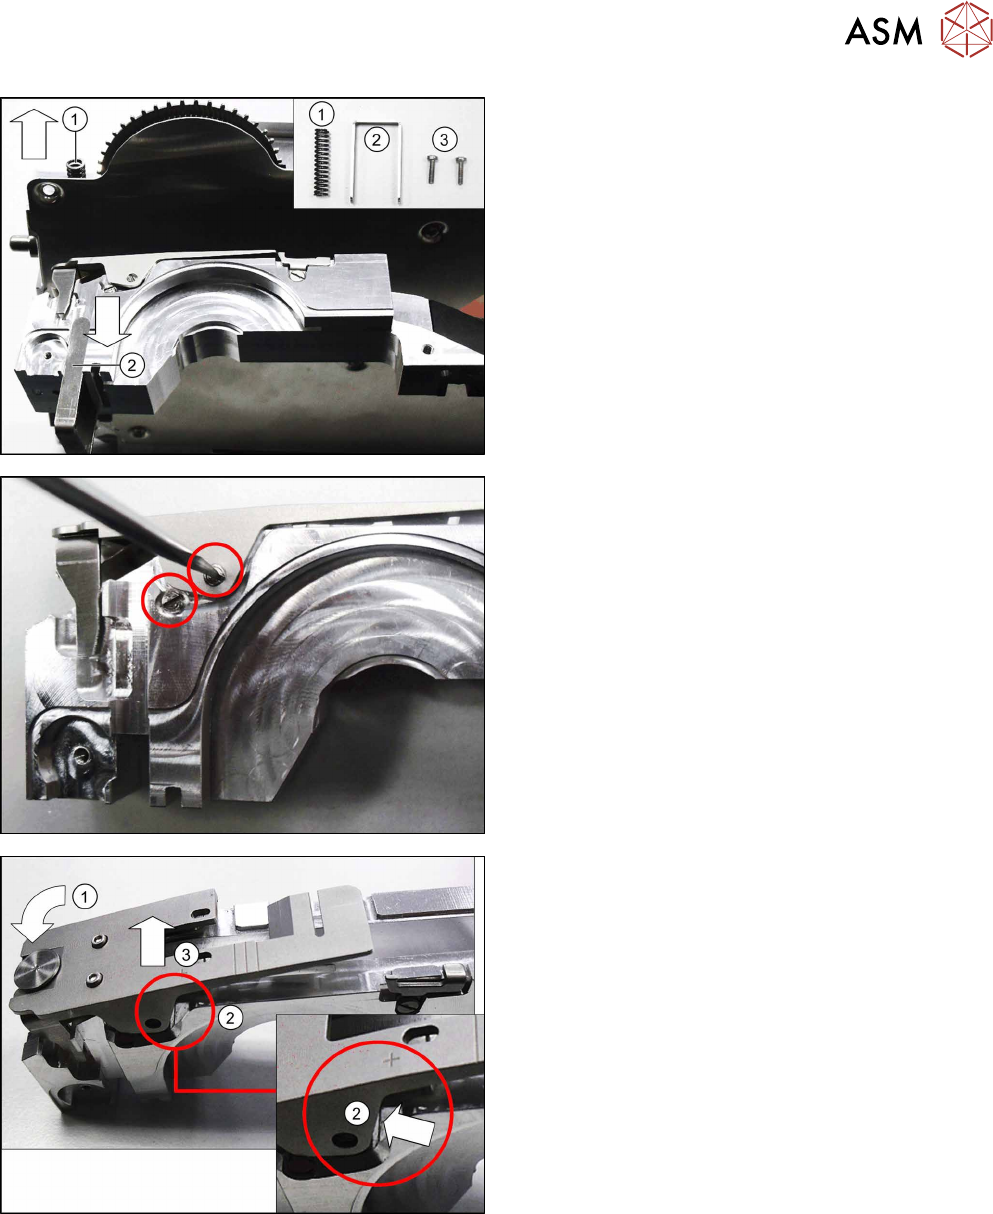
► Remove the compression spring(1), the pressure
fork(2) and the two screws(3), so that these are
not lost.
► Place the feeder module carefully down on a
stable, level and clean surface.
► Place the tape duct carefully down on its right
side, onto a stable, level and clean surface.
► Remove the two marked screwed axes.
► Press the front of the pickup window down as far
as the stop.(1)
Make sure that the pickup window is pressed into
the recess on the tape duct.(2)
► Press the pickup window into the recess on the
tape duct.(3)
Make sure that the pickup window is pushed out
of the snap tab on the right side of the tape duct.