XPF-L 服务工程师训练手册中文版.pdf - 第46页
12. 松开下图中 hook 上的 2 颗螺栓 , 将 hook 下部下降到最低位置 . Loosen the 2 bolts Lower the hook 13. 选择 Z-axis 微动模式 , 很慢很 小心的将 Z-axis 下降到第 11 步记录的 Z_ RevolverNozzleDownHeight 数值 . 14. 如图所示 , 很松的将 hook 锁紧 jig 安装到 hook 上 . Loosely attach th…
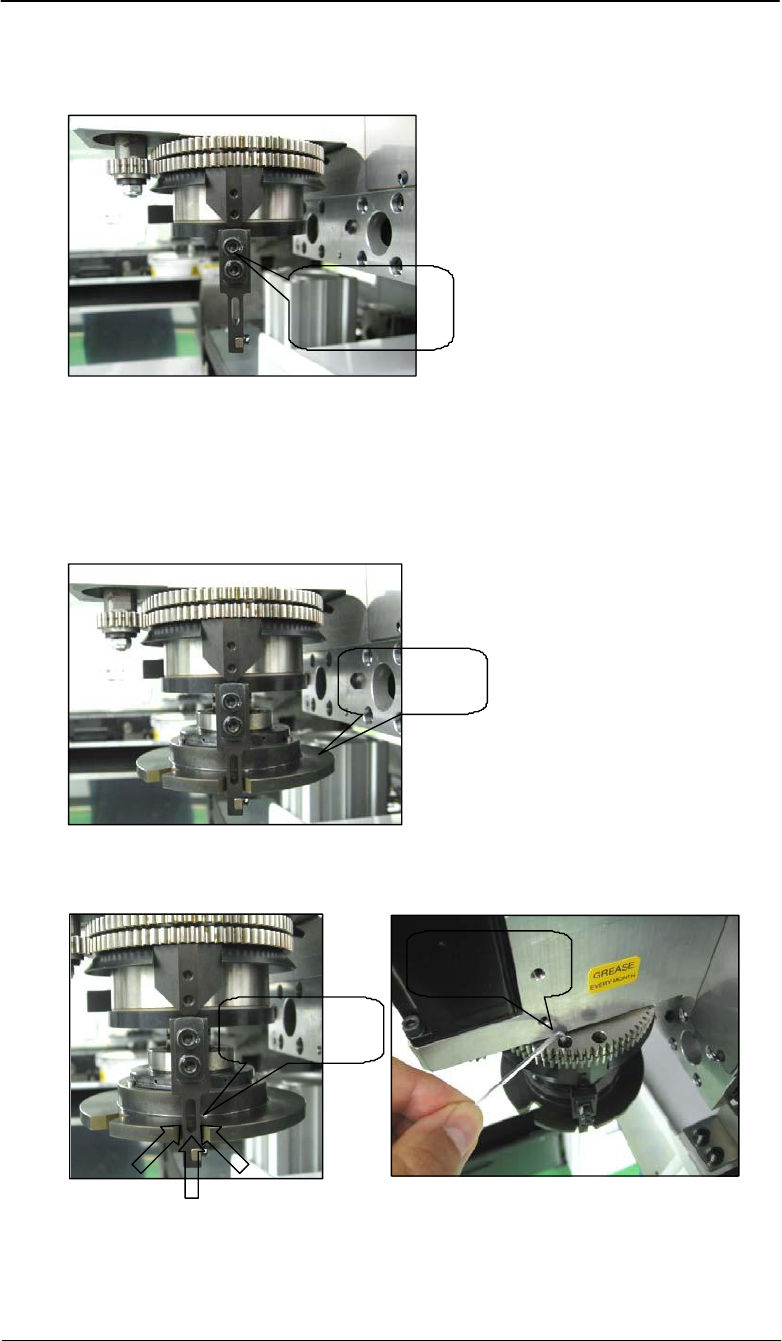
6. 使用两个安装螺栓将hook组件安装到Q-axis齿轮上,但是请先不要完全锁紧. 这两个安装螺栓
应该足够松,能让hook能够前后移动.
Attach the
hook to the Q-
axis gear
7. 选择 [Custom Maintenance] – [I/O Check] – [RY01B: VacuumPumpOn] – [ON] 来
打开真空泵。
8. 选择[Y010 VacuumOff] – [OFF]将头部真空打开.
9. 将hook中心调整JIG安装到头部,使hook处于Jig的一个沟槽中.
Attach the
centering jig
10. 将hook推向沟槽后部并将如图中2PCS螺栓用1.0 Nm力矩锁紧.
Lock the two
bolts (1.0 Nm)
Push the hook
all the way in
11. 选择 [Custom Maintenance] – [Proper Data Editor] – [MACHINE_ORIGIN] 然后
记下 [Z_RevolverNozzleDownHeight] 数值.
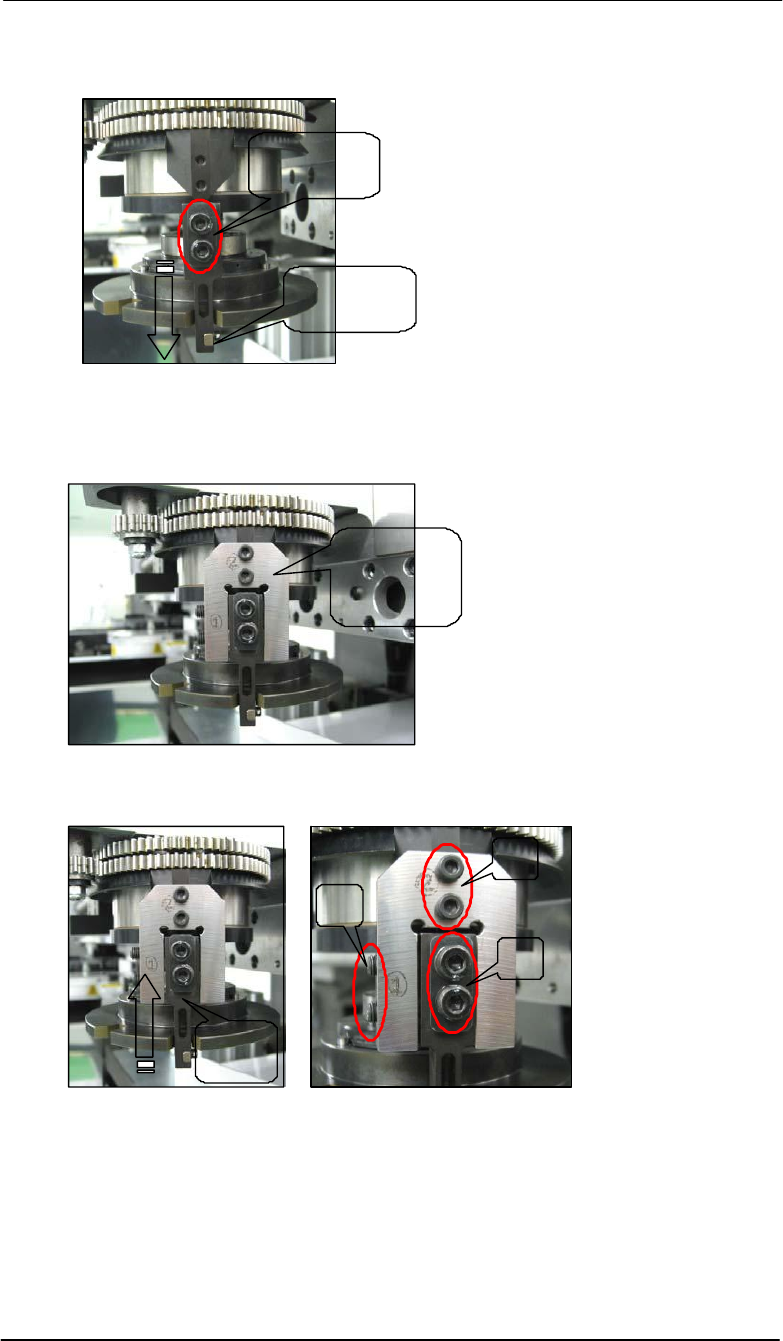
12.松开下图中hook上的2颗螺栓,将hook下部下降到最低位置.
Loosen the
2 bolts
Lower the
hook
13. 选择Z-axis 微动模式,很慢很小心的将Z-axis下降到第11步记录的Z_RevolverNozzleDownHeight
数值.
14.如图所示,很松的将hook锁紧jig安装到hook上.
Loosely
attach the
locking jig
15. 将hook爪尽量向上推向hook中心调整JIG底部, 然后按以下顺序按照要求的力矩锁紧
螺栓.
2
Torque settings
1
Bolts 1: 1.0 Nm torque
3
Bolts 2: 1.0 Nm torque
Push
up
Bolts 3: 2.0 Nm torque
16. 将hook锁紧jig松开 (螺栓 1 然后螺栓 2) ,从机器中取出hook锁紧jig.
17. 上升Z-axis 1 to 2 mm,使hook爪和hook中心调整JIG顶部有间隙.
18. 用手托住jig,然后关闭 [Y010] and [RY01B] I/Os 从头上取出中心调整jig.

19. 从头上取出hook锁紧jig.
20. 根据“8.2 Measuring the Q- axis origin”完成hook原点测量.
21. 选择 [Maintenance] – [Head Calibration] – [Start] – START 进行 head calibration.