Service Manual SIPLACE SmartFeeder.pdf - 第37页
6 Repairs to SmartFeeder 4 mm X / Xi 6.5 Pickup window Service Manual SIPLACE SmartFeeder 4 - 8 mm X / Xi SIPLACE SmartFeeder 2 x 8 mm X / Xi 11/2020 37 6.5.1 Removing the Pickup Window ► Carefully place the feeder modul…
6 Repairs to SmartFeeder 4 mm X / Xi
6.5 Pickup window
36 Service Manual SIPLACE SmartFeeder 4 - 8 mm X / Xi SIPLACE SmartFeeder 2 x 8 mm X / Xi 11/2020
6.5 Pickup window
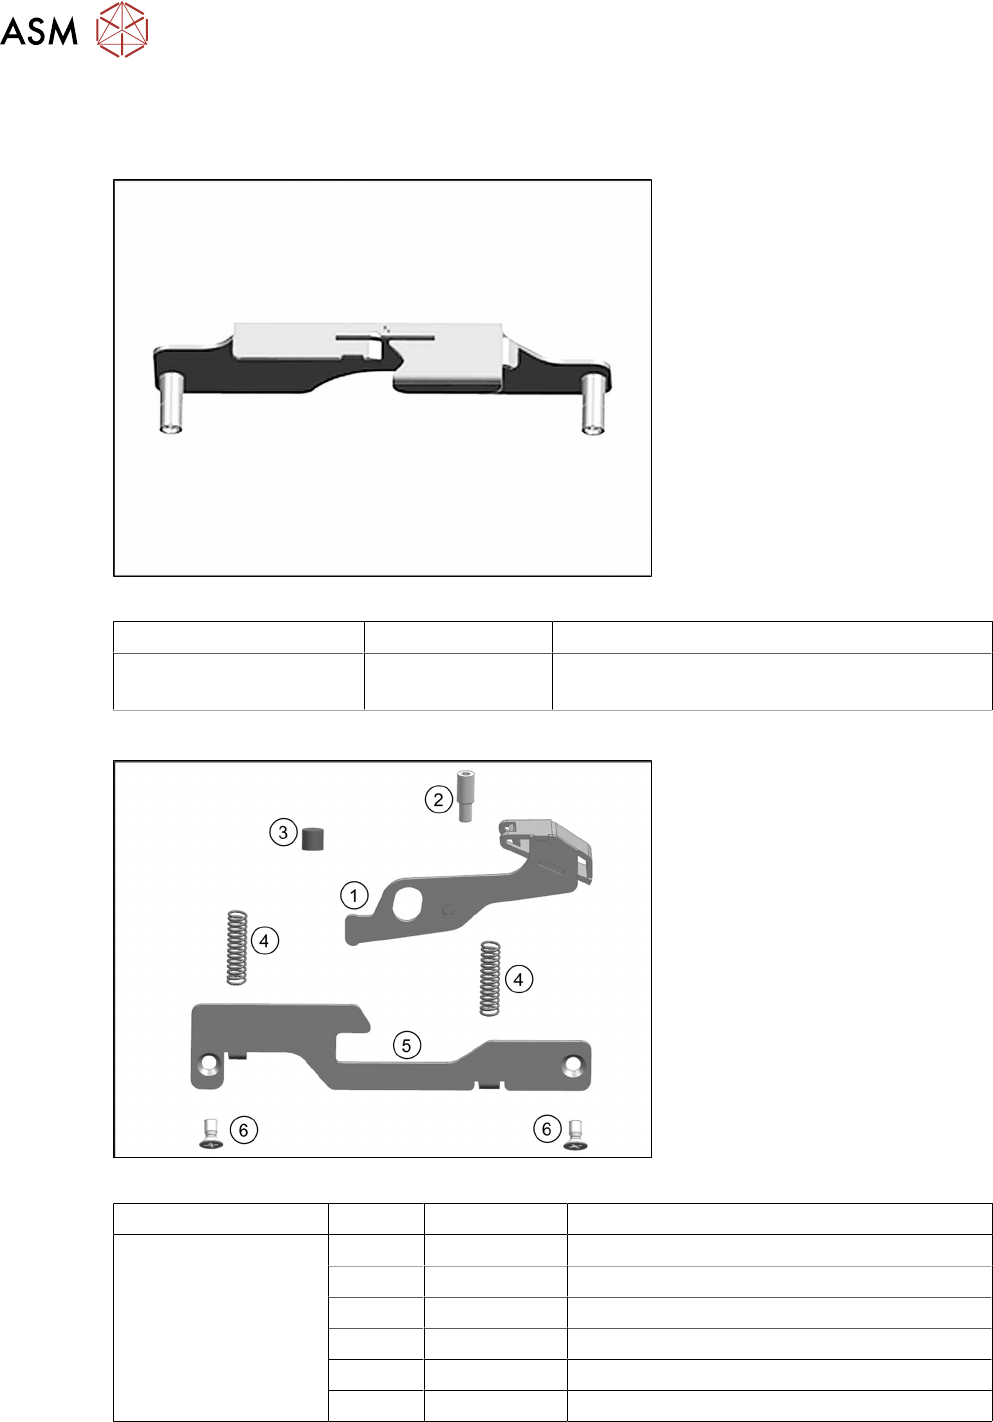
Spare part required
Fig.6: Pickup window assy. X4Smart
Feeder module Item no. Designation
SmartFeeder 4mmX
SmartFeeder 4mmXi
03153018-01 Pickup window assy. X4Smart V3
Other spare parts
Fig.7: Actuator, pressure springs, counterplate and various screws
Feeder module Position Item no. Designation
SmartFeeder 4mmX
SmartFeeder 4 mm Xi
1 03148103-xx Actuator pickup window X8Smart assy. V2
2 00349254Sxx Fitting screw
3 03222145-xx Seal for drilled hole X4
4 03109568-xx Pressure spring for pickup window X8Smart
5 03080581Sxx Counterplate for pickup window X8Smart
6 03075967-xx ISO 7046-2-M2.5 x 5-A2-70-H AV
Tools required
●
Phillips screwdriver

6 Repairs to SmartFeeder 4 mm X / Xi
6.5 Pickup window
Service Manual SIPLACE SmartFeeder 4 - 8 mm X / Xi SIPLACE SmartFeeder 2 x 8 mm X / Xi 11/2020 37
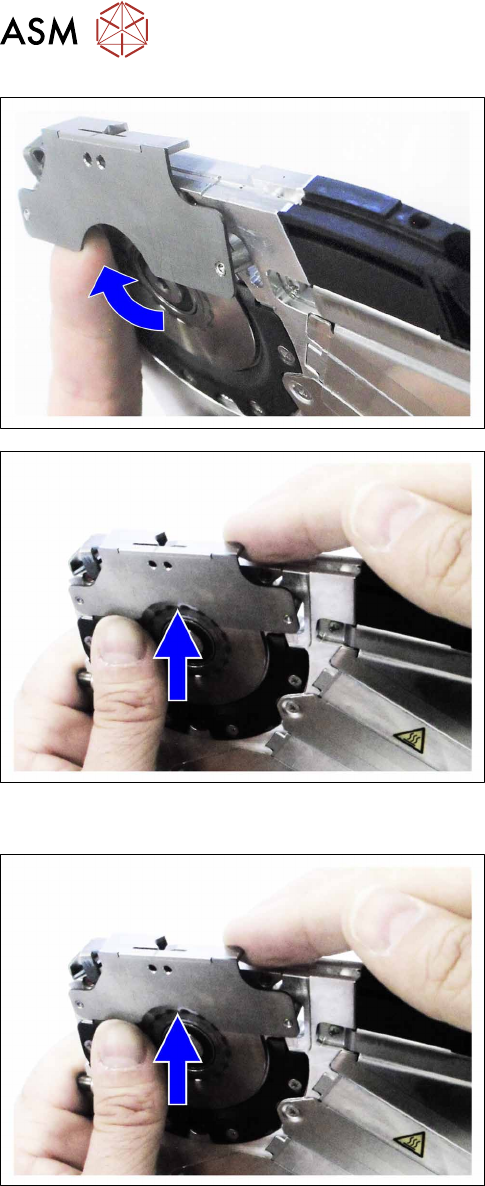
6.5.1 Removing the Pickup Window
► Carefully place the feeder module with the left
side down on a stable, level and clean surface.
► Remove the two Phillips screws.
► Remove the counterplate.
► Remove the two pressure springs.
6 Repairs to SmartFeeder 4 mm X / Xi
6.5 Pickup window
38 Service Manual SIPLACE SmartFeeder 4 - 8 mm X / Xi SIPLACE SmartFeeder 2 x 8 mm X / Xi 11/2020
► Move the feeder module to a position where it is
upright and stable.
► Press the pickup window slightly upwards.
► Carefully lift the pickup window over the pin
wheel.
► Remove the pickup window from the left side.
6.5.2 Fitting the pickup window
► Move the feeder module to a position where it is
upright and stable.
► Carefully lift the pickup window from the lefthand
side over the pin wheel.