YSM40R_Mainte_E.pdf - 第149页
3-79 3 Periodic maintenance items 5 Detach the low er pump. 1. Use a hex wrench (4) to remove 2 bolts (front side) that mount the lower pump. 2. Detach the lower pump, and also disconnect the power connector and ground w…
3-78
3
Periodic maintenance items
7.2.2 Detaching the pumps and making preparations
Check safety again before detaching the pumps.
Read "Precautions when cleaning the pump and replacing the parts subject to wear" on the preceding page and follow
the instructions to ensure the safety.
1
Prepare for work.
1. Detach the feeder exchange carriage
on the front of the machine.
2. Detach the tape cutter duct on the front
of the machine.
3. Power off the machine.
2
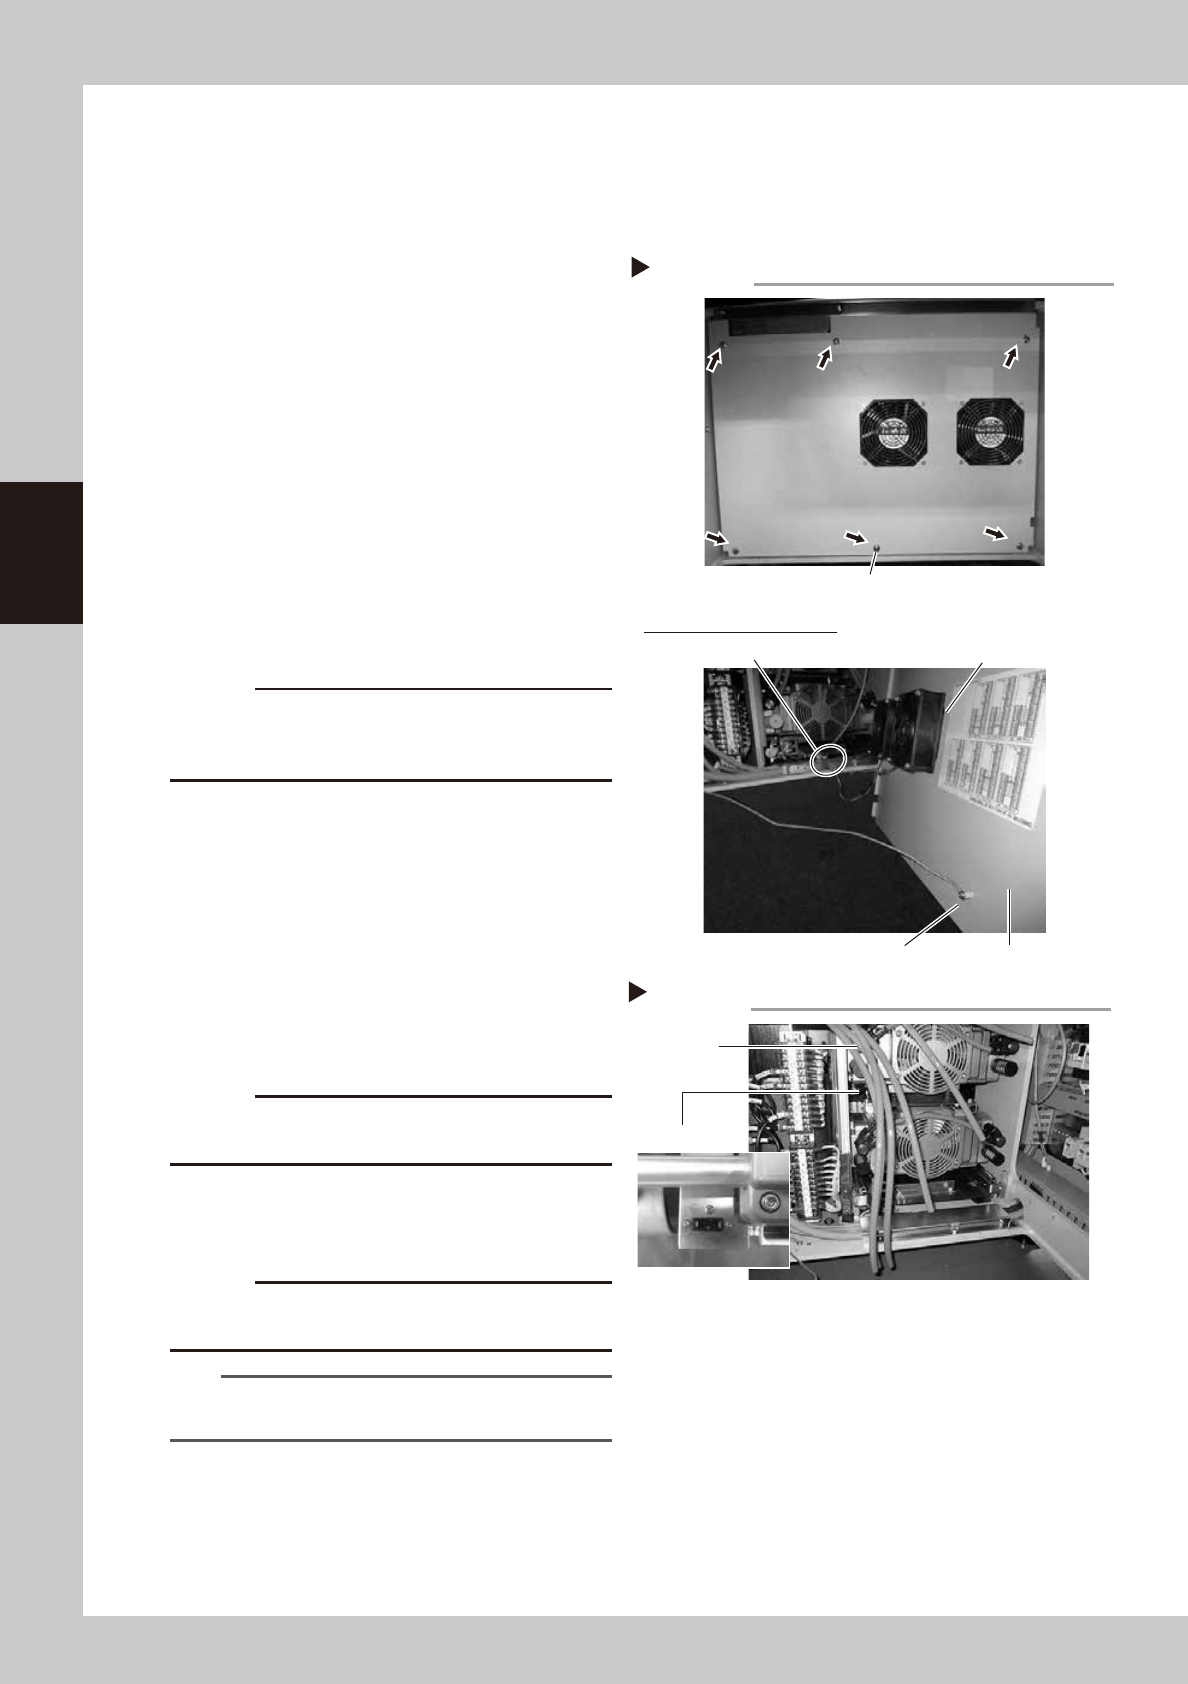
Detach the front cover.
1. Use a Phillips screwdriver to remove the
screws (6 pieces) that hold the machine
front cover and detach the cover.
2. Disconnect the ground wire located
behind the cover.
3. Detach the fan wiring connectors (2
places).
533A1-N9-00
c
CAUTION
When detaching the front cover, be careful not to
damage the harness wires, and pump and other
components in the machine.
3
Disconnect the air hoses.
In the case of a 4-beam machine,
disconnect 4 air hoses each on the left and
right sides. In the case of a 2-beam
machine, disconnect only 4 air hoses on the
right side as viewed from the front.
533A3-N9-00
4
Detach the upper pump.
1. Disconnect the power connector and
ground wire from the side housing.
c
CAUTION
When disconnecting the ground wire, be careful not to
lose the washer.
2. Use a hex wrench (4) to remove 4 bolts
that mount the upper pump.
3. Pull out the upper pump to the front side.
c
CAUTION
The pump is heavy. When detaching the pump, be
careful not to drop it to avoid injury.
TIP
2-beam type machine (1 pump) is not equipped with
the upper pump.
Removing the machine front cover
Step 2
Fan
Fan wiring connector
Rear side of the front cover
Mounting screw
Ground wire
Front cover
Step 3, 4
Air hose
Disconnecting air hoses/power connecto
r
Power connector
3-79
3
Periodic maintenance items
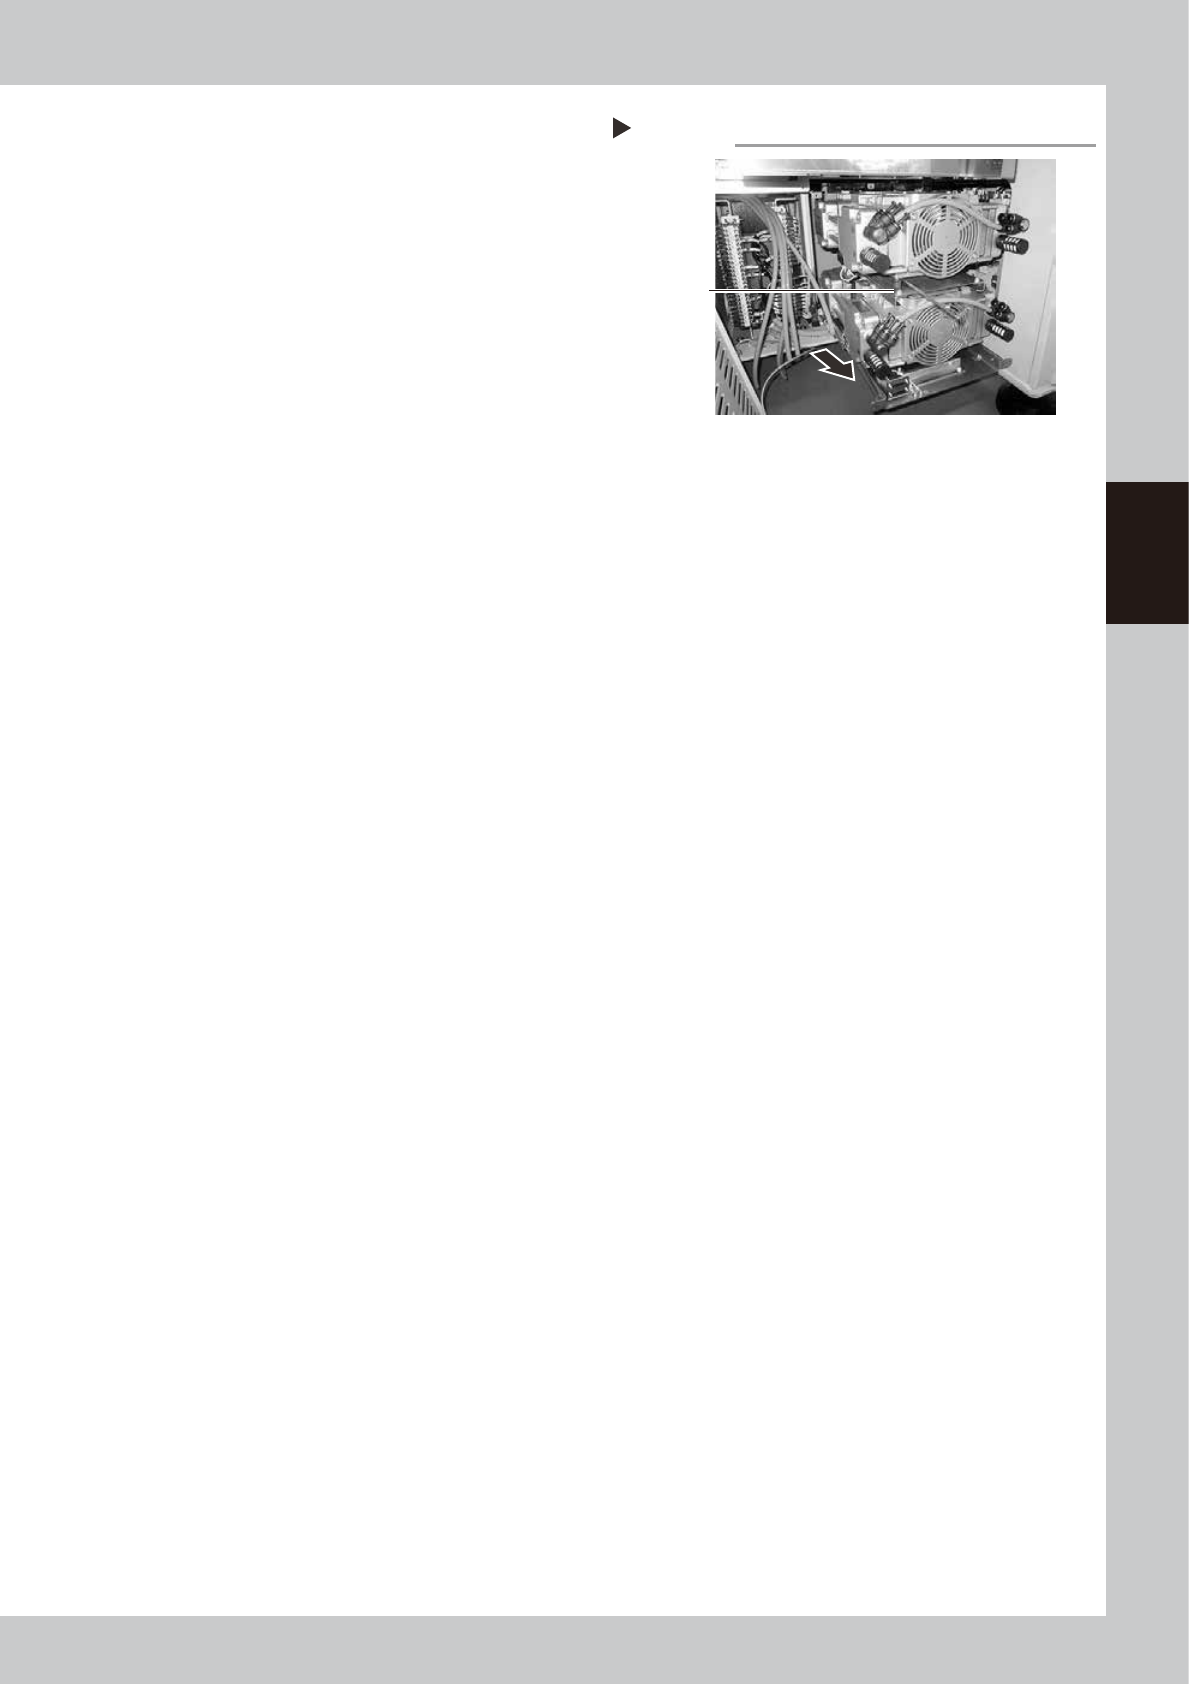
5
Detach the lower pump.
1. Use a hex wrench (4) to remove 2 bolts
(front side) that mount the lower pump.
2. Detach the lower pump, and also
disconnect the power connector and
ground wire from the side housing.
3. Pull out the upper pump to the front side.
533A4-N9-00
Step 4, 5
Detaching the pump
Mounting bolts
(4 places)
3-80
3
Periodic maintenance items
7.2.3 Detaching the parts subject to wear
n
Detaching head cover and cylinder (for replacing O-ring in connecting pipe)
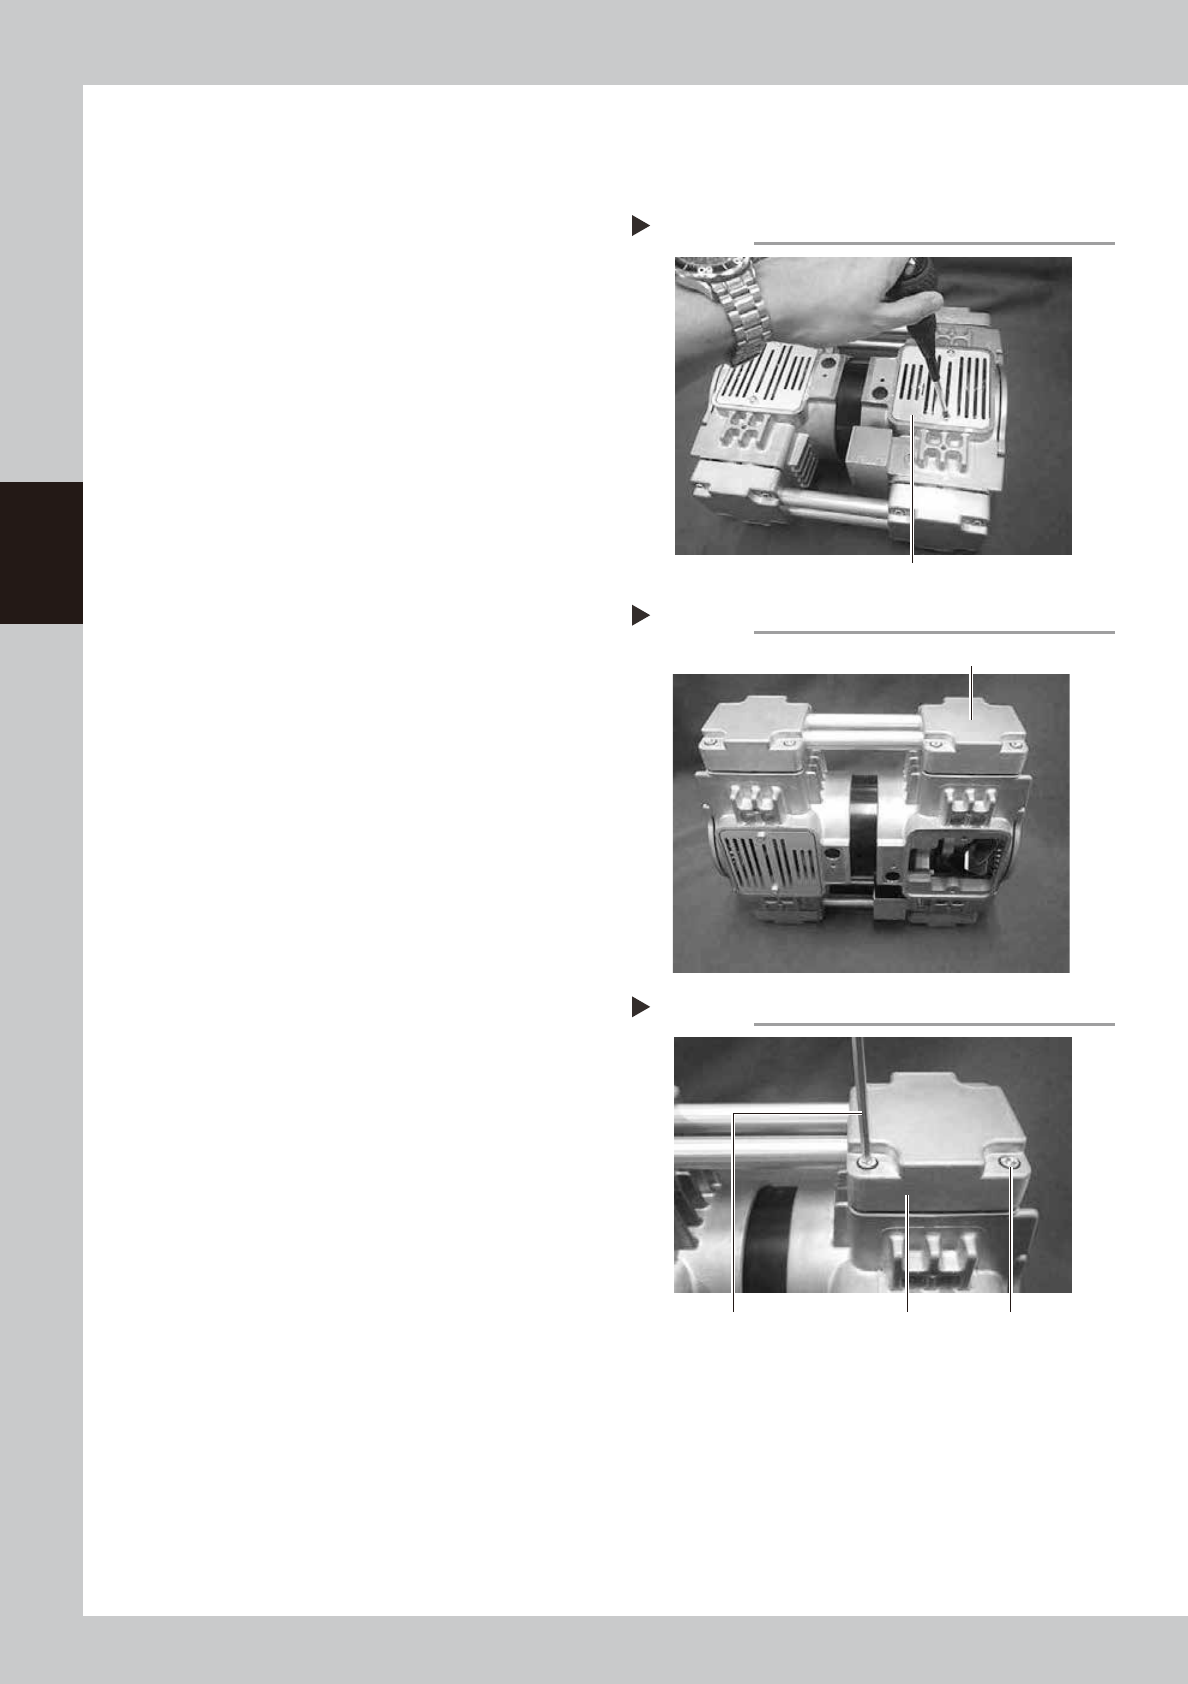
1
Detach the panel.
Use a Phillips screwdriver to remove the
screws that mount the panel.
533A5-N9-00
2
Place the pump upright.
Place the pump in an upright position so
that the head whose parts are to be
replaced is at the top.
533A6-N9-00
3
Remove the mounting bolts.
Use a hex wrench to remove 4 bolts (M6×L30)
each mounting the left and right head
covers (remove a total of 8 bolts).
4
Detach the head covers.
Detach the head covers along with the
connecting pipe.
533A7-N9-00
Step 1
Detaching the panel
Panel
Step 2
Placing the pump upright
Head whose parts are to be replaced
Step 3, 4
Detaching head cover
Hex wrench Head cover Mounting bolt