YSM40R_Mainte_E.pdf - 第151页
3-81 3 Periodic maintenance items 5 Replace the O-rings. 1. Detach the connecting pipe from the head covers. 2. Replace the O-rings (4 pieces) on the connecting pipe with new ones. At this point, apply grease (NSL) to th…
3-80
3
Periodic maintenance items
7.2.3 Detaching the parts subject to wear
n
Detaching head cover and cylinder (for replacing O-ring in connecting pipe)
1
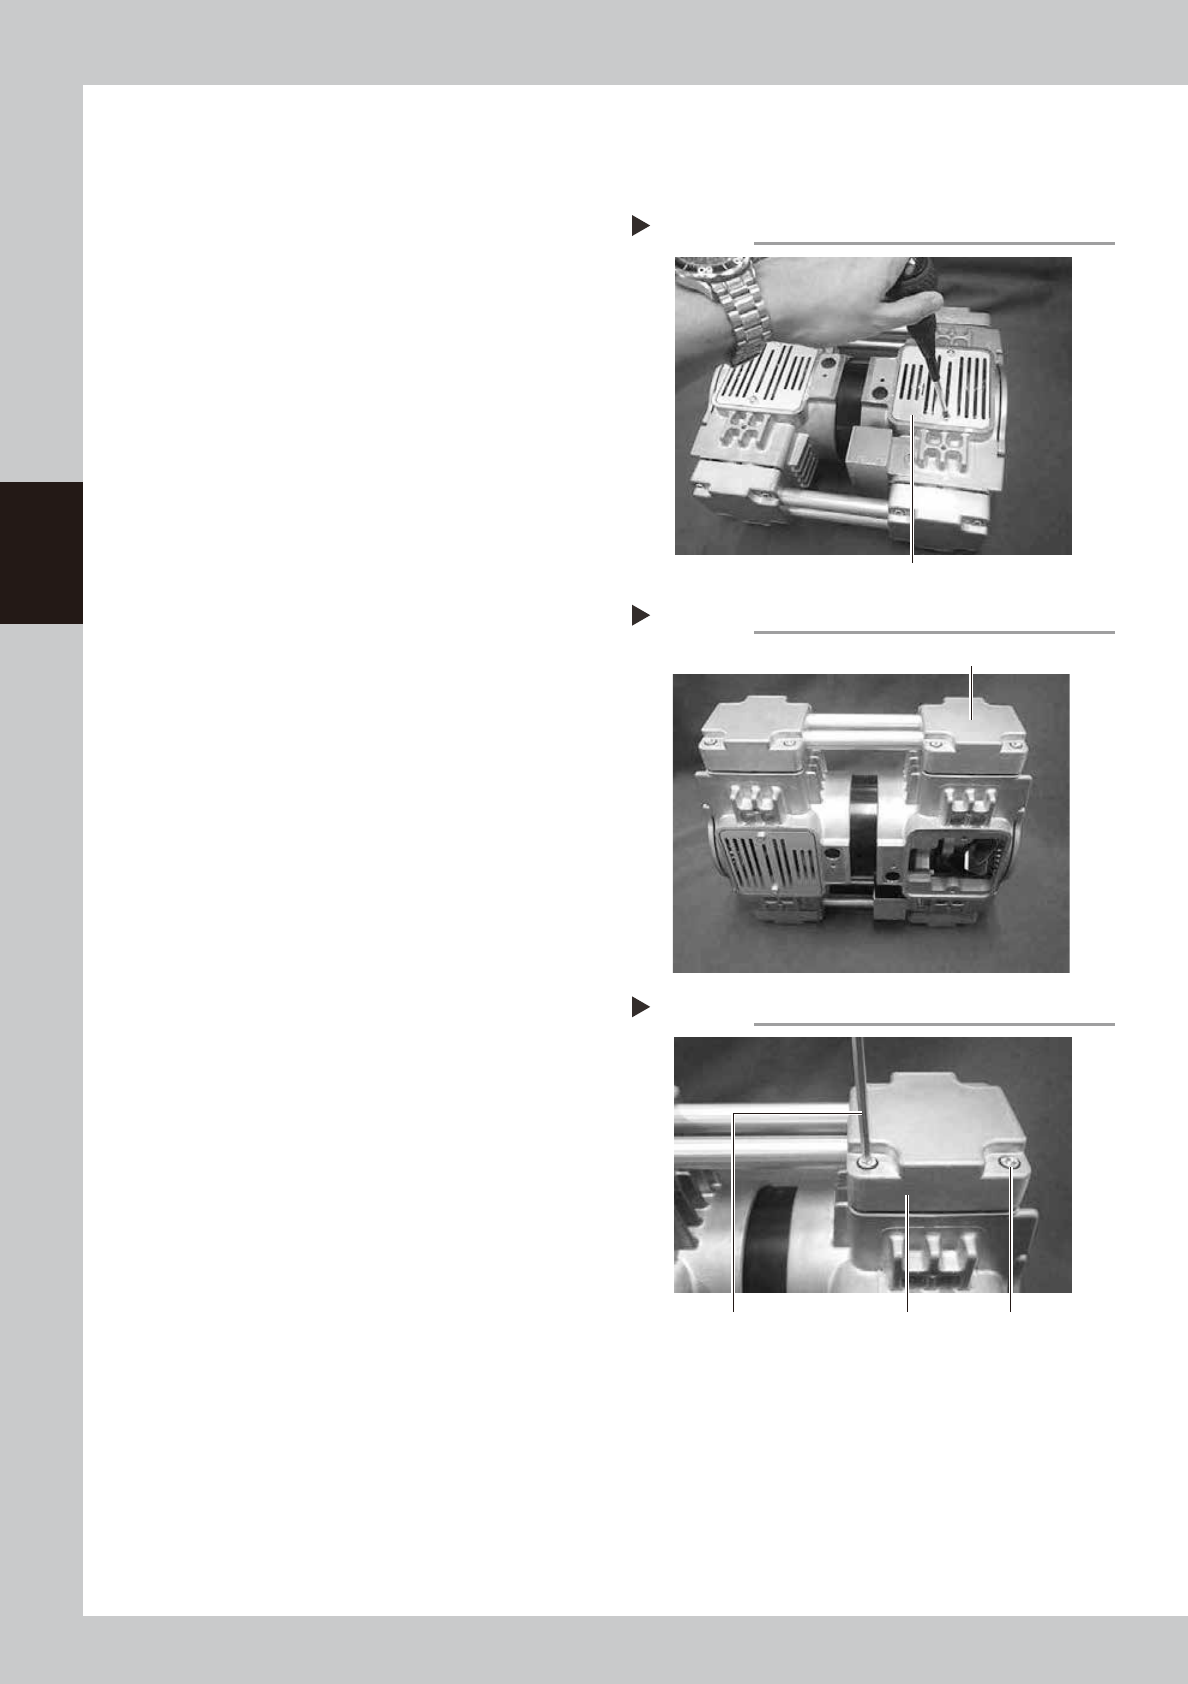
Detach the panel.
Use a Phillips screwdriver to remove the
screws that mount the panel.
533A5-N9-00
2
Place the pump upright.
Place the pump in an upright position so
that the head whose parts are to be
replaced is at the top.
533A6-N9-00
3
Remove the mounting bolts.
Use a hex wrench to remove 4 bolts (M6×L30)
each mounting the left and right head
covers (remove a total of 8 bolts).
4
Detach the head covers.
Detach the head covers along with the
connecting pipe.
533A7-N9-00
Step 1
Detaching the panel
Panel
Step 2
Placing the pump upright
Head whose parts are to be replaced
Step 3, 4
Detaching head cover
Hex wrench Head cover Mounting bolt
3-81
3
Periodic maintenance items
5
Replace the O-rings.
1. Detach the connecting pipe from the
head covers.
2. Replace the O-rings (4 pieces) on the
connecting pipe with new ones. At this
point, apply grease (NSL) to the entire
surface of each new O-ring.
533A8-N9-00
6
Put a mark.
Before detaching the cylinder, put a mark
on the casing and cylinder with an oil-based
marker pen to indicate the reassembly
position.
533A9-N9-00
c
CAUTION
The pump will break down if the cylinder is reassembled
in the wrong direction, so always put a mark to indicate
the reassembly position.
7
Raise the cylinder.
Turning the fan raises the cylinder. Wear
gloves and slowly turn the fan to raise the
cylinder.
c
CAUTION
The inside of the pump might be hot. Always wear
gloves before touching the fan and cylinder.
8
Detach the cylinder.
c
CAUTION
Do not drop the spacer located on the inner periphery
of the cylinder installation surface.
533B1-N9-00
Step 5
Replacing the O-ring
Connecting pipe
Head cover
O-ring
Step 6
Marking
Oil-based marker pen
Step 7, 8
Detaching the cylinder
Cylinder
Fan
3-82
3
Periodic maintenance items
n
Detaching pressing plate and cup packing
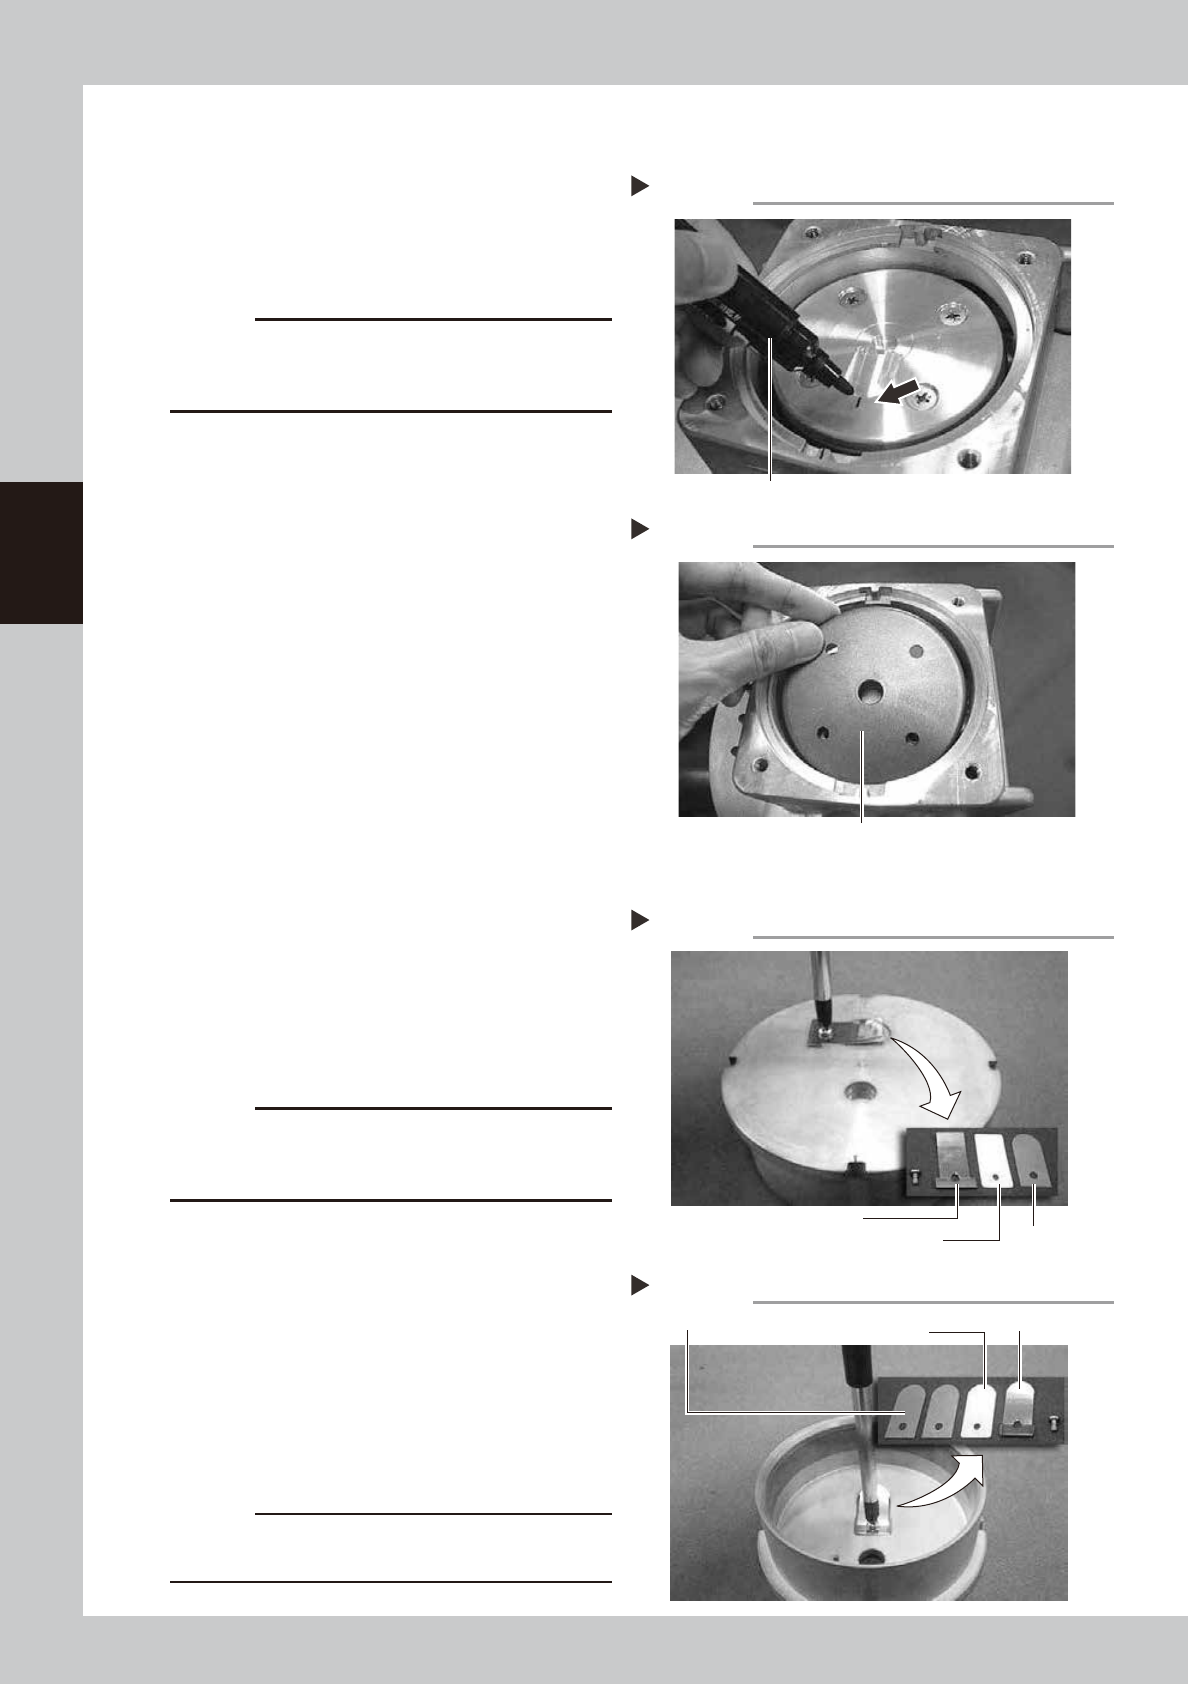
1
Put a mark.
Using an oil-based marker pen, put a mark
on the pressing plate at the position of the
mark on the casing.
533B2-N9-00
c
CAUTION
The pump will break down if the pressing plate is
reassembled in the wrong direction, so always put a
mark to indicate the reassembly position.
2
Detach the pressing plate.
Always wear gloves and use a Phillips
screwdriver to loosen 4 mounting screws
(M5×L12) and detach the pressing plate.
Clean the detached pressing plate.
3
Detach the cup packing.
533B3-N9-00
n
Detaching cylinder parts
1
Detach the parts on the exhaust
valve side.
Use a Phillips screwdriver to loosen the
mounting screw and detach the exhaust
valve pressing plate, exhaust valve, and
exhaust valve backup.
533B4-N9-00
c
CAUTION
Do not dispose of the exhaust valve pressing plate and
intake valve pressing plate as they will be reused after
cleaning.
2
Detach the parts on the intake
valve side.
Invert the cylinder, loosen the mounting
screw with a Phillips screwdriver, and detach
the intake valve pressing plate, intake valves
(2 pieces), and intake valve backup.
533B5-N9-00
3
Clean the cylinder.
Using a lint-free cloth moistened with a
cleaning solvent, wipe the entire cylinder.
c
CAUTION
During cleaning, be careful not to erase the mark you
put on the cylinder.
Step 1
Marking
Oil-based marker pen
Step 3
Detaching cup packing
Cup packing
Step 1
Detaching exhaust valve
Exhaust valve
Exhaust valve pressing plate
Exhaust valve backup
Step 2
Detaching intake valve
Intake valves (2 pieces) Intake valve pressing plate
Intake valve backup