YSM40R_Mainte_E.pdf - 第167页
4-7 4 Maintenance of options 3.2 Monthly inspection 3.2.1 AZ-axis T he following describes the cleaning and lubrication procedures for the AZ-axis. 1 Detach the co ver . Use a Phillips screwdriver to detach the rear cove…
4-6
4
Maintenance of options
3.1 Daily inspection
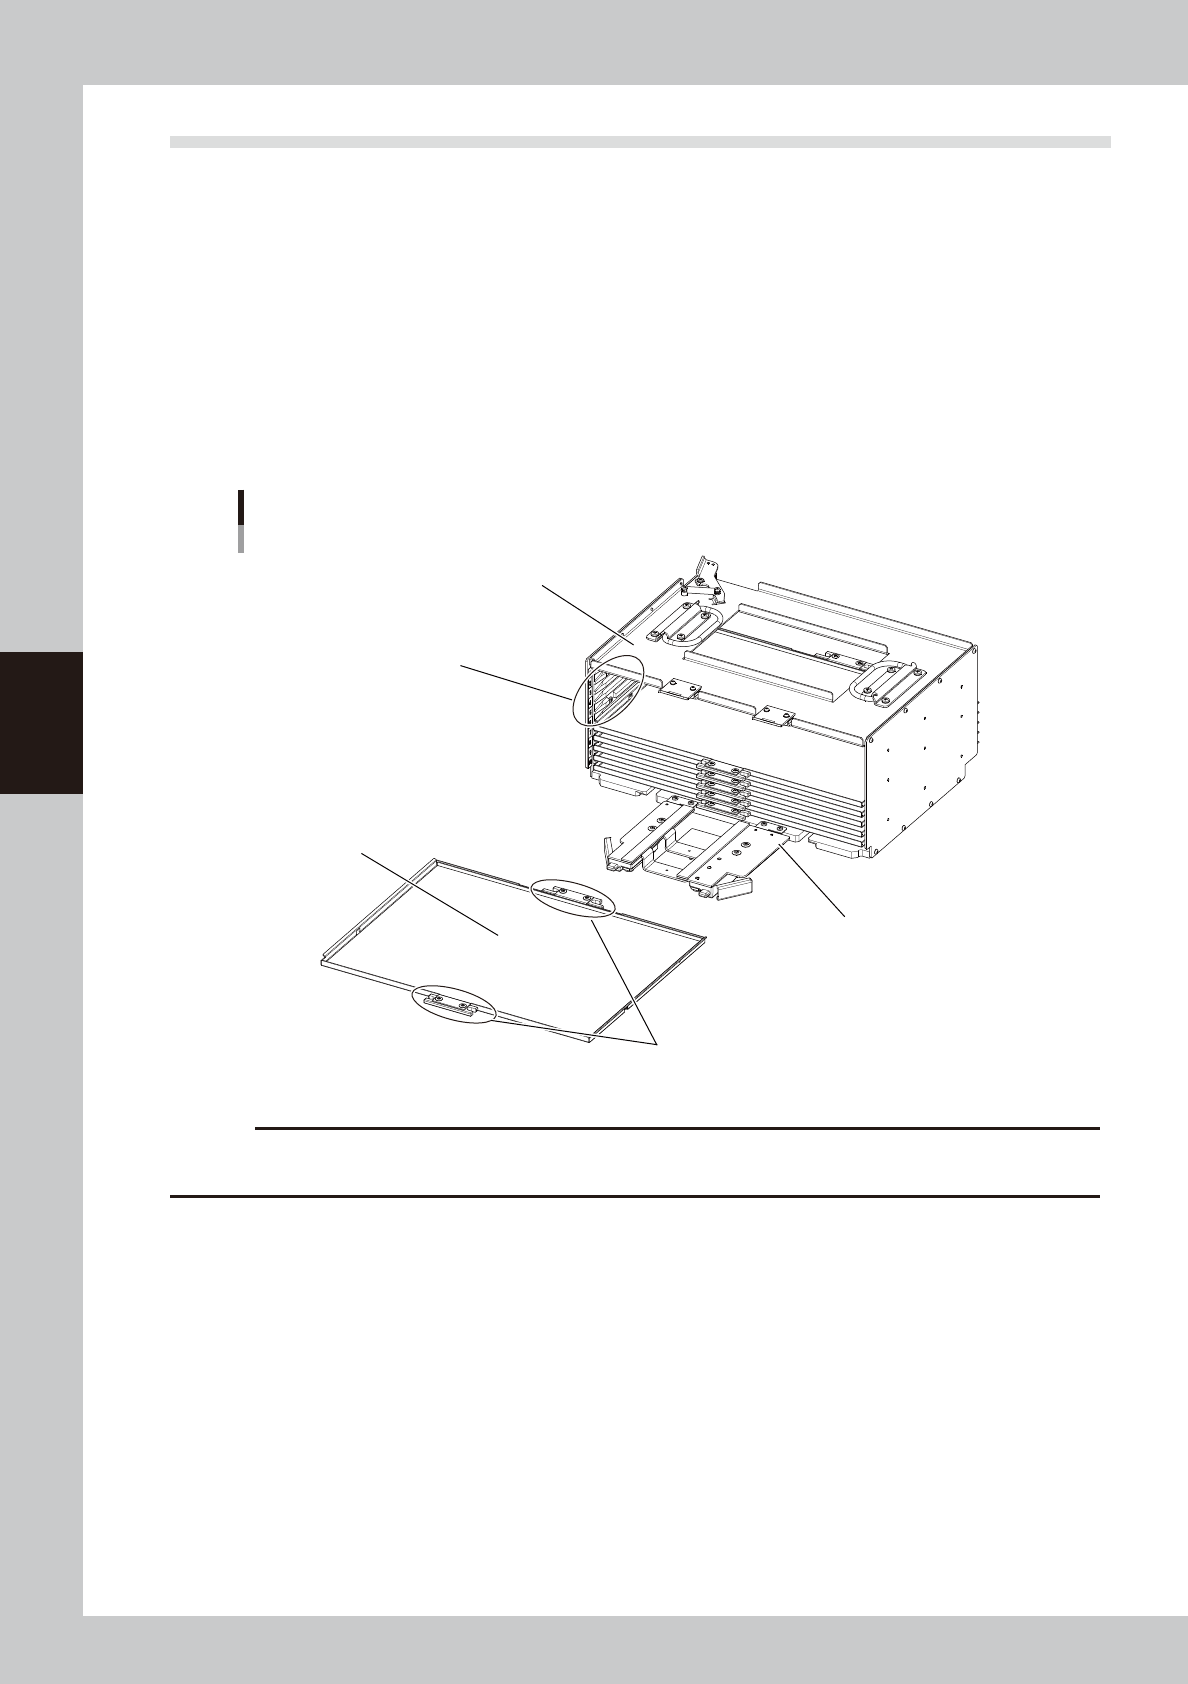
3.1.1 Inspecting magazines and pallets
A deformed magazine or pallet may cause errors when picking up parts or pulling the pallet out of the
magazine. Before setting tray parts on a pallet, make sure that the magazine and pallet are not deformed or
warped.
n
Points to check
· Magazine is not deformed.
· Magazine’s pallet guides are not worn.
· Pallet retainer door has no play.
· Pallet is not warped or deformed.
· Pallet pullout piece is not worn or damaged.
Magazine and pallet
Check for deformation and warp
Pallet is not warped or deformed.
Magazine is not deformed.
Magazine’s pallet guides are not worn.
Pallet retainer door has no play.
Pallet pullout piece is not worn or damaged.
53414-N9-00
c
CAUTION
If the magazine or pallet is deformed or excessive wear is found, stop using and replace it with a new magazine or
pallet.
4-7
4
Maintenance of options
3.2 Monthly inspection
3.2.1 AZ-axis
The following describes the cleaning and lubrication procedures for the AZ-axis.
1
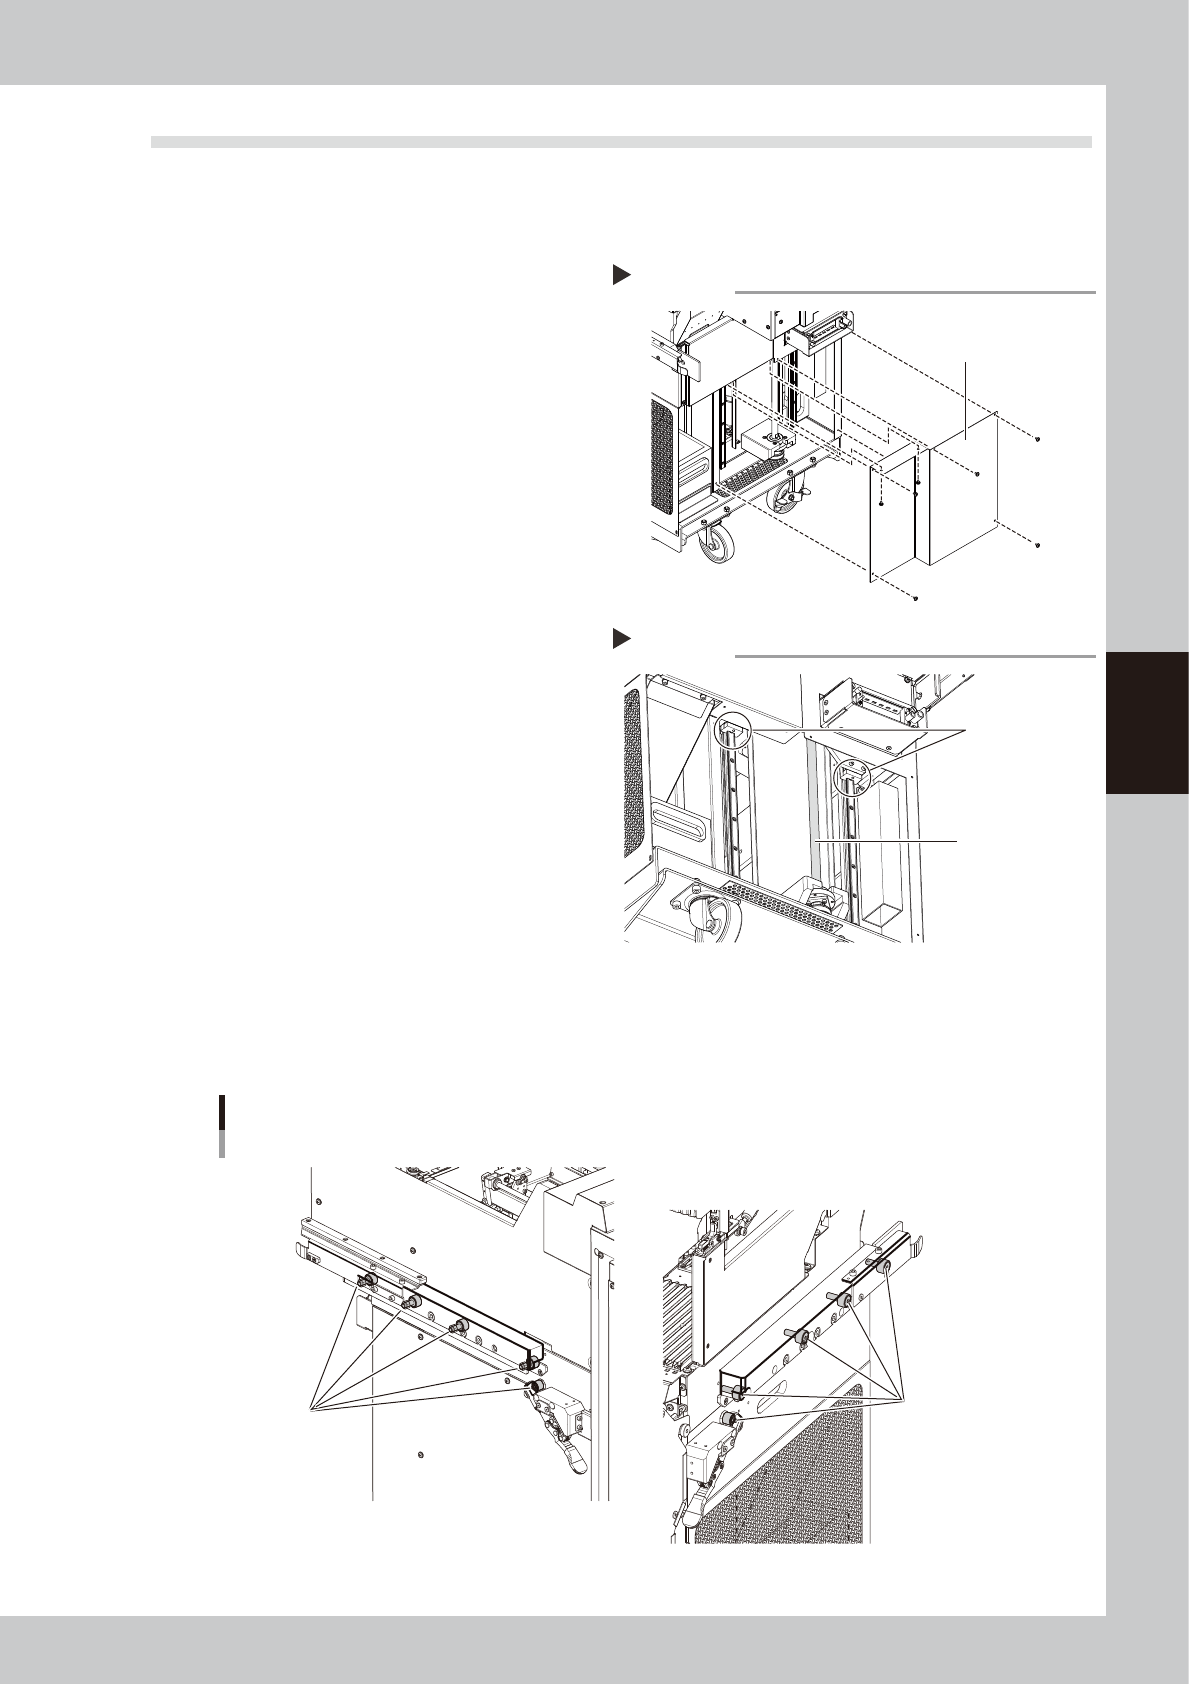
Detach the cover.
Use a Phillips screwdriver to detach the rear
cover of the cATS.
53404-N9-00
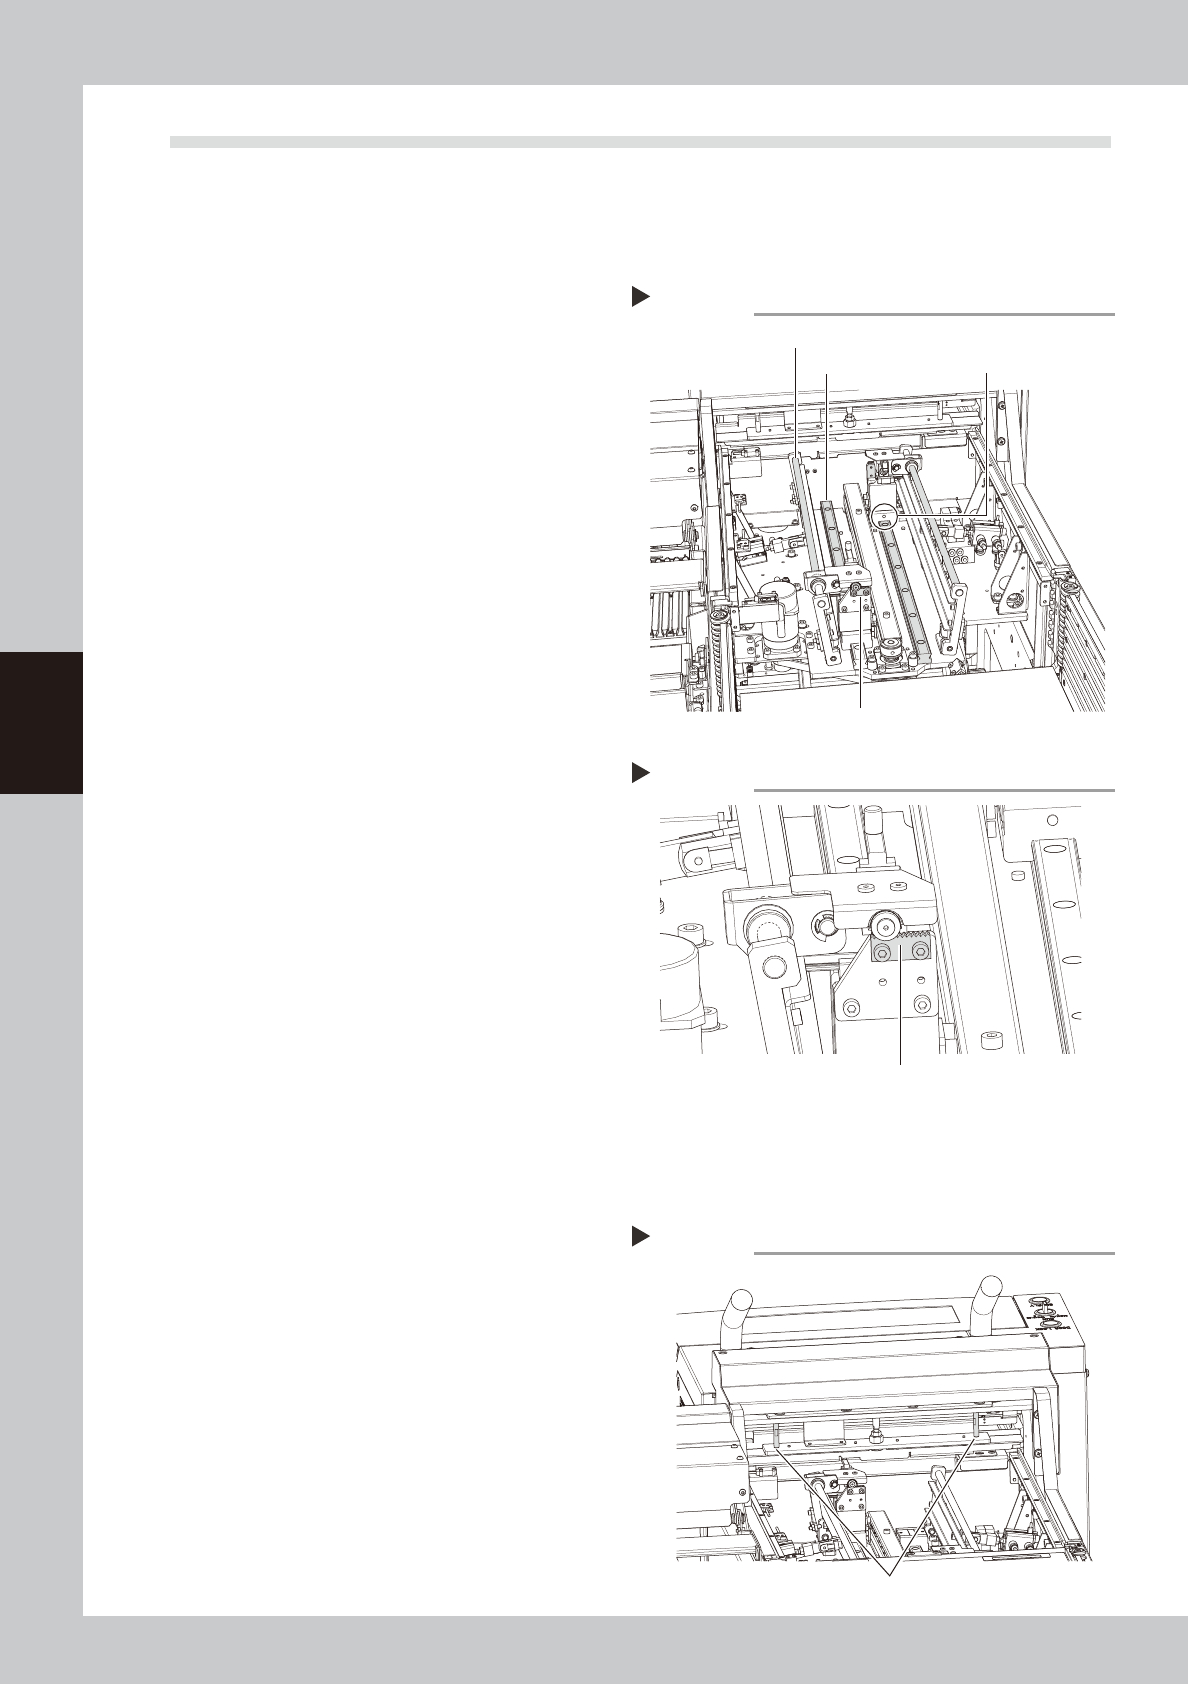
2
Clean the ball screw and guide.
Use a lint-free cloth to wipe off the old
grease and dirt on the ball screw and guide.
3
Apply grease.
Apply grease by hand to the ball screw. Also
apply grease to the guide using a grease
gun (bent type).
53405-N9-00
4
Reattach the cover.
Reattach the cover that was detached in
Step 1.
3.2.2 Both sides of cATS
Lightly apply grease by hand to the cam followers on both sides of the cATS.
Both sides of cATS
Cam follower
cATS left side
cam follower
cATS right side
cam follower
53406-N9-00
Applying grease
Step 3
Grease nipple
for AZ-axis guide
AZ-axis ball screw
Detaching the cover
Step 1
Cover
4-8
4
Maintenance of options
3.3 6-month inspection
3.3.1 AH-axis
The following describes the cleaning and lubrication procedures for the AH-axis (guide, ball guide, rack &
pinion).
1
Clean the guide.
Use a lint-free cloth to wipe off the old
grease and dirt on the guide.
2
Apply grease.
1. As shown in the figure on the right, move
the grease nipple to a position where a
grease gun can be easily used.
2. Use a grease gun (bent type) to inject
grease into the grease nipple.
53407-N9-00
3
Clean the ball guide.
Use a lint-free cloth to wipe off the old
grease and dirt on the ball guide.
4
Apply grease.
Apply a thin coat of grease by hand to the
ball guide.
5
Clean the rack & pinion.
Use a lint-free cloth to wipe off the old
grease and dirt on the rack & pinion.
6
Apply grease.
Uniformly apply grease by hand to the rack
gear.
53408-N9-00
7
Remove excess grease.
1. After applying grease, move each unit
back and forth a few times.
2. Check the grease condition and wipe
away excess grease using a lint-free
cloth.
3.3.2 Magazine shaft
The following describes the cleaning and lubrication procedures for the magazine shaft ball guide.
1
Clean the ball guide.
Use a lint-free cloth to wipe off the old
grease and dirt on the ball guide.
2
Apply grease.
Apply a thin coat of grease by hand to the
ball guide.
53409-N9-00
Applying grease to the AH-axis
Step 2
Ball guide
Rack gear
Grease nipple for guide
Guide
Applying grease to the rack gear
Step 6
Rack gear
Applying grease to the magazine shaft
Step 2
Magazine shaft