YSM40R_Mainte_E.pdf - 第65页
2-10 2 Daily maintenance items n Checking the nozzles with the maintenance mirror T he maintenance mirror is located near the feeder slope of this machine to make it easier to check the condition of the nozzle tips. 1. U…
2-9
2
Daily maintenance items
1.2 Checking the nozzles visually
To visually check nozzles, remove each nozzle from the head or from the nozzle station. Also, YSM40R is
equipped with a maintenance mirror that can be used to visually check nozzles.
n
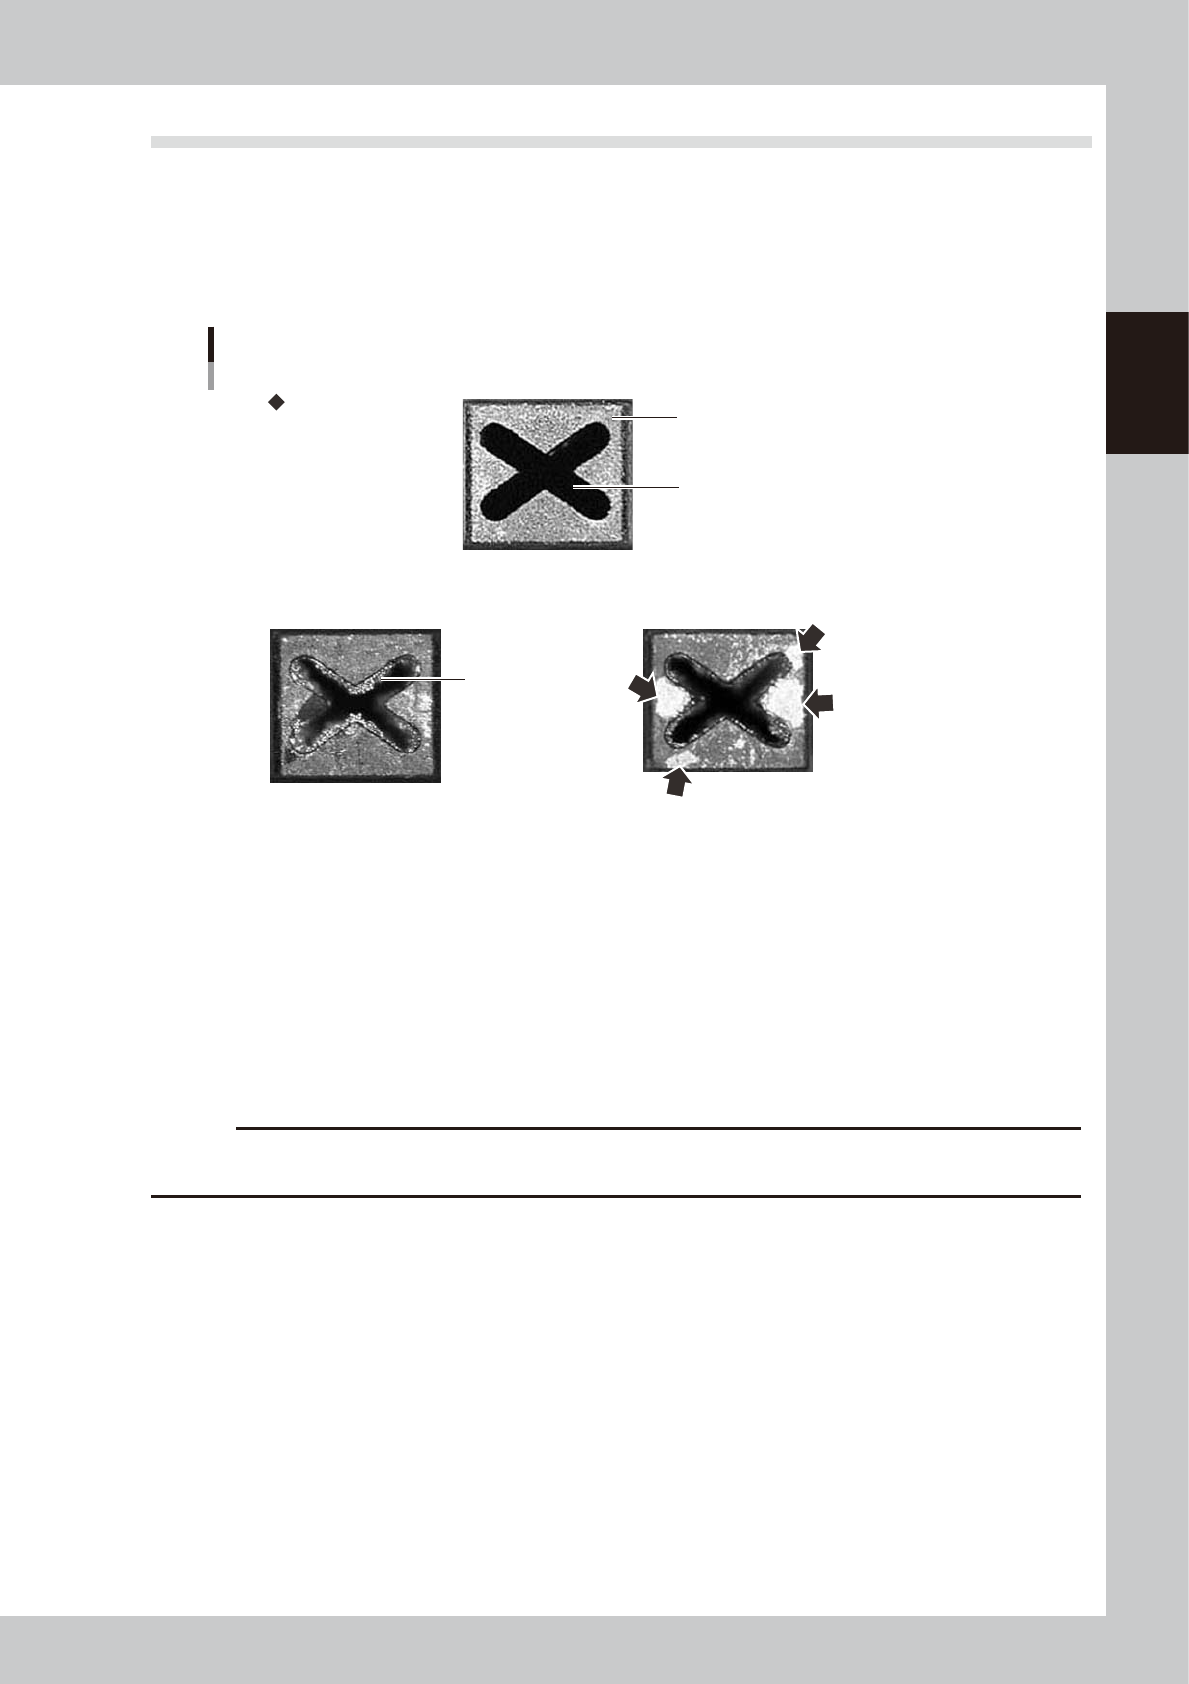
Points to check detached nozzles
Check the removed nozzles with a magnifying glass or similar tool. If solder or dust is adhering to the nozzle tip or
nozzle hole, then clean the nozzles.
Nozzle tip
Solder is adhering to
nozzle hole.
Solder is adhering to
nozzle tip (flat surface).
Nozzle hole
Checking the nozzle condition
No good: Nozzle is clogged No good: Shiny material on tip
Normal condition
53202-N9-00
n
Checking nozzles by detaching them from the head individually
1. Move the head to a position where the nozzles can be easily detached, then detach each nozzle manually.
2. After checking and cleaning the nozzle, reattach the nozzle to the head while making sure the head position and the
nozzle's orientation are correct.
n
Checking nozzles by detaching them from the nozzle station (option)
1. Return all nozzles in the nozzle station.
2. Press the [Nozzle Stn Shutter] button on the [Unit]-[Head] tab screen to be ready for detaching nozzles.
3. After checking and cleaning the nozzle, return nozzles to original positions and press the [Nozzle Stn Shutter] button.
c
CAUTION
Be sure to attach nozzles to the original head. When the nozzles were detached from the nozzle station (option), return
them in the original positions.
2-10
2
Daily maintenance items
n
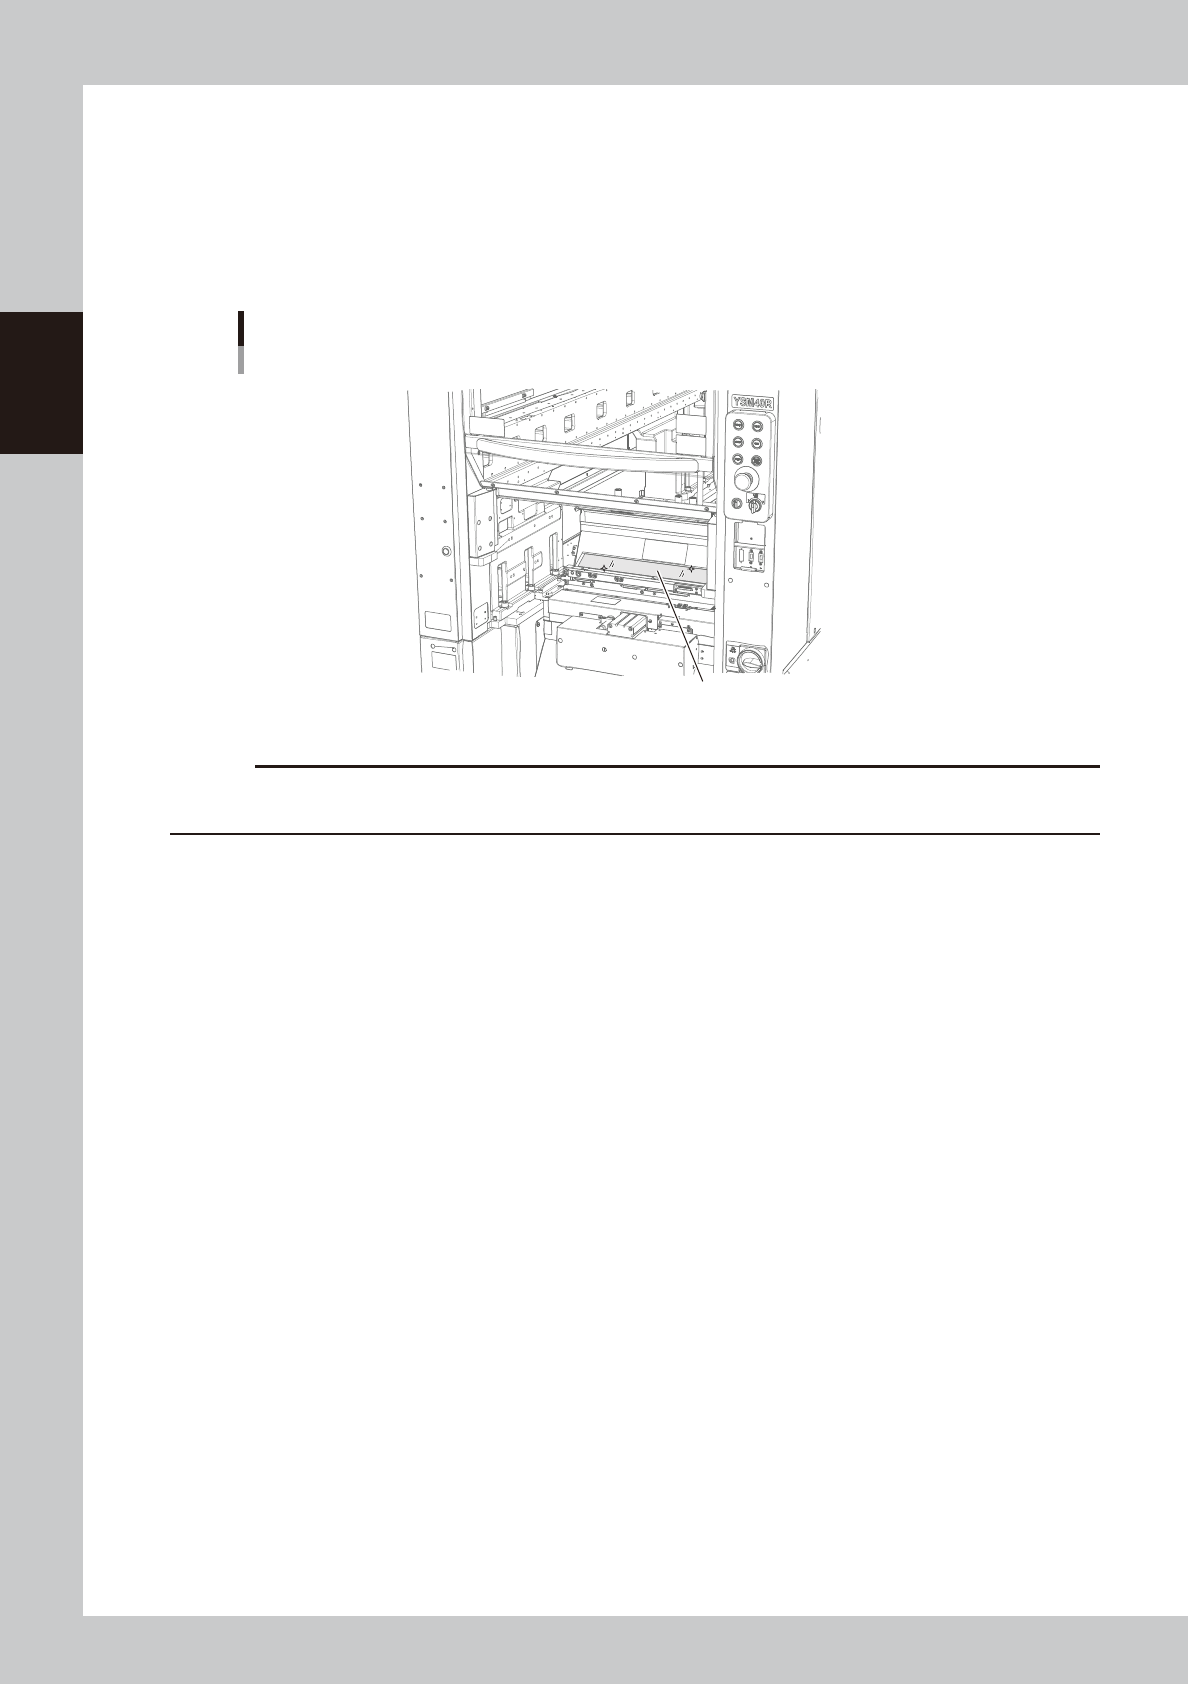
Checking the nozzles with the maintenance mirror
The maintenance mirror is located near the feeder slope of this machine to make it easier to check the condition of the
nozzle tips.
1. Use the CLAMP ON/OFF switch to lower the feeder exchange carriage and remove it from the machine.
2. Move the head to a position above the maintenance mirror.
3. Use the maintenance mirror to check the condition of the nozzle tips.
Maintenance mirror
Maintenance mirror
53203-N9-00
c
CAUTION
If any nozzle is dirty or clogged, clean the nozzle hole and nozzle tip. See "1.2 Nozzle cleaning" in Chapter 3 for
details.
2-11
2
Daily maintenance items
2. Cleaning the feeder plate
Chips or foreign object falling on the feeder plate might bite into the surface during feeder setting and cause
the pickup position to deviate. Periodic inspection and cleaning are recommended to prevent this problem.
n
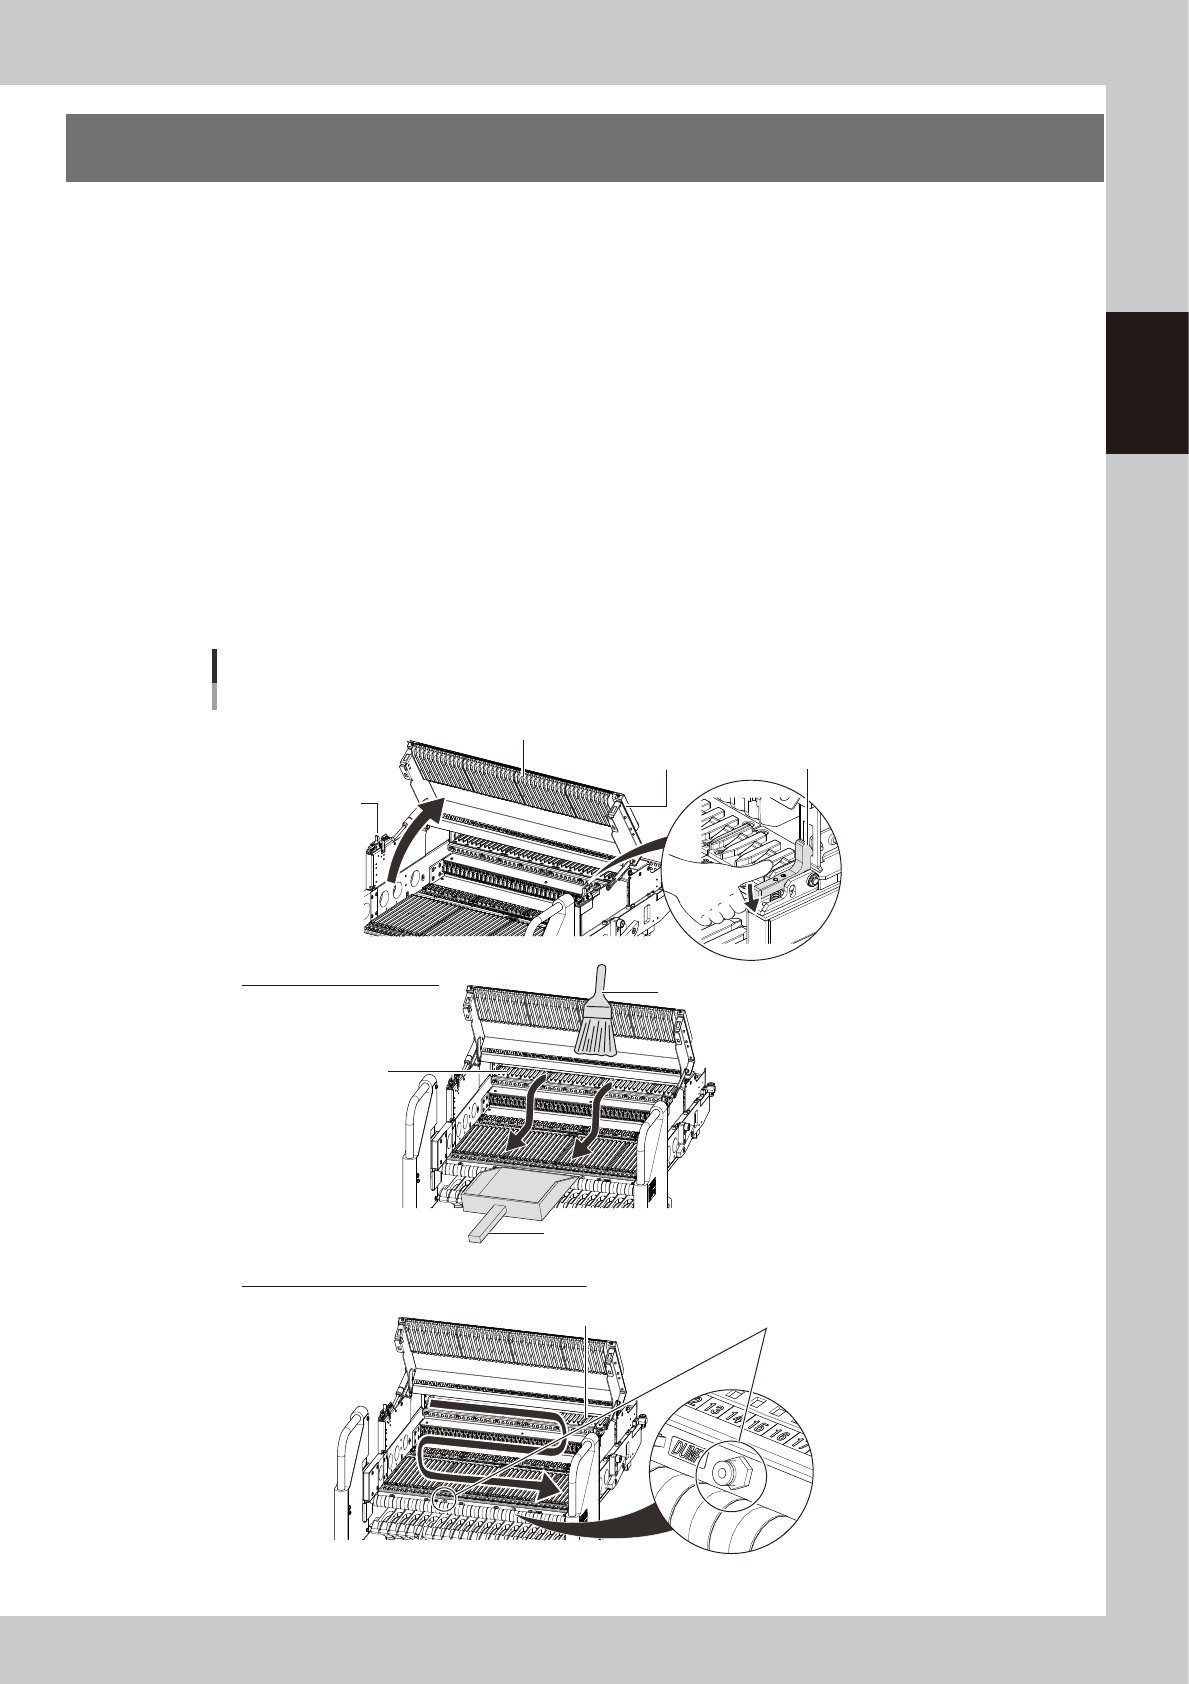
Cleaning with feeder plate cleaning brush
1. Detach the feeder exchange carriage from the machine.
2. Using a feeder plate cleaning brush, sweep out the chips and debris in the direction of arrow shown in the figure
below.
n
Cleaning with vacuum cleaner
1. Detach the Feeder exchange carriage from the machine.
2. Use a household vacuum cleaner, etc. to suction the dust and small debris that were generated from chips and paper
tape residue, etc.
n
Cleaning with vacuum assembly
1. Set the feeder exchange carriage on the machine.
2. Connect the optional vacuum assembly (KHY-M88V0-A0X) to the air connectors on the front of carriage.
3. Vacuum the dust and small debris generated from chips and paper tape residue, etc.
Cleaning feeder plate
Feeder exchange carriage for YSM40R
Cleaning with vacuum cleaner (Vacuum assembly)
Open guide rail cover.
Cleaning with cleaning brush
Cover lock
Connect air connector vacuum assembly.
Guide rail cover Cover lock
Feeder plate
Feeder plate
Cleaning brush
Use dust pan to collect foreign objects.
53204-N9-00