4H4CEOM1.pdf - 第112页
Page 4-4 Before Production 4-2-2 Checking Air Pressure 1 . Remove the screw with a driver , and open the cover at the lower side of the rear operation area. 2 . Make sure the pressure gauge indications are within the fol…
Page 4-3
PRODUCTION
4
4H4C-E-OMA04-A01-00
4-2 Before Production
4-2-1 Start-up Inspection
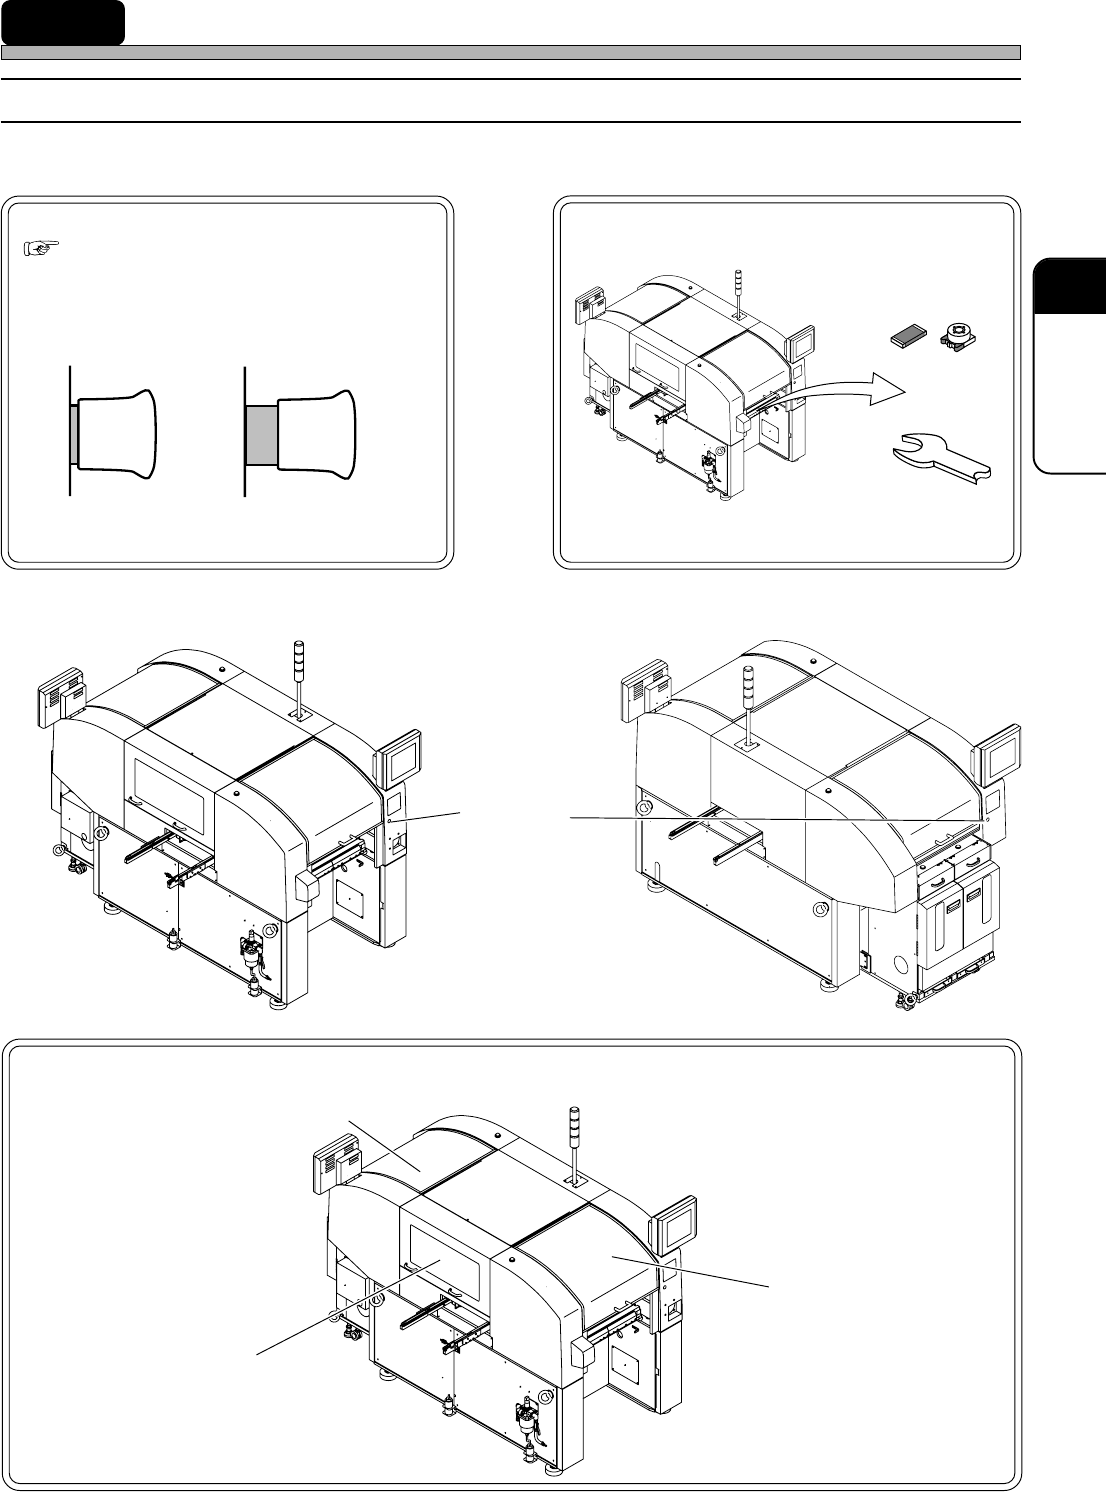
Before starting operation, check the following points.
Are all the covers closed?
Are emergency stop buttons reset?
(
SAFETY PRECAUTIONS)
State of emergency stop
State of reset
Are there any foreign objects on conveyors or
feeder bases?
Chips
Tools
Emergency
stop button
433C-039E
433C-040E
Front View Rear View
∗ Pull it forward to reset.
Front Safety Cover
4H4C-AN00
4H4C-AN00
4H4C-AN00
4H4C-AO00
Rear Safety Cover
Side Safety Cover
Page 4-4
Before Production
4-2-2 Checking Air Pressure
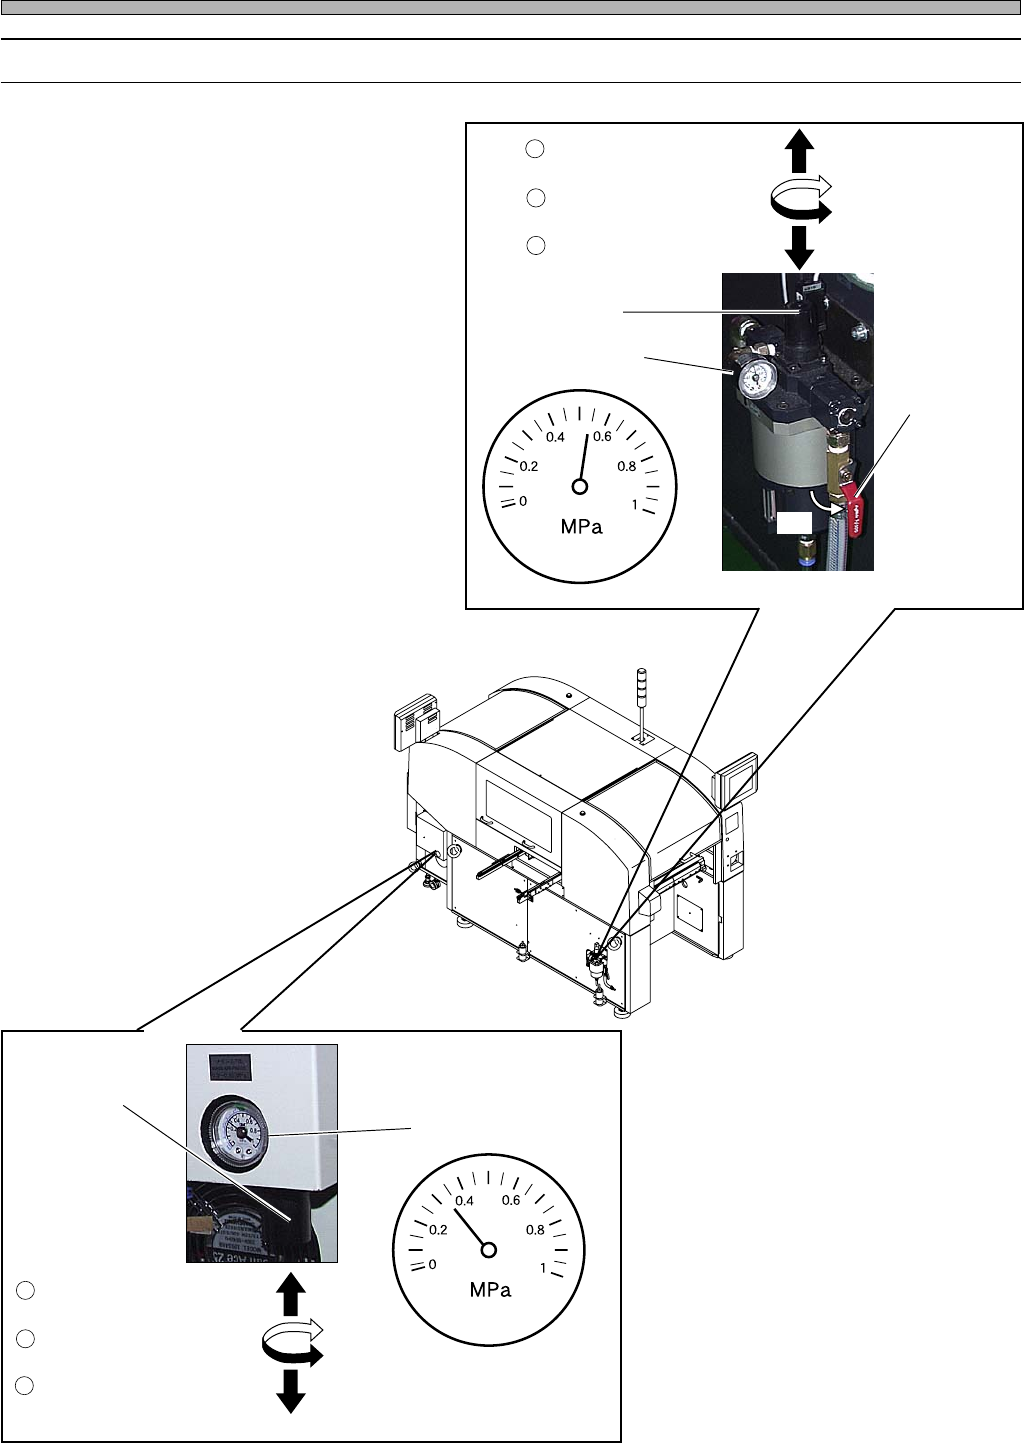
1. Remove the screw with a driver, and
open the cover at the lower side of
the rear operation area.
2. Make sure the pressure gauge
indications are within the following
ranges.
Main Body: 0.49 MPa or more
and 0.78 MPa or less
Tray Feeder: 0.30 MPa or more
and 0.35 MPa or less
∗ Make sure the lever is ON.
∗ If air pressure is improper, turn the valve
and adjust it.
1
Unlock the valve.
2
Adjust the air pressure.
3
Lock the valve.
Valve
Pressure Gauge
Lever
To turn it
ON, throw
it down.
4H4C-001P
ON
Front Side
4H4C-AN00
4H4C-E-OMA04-A01-00
4H4C-002P
3
Lock the valve.
2
Adjust the air pressure.
1
Unlock the valve.
Valve
Pressure Gauge
4H4C-017E
Page 4-5
PRODUCTION
4
4-3 Starting Production
NOTICE
Before starting production, check the positions of emer-
gency stop buttons and how to use them. ( SAFETY
PRECAUTIONS)
• When this equipment is in abnormal condition, press this
button immediately.
• Pulling the emergency stop button out resets it.
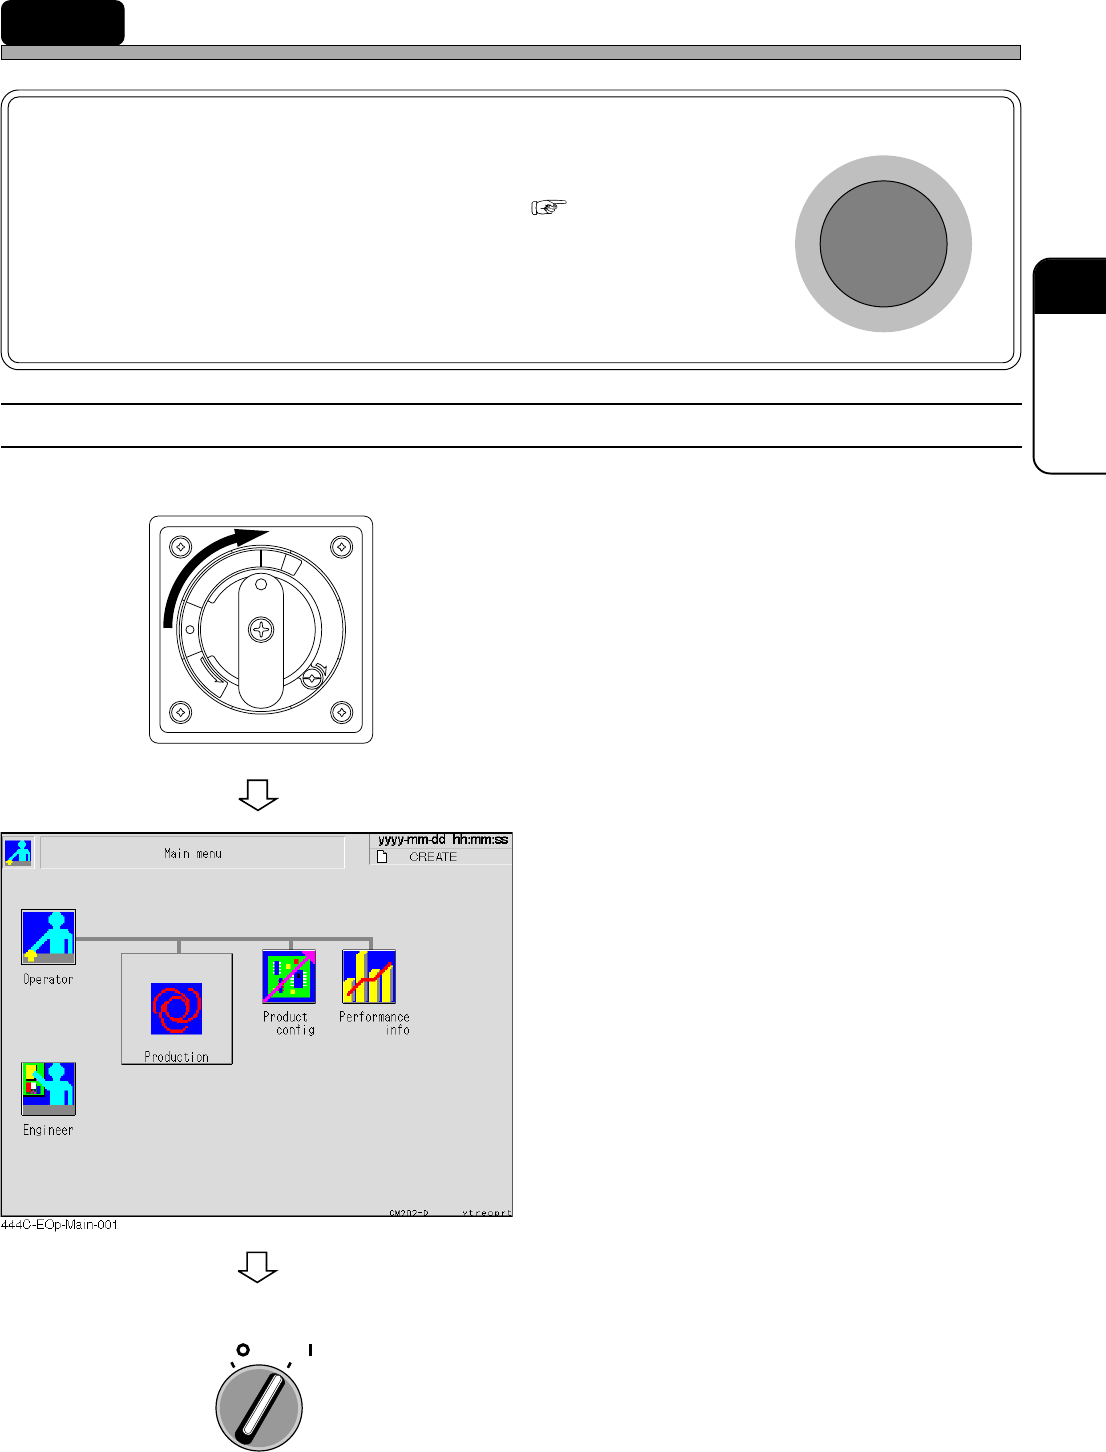
4-3-1 Starting up Machine
Start up the machine in the following order.
1. Turn ON the power supply switch.
• Power is supplied to the machine and the touch
panel starts to be displayed.
• The system starts loading to the machine. It
will take several minutes.
• After the system has been loaded, the screen
as shown left is displayed.
2. Turn ON the servo switch.
R
E
L
E
A
S
E
T
R
I
P
O
F
F
O
N
R
E
S
E
T
OFF ( )
ON ( )
SERVO
E
M
E
R
G
E
N
C
Y
S
T
O
P
4H4C-E-OMA04-A01-01