4H4CEOM1.pdf - 第85页
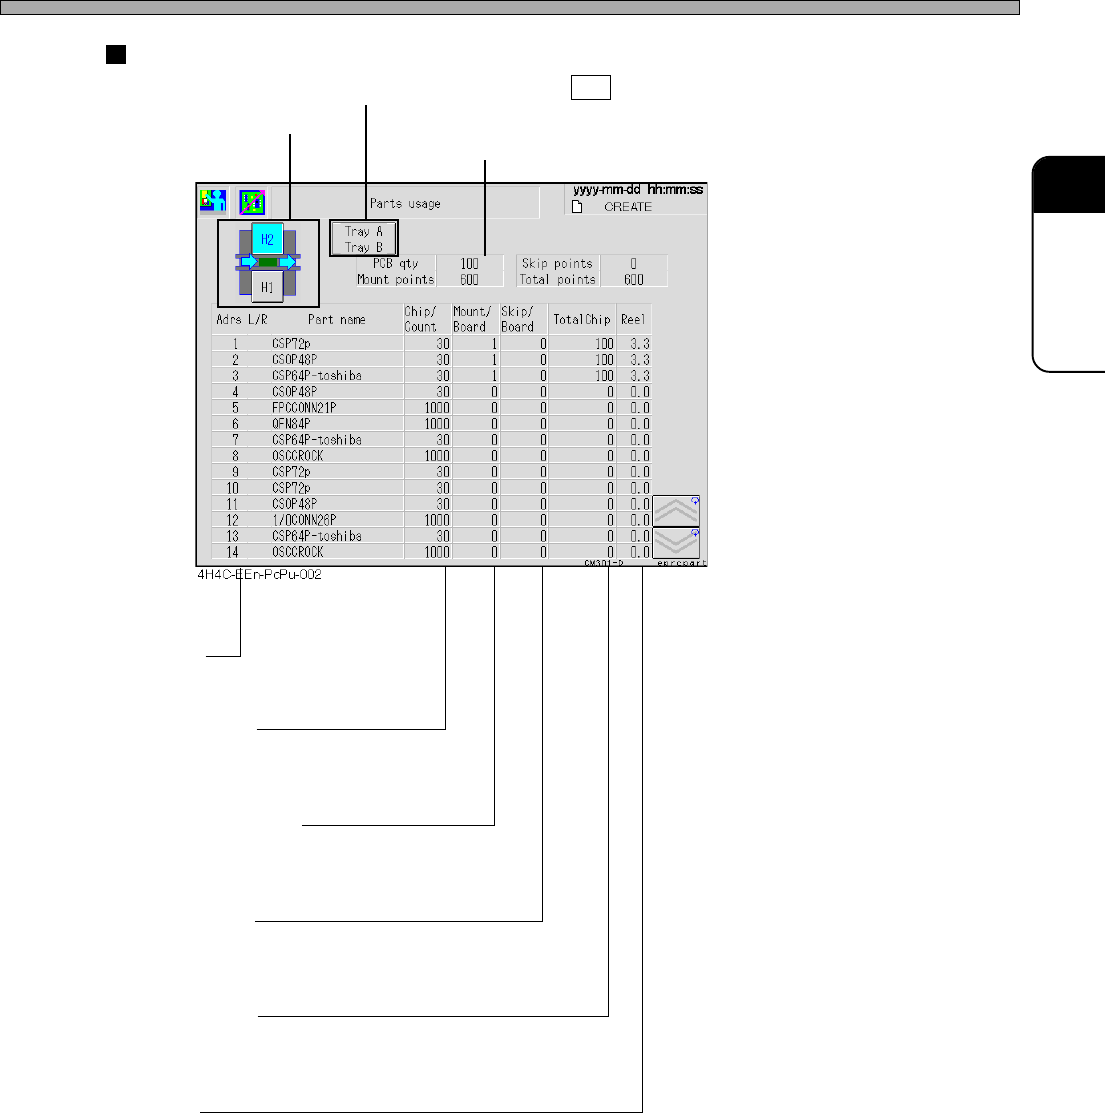
Page 3-7 FUNCTIONS 3 Production Settings Result of calculation Stage Selection T ray selection (Only when H2 is selected) [Adrs] The address No. of feeder table Chip/Count H1: The number of chips per reel H2: The number …
Page 3-6
Production Settings
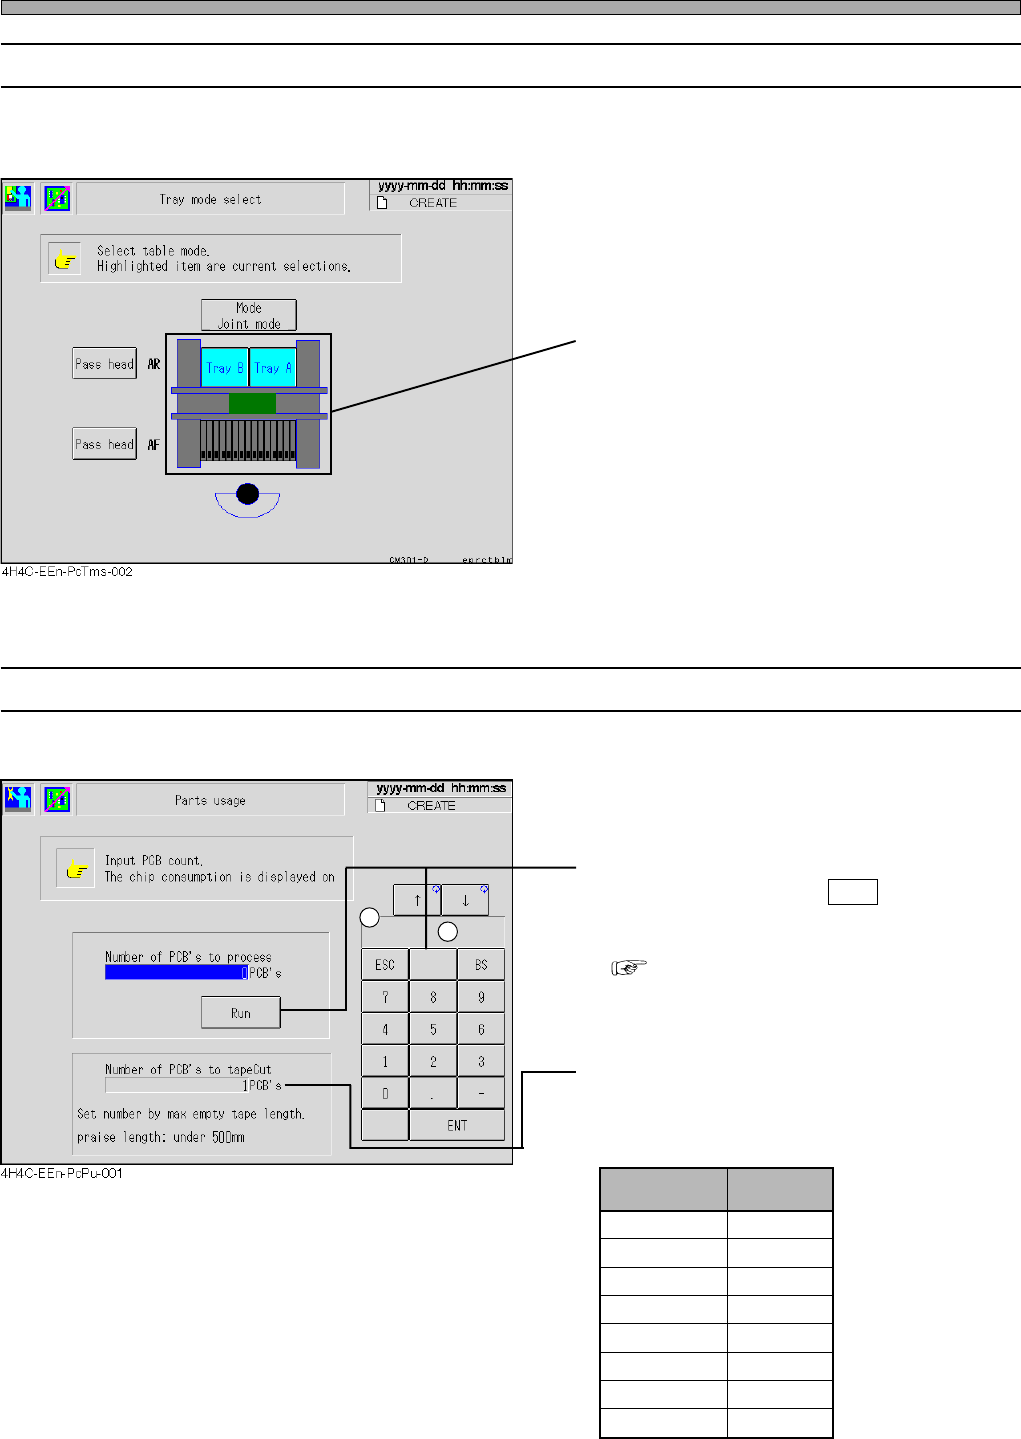
3-2-2 Selecting Tray Mode
This is used to select the table that will work in the reserved mode.
∗ The table mode is switched on PT.
• Press the feeder table to be worked.
∗ The highlighted switch shows the table set
now.
∗ When the power is on, changing motion is
performed.
3-2-3 Calculating Chip Consumption
This machine can calculate the consumption of chips to the count of production boards beforehand.
• Enter the count of production boards with
numeric keys, then press Run .
The number of the chips required to be set in
the feeder is calculated and displayed.
( Next Page)
• Tape Cut Timing Setting (Option)
When changing the number of times of cutting,
the length of the empty tape must be the value
or under in the following list.
4H4C-E-OMA03-A01-03
Tape Width Length
8 mm
12 mm
16 mm
24 mm
32 mm
44 mm
56 mm
72 mm
500 mm
500 mm
400 mm
400 mm
300 mm
300 mm
200 mm
200 mm
1
2
Page 3-7
FUNCTIONS
3
Production Settings
Result of calculation
Stage Selection
Tray selection (Only when H2 is selected)
[Adrs]
The address No. of feeder table
Chip/Count
H1: The number of chips per reel
H2: The number of chips per pallet
Mount/Board
The number of the chips to be
mounted per board
Skip/Board
The number of the mounting skip
points per board
[Total Chip]
The consumption of chips to the
count of boards
[Reel]
H1: The number of tape reels required for the count of boards
H2: The number of pallets required for the count of boards
Chip/Count
Mounting/
Board
Skip/Board
4H4C-E-OMA03-A01-02
Board Count
Page 3-8
Production Settings
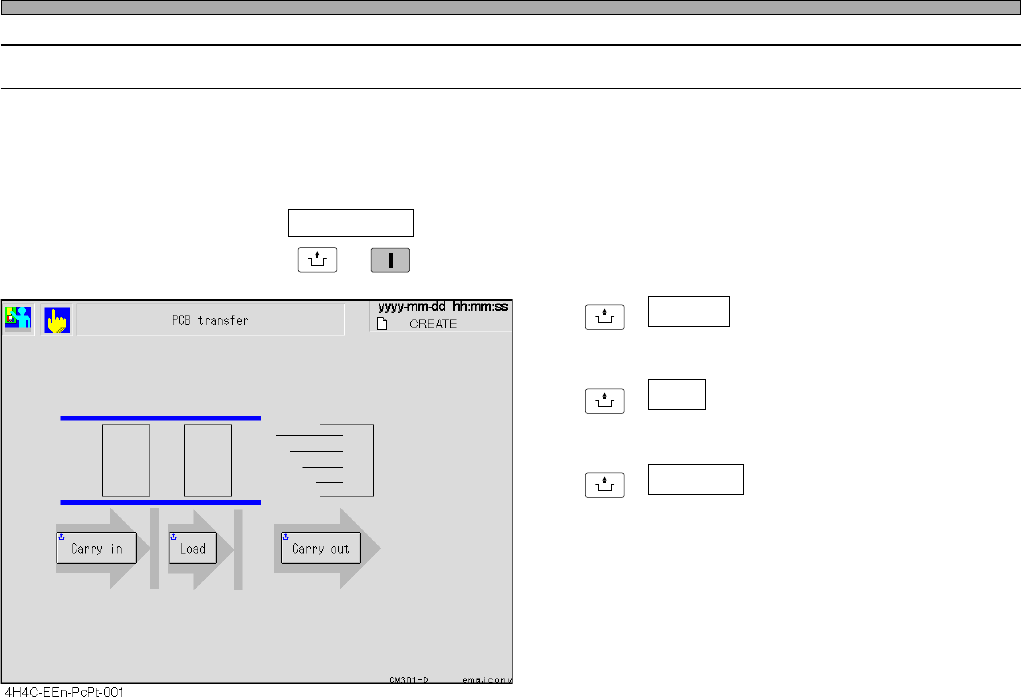
3-2-4 Board Transport
This is used to perform each step from transporting board in to transporting it out to the next
process.
• The board on the conveyor is displayed as a green rectangle. While it is being transported, its
image is blinking.
∗ After pressing PCB transfer on the production settings menu, make sure the servo switch is ON,
and then press
UNLOCK
→
START
.
UNLOCK
+ Carry in
Transports the board in from the previous
process to the left conveyor.
UNLOCK
+ Load
Transports the board from the left conveyor to
the right conveyor.
UNLOCK
+ Carry out
Transports the board from the right conveyor
out to the next process.
4H4C-E-OMA03-A01-01