80S-20用户手册.pdf - 第507页
SIPLACE 80S-20/F4 User Manual 11 Station extensions /Hardware Software version SR.407.xx 01/2001 US Edition 11.9 Flux dispenser unit 507 Å Ref ill the flux, r eplace the lid, and return the reserv oir to its retainer . S…
11 Station extensions /Hardware SIPLACE 80S-20/F4 User Manual
11.9 Flux dispenser unit Software version SR.407.xx 01/2001 US Edition
506
CAUTION
If the flux dispenser is likely to be out of service for any time (more than 1 hour), the press-fit cap
must be pulled over the centering nozzle. This will prevent the flux from crystallizing, and thus
sealing the centering nozzle. 11
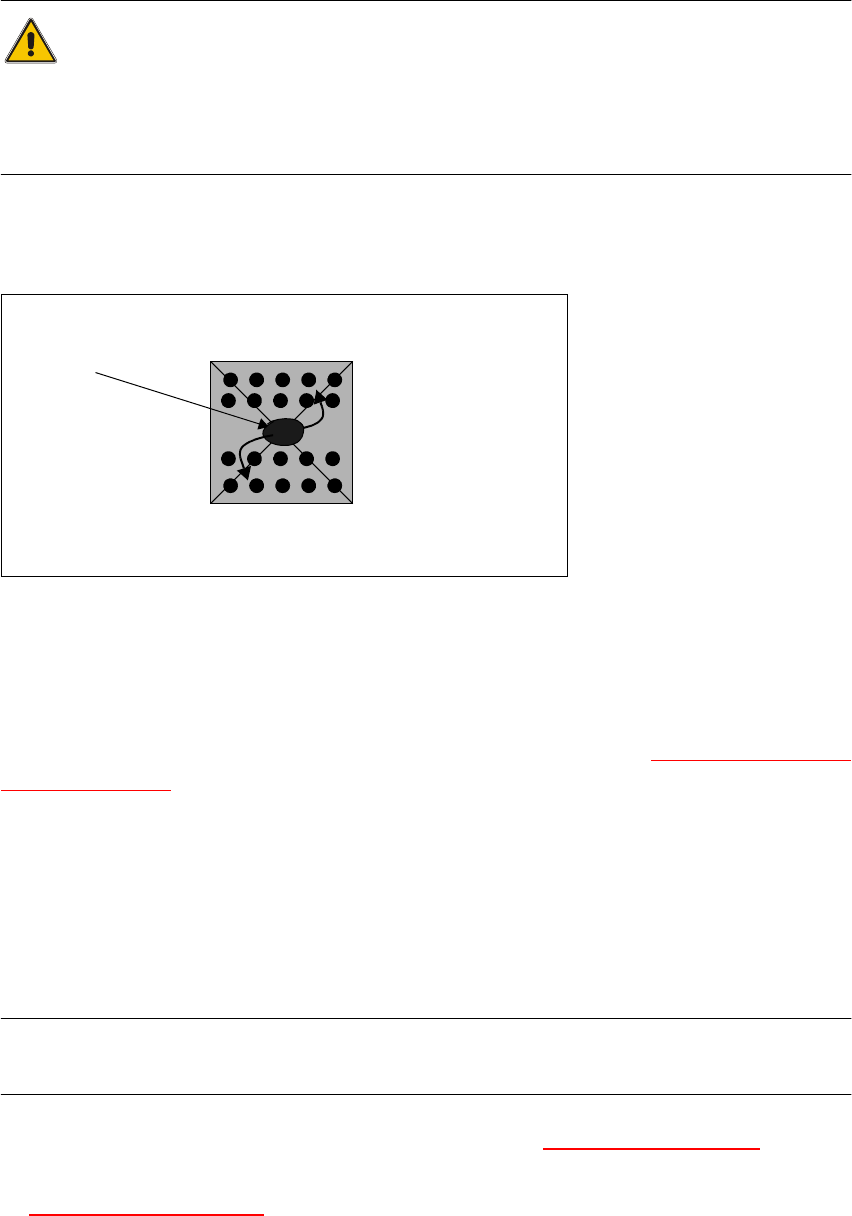
The flip-chip component is inserted at the placement position, and held in position for a pre-set
time to allow the flux to dry. 11
Fig. 11.9 - 2 Principle of a component with flux
(1) The flux charge runs to the leads
11
The PCB then remains in the machine for a variable period to ensure that the flux has dried fully. 11
The procedure for entering the required parameters is described in Section 11.9.7.1 Package form
list and parameters. 11
11.9.4 Refilling the flux
A warning is output at the station computer when the flux has to be refilled. It is possible to con-
tinue placement for a short period, but the reservoir should not be allowed to run dry in order to
avoid unwanted periods of stoppage. 11
PLEASE NOTE
The reservoir must be refilled off the machine to prevent flux being dropped into the machine. 11
Å Move the fluxer head into the refill position. See Section 11.9.7.4 Single functions
Å Pull the reservoir up and out of its retainer, and turn the lid to remove it from the tank. See Fig.
11.9 - 1 "Fluxing overview"
.
111

SIPLACE 80S-20/F4 User Manual 11 Station extensions /Hardware
Software version SR.407.xx 01/2001 US Edition 11.9 Flux dispenser unit
507
Å Refill the flux, replace the lid, and return the reservoir to its retainer. See Fig. 11.9 - 1 "Fluxing
overview". Make sure that the reservoir is firmly seated in the retainer.
Å Use the Single Functions to flush the fluxer head until the hose and syringe are free of air, and
the flux emerges continuously. See Section 11.9.7.4 Single functions
.
PLEASE NOTE
Always make sure that there are no air bubbles anywhere in the dispensing needle. 11
11 Station extensions /Hardware SIPLACE 80S-20/F4 User Manual
11.9 Flux dispenser unit Software version SR.407.xx 01/2001 US Edition
508
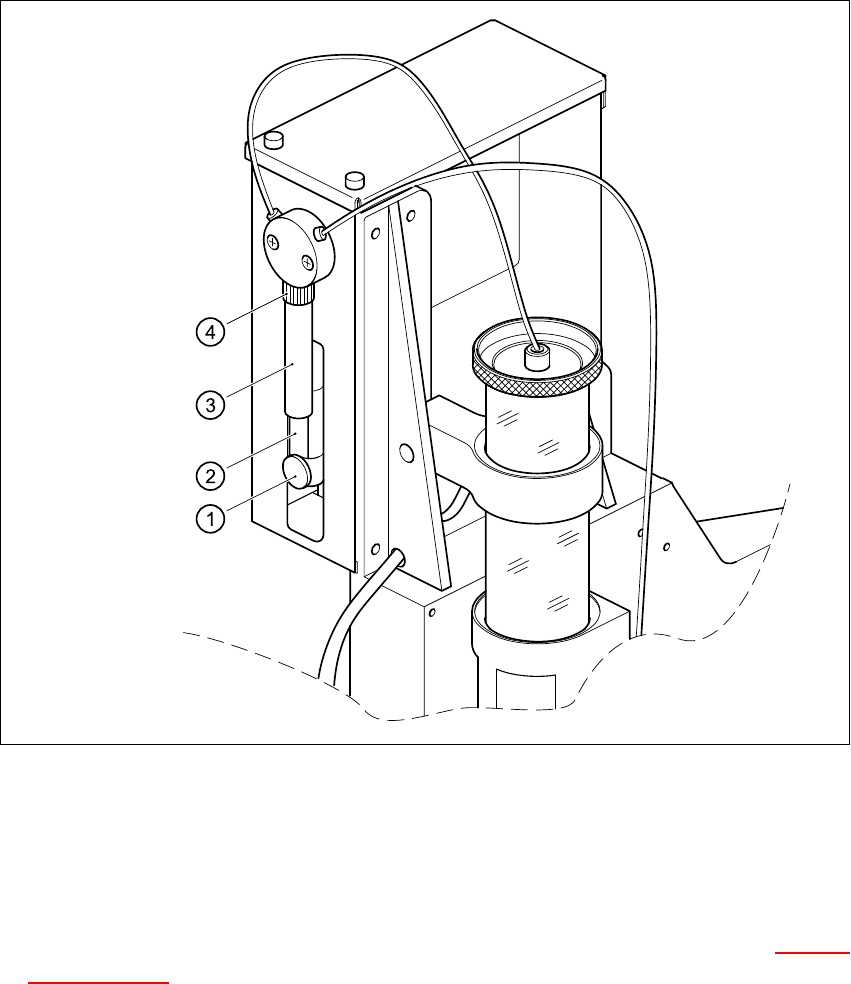
11.9.5 Changing the syringe
It is not necessary to change the syringe during normal operation. During servicing work, however,
it may be necessary to dismantle or change the syringe. 11
Fig. 11.9 - 3 Changing the syringe
(1) Knurled screw
(2) Syringe piston
(3) Syringe
(4) Unscrew the retaining nut
Å Use the Single Functions to move the fluxer head into the refill position. See section 11.9.7.4
Single functions. The syringe piston will move down.
Å Loosen the knurled screw on the syringe piston.
Å Push the syringe piston up. This will empty the syringe, and the flux will be pushed back into
the reservoir.
Å Remove the retaining nut together with the syringe.