YG300_Ope_E.pdf - 第53页
Chapter 2 Basic operation Contents 1 . B e f o r e o p e r a t i o n 2 - 1 1 . 1 C a n c e l i n g e m e r g e n c y s t o p 2 - 1 1 . 2 C l e a r i n g a n e r ro r 2 - 2 1 . 3 T y p i c a l e r r o r s a n d t r o u b …
1-24
1
Part names and functions
3
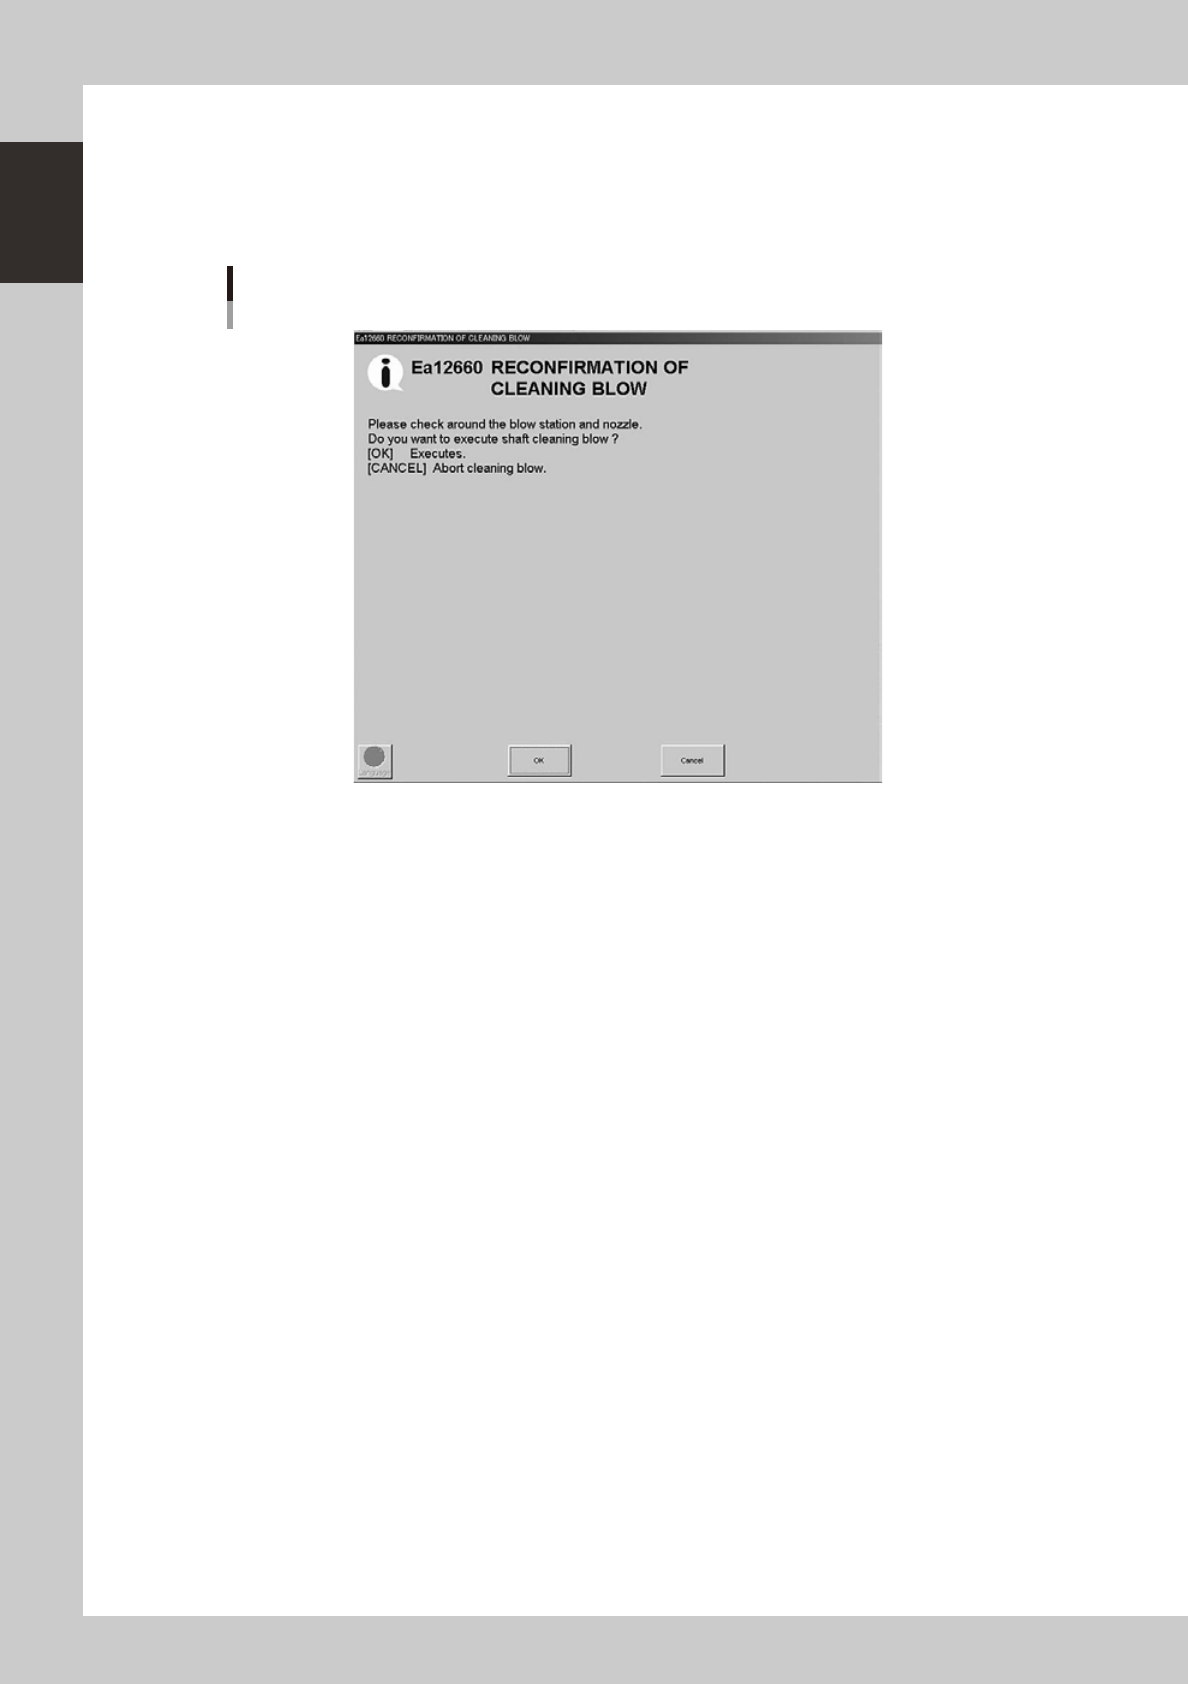
A confirmation dialog box appears asking you to make a final check.
Check the contents of the dialog box and press the corresponding button.
[OK]: Performs nozzle shaft blow to clean the nozzles.
[Cancel]: Closes the dialog box and returns to the [Unit]-[Head] screen without performing nozzle
shaft blow.
Final confirmation dialog box for nozzle shaft blow
242104-M3-00
n
Safety checks
The nozzle shaft blow function also contains the following safety checks.
• Nozzle shaft blow interruption alarm
The head immediately rises if operation stops during nozzle shaft blow due to emergency stop or an interlock triggering.
If the head rises but the air blow still continues, then the nozzle might come loose from the head. To prevent this, a
confirmation dialog box appears if the machine operation stopped during nozzle shaft blow.
• Nozzle sensors to check whether a nozzle is left on the blow station
The nozzle shaft blow function forces high-pressure air through the nozzles during cleaning, so the nozzles might come
loose from the head if machine operation stops during nozzle blow. If a nozzle comes loose from the head and remains
on the blow station while the automatic operation still continues, then the nozzle left on the blow station might interfere
with other heads or with the multi-max unit. To prevent this, nozzle sensors are installed so that the machine constantly
monitors whether a nozzle is left on the blow station.
An “interlock error” is issued if any of these sensors detects a nozzle on the blow station at any time other than when the
head is lowered during nozzle blow. The machine operation is then disabled.

Chapter 2 Basic operation
Contents
1. Before operation 2-1
1.1 Canceling emergency stop 2-1
1.2 Clearing an error 2-
2
1.3 Typical errors and troubleshooting 2-
3
2. Operation screen and buttons 2-8
2.1 Basic configuration of operation screen 2-8
2.2 Setup screen 2-1
1
2.3 Unit screen 2-1
2
3. Starting and stopping the machine 2-19
3.1 Pre-operation check 2-20
3.2 Starting the machine 2-2
1
3.3 Warming up the machine 2-2
3
3.4 Adjusting the conveyor unit setup 2-2
5
3.4.1 Conveyor unit setup flow 2-26
3.5 Preparing the component supply unit 2-28
3.5.1 Tape feeder 2-28
2-1
2
Basic operation
1. Before operation
The following explains how to cancel emergency stop and clear errors. Read before operating the machine.
n
Cautions during machine operation
• Do not turn off the compressed air during operation. The machine may malfunction, as pneumatic devices are not
correctly controlled.
• Before beginning maintenance work, always make sure that no air pressure remains in air cylinders.
n
Cautions during power outages
If a power outage (blackout) occurs during automatic machine operation, always turn the main power switch off to
prevent faulty operation after power has been restored. If any boards are left in the machine, remove them.
1.1 Canceling emergency stop
Follow these steps to cancel emergency stop.
1
Release the emergency stop button.
When the emergency stop button is pressed, turn it clockwise to release it.
2
Check safety.
Before continuing the procedure, check the surrounding area for safety.
3
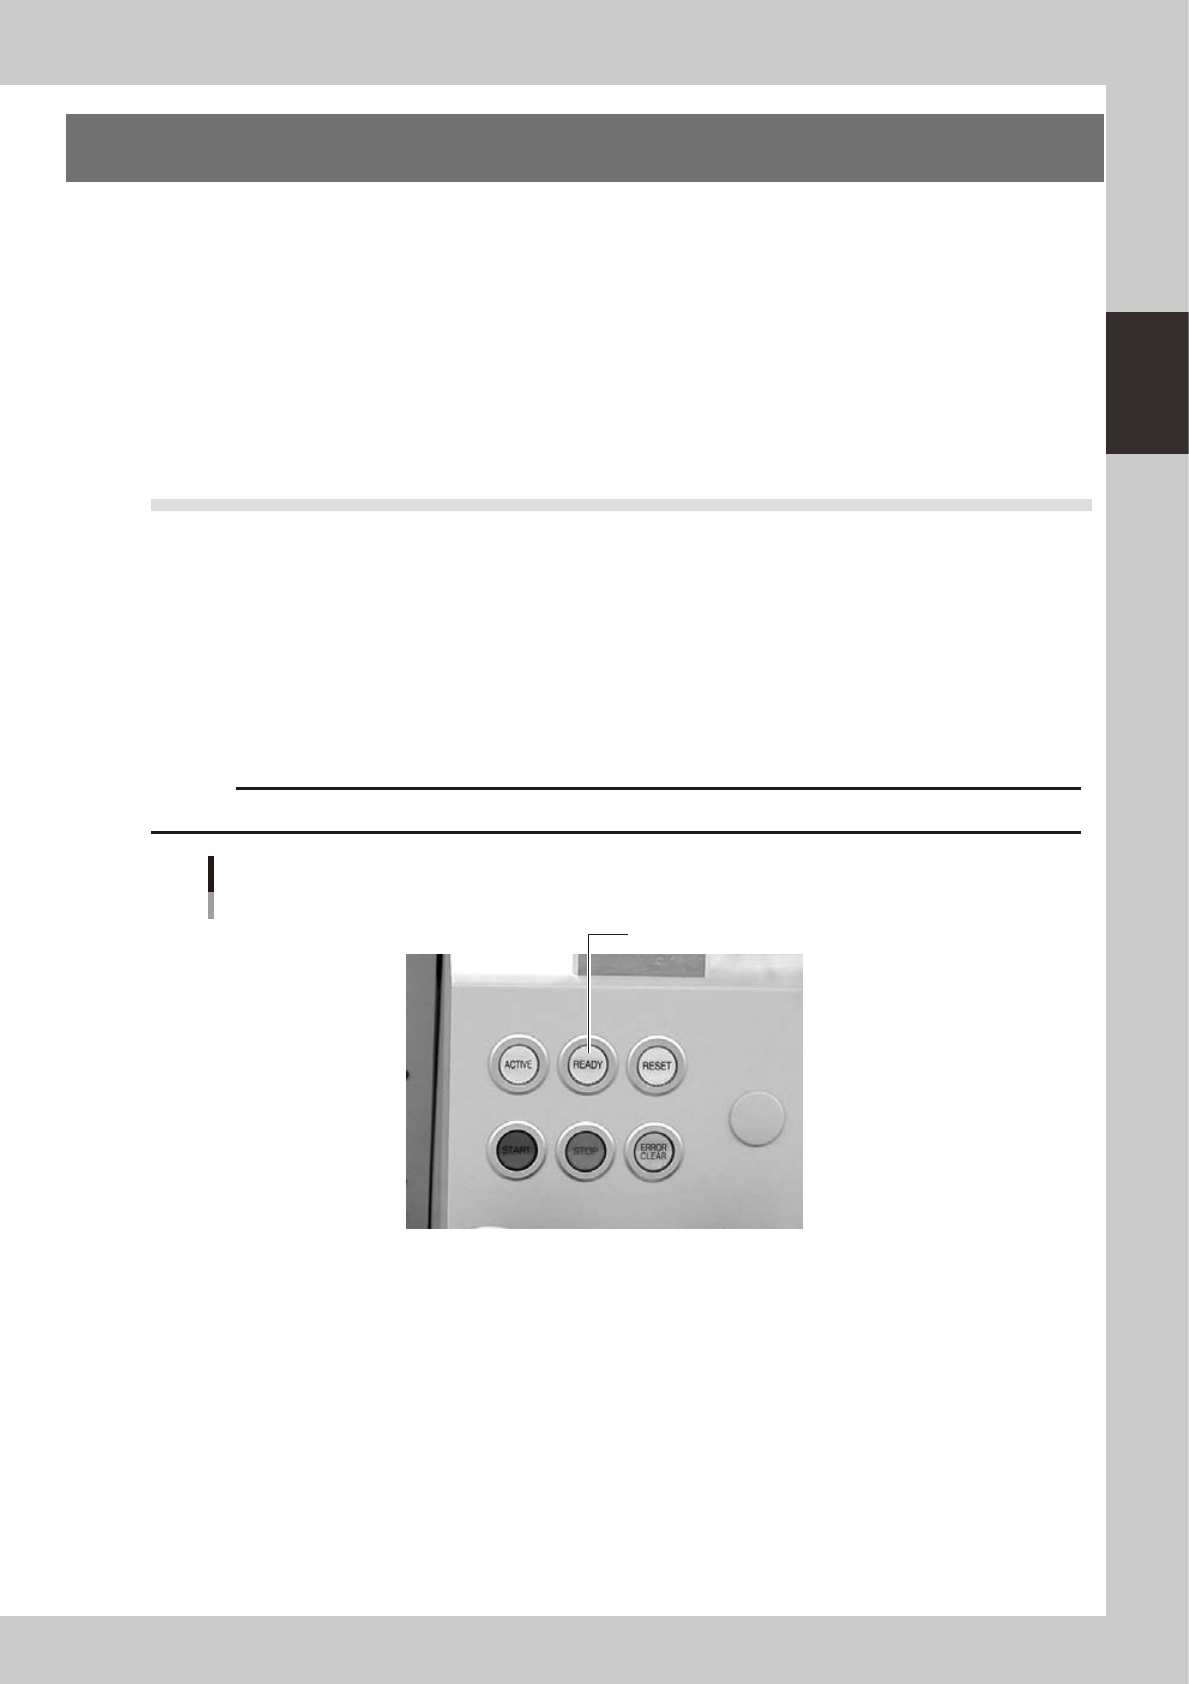
Press the [READY] button.
Pressing the [READY] button on the operation panel turns on the servomotors.
c
CAUTION
The [READY] button is enabled only when the [ACTIVE] button next to it is turned on.
[READY] button
Press the [READY] button to turn on the servo.
24200-M3-00
4
Check the signal light and screen display.
Check that the red lamp of the signal light is off and the emergency stop sign on the top left (status
area) of the operation screen is now off.