YG300_Ope_E.pdf - 第84页
2-31 2 Basic operation 3 . I n s t a l l i n g t h e f e e d e r o n t h e m o u n t e r F o l l o w t h e i n s t r u c t i o n s b e l o w t o a t t a c h t h e f e e d e r o n t h e s u r f a c e m o u n t e r . 1 C h…
2-30
2
Basic operation
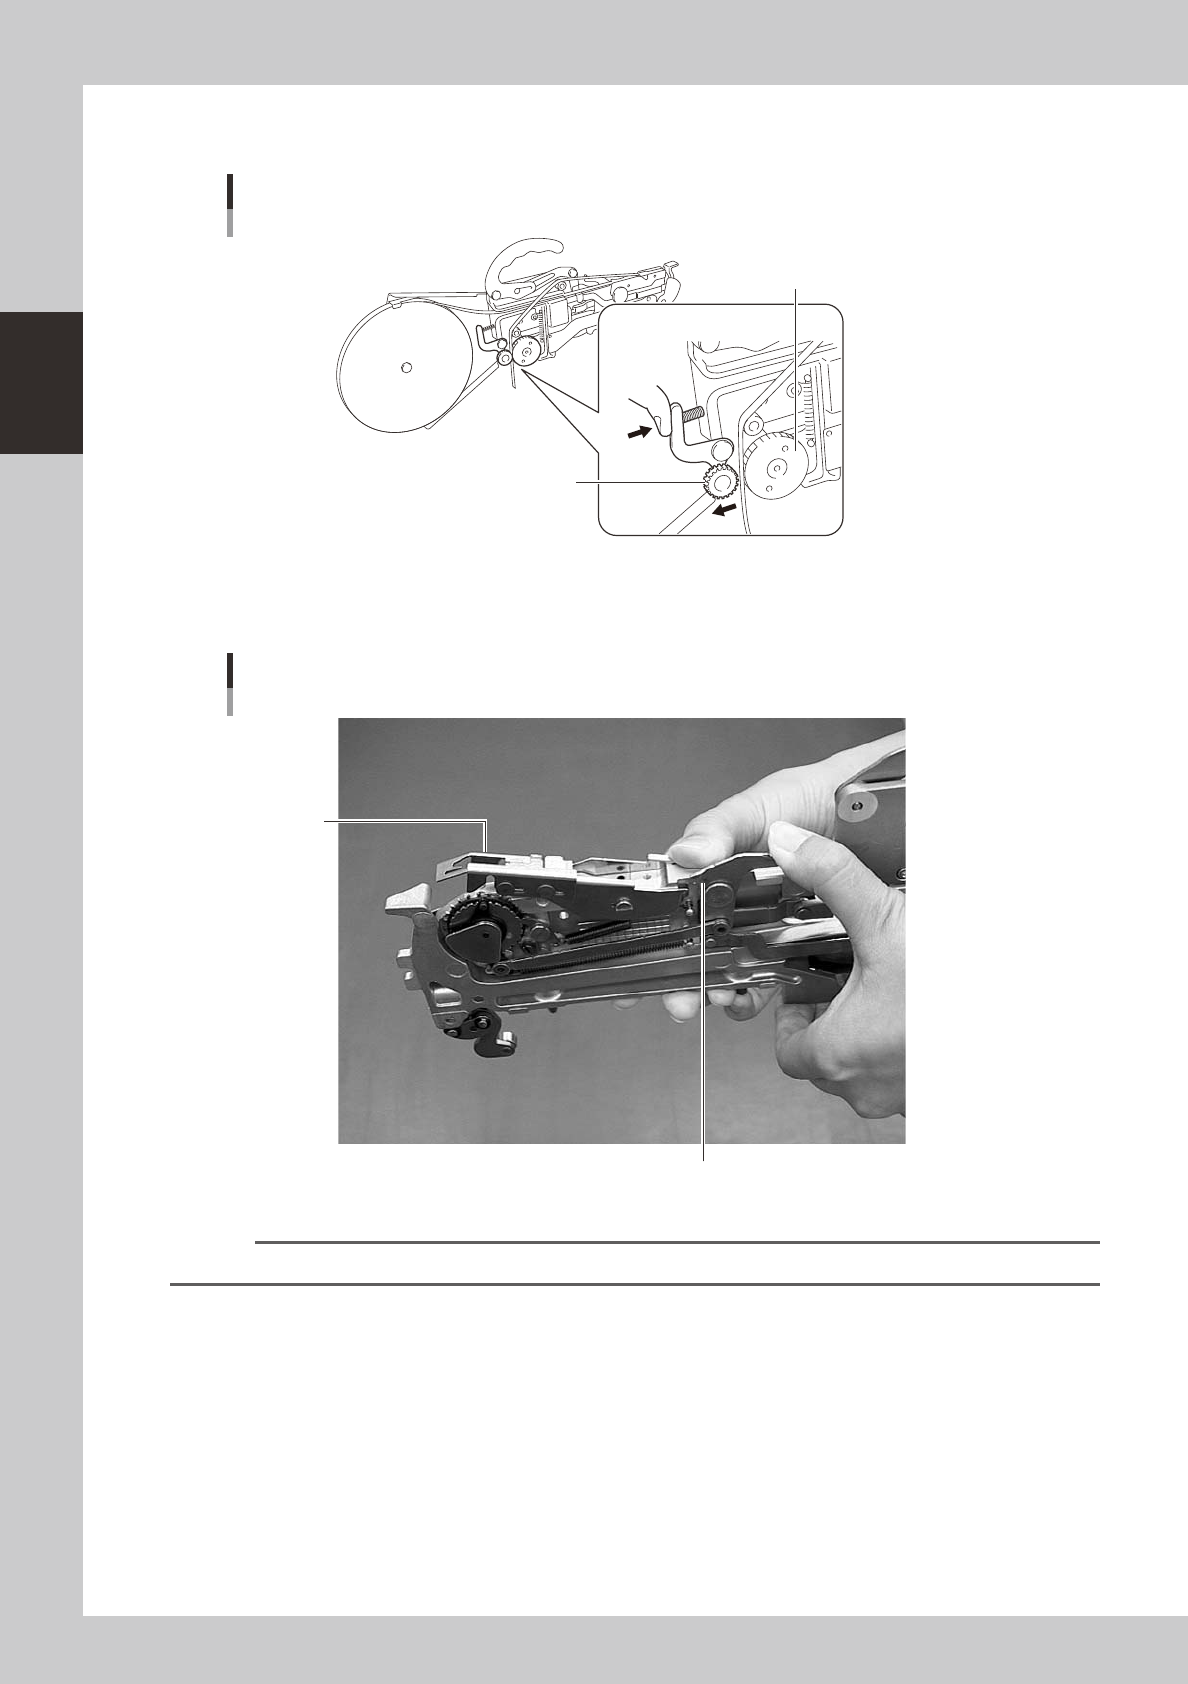
Press the idle roller assembly lever and insert the top tape between the drive roller assembly and the
idle roller assembly.
Drive roller assembly and idle roller assembly
Drive roller assembly
Idle roller assembly
23210-M0-00
5
Set the tape guide.
After the tape is set, press the lock lever to lower the tape guide.
Tape guide setup
Lock lever
Tape guide
23211-M0-00
n
NOTE
Set the carrier tape so that the tape feed gears fit into the feed holes in the carrier tape.
2-31
2
Basic operation
3. Installing the feeder on the mounter
Follow the instructions below to attach the feeder on the surface mounter.
1
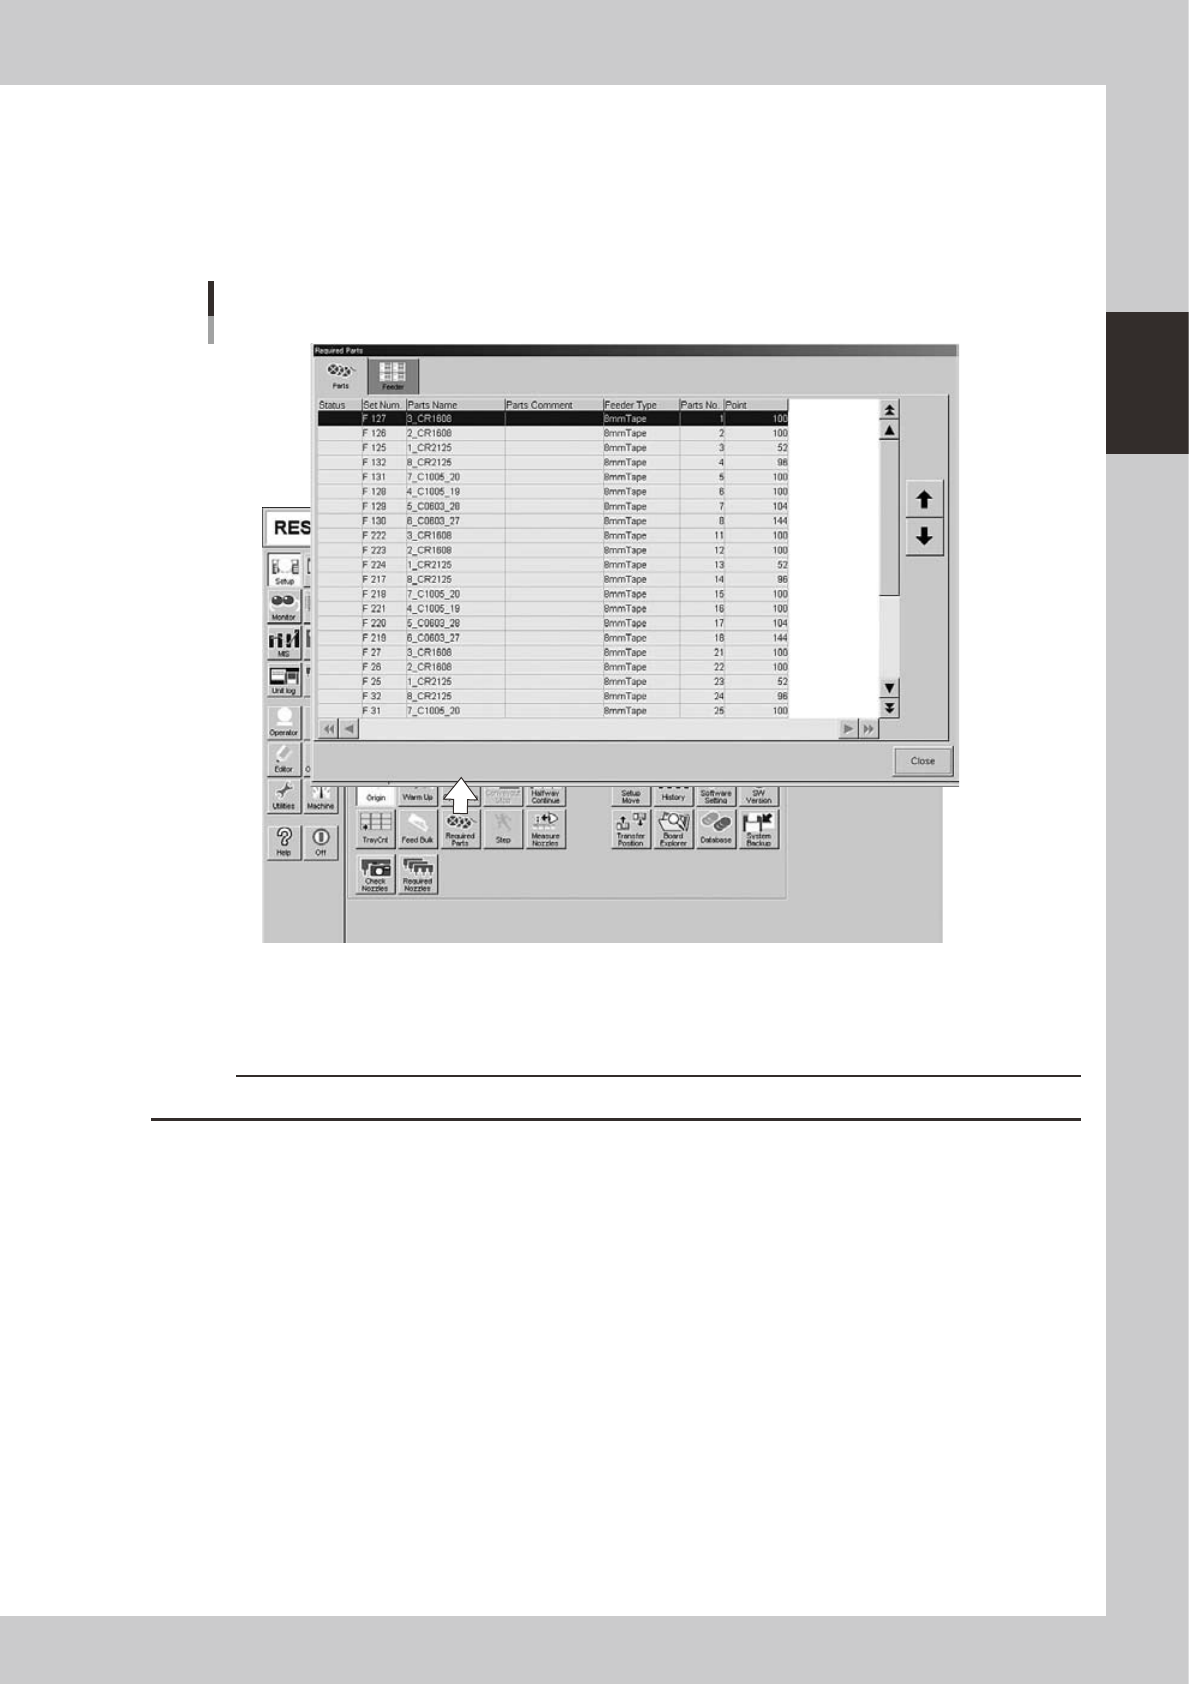
Check the feeder setup position.
On the [Setup] screen, press the [Required Parts] button to open the "Required Parts" screen and check
the feeder setup position.
"Required Parts" screen
24217-M3-00
e
2
Press the emergency stop button.
Press the emergency stop button on the mounter to stop mounter operation.
c
CAUTION
Installing a feeder unit without stopping the mounter might cause items to be entangled in machine.
3
Clean the surface of the feeder plate.
Chips or debris caught between the feeder and feeder plate will tilt the feeder, causing unstable
pickup.
2-32
2
Basic operation
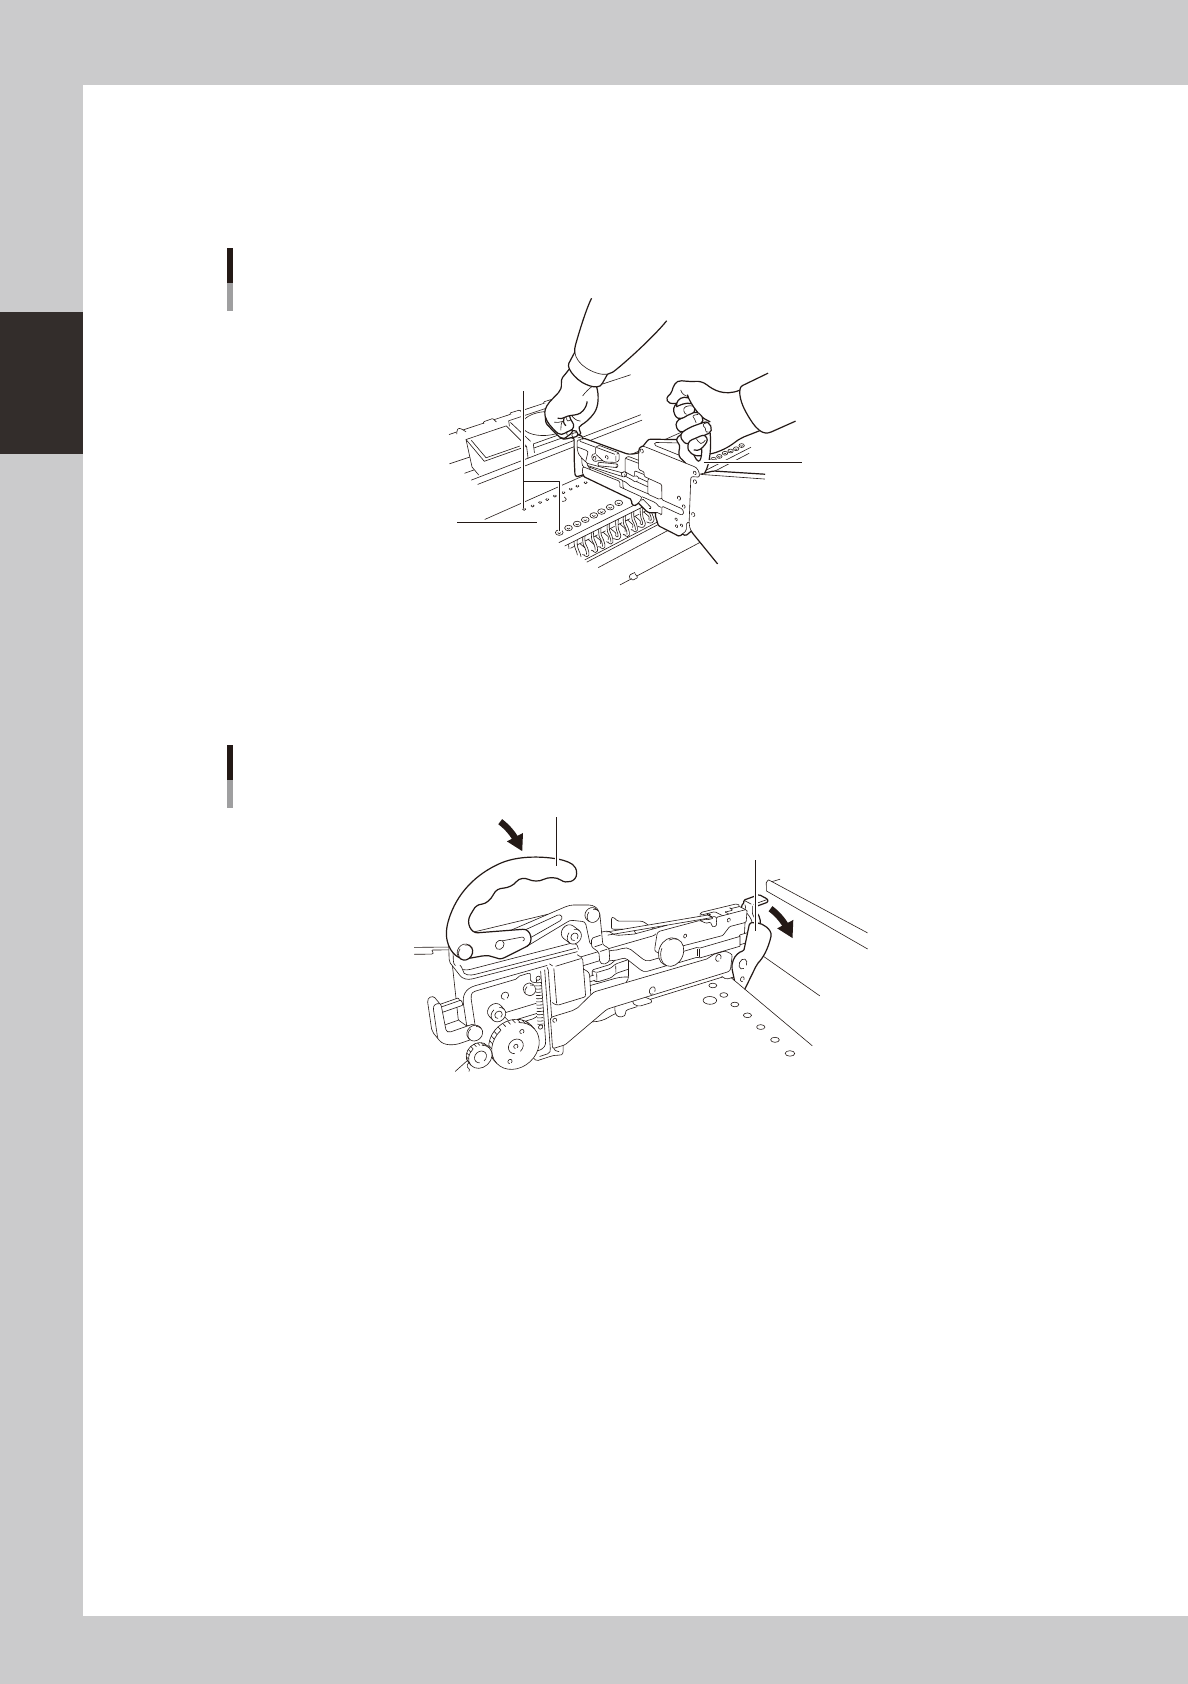
4
Insert the feeder into the knock-pin holes in the feeder plate.
Hold the edge of the feeder and the clamping lever lock handle while the handle is in the lifted
position. Then lower the feeder from directly above the feeder plate while keeping the feeder
horizontal. The feeder plate has knock-pin holes. Insert the front and rear knock pins on the feeder into
the knock-pin holes securely.
30
18
19
20
21
22
23
24
25
26
27
28
29
35
32
33
34
38
36
37
23
24
25
26
27
28
29
46
47
48
44
45
Attaching the feeder
Knock-pin holes
Feeder plate
Handle
23212-M0-00
5
Push down the clamping lever.
Lower the clamping lever lock handle. Then push down the clamping lever so that it is securely set on
the feeder plate. If the lever is not properly set, the feeder may come off during component mounting
or operation.
1
2
3
4
5
6
7
8
Clamping Lever
Clamping lever lock handle
Clamping lever
23213-M0-00