YG300_Ope_E.pdf - 第87页
3-1 3 Starting and ending pr oduction 1 . S t a r t i n g p r o d u c t i o n T h i s s e c t i o n d e s c r i b e s h o w t o s e l e c t t h e b o a r d d a t a w h i c h i s a l r e a d y r e g i s t e r e d a n d p …

Chapter 3 Starting and ending production
Contents
1. Starting production 3-1
1.1 Resuming operation from the stopped point 3-4
1.1.1 Loading the saved data 3-5
1.1.2 Editing mount flags 3-5
2.
Ending production and turning power off
3-6
3. Modular error stop function 3-
8
4. Displaying the production monitors 3-1
1
4.1 Production 3-11
4.2 Main 3-1
3
4.3 Detail 3-1
5
4.4 Vision 3-1
7
4.5 Alignment 3-1
9
4.6 Retry 3-2
0
4.7 Fiducial 3-2
1
4.8 Badmark 3-2
2
4.9 Pick Pos. (Pickup position offset) 3-2
3
4.10 Pick Rate Warning 3-2
5
3-1
3
Starting and ending production
1. Starting production
This section describes how to select the board data which is already registered and perform component
mounting.
1
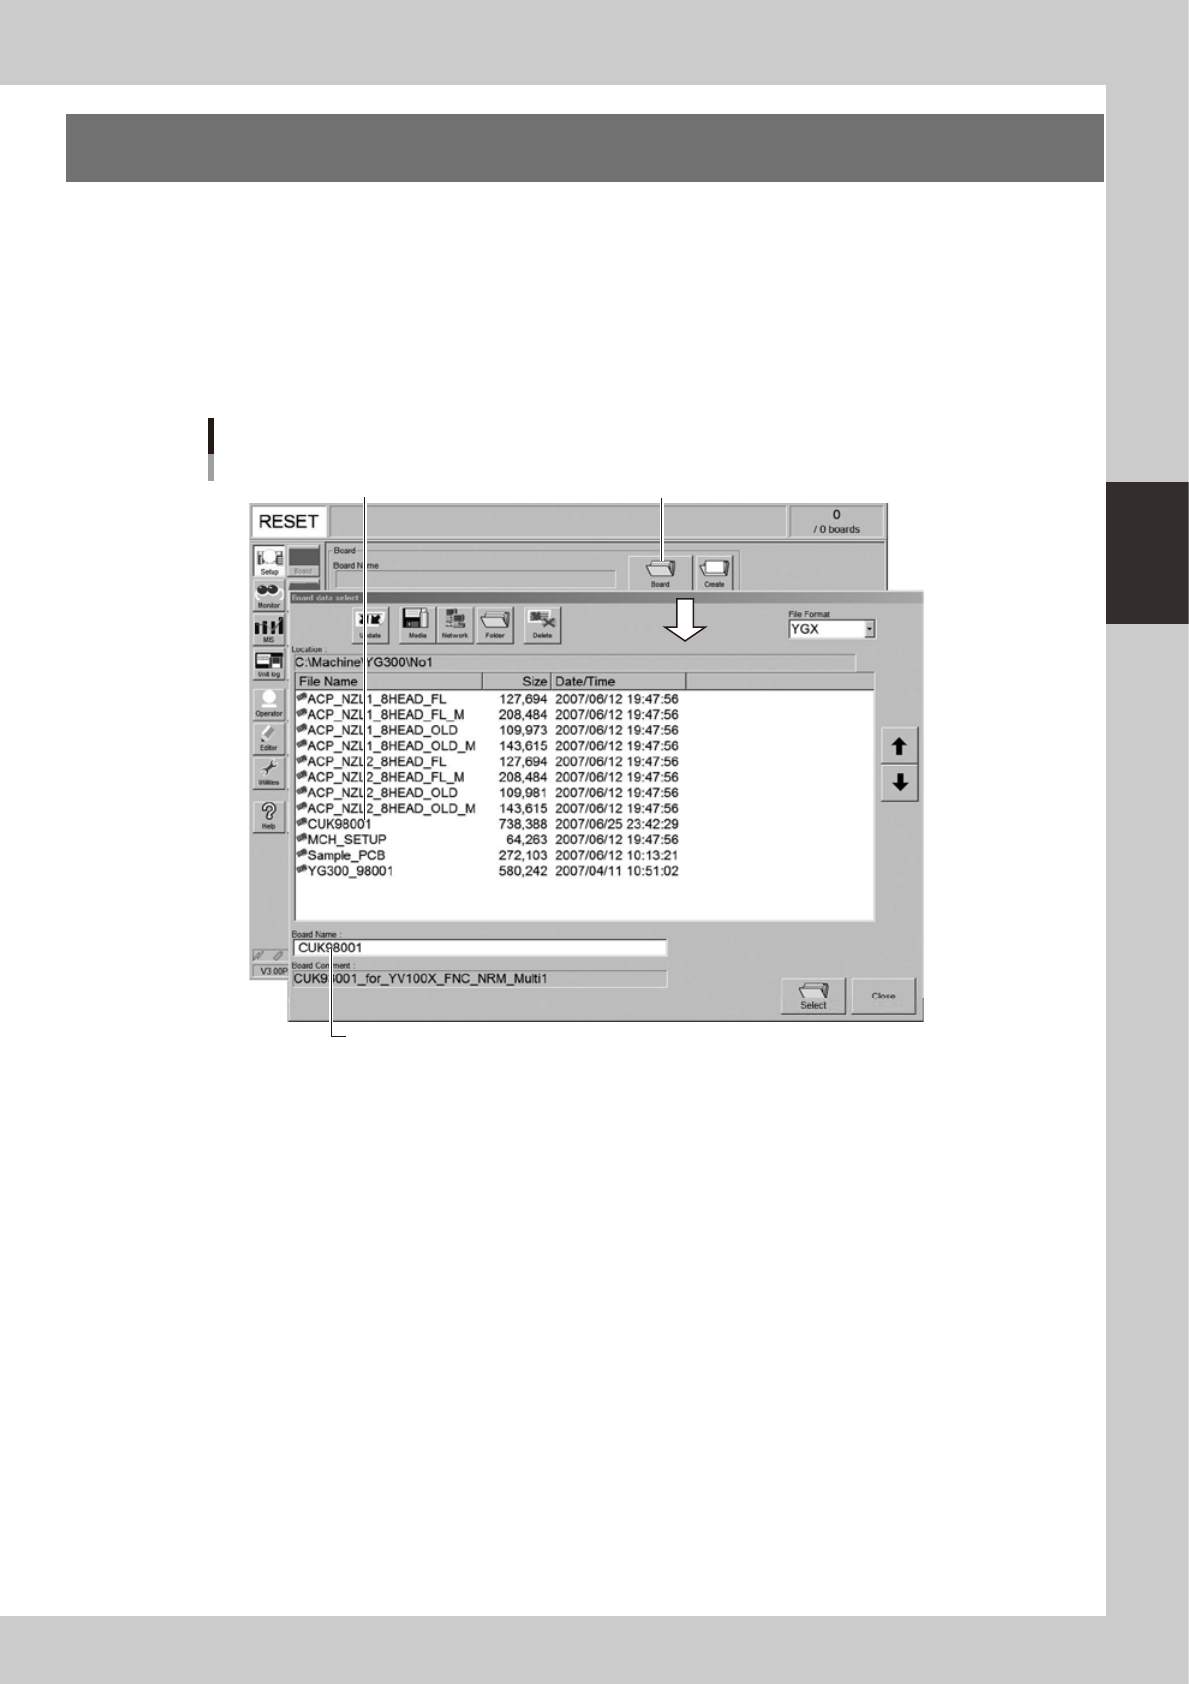
Select the board data.
1. When the board data is not yet selected, press the [Board] button on the Setup screen.
A list of registered board data appears.
2. Line up the cursor with the board data to use for production and press the [Select] button.
The machine loads the seleted board data.
Press [Board] button.
Selecting the board data
Select board data from list.
Selected board name is displayed.
24300-M3-00
3-2
3
Starting and ending production
2
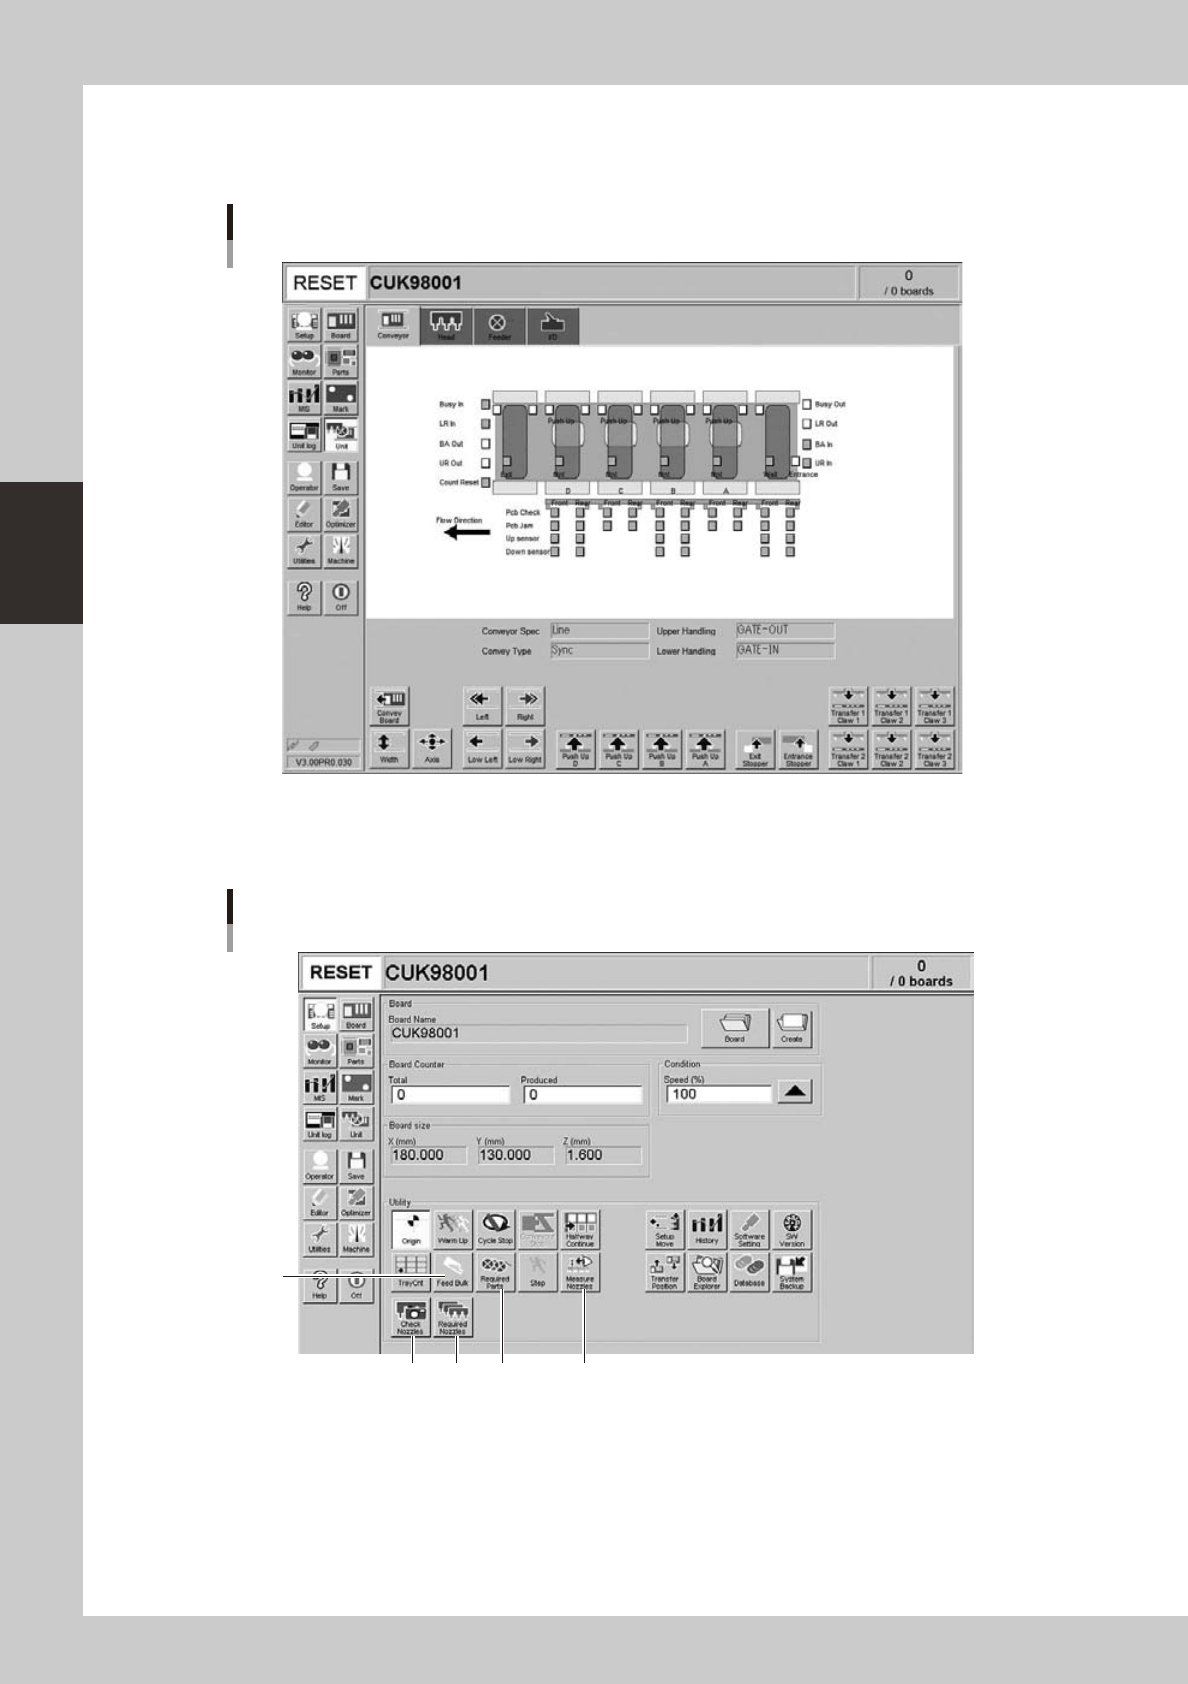
Set up the conveyor unit.
Open the [Unit] - [Conveyor] tab screen, and adjust the conveyor width and push-up pins according to
the board. For further details, refer to "3.4 Adjusting the convey unit setup" in Chapter 2.
[Unit] - [Conveyor] screen
24301-M3-00
3
Check the other setup items.
Return to the [Setup] screen, and press the following buttons to check or change the setting data.
3
124
Setup screen
5
24302-M3-00
1. [Required Parts] button
Displays the designated feeder set positions and components to be mounted. Check whether the necessary feeders are
installed in the correct feeder set positions on the feeder plate.