YG300_Ope_E.pdf - 第83页
2-30 2 Basic operation P r e s s t h e i d l e r o l l e r a s s e m b l y l e v e r a n d i n s e r t t h e t o p t a p e b e t w e e n t h e d r i v e r o l l e r a s s e m b l y a n d t h e i d l e r o l l e r a s s e…
2-29
2
Basic operation
4
Set the tape in the tape feeder.
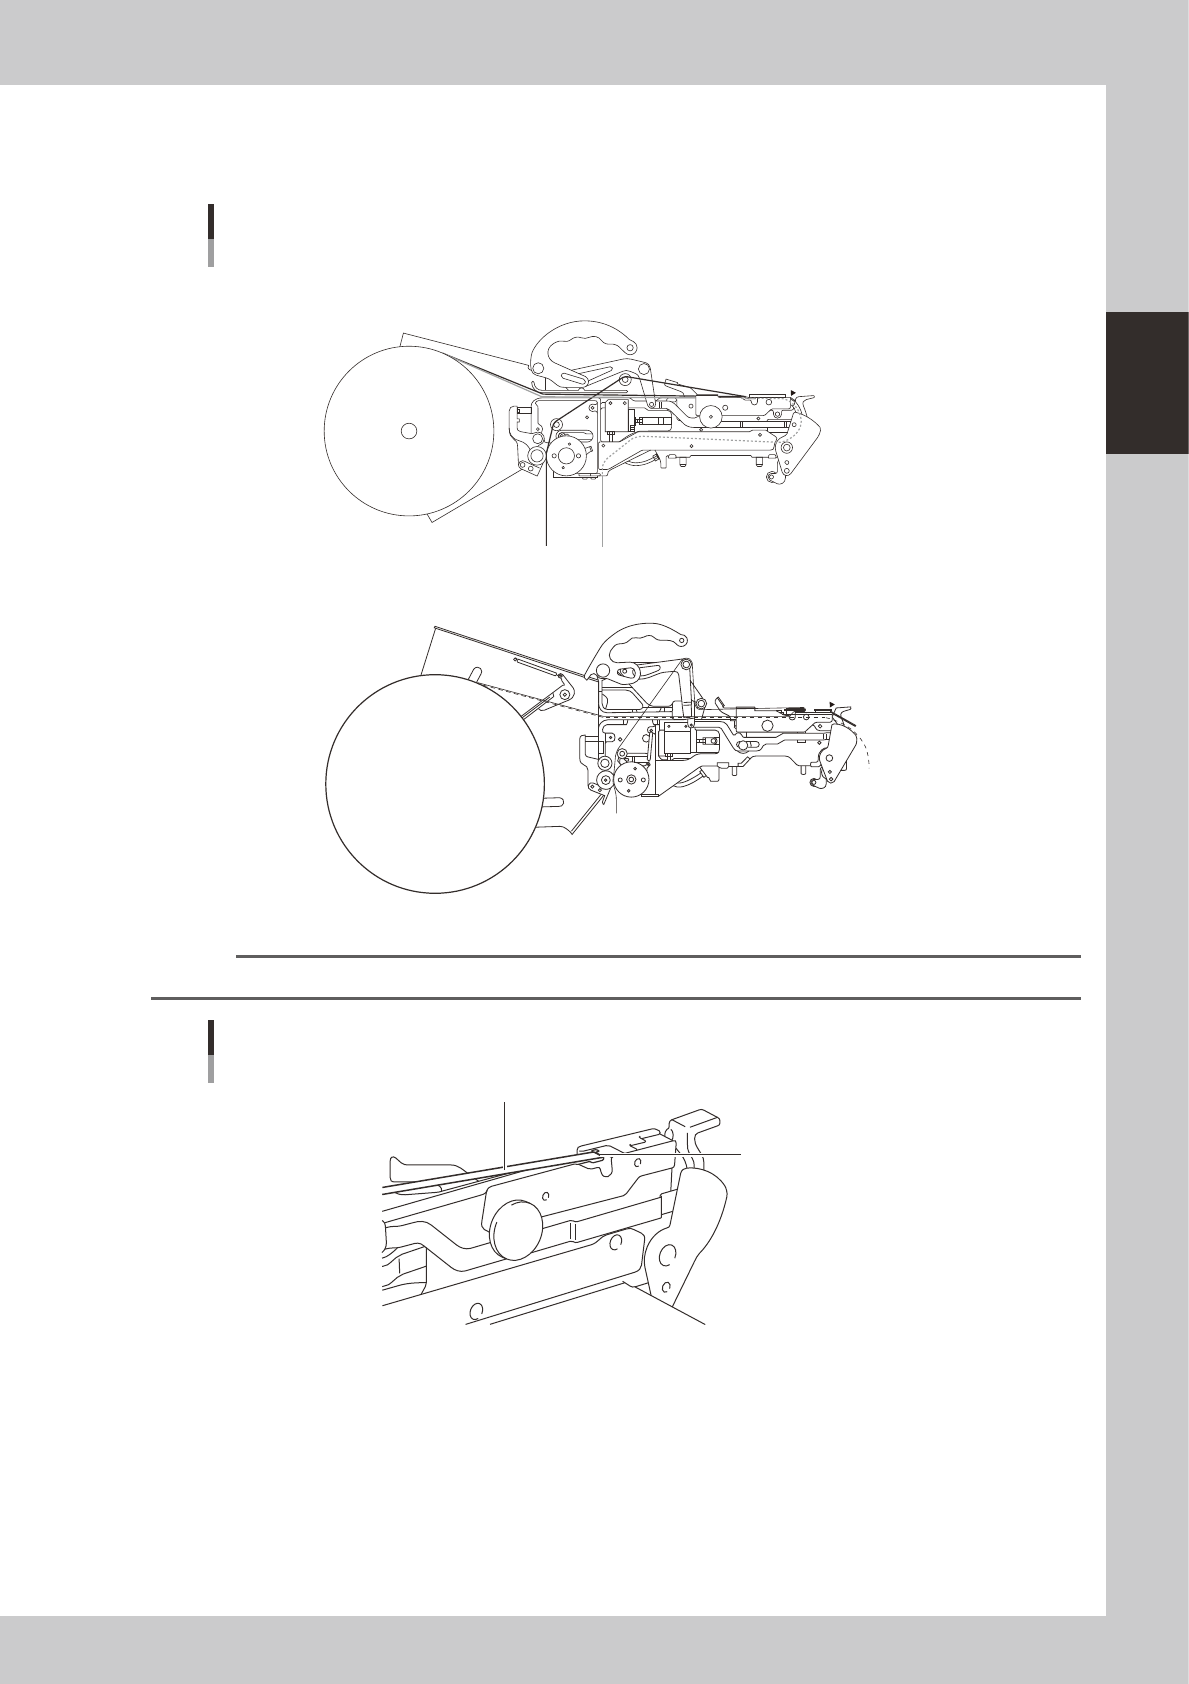
Set the separated layers of the tape on the tape feeder through the tape paths shown in the picture
below.
CL type tape feeder
: Top tape
: Carrier tape
A to E
E
A
a
a to c
c
C
B
b
D
8mm tape feeder
12mm, 16mm tape feeder
A
a
C
B
b
c
E
D
Tape path example
23208-M0-00
n
NOTE
Pass the top tape through the notch in the tape guide and turn it back.
Turning the top tape
Top tape
Notch
23209-M0-00
2-30
2
Basic operation
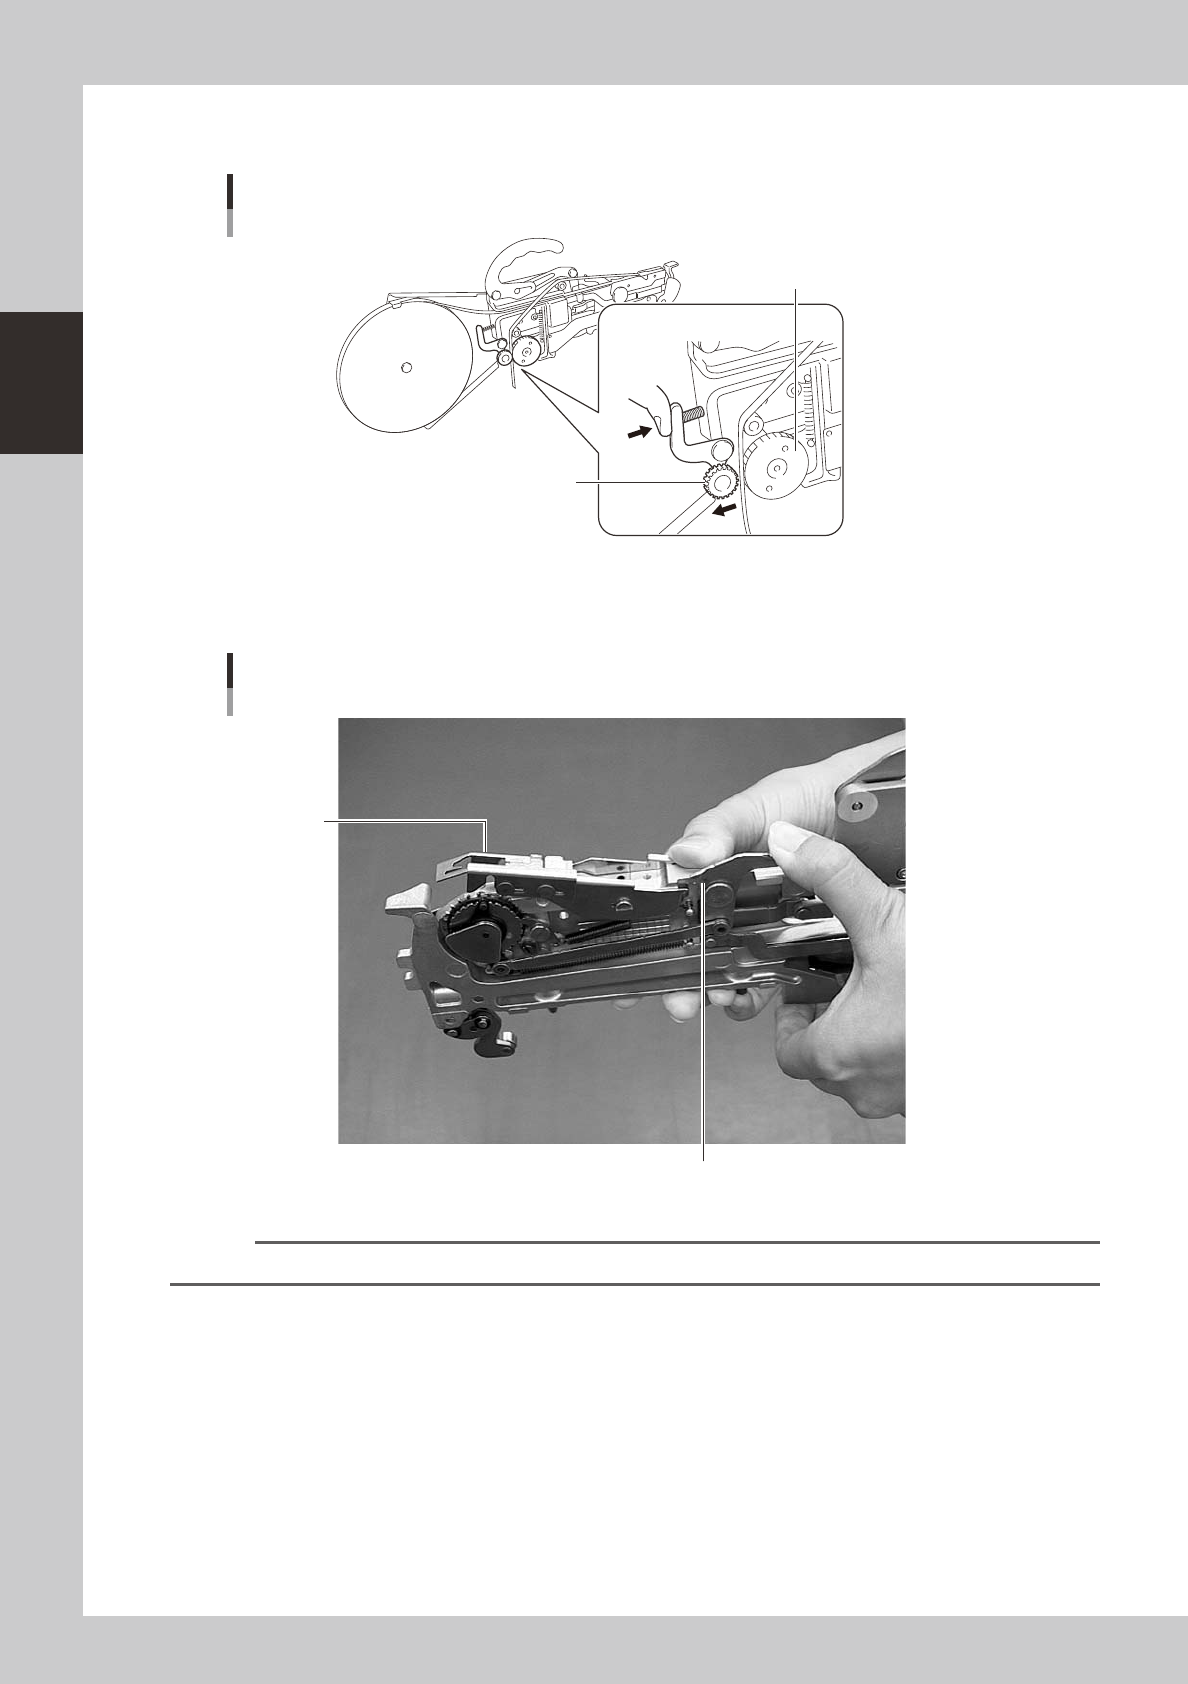
Press the idle roller assembly lever and insert the top tape between the drive roller assembly and the
idle roller assembly.
Drive roller assembly and idle roller assembly
Drive roller assembly
Idle roller assembly
23210-M0-00
5
Set the tape guide.
After the tape is set, press the lock lever to lower the tape guide.
Tape guide setup
Lock lever
Tape guide
23211-M0-00
n
NOTE
Set the carrier tape so that the tape feed gears fit into the feed holes in the carrier tape.
2-31
2
Basic operation
3. Installing the feeder on the mounter
Follow the instructions below to attach the feeder on the surface mounter.
1
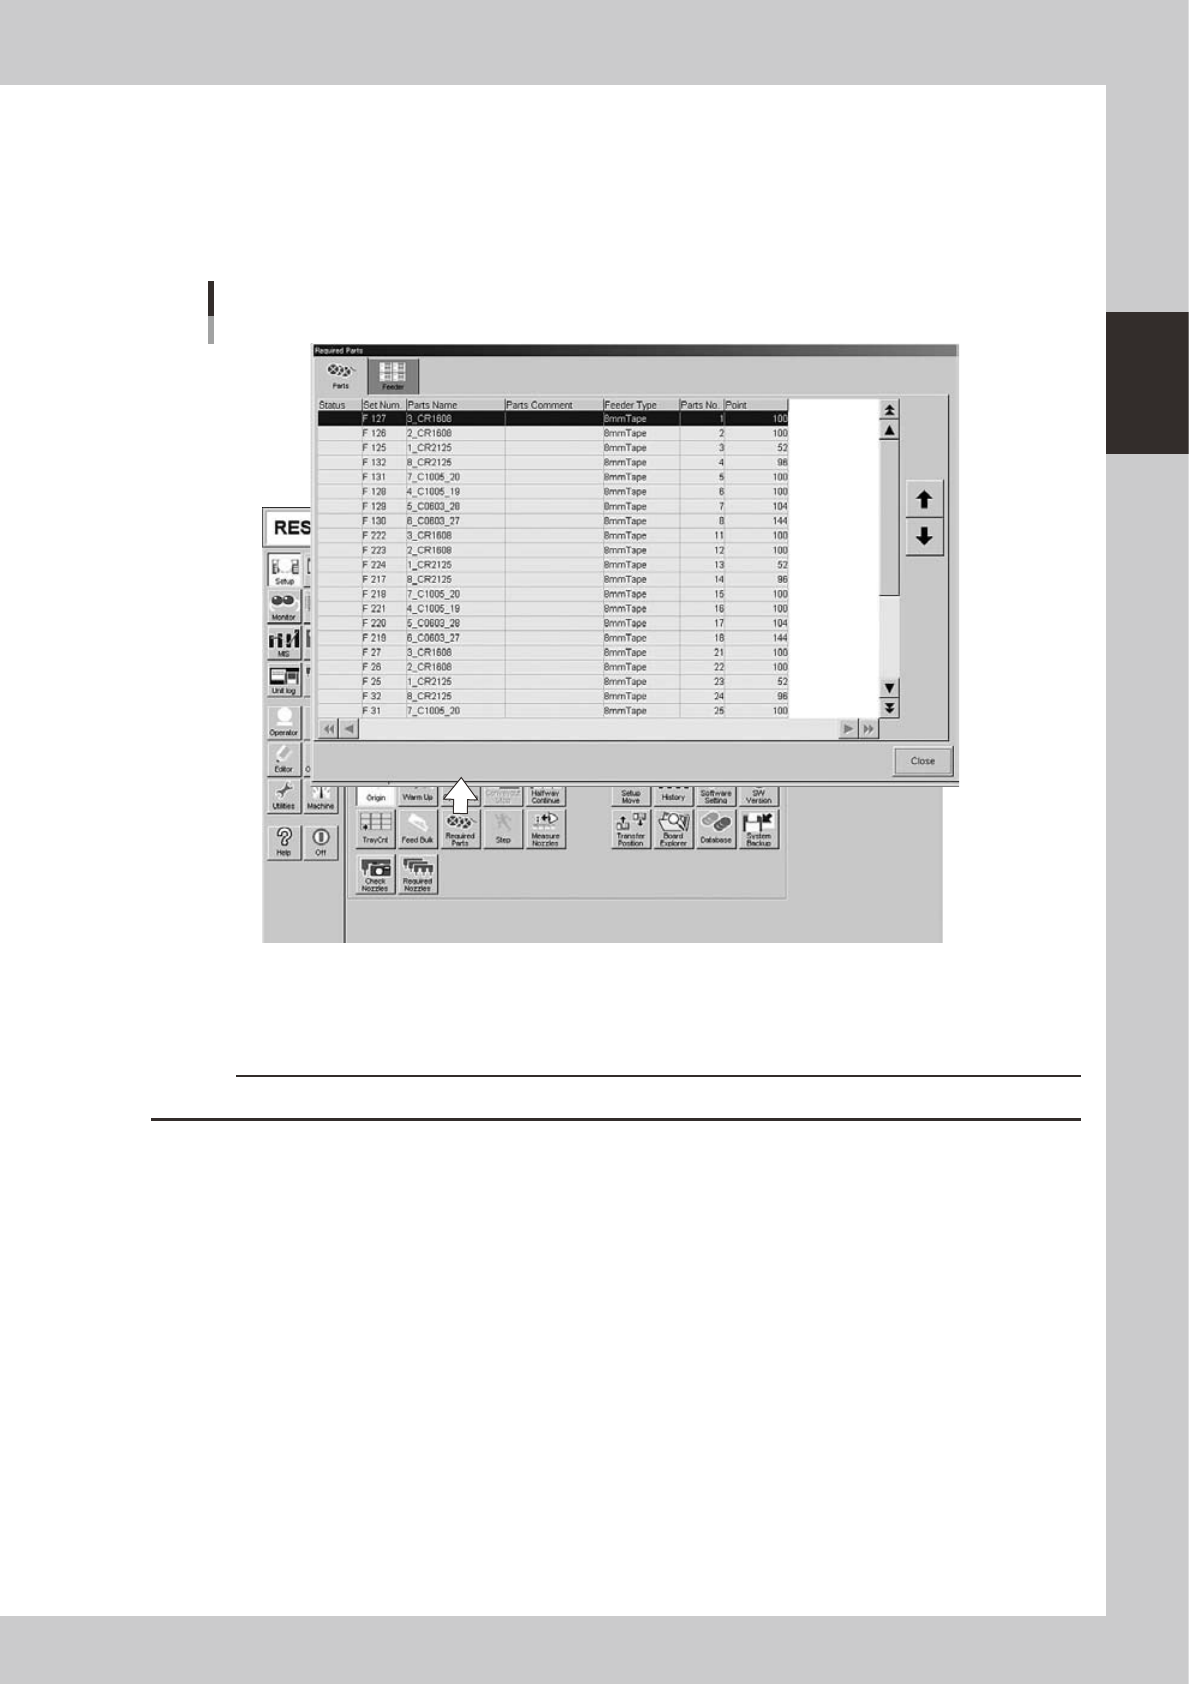
Check the feeder setup position.
On the [Setup] screen, press the [Required Parts] button to open the "Required Parts" screen and check
the feeder setup position.
"Required Parts" screen
24217-M3-00
e
2
Press the emergency stop button.
Press the emergency stop button on the mounter to stop mounter operation.
c
CAUTION
Installing a feeder unit without stopping the mounter might cause items to be entangled in machine.
3
Clean the surface of the feeder plate.
Chips or debris caught between the feeder and feeder plate will tilt the feeder, causing unstable
pickup.