Process Lens PL Service Manual_EN.pdf - 第115页
3 Replacing spare parts Se rv ic e Ma nu al P ro ce ss L en s PL - 0 3/ 20 25 11 5 Fig.155: Confirming messages ► Click on Yes(5) to download the Bug Report first. ► Click on Yes(6) to download the Application BIOS. 3…
3 Replacing spare parts
114 Service Manual Process Lens PL - 03/2025
Spare fuses:
●
F1: Fuse T5A 5x20mm SPT series (0001.2511 Schurter)
●
F2: Fuse T2A 5x20mm (0034.3120 Schurter / 0239 002 XP Littelfuse)
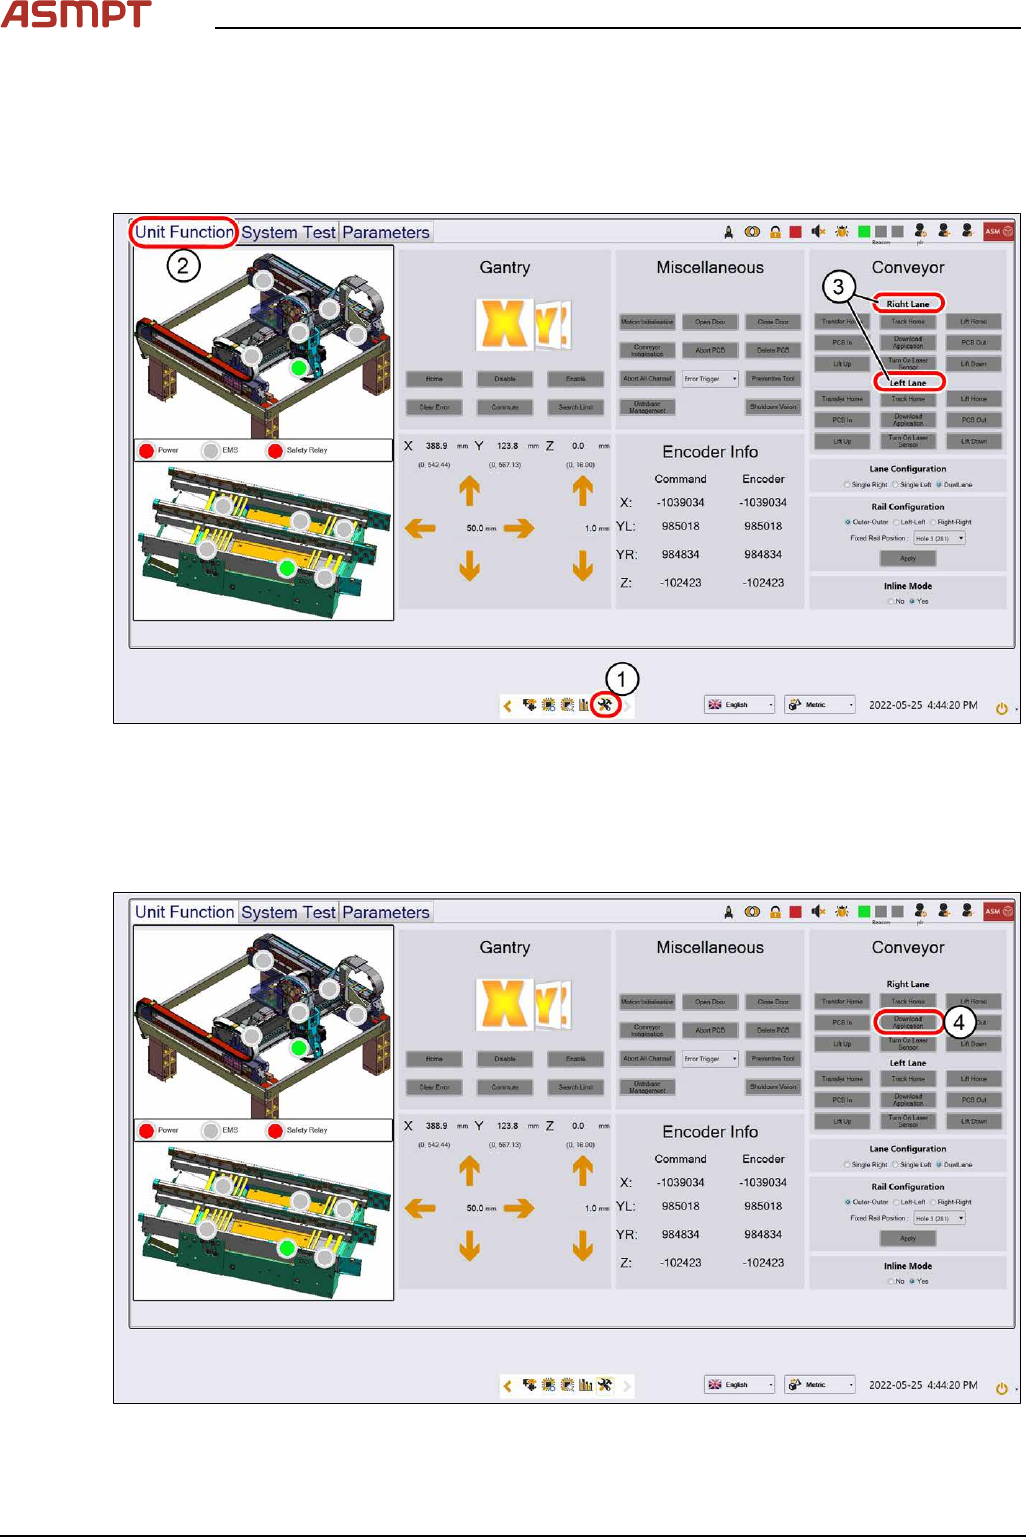
eSW Download
Fig.153: Selecting the lanes
► Click on this icon(1) to enter the settings menu.
► Click on Unit Function(2) to enter the settings user menu.
► Select the Right Lane or the Left Lane(3).
► Switch to operator level Machine service.
Fig.154: Downloading the eSW
► Click on Download Apllication(4) to proceed the download of the eSW.
3 Replacing spare parts
Service Manual Process Lens PL - 03/2025 115
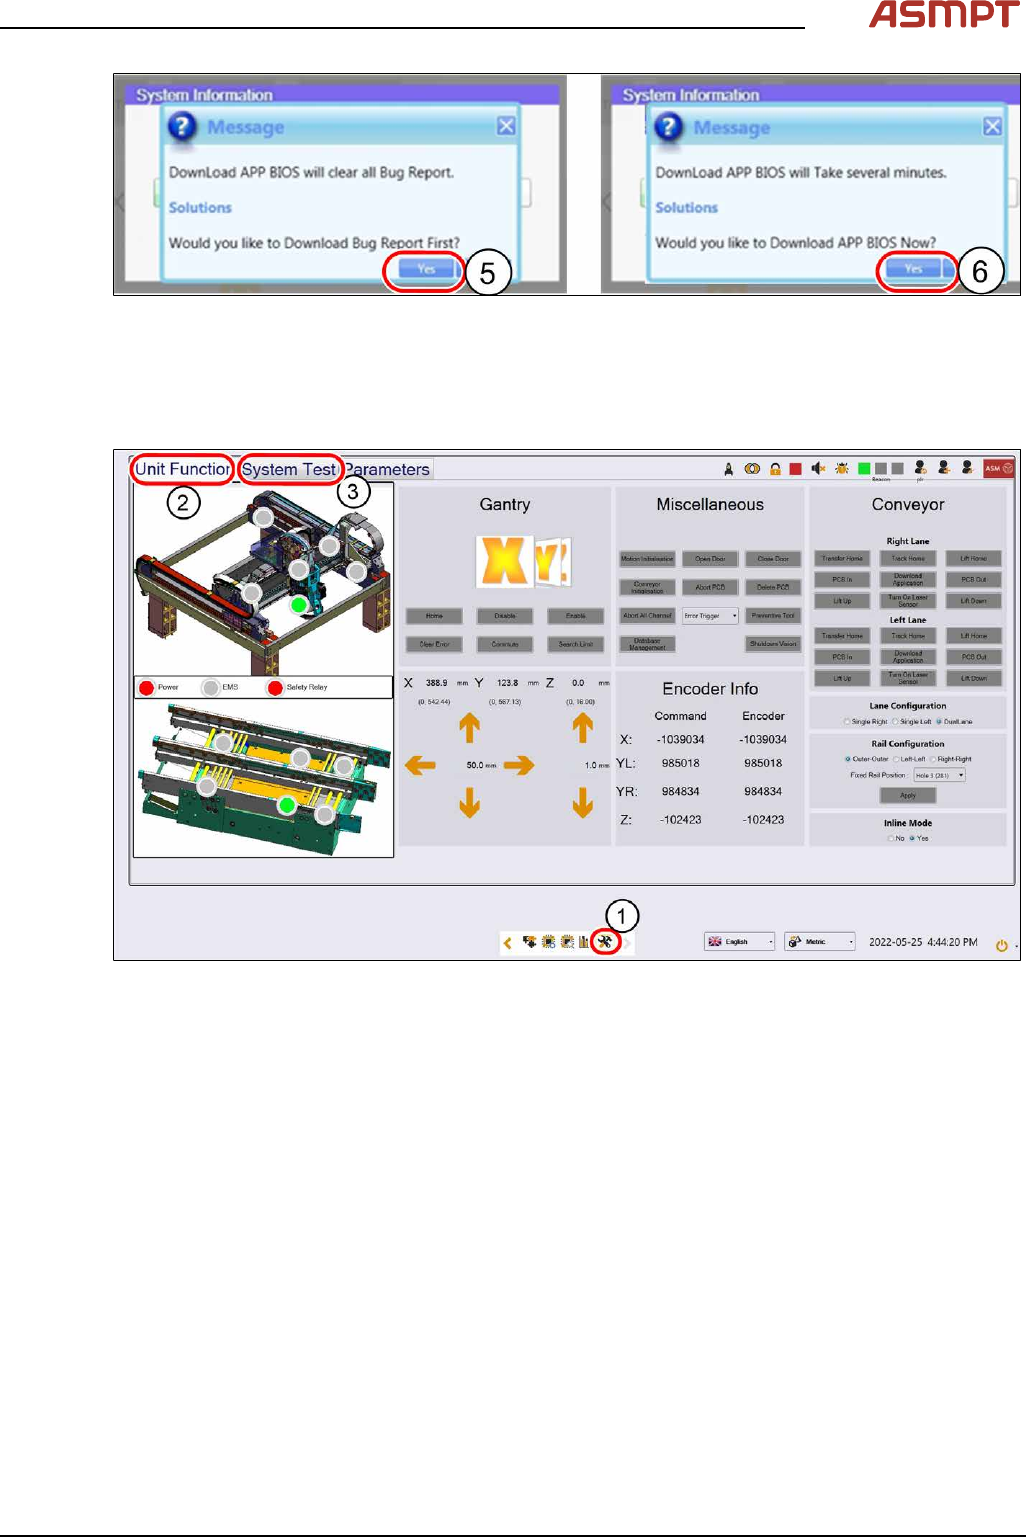
Fig.155: Confirming messages
► Click on Yes(5) to download the Bug Report first.
► Click on Yes(6) to download the Application BIOS.
3.5.1.8 Teaching the PCB sensors
Fig.156: “Unit function” tab and “System test” tab
► Click on this icon(1) to enter the settings menu.
► Click on Unit Function(2) to enter the settings user menu.
► Switch to operator level Machine service.
► Click on System Test(3) to enter the calibration menu.
3 Replacing spare parts
116 Service Manual Process Lens PL - 03/2025
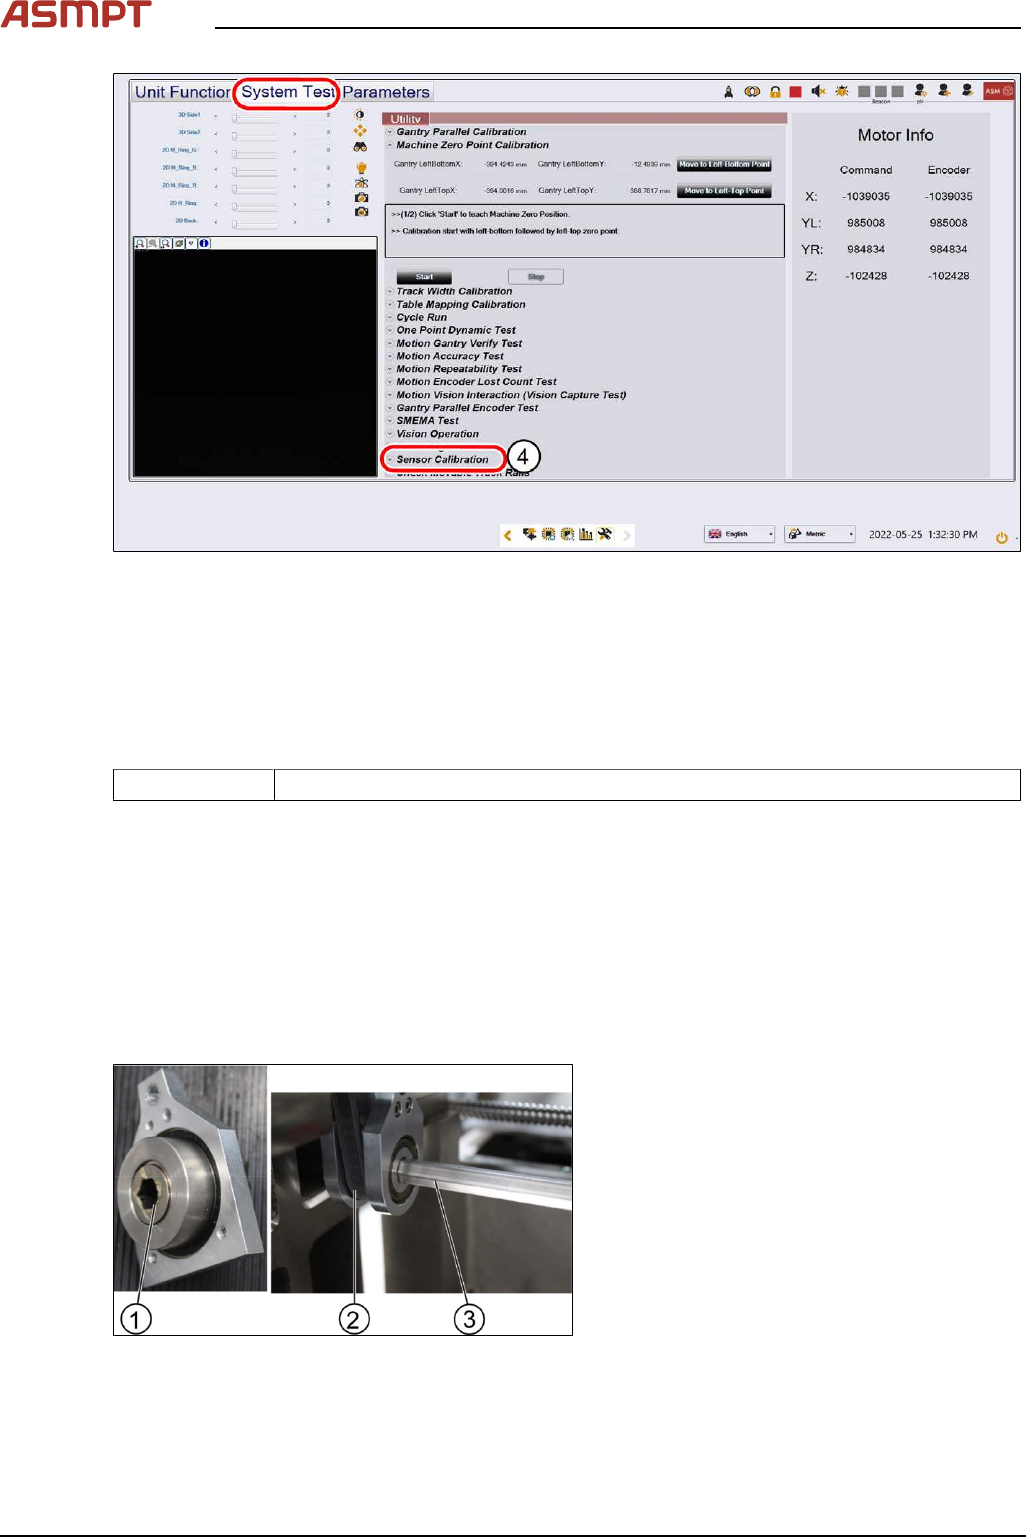
Fig.157: Sensor calibration
► Click on Sensor Calibration(4) to proceed the calibration of the PCB sensor.
3.5.2 Single-lane conveyor
3.5.2.1 Changing the conveyor belt
Parts
03139303-xx Brecoflex timing belt 10T5/2440
Equipment and tools
●
Allen key size 2.0, 2.5, 4
●
Spanner size 10
Requirements
●
Machine is switched off.
●
Tension meter.
Removal
Fig.158: Gear and conveyor rod
► Remove the screw (1) to remove the rod
(3). Use a spanner size 10 and a short
Allen key size 4 to remove the screw (1).
► Move the rod (3) backwards.