Process Lens PL Service Manual_EN.pdf - 第161页
4 Machine - Calibrations Se rv ic e Ma nu al P ro ce ss L en s PL - 0 3/ 20 25 16 1 Fig.252: SC Adjust Light 01 0325 ► Adjust the lighting (1) till some images show on the LIVE image window (2) ► Jog the camera till L…
4 Machine - Calibrations
160 Service Manual Process Lens PL - 03/2025
Step 8
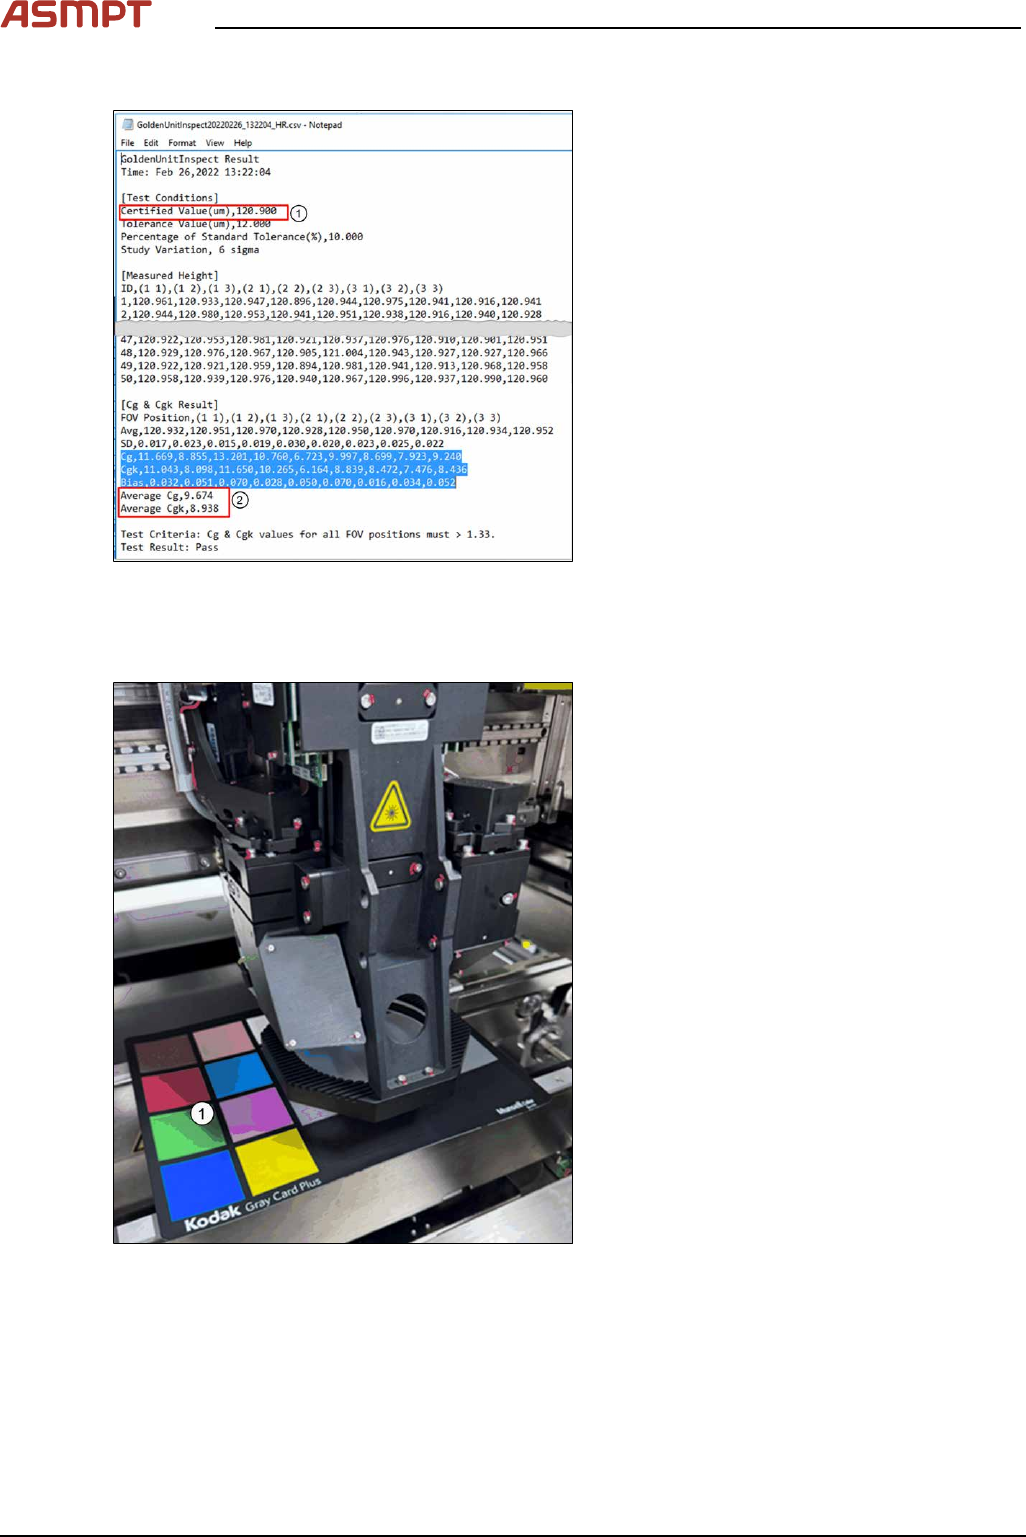
Fig.250: Text file
► Open the file with a text editor or MS Ex-
cel.
ð At the bottom rows, the calculated Cg
and Cgk values are listed (2).
Example of a GoldenUnitInspect
***timestamp***.csv output file using a
target of height 123µm.
4.6 Calibrations - Lighting Calibration (Pseudocolor)
Fig.251: Kodak card
► Open the machine cover.
► Place the Kodak Card(1)[03234864‑xx] /
[03254631‑xx] on the conveyor.
4 Machine - Calibrations
Service Manual Process Lens PL - 03/2025 161
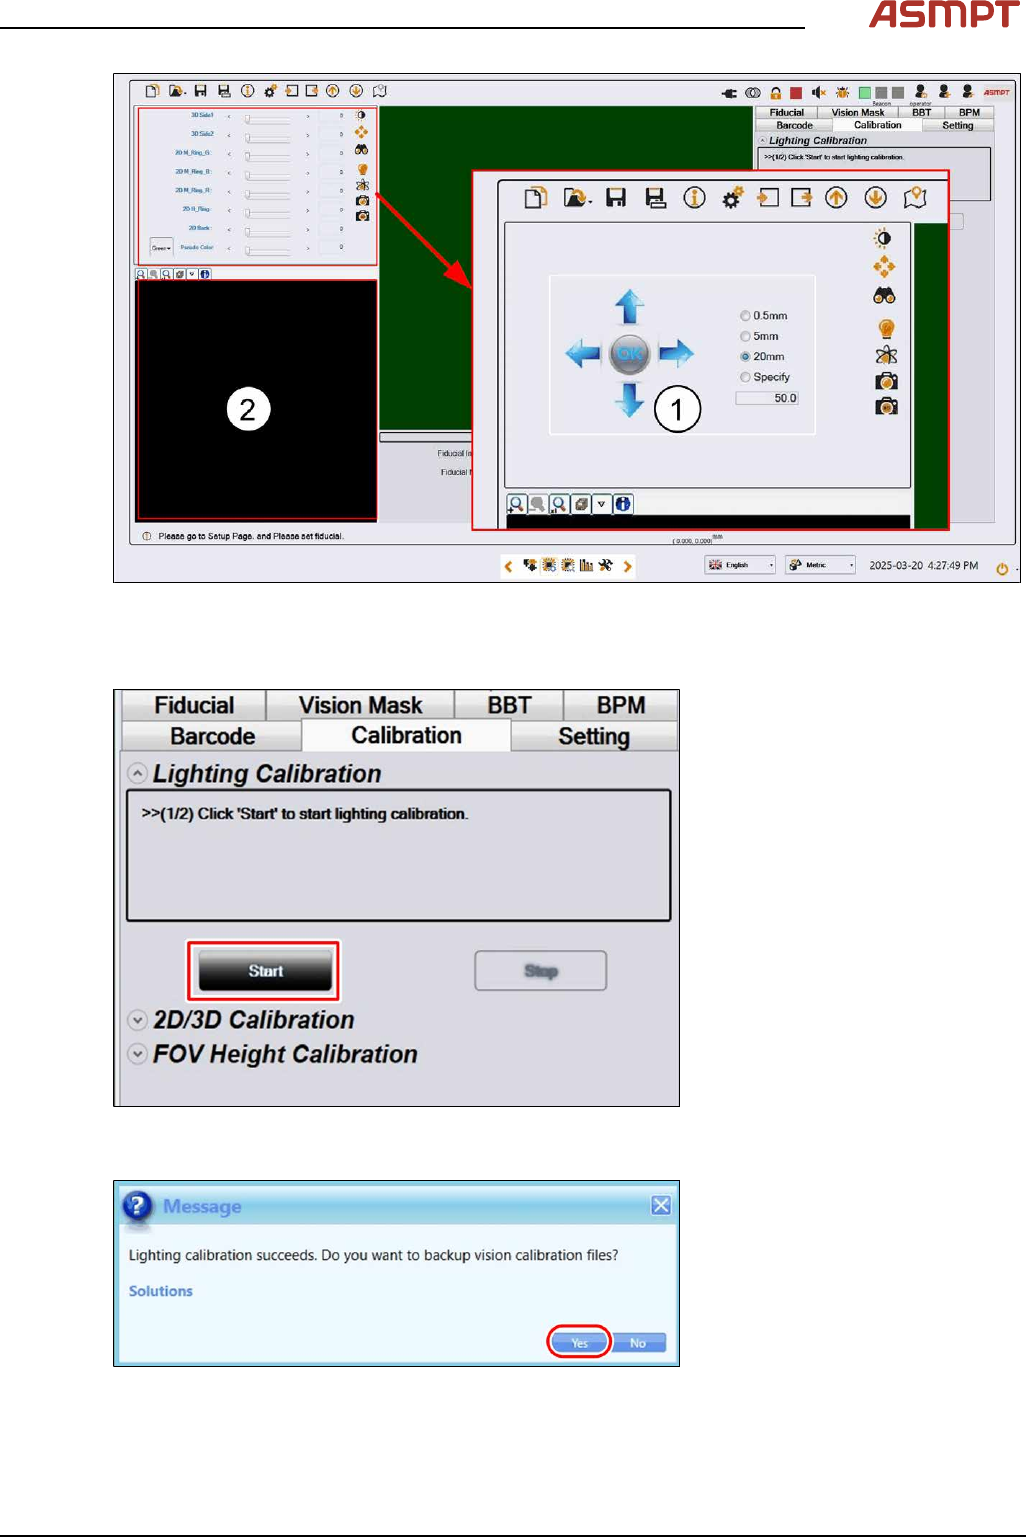
Fig.252: SC Adjust Light 01 0325
► Adjust the lighting(1) till some images show on the LIVE image window(2)
► Jog the camera till LIVE image window(2) shows grey color.
Fig.253: "Start" button
► Click Start to start the calibration.
Fig.254: "Yes" button
► Click Yes to proceed.
4 Machine - Calibrations
162 Service Manual Process Lens PL - 03/2025
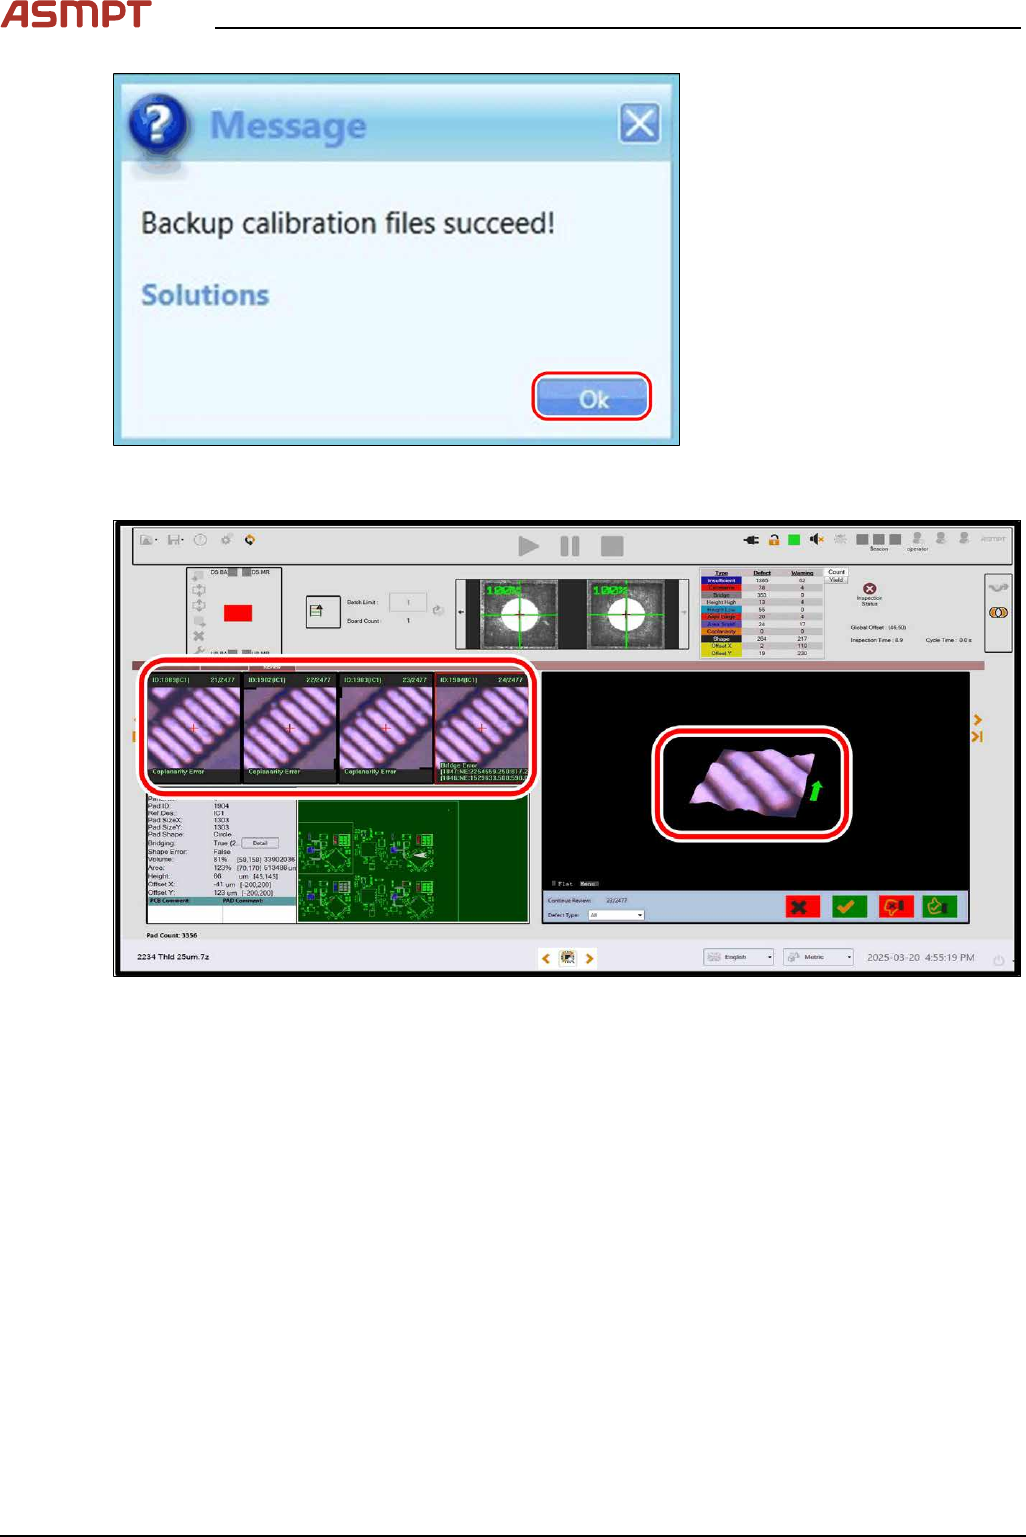
Fig.255: "OK" button
► Click OK to end the calibration.
Fig.256: Checking with PCB
► Use a PCB to check if the pad / solder displays the actual color of the PCB.