Process Lens PL Service Manual_EN.pdf - 第162页
4 Machine - Calibrations 16 2 Se rv ic e Ma nu al P ro ce ss L en s PL - 0 3/ 20 25 Fig.255: "OK" button ► Click OK to end the calibration. Fig.256: Checking with PCB ► Use a PCB to check if the pad / solder …
4 Machine - Calibrations
Service Manual Process Lens PL - 03/2025 161
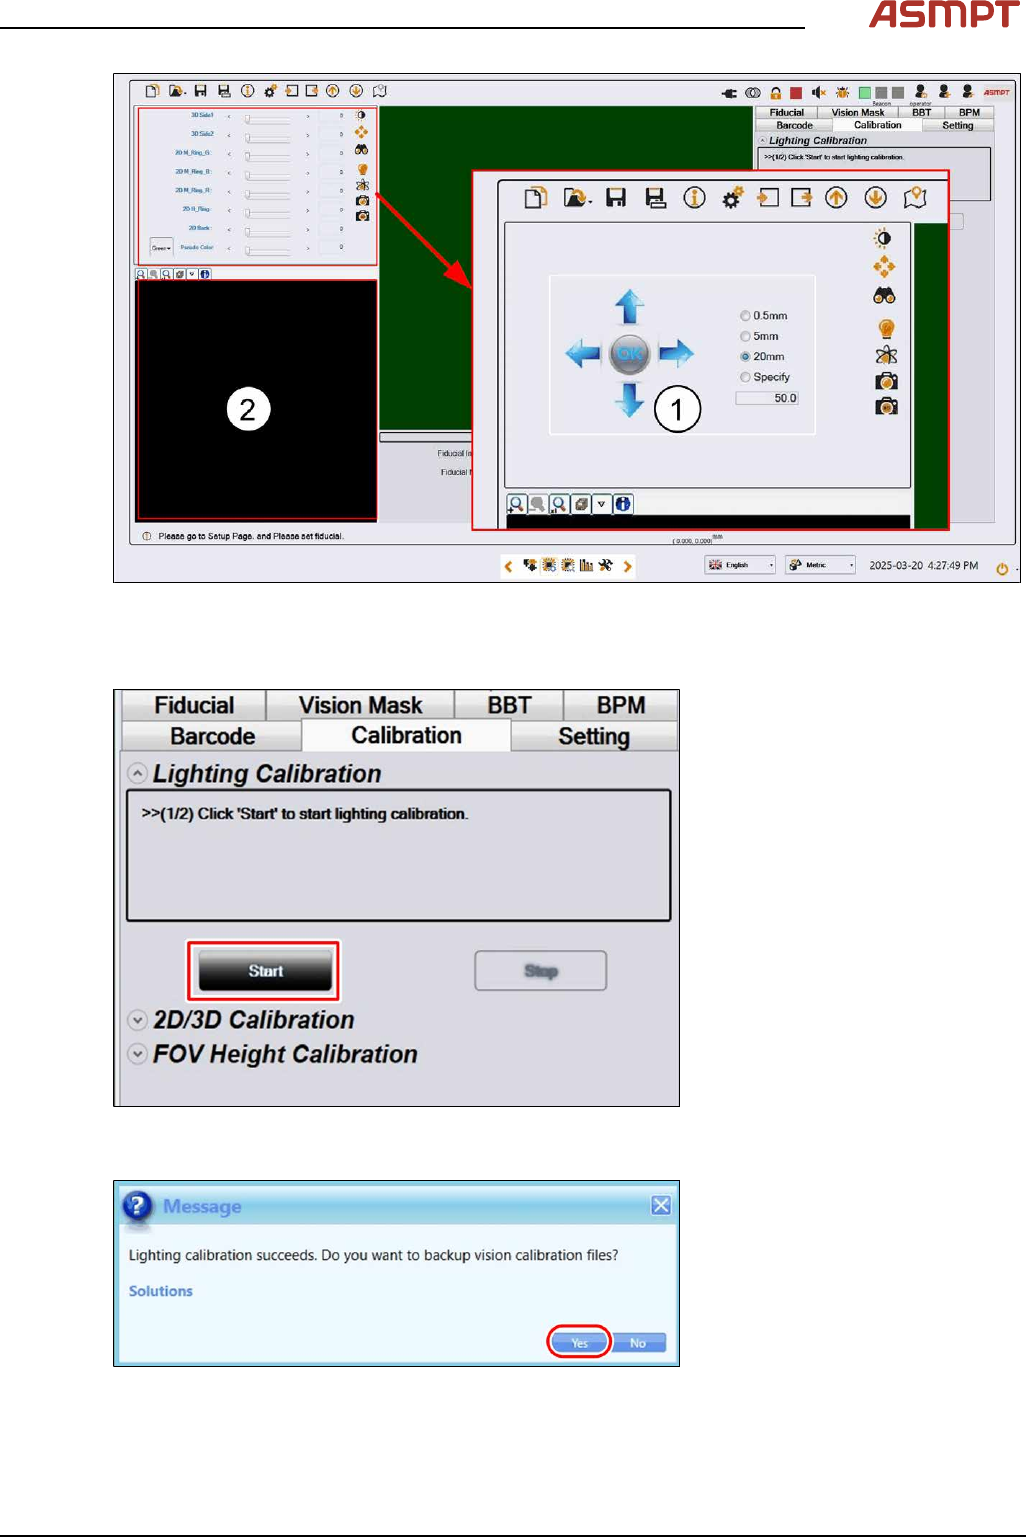
Fig.252: SC Adjust Light 01 0325
► Adjust the lighting(1) till some images show on the LIVE image window(2)
► Jog the camera till LIVE image window(2) shows grey color.
Fig.253: "Start" button
► Click Start to start the calibration.
Fig.254: "Yes" button
► Click Yes to proceed.
4 Machine - Calibrations
162 Service Manual Process Lens PL - 03/2025
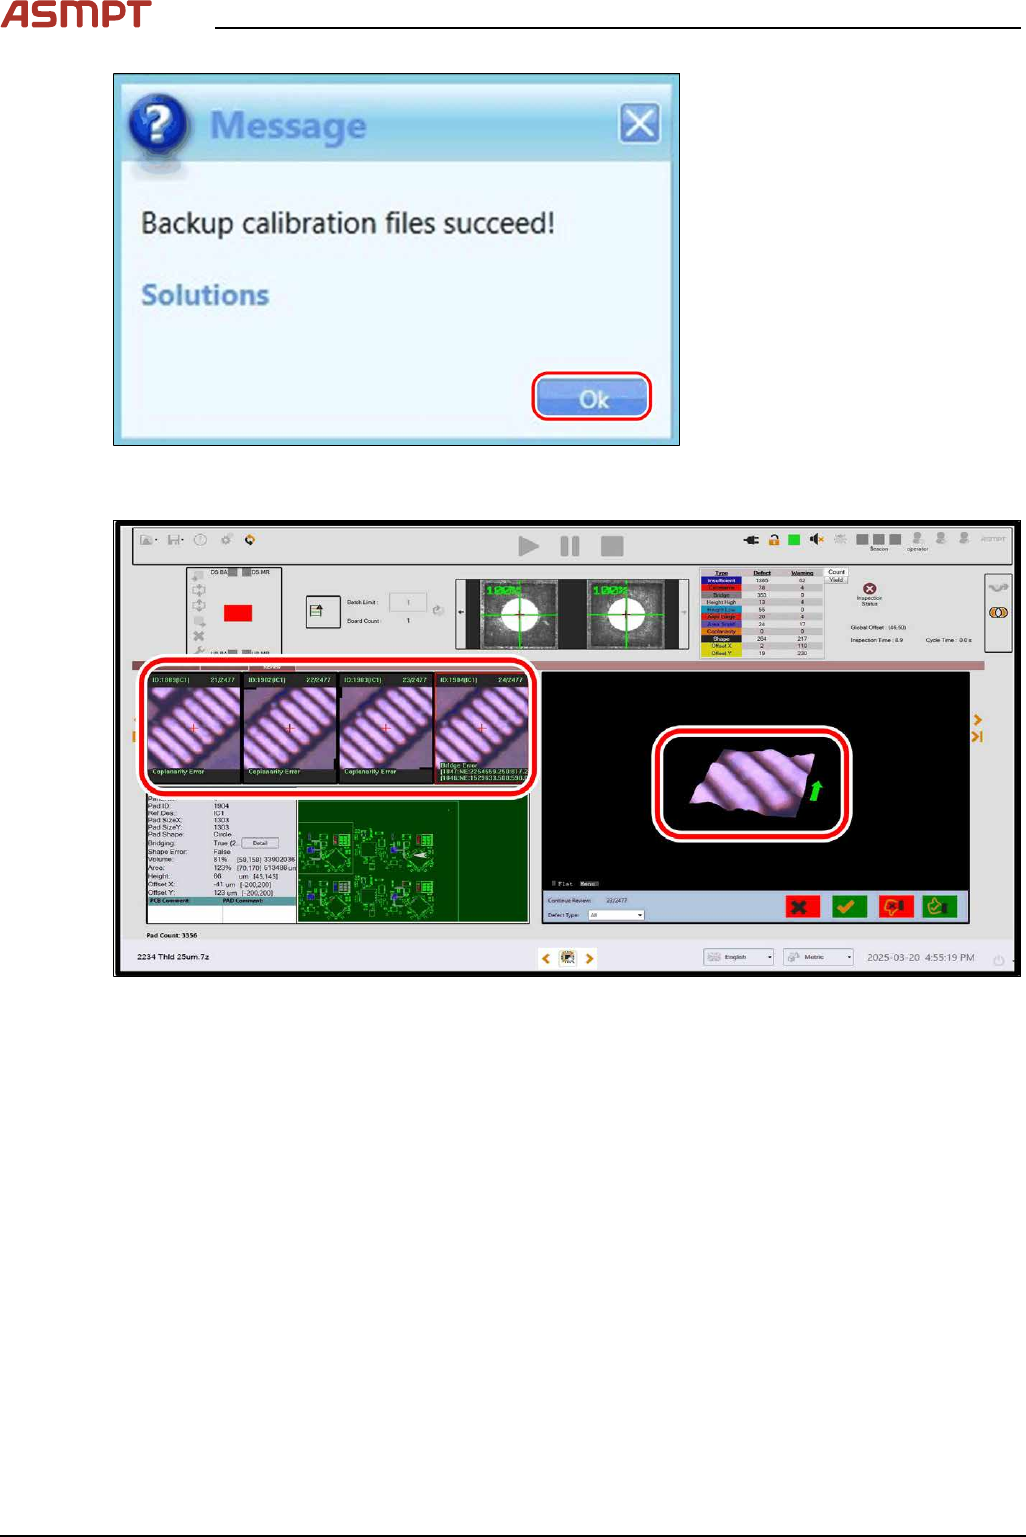
Fig.255: "OK" button
► Click OK to end the calibration.
Fig.256: Checking with PCB
► Use a PCB to check if the pad / solder displays the actual color of the PCB.
4 Machine - Calibrations
Service Manual Process Lens PL - 03/2025 163
4.7 GR&R Test
After completing the calibrations, perform a GR&R to check that the Process Lens PL is ready for
measurements.
What is GR&R?
Performing the GR&R procedure on a pasted or a simulated pasted board such as the CeTaq glass
target allows us to check that the Process Lens PL is:
1. measuring precisely with little variation.
2. of many dimensionally diverse targets.
3. when measured repeatedly.
What value does the Process Lens PL need to achieve?
The %GR&R of the Volume(%), Area(%), Height(mm), Offset X and Offset Y(mm) reported at the end
of the procedure should be less than 10%, a value which indicate that the variations in the measure-
ments attributed to the Process Lens PL is much smaller that the variations of all the parts measured.
A %GR&R of greater than 10% is an indication that there is an issue in achieving precision and the
root cause of measurement variation needs to be corrected.
What is needed?
●
Use a CeTaq glass board (with simulated paste deposits).
●
A working recipe of the board without bad marks.
Pre-condition before GRR test is carried out.
Recipe of CeTaq glass board is created including.
1. Fiducal teached and verified.
2. Bare Board Teach is teached and verified.
Conducting the test
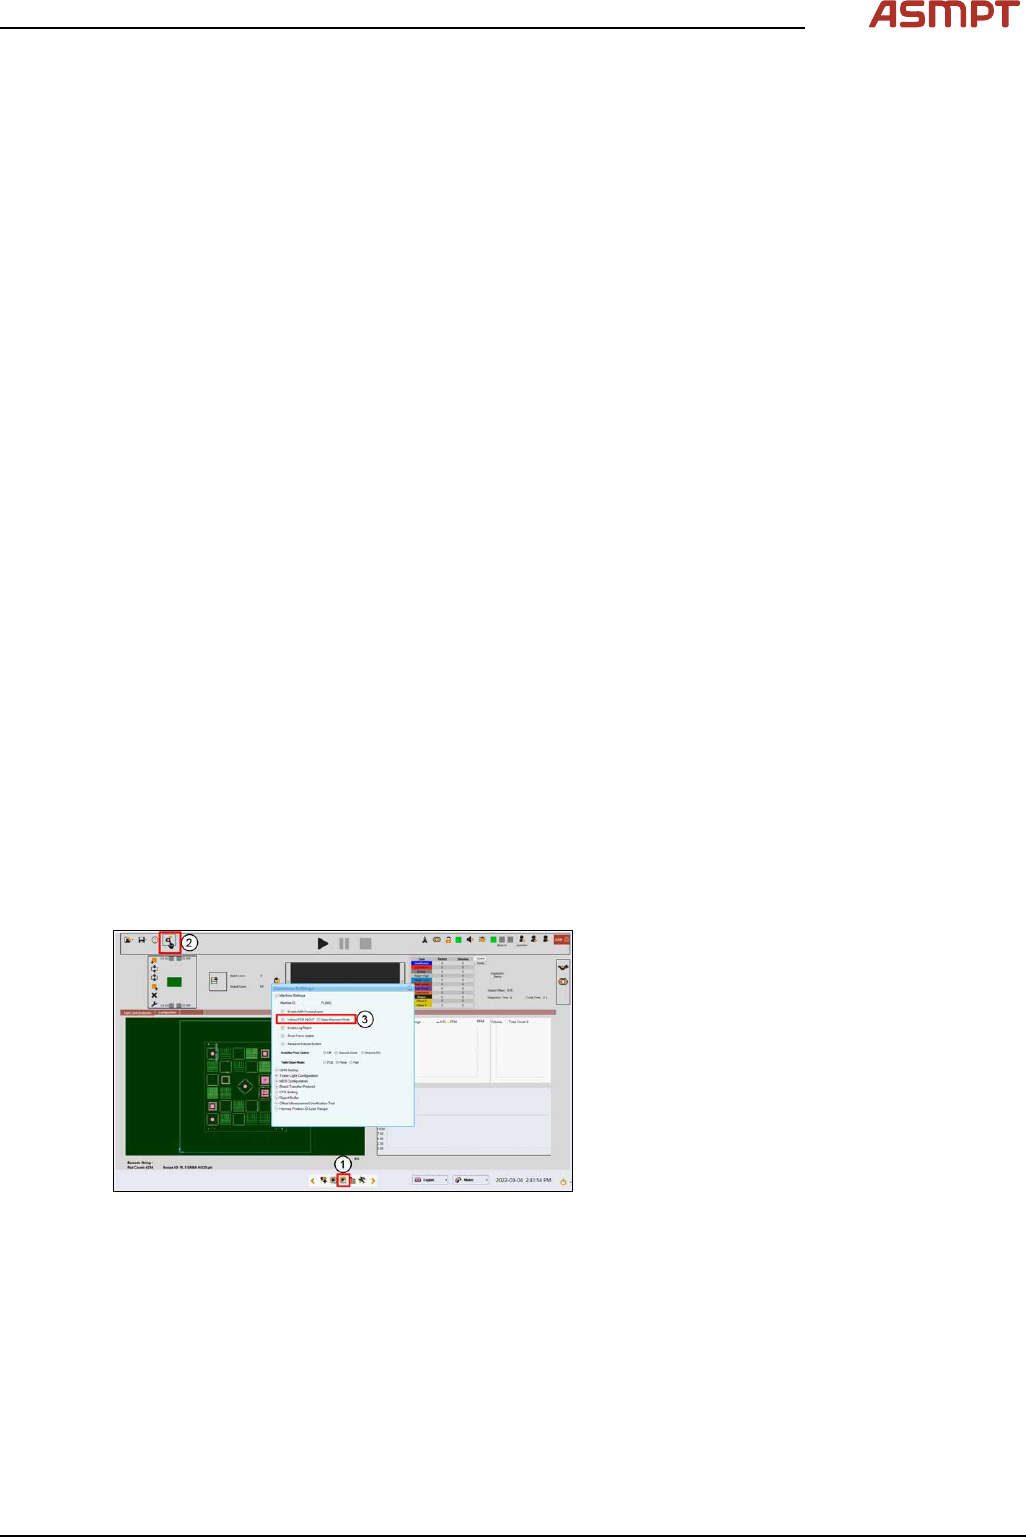
Fig.257: Inspection page
► Insert CeTaq glass board into machine
and convey into inspection area.
► Click Inspection page(1).
► Click Common Setting(2).
► Ensure Without PCB IN/OUT(3) is
checked.