DECAN_S2_Admin(Eng_Ver4.5).pdf - 第22页
Preface vii Check before service . Remove power & air-source only for authorized personnel . As the current with h igh-volta g e flows inside the cover or in the area n ear the switch, ta ke precautions against elect…
Advanced Chip Shooter DECAN S2 Administrator’s Guide
vi
Rear View of the Machine
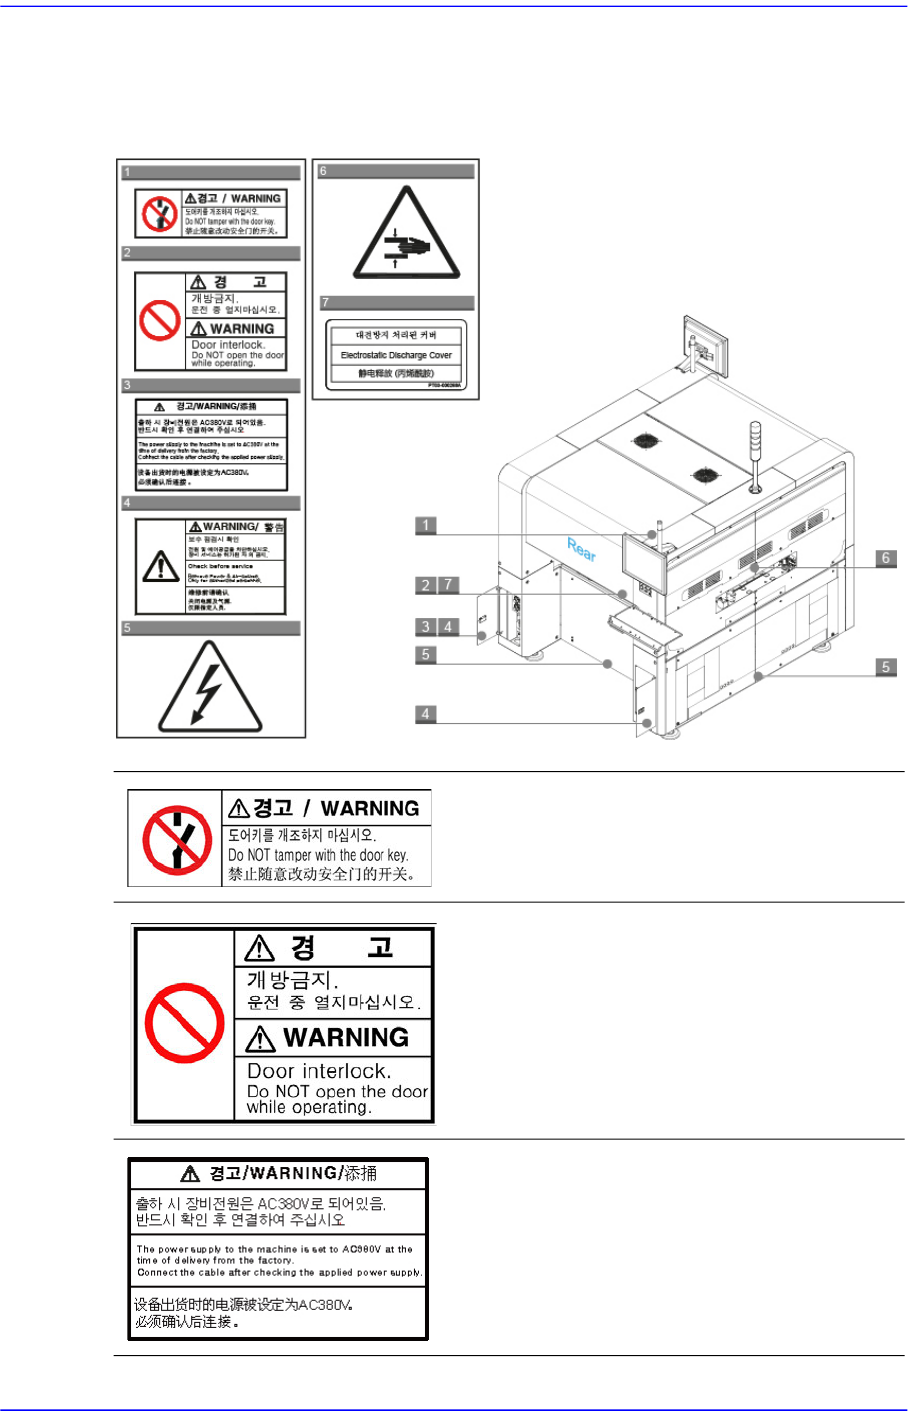
The following labels are attached on the rear part of this machine.
Figurei.2 Safety labels attached on the rear part of the machine
Do not modify the door key.
Unauthorized modification of the door key is
prohibited. It may be dangerous.
Do not open the door during operation.
Part where this label is attached contains
moving parts, it is very dangerous if the user
open the cover while operating.
The power supply is set to AC 380V before
delivery. Check whether the supply power
and machine power supply setup are
correct.
Preface
vii
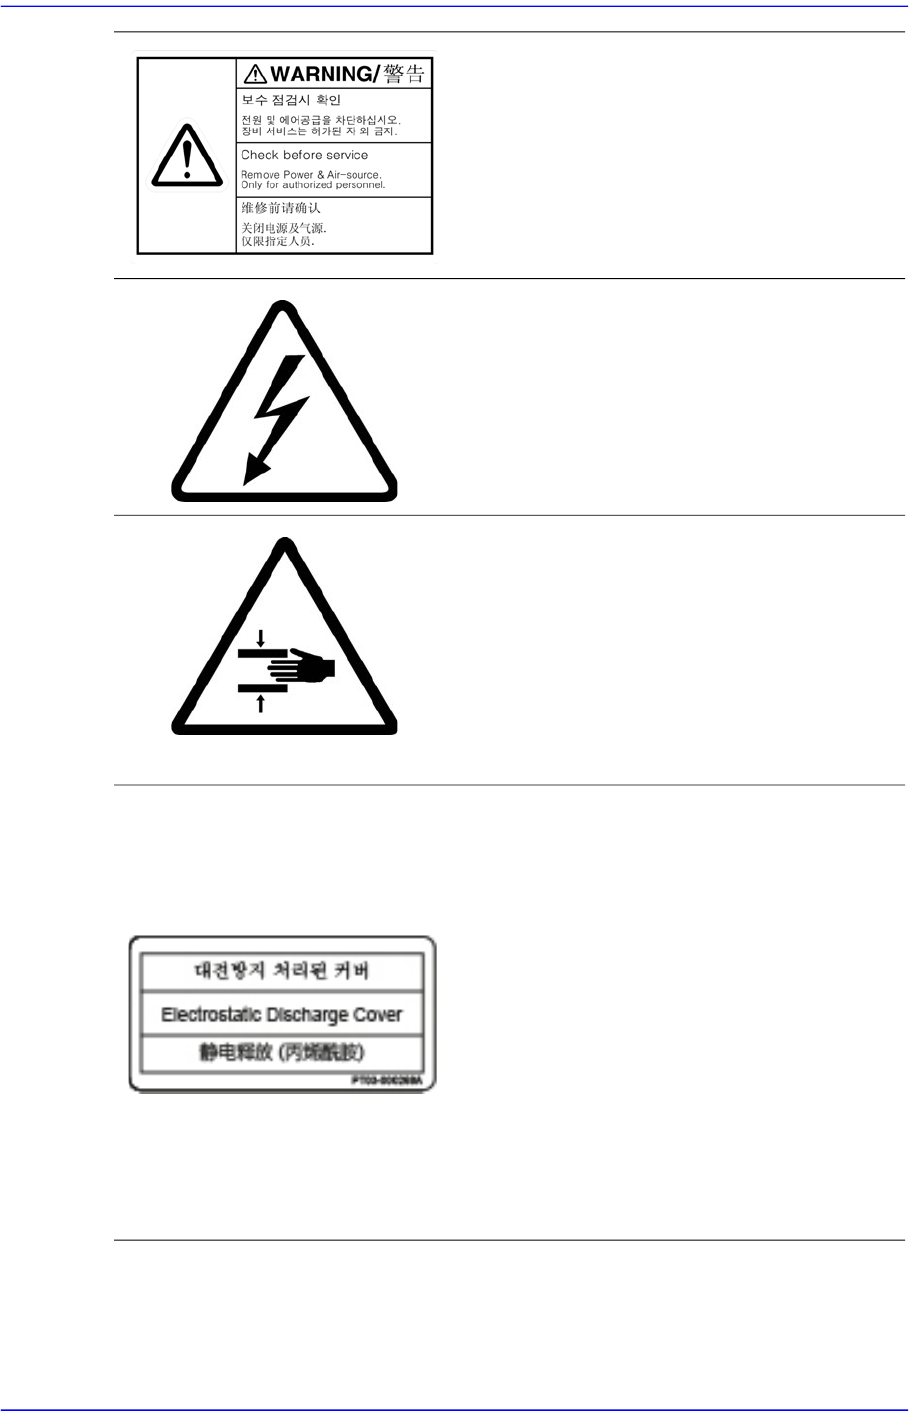
Check before service.
Remove power & air-source only for
authorized personnel.
As the current with high-voltage flows inside
the cover or in the area near the switch,
take precautions against electric shock.
Be sure to turn off the main switch in the
left-lower cover of the rear side before
maintenance.
Do not put a hand in during operation.
Part where this label is attached contains
moving parts,
it is very dangerous if the user
disassembles any part or opens the cover
while operating.
Sto
p the machine before servicing.
Stop the machine before maintenance or
error troubleshooting.
Be careful when cleaning the cover.
Dip a clean ultra-fine fiber cloth in the
specified cleaning liquid, and wipe the
acrylic cover of the door gently using the
cloth.
The following actions may damage the anti-
static
cover. F
or this reason, please handle
carefully.
Cleaning using hydrogen carbonate,
ester, ketone, acid, strong alkali or
chemicals similar to these
Cleaning by rubbing the acrylic cover
applying strong force with an ultra-fine
fiber cloth
Advanced Chip Shooter DECAN S2 Administrator’s Guide
viii
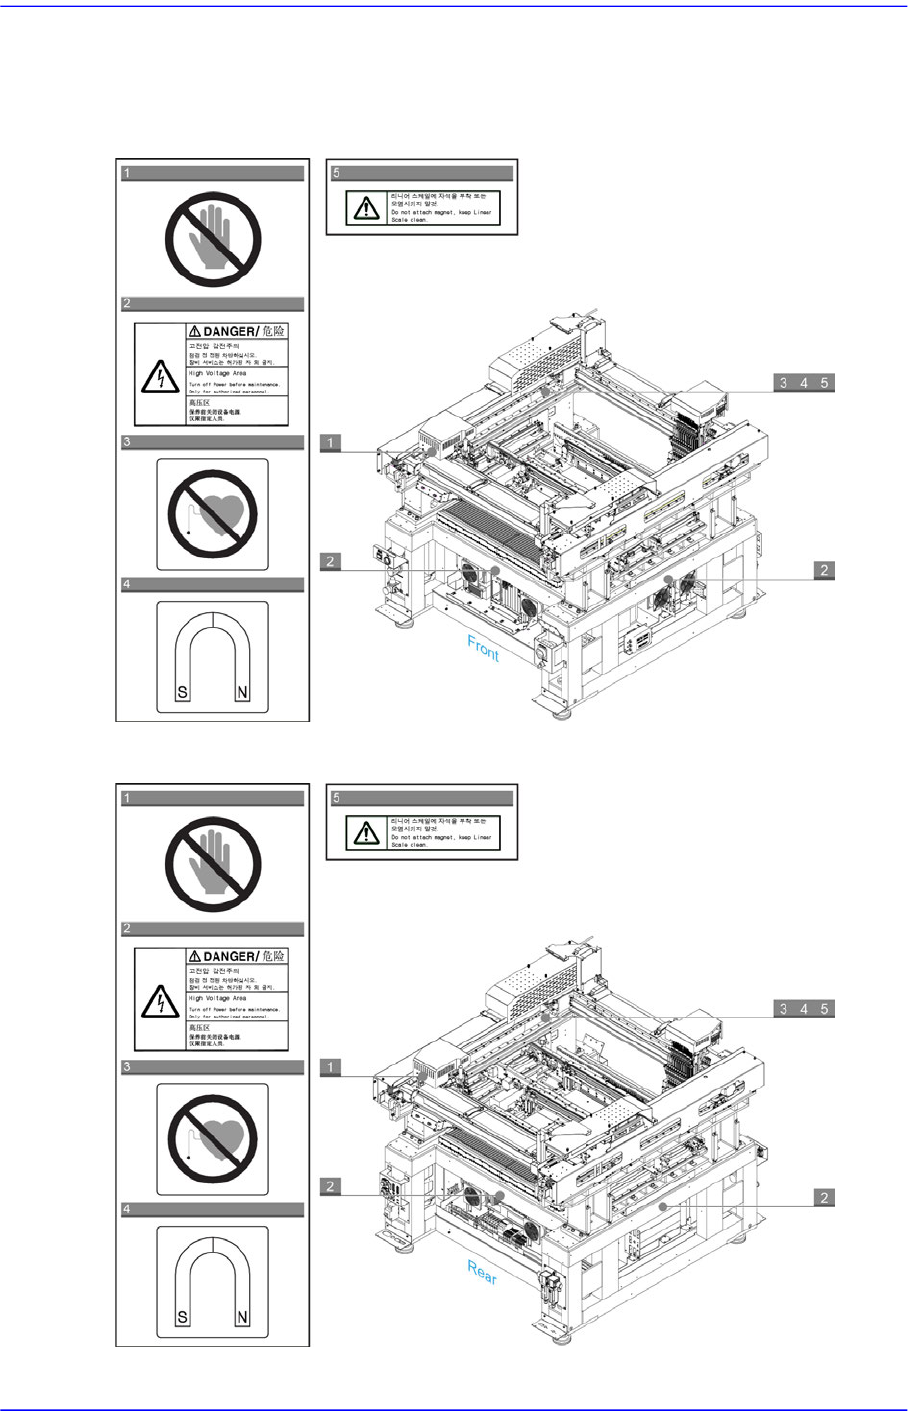
Internal Part of the Machine.
The following labels are attached on the rear part of this machine.
Figurei.3 Safety labels attached to the inside of the machine at the front
Figurei.4 Safety labels attached on the inside of the machine at the rear