DECAN_S2_Admin(Eng_Ver4.5).pdf - 第439页
14-70 Advanced Chip Shooter DECAN S2 Ad ministra tor’s Guid e 3. Then, after the head assembly moves to the designated positi on, move all Z-axes down. At this time, remove all inserted nozzles m anually . 4. Then the me…

14-69
Machine Calibration
14.3.10.7. Fly to Fix Camera & Fly Runout Offset Calibration
Calibrates the relation between the Fly camera and Fix camera. The calibration is
performed to compensate the offset that occurs due to the difference between the ‘part-
alignment height’ and placement height when placing the part after part-recognition by the
fly-camera.
The offset that occurs this time is caused by the run-out, bending of an axis, etc. Perform
compensation of the value at the recognition height of the fly camera and fiducial camera,
which are the same as the placement height.
In order to perform calibration of this, first check if the calibration tool is placed on the
calibration tool position of the front ANC.
The following is the procedure to calibrate the ‘Fly to Fix Offset’
1. Click the <Nozzle Prepare> button and insert the CN400 nozzle into the No. 1 hole of
the ANC manually.
2. If the <14. Fly to Fix Offset> is clicked after selecting the <Automatic Next> check
box, calibration is performed for the selected gantry automatically.
If calibration is performed after selecting the <No Real Motion [Manual]> check box,
the nozzle is inserted into each head manually. Click the <Next> button to move onto
the next step.
If calibration is performed without selecting either the <Automatic> check box or
<Manual> check box, the nozzle is changed automatically for the currently selected
nozzle. Click the <Next> button to move onto the next step.
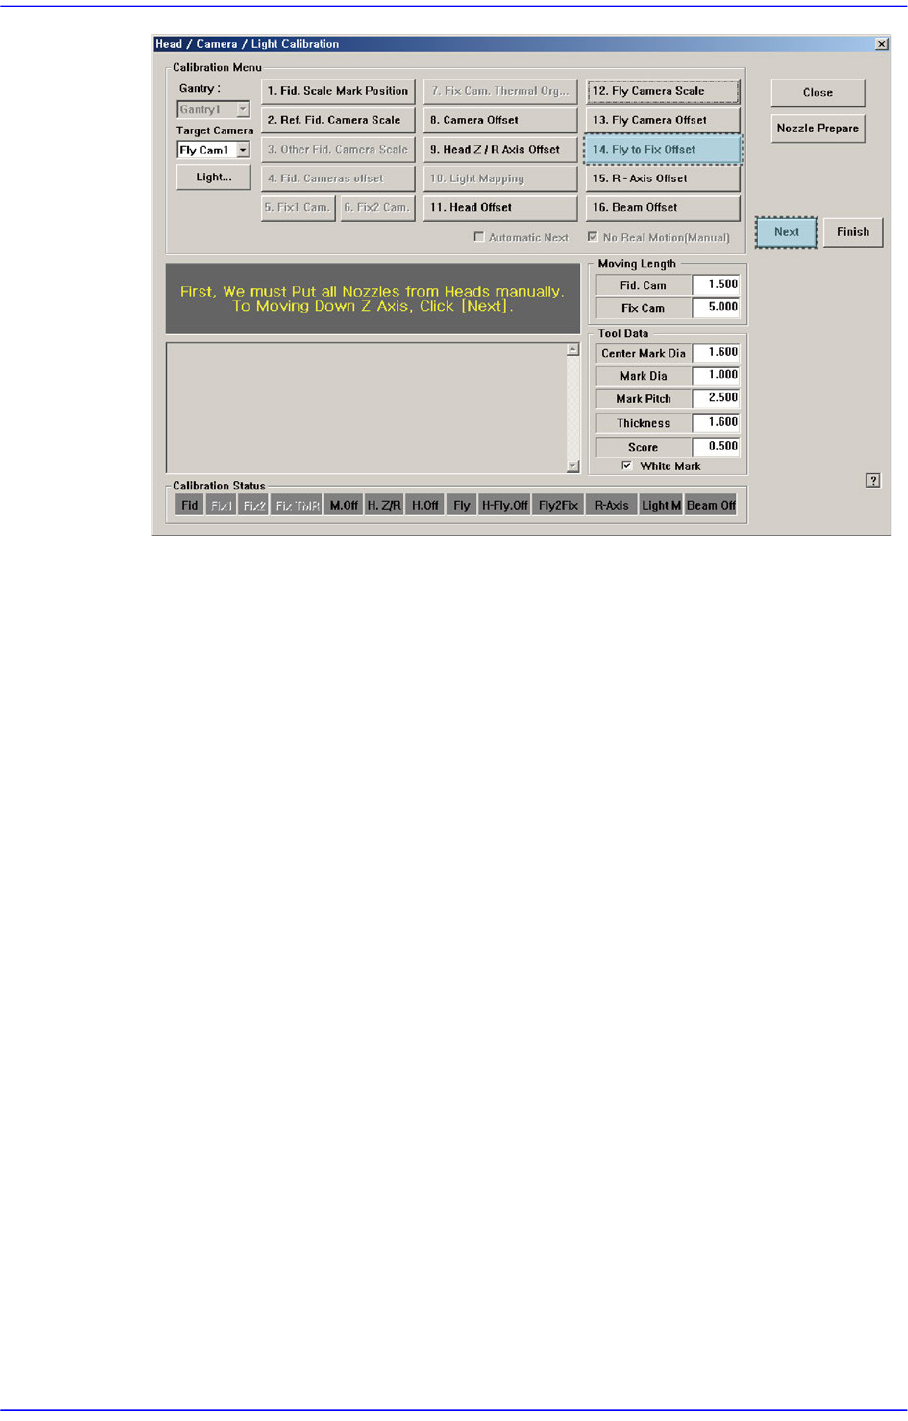
If the <14. Fly to Fix Offset> button is selected, the message “First, We must Put all
Nozzles From Heads on Manually. To Move down Z Axis, Click [Next]” appears.
Click the <Next> button to move down the Z-axis of the head in order to manually
move all nozzles inserted in the nozzle-holder of the head.
14-70
Advanced Chip Shooter DECAN S2 Administrator’s Guide
3. Then, after the head assembly moves to the designated position, move all Z-axes
down. At this time, remove all inserted nozzles manually.
4. Then the message “Next Attach the Calibration Tool to Head 1. Click [Next] for
Moving Down Head. After Moving, Attach the Calibration Nozzle to head Manually”
appears. Click the <Next> button after inserting the CN400 nozzle in the nozzle-
holder of Head #1 manually.
5. “The message “Move To Center Position of Calibration Tool. To Move, Click [Next].”
appears in the message window. Click the <Next> button to move the head assembly
to the calibration tool position on the ANC.
6. The message “Move To Center Position of [Fix1] Camera. To Move, Click [Next]”
appears. Click the <Next> button to move the head assembly to the center of the Fix1-
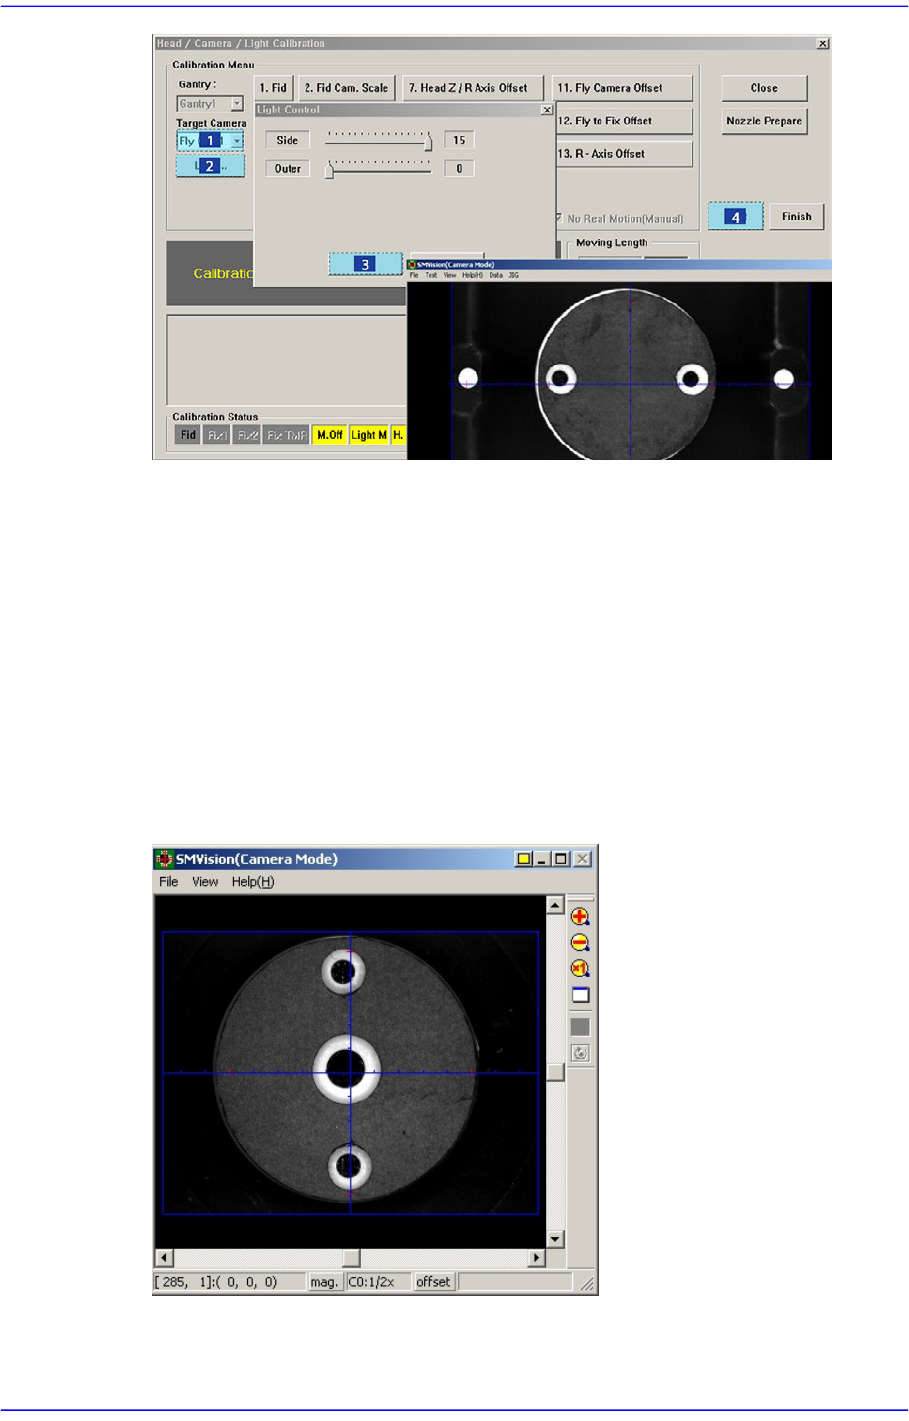
Camera. At this time, select the ‘Fix Cam1’ in the <Target Camera> combo box. Click
the <Light…> button and adjust the brightness of the light in the ‘Light Control’
dialog box so that the fiducial mark on the CN400 nozzle that is seen in the
‘SMVision’ window can be seen clearly.
7. Then the Head 1 moves up to the ‘part-alignment height’ of the fly camera and the
mirror is closed.
Then the message “Calibration is Prepared. To Calibrate, Click [Next]” appears in the
message window. At this time, click the <Light…> button and adjust the brightness of
the light in the ‘Light Control’ dialog box so that the fiducial mark on the calibration
tool that is seen in the ‘SMVision’ window can be seen clearly. Then click the <Next>
button.
14-71
Machine Calibration
8. In order to perform calibration, first recognize the 2 fiducial marks on the bottom
surface of the calibration tool by using the fly camera while rotating the calibration
tool at 45 degree intervals.
Then put the calibration tool down on the calibration tool position on the ANC and
recognize the 2 fiducial marks on the top surface of the calibration tool by using the
fiducial camera.
Subsequent to that, pick the calibration tool again, rotate it by 90 degrees and put it
down at that spot. Then recognize the 2 fiducial marks on the upper surface of the
calibration tool by using the fiducial camera.
In this manner, rotate each head at 90 degree intervals and perform measurement in
four directions of 0, 90, 180 and 270 degrees.
9. If the calibration procedure is completed for all heads normally, the result is displayed
as shown in the following figure.