DECAN_S2_Admin(Eng_Ver4.5).pdf - 第352页
13-5 Production Setu p equipment. If the equipment is paused by clicking the <PCB Stop> button, whe n starting the work, click the <PCB Restart> bu tton first and then press the 'ST AR T' button. …

13-4
Advanced Chip Shooter DECAN S2 Administrator’s Guide
Indicates number of PCBs produced in an hour after the initial PCB is fer to
the work station.
<Cycle Time> Static box
Cycle Time =Build Time +Transfer Time
sec/board
Indicates the required time in the “second” unit until the next PCB is fed since
the most recently produced PCB was fed to the work station. [Cycle Time
(sec/board) ]
CPH
Indicates the number of PCBs that are expected to be produced in an hour
based on the Cycle Time (sec/board).
Board/Hour
Indicates the number of parts that are expected to be placed in an hour based
on the Cycle Time (sec/board).
<Production Plan> edit box
Set the total number of PCBs to be worked on. If the value becomes 0, the
production is stopped.
<Reset> button
Initializes the number of produced PCBs to “0”.
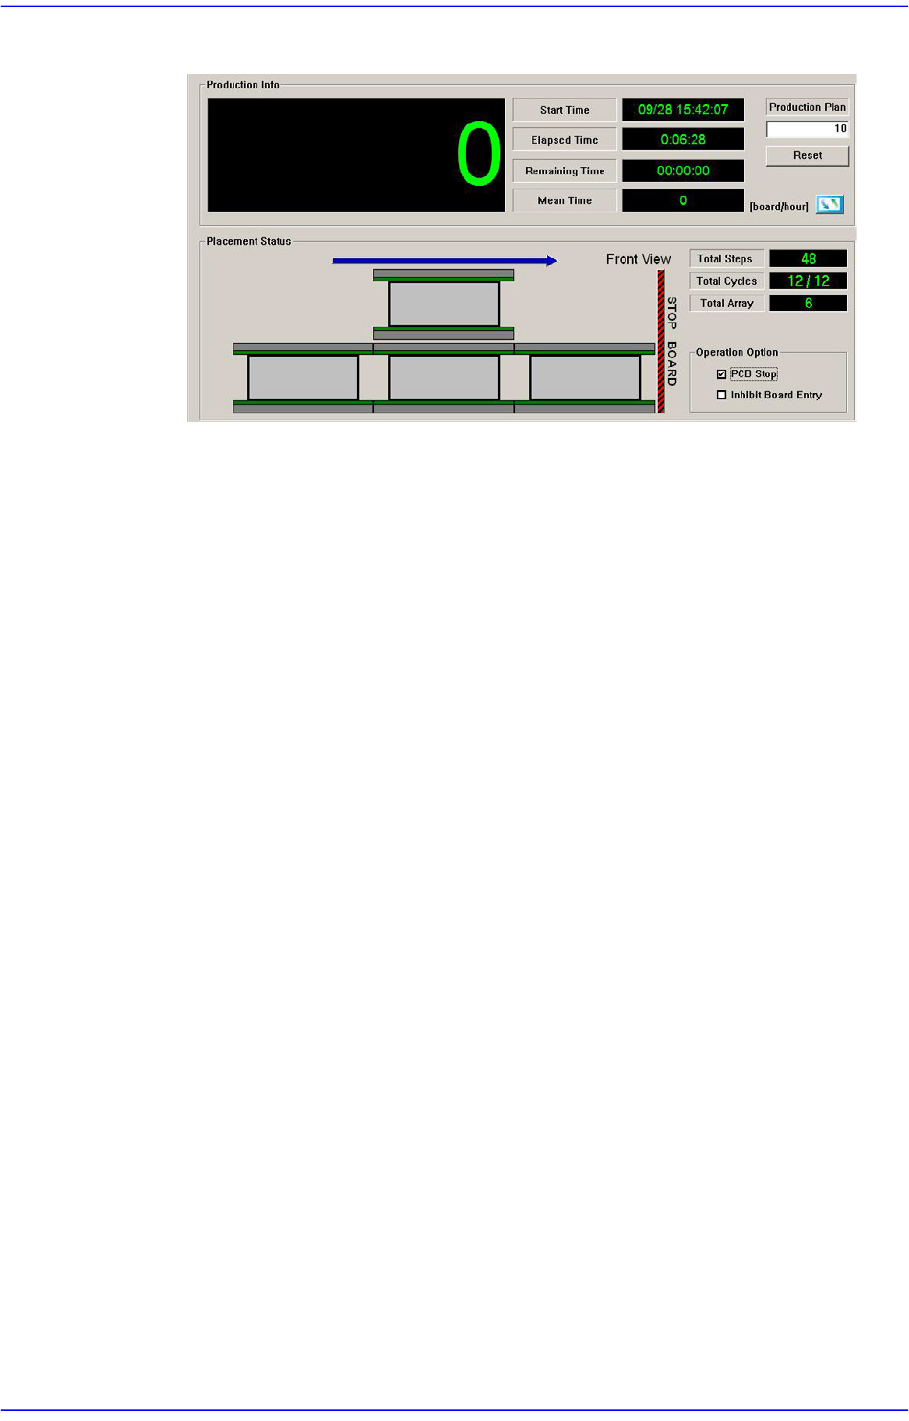
<Placement Status> group
Displays the data related to PCB board. Shows the status of the PCB feeding to the
conveyor graphically and indicates the progress of the work on the PCB in percentage.
<Total Steps> Static box
Displays the total number of steps.
<Total Cycles> Static box
Displays the total number of cycles.
<Total Array> Static box
Displays the total number of Array PCBs.
<Operation Option> group
This function can be selected and executed during placement.
<PCB Stop> check box
Selecting this check box during operation will pause the equipment after finishing
the placement for the PCB in the current placement area. Then they are displayed
as shown in the following screen.
At this time, the equipment is in “RUN_RDY” state. The shutdown of the
equipment in “RUN_RDY” state is not included in the shutdown count of the
13-5
Production Setup
equipment.
If the equipment is paused by clicking the <PCB Stop> button, when starting the
work, click the <PCB Restart> button first and then press the 'START' button.
<Inhibit Board Entry> check box
Check this box to stop PCBs from entering the transport rail automatically from an
upstream transport rail or board station. If the equipment is temporarily stopped by
this function, the equipment state is changed into “RUN_RDY” state.
The shutdown of the equipment in “RUN_RDY” state is not included in the
shutdown count of the equipment.
<One Time Skip> button
Skip only the new PCBs fed to the equipment temporarily without placing them. Since
separate setup is needed to enable this function, our C/S department must first be
contacted.
When using this function, the following pre-requisitions shall be satisfied:
Small PCB (substrate) that is set to ‘Work’ among array PCBs that use no bad
mark
Small PCB (substrate) to which ‘One-Time-Skip’ function is applied in the ‘PCB
Array’ dialog box is already set up
PCB download completed.
When these pre-requisitions are met, the ‘One-Time-Skip’ function is applied after
auxiliary menu of ‘Start’ or ‘Cont.’ is selected, and the placement is performed.
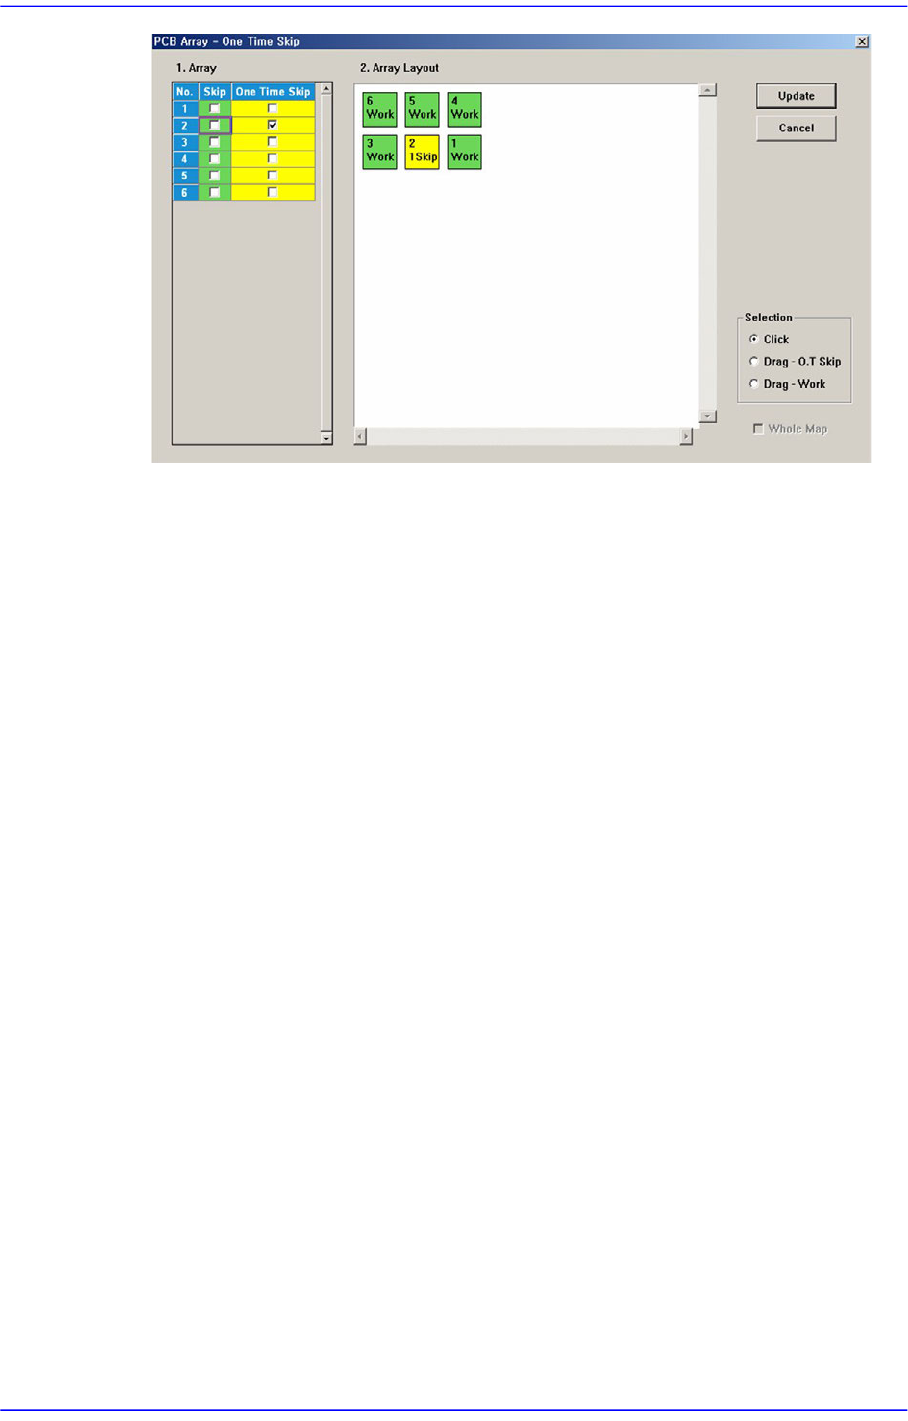
Clicking the button will display the following dialog box.
13-6
Advanced Chip Shooter DECAN S2 Administrator’s Guide
<1. Array> group
Sets whether to perform placement on small PCBs in the array PCB.
<No> column
Refers to each small PCB in the array PCB. It is created as many as the
number of small PCBs.
<Skip> column
Allows the small PCB selected in this column to be skipped without being
placed during placement and sets the small PCB indicated in the <2.Array
Layout> group to ‘Skip’.
<One Time Skip> column
Of the small PCBs set to ‘Work’ in the array PCB, it allows only the new PCB
fed to the equipment to be skipped temporarily without being placed.
In order to use the ‘One-Time-Skip’ function, select the corresponding small
PCB and click the <One Time Skip> button in the ‘Product Monitor’ tab
dialog box.
<2. Array Layout> group
Selects the small PCBs in the array PCB using the mouse. It indicates whether
currently set placement work has been performed or not on the small PCBs.
<Selection> option box group
[‘Work’ –Work on the PCB; ‘Skip’ –Not to work on the PCB]
<Click> option box
If the small PCB displayed on the ‘PCB Array Layout’ dialog box is selected
using the mouse with this option box selected, the setup of the corresponding
small PCB is changed.
If the small PCB set to ‘Work’ is selected, ‘Work’ is changed to ‘Skip’. If the